- in खिड़कियां by व्यवस्थापक
माउस कनेक्ट होने पर टचपैड को स्वचालित रूप से अक्षम करें

If you use a traditional mouse over Touchpad, you could automatically disable touchpad when you plug in the USB Mouse. This can be easily done via Mouse Properties in Control Panel where you have a label called “Leave touchpad on when a mouse is connected”, so you need to uncheck this option and you’re good to go. If you have Windows 8.1 with the latest update, you could easily configure this option right from PC settings.
This option makes it easier for users to navigate and you don’t need to worry about accidental touch or click over touchpad when using a USB Mouse. So without wasting any time let’s see How to Automatically disable Touchpad when Mouse is Connected in Windows 10 with the help of the below-listed guide.
माउस कनेक्ट होने पर टचपैड को स्वचालित रूप से अक्षम करें
कुछ गलत होने की स्थिति में एक पुनर्स्थापना बिंदु बनाना सुनिश्चित करें।
Method 1: Disable Touchpad when Mouse is connected via Settings
1. खोलने के लिए विंडोज की + I दबाएं सेटिंग उसके बाद क्लिक करें उपकरण.

2. बाएं हाथ के मेनू से, चुनें टचपैड।
3. Under Touchpad अचिह्नित "माउस कनेक्ट होने पर टचपैड को चालू रखें".
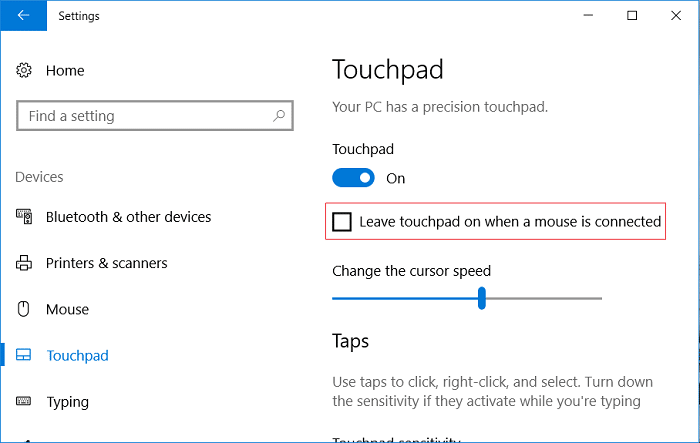
4. परिवर्तनों को सहेजने के लिए अपने पीसी को रीबूट करें।
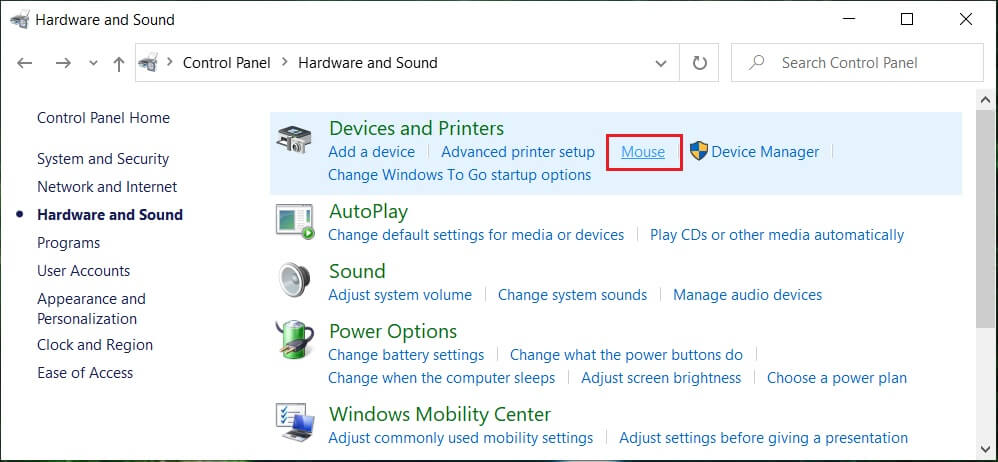
Method 2: Disable Touchpad when Mouse is connected via Mouse Properties
1. खोज लाने के लिए विंडोज की + क्यू दबाएं, टाइप करें नियंत्रण, और पर क्लिक करें नियंत्रण कक्ष खोज परिणामों से।

2। अगला, पर क्लिक करें हार्डवेयर और ध्वनि।

3. Under Devices and Printers click on चूहा।
4। पर स्विच ELAN or Device Settings तब टैब अचिह्नित "Disable internal pointing device when the external USB pointing device is attached"विकल्प
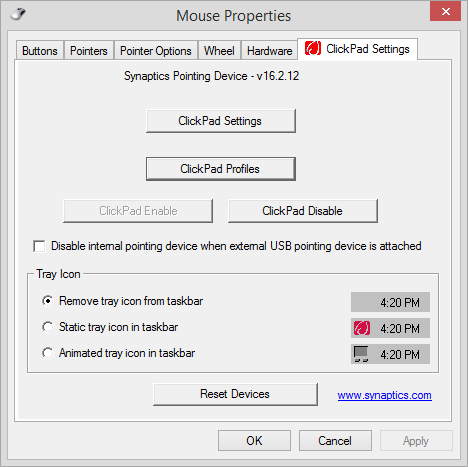
5. अप्लाई पर क्लिक करें, उसके बाद ठीक है.
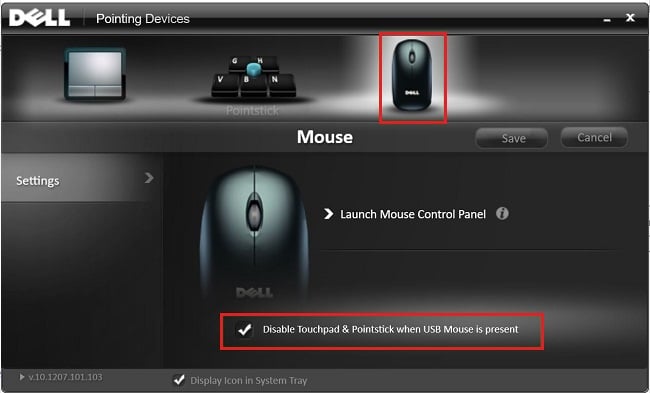
Method 3: Disable Dell Touchpad when Mouse is connected
1. विंडोज की + आर दबाएं फिर टाइप करें main.cpl और हिट दर्ज करें खोलने के लिए माउस गुण.

2. Under Dell Touchpad tab, click on “Click to change Dell Touchpad settings".
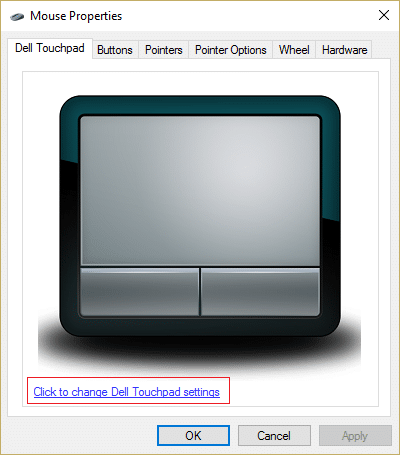
3. From Pointing Devices, select the Mouse picture from the top.
4. चेकमार्क "Disable Touchpad when USB mouse is present".
5. परिवर्तनों को सहेजने के लिए अपने पीसी को रीबूट करें।
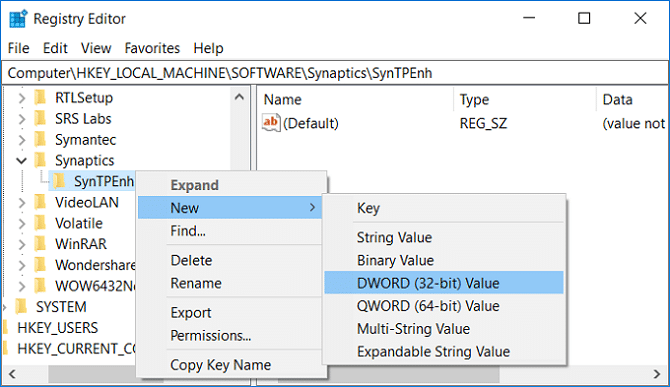
Method 4: Disable Touchpad when Mouse is connected via Registry
1. विंडोज की + आर दबाएं फिर टाइप करें regedit पर और रजिस्ट्री संपादक खोलने के लिए एंटर दबाएं।

2. निम्नलिखित रजिस्ट्री कुंजी पर जाएँ:
HKEY_LOCAL_MACHINESOFTWARES सिनैप्टिक्स SynTPEnh
3। राइट-क्लिक करें सिंटीपीईएनएच फिर चुनें नया > DWORD (32-बिट) मान।
4. Name this DWORD as IntPDFeature अक्षम करें and then double click on it to change its value.
5. सुनिश्चित करें कि Hexadecimal is selected under Base then इसका मान 33 पर बदलें और ओके पर क्लिक करें
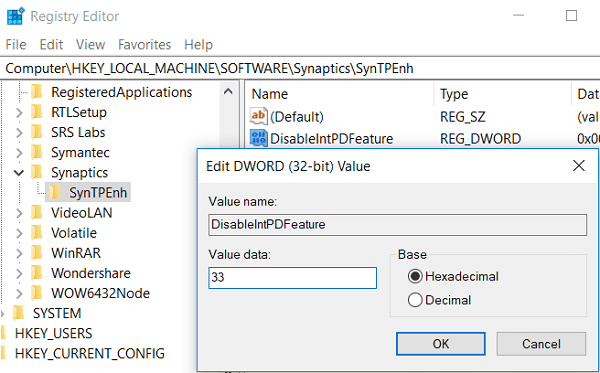
6. परिवर्तनों को सहेजने के लिए अपने पीसी को रीबूट करें।
Method 5: Disable Touchpad when Mouse is Connected in Windows 8.1
1. Press Windows Key + C key to open सेटिंग आकर्षण।
2। चुनते हैं पीसी सेटिंग बदलें than from the left-hand menu click on PC and Devices.
3। फिर पर क्लिक करें माउस और टचपैड, then from the right window look for an option labelled as “माउस कनेक्ट होने पर टचपैड को चालू रखें".
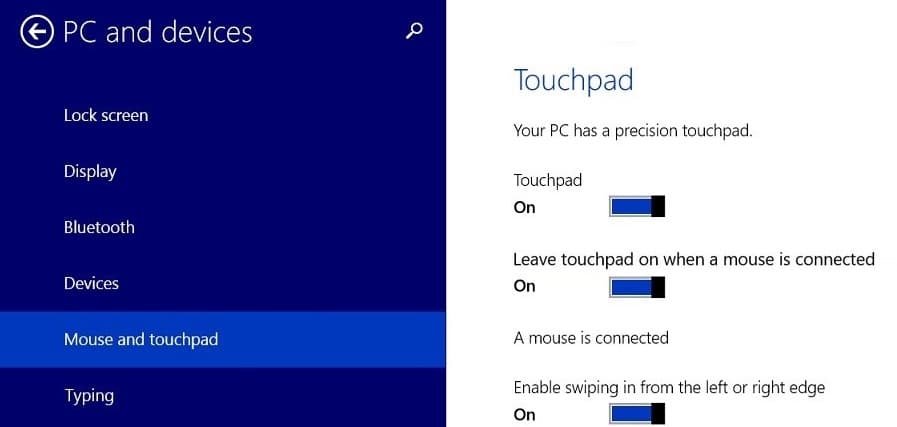
4। यह सुनिश्चित कर लें disable or turn off the toggle for this option.
5. Reboot your PC to save changes, and this will automatically disable Touchpad when Mouse is connected.
अनुशंसित:
यही आपने सफलतापूर्वक किया है Disable Touchpad when Mouse is Connected in Windows 10 लेकिन यदि आपके पास अभी भी इस गाइड के संबंध में कोई प्रश्न हैं तो बेझिझक उन्हें टिप्पणी अनुभाग में पूछ सकते हैं।