Txhim kho Start Menu Tsis Ua Haujlwm hauv Windows 10

If you have recently updated or upgraded to Windows 10, then chances are your Start Menu may not work properly, making it impossible for users to navigate around Windows 10. Users are experiencing various issues with Start Menu such as Start Menu does not open, Start Button is not working, or Start Menu freezes etc. If your Start Menu isn’t working then don’t worry as today we will see a way to fix this issue.
This exact cause is different for different users because each user has a different system configuration and environment. But the problem can be related to anything like corrupted user account or drivers, damaged system files, etc. So without wasting any time, let’s see How to Fix Start Menu Not Working in Windows 10 with the help of the below-listed tutorial.
Nco ntsoov tsim qhov taw tes rov qab tsuas yog thaum muaj qee yam yuam kev.
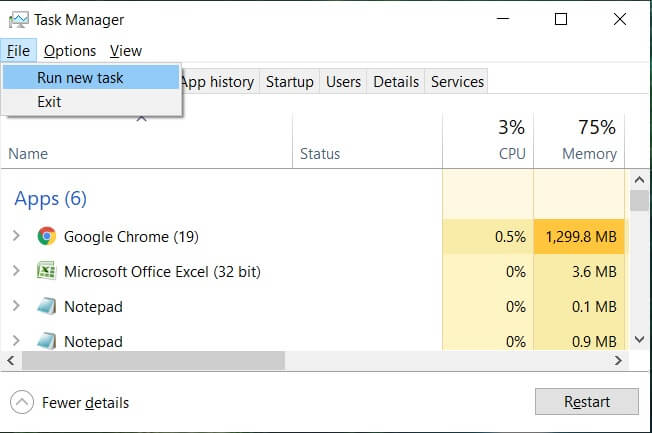
To run Command Prompt as an administrator, press Ctrl + Ua haujlwm + Esc to open Task Manager. Then click on cov ntaub ntawv ces xaiv Khiav haujlwm tshiab. Hom cmd.exe thiab checkmark "Ua kom tiav txoj haujlwm no nrog kev ua haujlwm” then click OK. Similarly, to open PowerShell, type powershell.exe and again checkmark the above field then hit Enter.

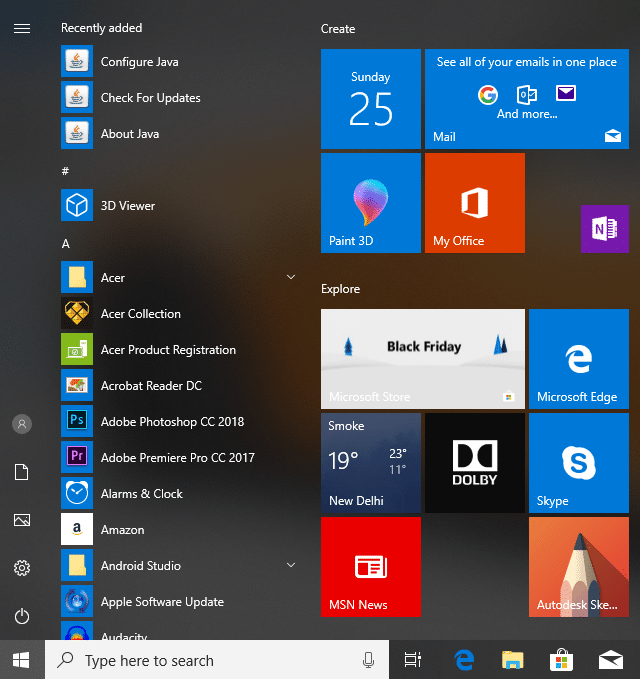
Txoj Kev 1: Rov qab Windows Explorer
1. Nias Ctrl + Ua haujlwm + Esc yuam sij ua ke los tso lub Tus Tswj Xyuas Haujlwm.
2. Nrhiav kev explorer.exe hauv daim ntawv ces right-click rau nws thiab xaiv End Task.

3. Tam sim no, qhov no yuav kaw qhov Explorer thiab rov ua nws, nyem Cov Ntaub Ntawv> Khiav haujlwm tshiab.
4. Hom explorer.exe thiab ntaus OK kom rov pib dua Explorer.

5. Exit Task Manager and see if you’re able to Fix Start Menu Not Working in Windows 10.
6. If you’re still facing the issue, then log out from your account and re-login.
7. Nias Ctrl + Ua haujlwm + Del key at the same time and click on Signout.
8. Type in your password to login to Windows and see if you’re able to fix the issue.
Method 2: Create a new local administrator account
Yog tias koj tau kos npe nrog koj tus account Microsoft, tom qab ntawd ua ntej tshem tawm qhov txuas mus rau tus lej ntawd los ntawm:
1. Nias Windows Key + R ces ntaus "ms-nqis:” (tsis muaj quotes) thiab ntaus Enter.
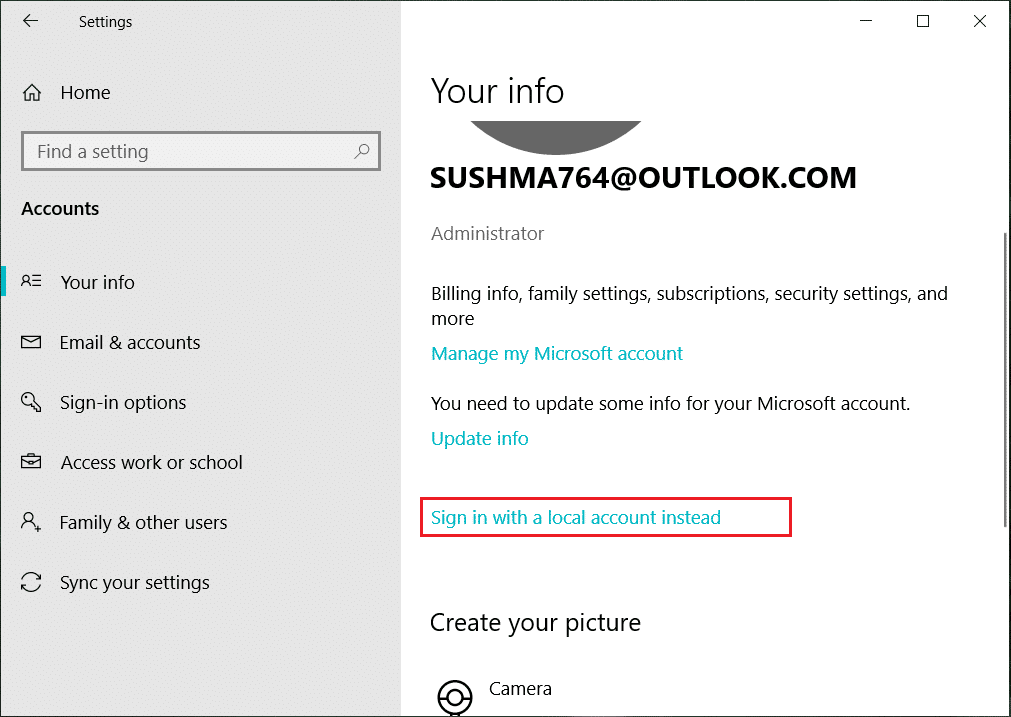
2. Xaiv Account> Sau npe nrog ib tus account hauv zos xwb.
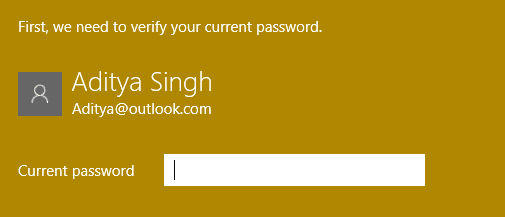
3. Ntaus ntawv nyob rau hauv koj Microsoft account password thiab nias Tom ntej.
4. Xaiv a tus account tshiab lub npe thiab tus password, thiab tom qab ntawd xaiv Finish thiab kos npe tawm.
#1. Create the new administrator account:
1. Nias Windows Key + I kom qhib Chaw thiab tom qab ntawd nyem Cov nyiaj.
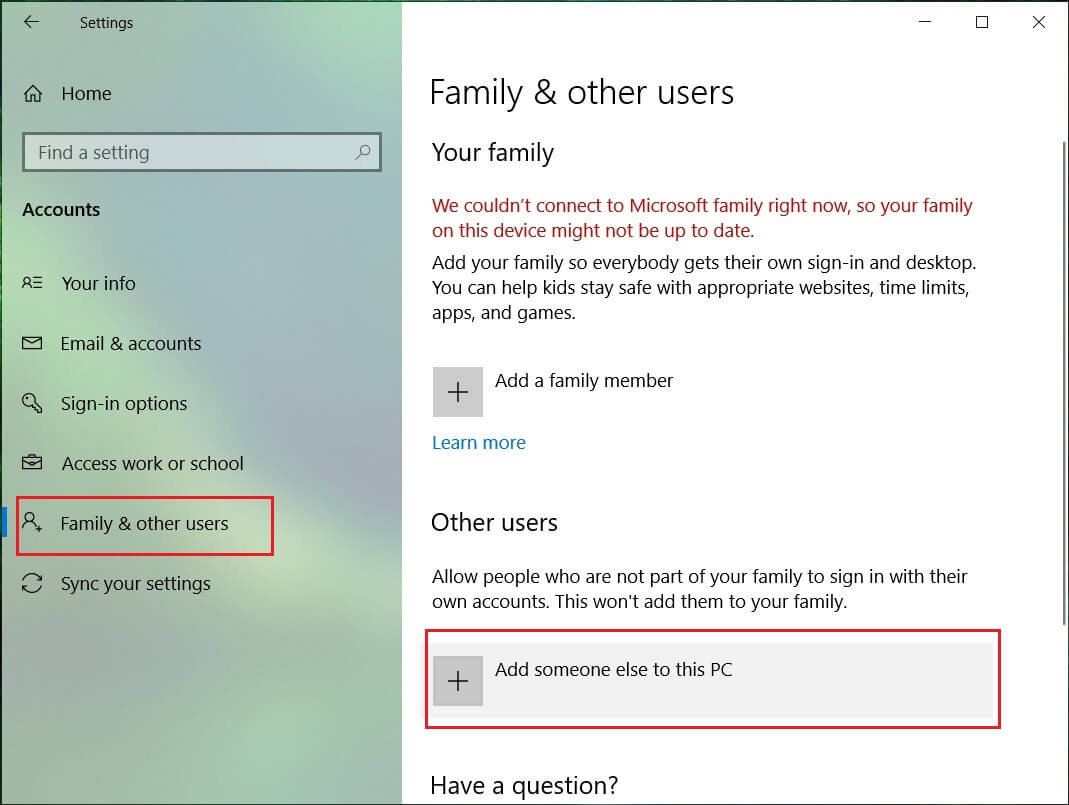
2. Ces mus rau Tsev neeg & lwm tus neeg.
3. Nyob rau lwm tus neeg nyem rau ntawm "Ntxiv lwm tus neeg rau lub PC no."
4. Tom ntej no, muab lub npe rau tus user and a password then select Next.
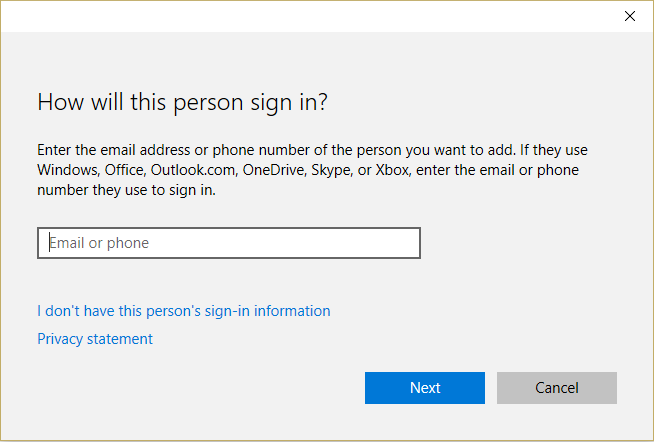
5. Teeb a username thiab password, ces xaiv Tom ntej no> Ua tiav.
#2. Next, make the new account an administrator account:
1. Rov qhib dua Qhov Chaw Xaiv Lub Chaw thiab nias rau Nyiaj.

2. Mus rau Tsev neeg & lwm tus neeg tab.
3. Lwm tus neeg xaiv tus as khauj uas koj nyuam qhuav tsim thiab xaiv a Hloov hom account.
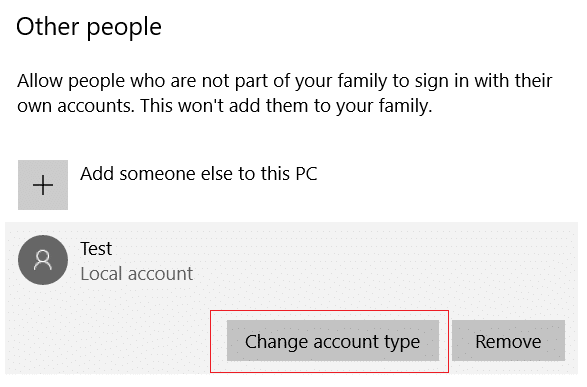
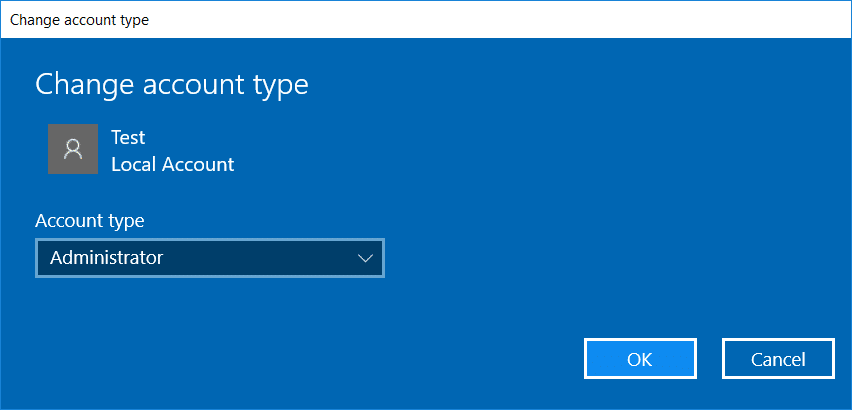
4. Nyob rau hauv hom Account, xaiv Administrator ces nias OK.
#3. If the issue persists try deleting the old administrator account:
1. Ib zaug ntxiv mus rau Windows Chaw ces Account> Tsev neeg & lwm tus neeg.
2. Nyob rau hauv Lwm cov neeg siv, xaiv tus qub tswj account, nyem Tshem tawm, thiab xaiv Rho tawm tus account thiab cov ntaub ntawv.

3. If you were using a Microsoft account to sign in before, you can associate it with the new administrator by following the next step.
4. Nyob rau hauv Windows Settings > Accounts, xaiv Sau npe nrog Microsoft account hloov thiab sau koj tus account info.
Thaum kawg, koj yuav tsum muaj peev xwm Txhim kho Start Menu Tsis Ua Haujlwm hauv Windows 10 as this step seems to fix the issue in most cases.
If you continue to experience Start Menu’s issue, it’s recommended to download and run Start Menu Troubleshooter.
1. Download and run Start Menu Troubleshooter.
2. Ob npaug nias rau ntawm downloaded ntaub ntawv thiab ces nias Tom ntej.
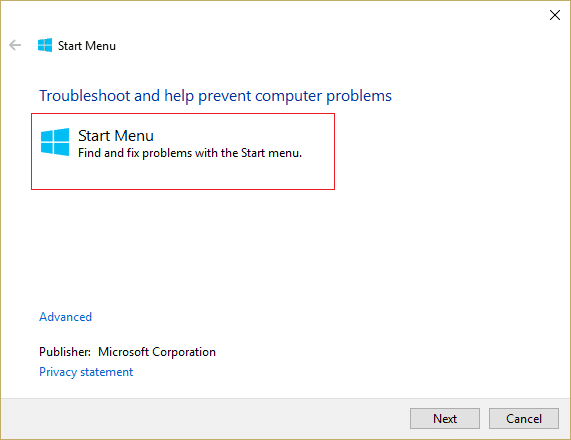
3. Let it finds and automatically Fixes Start Menu Not Working in Windows 10.
Method 4: Run System File Checker (SFC) and Check Disk
1. Qhib Command Prompt. Tus neeg siv tuaj yeem ua cov kauj ruam no los ntawm kev tshawb nrhiav 'cmd' Thiab tom qab ntawd nias sau.

2. Tam sim no ntaus cov hauv qab no hauv cmd thiab ntaus enter:
Sfc /scannow sfc /scannow /offbootdir=c: /offwindir=c:Windows

3. Tos rau cov txheej txheem saum toj no kom tiav thiab ib zaug ua tiav, rov pib koj lub PC.
4. Tom ntej no, khiav CHKDSK los ntawm Txhim kho cov ntaub ntawv yuam kev nrog Check Disk Utility (CHKDSK).
5. Cia cov txheej txheem saum toj no ua tiav thiab rov pib dua koj lub PC kom txuag tau cov kev hloov pauv.
Method 5: Force Cortana to Rebuild Settings
Open Command Prompt with administrative rights then type the following one by one and hit Enter after each command:
CD /d "%LOCALAPPDATA%PackagesMicrosoft.Windows.Cortana_cw5n1h2txyewy"
Taskkill /F /IM SearchUI.exe
RD /S /Q Settings
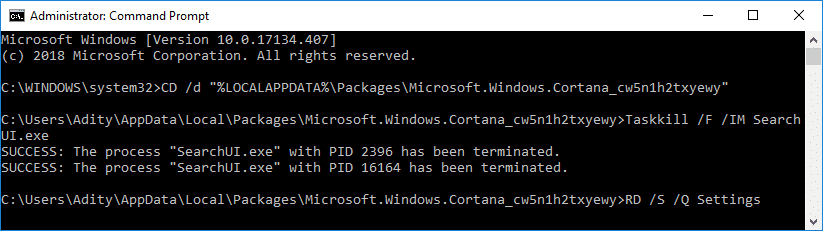
This will force Cortana to rebuild the settings and will Fix Start Menu and Cortana Not Working in Windows 10.
If the issue is still not resolved, follow this guide to fix any issues related to Cortana.
Method 6: Re-Register Windows App
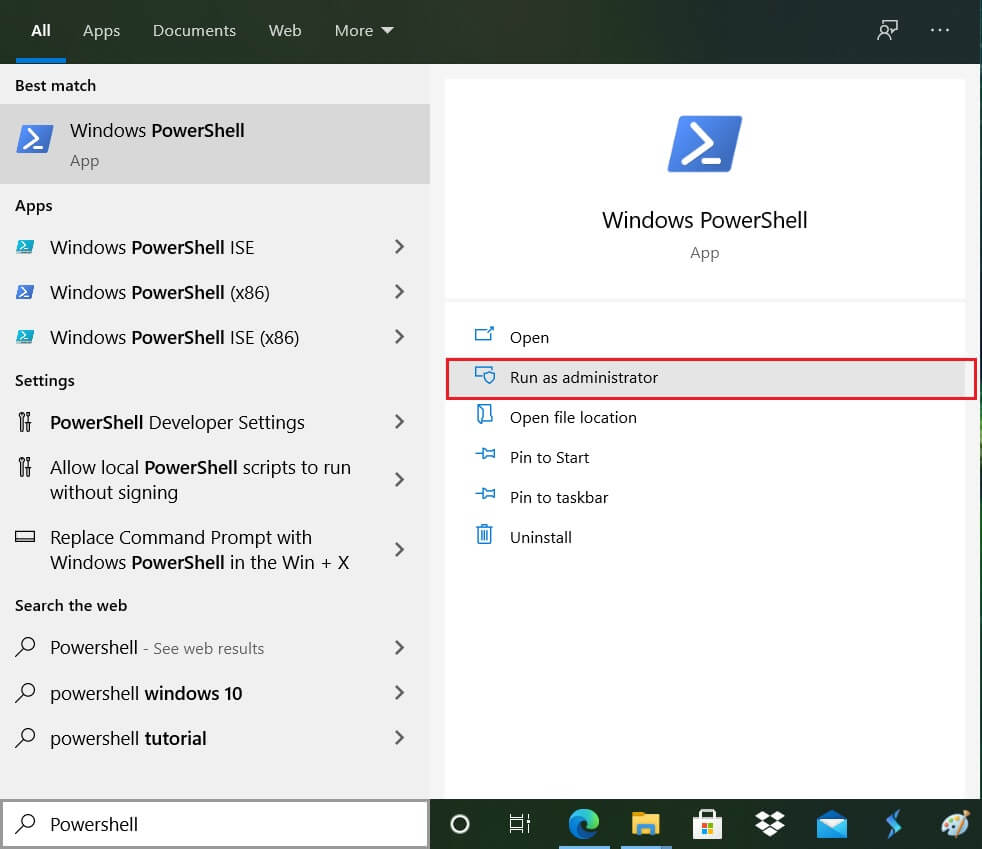
1. Hom PowerShell hauv Windows Search ces right-click ntawm PowerShell thiab xaiv Khiav li tus Administrator.
2. Tam sim no ntaus cov lus txib hauv qab no rau hauv PowerShell qhov rais:
Tau-AppXPackage -AllUsers | Foreach {Ntxiv-AppxPackage -DisableDevelopmentMode -Register "$ ($ _. InstallLocation) AppXManifest.xml"}

3. Tos kom lub Powershell ua raws li cov lus txib saum toj no thiab tsis quav ntsej ob peb qhov yuam kev uas tuaj yeem tshwm sim.
4. Reboot koj lub PC kom txuag tau cov kev hloov pauv.
Method 7: Registry Fix
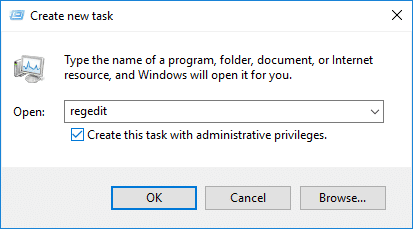
1. Press Ctrl + Shift + Esc to open Task Manager then click on cov ntaub ntawv thiab xaiv Ua haujlwm tshiab.
2. Hom regedit thiab checkmark "Ua kom tiav txoj haujlwm no nrog kev ua haujlwm” then click OK.
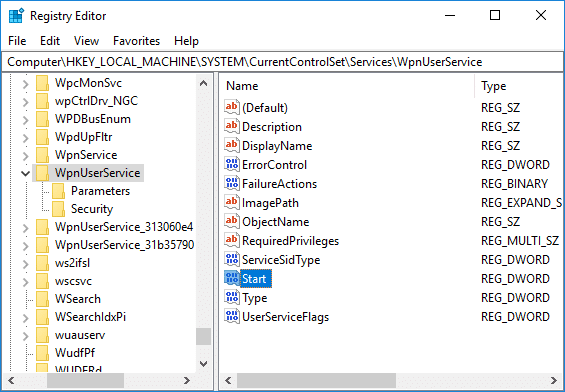
3. Now navigate to the following registry key in the Registry Editor:
ComputerHKEY_LOCAL_MACHINESYSTEMCurrentControlSetServicesWpnUserService
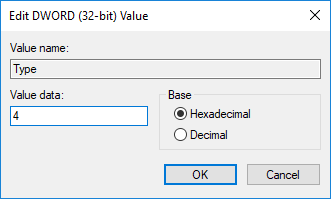
4. Nco ntsoov xaiv WpnUserService then in the right window double-click on the Pib DWORD.
5. Change its value to 4 then click OK.
6. Reboot koj lub PC kom txuag tau cov kev hloov pauv.
Txoj Kev 8: Hloov tshiab lossis rov pib dua Windows 10
Nco ntsoov: If you can’t access your PC, restart your PC a few times until you start Tsis Siv Neeg Kho. Ces navigate rau Troubleshoot> Reset this PC> Tshem tawm txhua yam.
1. Nias Windows Key + I kom qhib Chaw ces nyem rau Hloov tshiab & Kev ruaj ntseg icon.
![]()
2. Los ntawm cov ntawv qhia zaub mov sab laug xaiv Rov qab.
3. Hauv qab Pib dua lub PC, nyem rau ntawm "tau pib"Khawm.

4. Xaiv qhov kev xaiv rau Khaws kuv cov ntaub ntawv.

5. For the next step, you might be asked to insert Windows 10 installation media, so ensure you have it ready.
6. Now, select your Windows version and click tsuas yog tus tsav uas Windows tau nruab > remove my files.

5. Nyem ntawm qhov Rov qab pib dua khawm.
6. Ua raws li cov lus qhia ntawm lub vijtsam kom ua tiav qhov rov pib dua.
pom zoo:
Qhov ntawd yog nws koj tau ua tiav Txhim kho Start Menu Tsis Ua Haujlwm hauv Windows 10 tab sis yog tias koj tseem muaj lus nug txog qhov kev qhia no ces xav nug lawv hauv cov lus ntu.