Synchronize Windows 10 Clock with an Internet Time Server

Synchronize Windows 10 Clock with an Internet Time Server: If you have set the Clock in Windows 10 to automatically set time then you may be aware that the current time is synchronized with an Internet Time Server in order to update time. This means that the clock on your PC’s Taskbar or Windows Settings is updated at regular intervals to match the time on the time server which ensures that your clock has accurate time. You need to be connected to the internet for time to automatically synchronize with an Internet time server without which the time won’t be updated.
Now Windows 10 uses the Network Time Protocol (NTP) to connect with the Internet time servers in order to synchronize Windows Clock. If the time in Windows Clock is not accurate then you could face network issues, corrupted files, and incorrect timestamps in documents & important files. With Windows 10 you could easily change the time servers or can even add a custom time server when necessary.
So now you know it’s important for your Windows to display the correct time in order to ensure proper functioning of your PC. Without which certain applications and Windows services will start experiencing issues. So without wasting any time let’s see How to Synchronize Windows 10 Clock with an Internet Time Server with the help of the below-listed tutorial.
How to Synchronize Windows 10 Clock with an Internet Time Server
Obavezno stvorite točku vraćanja za slučaj da nešto pođe po zlu.
Method 1: Synchronize Windows 10 Clock with an Internet Time Server in Internet Time Settings
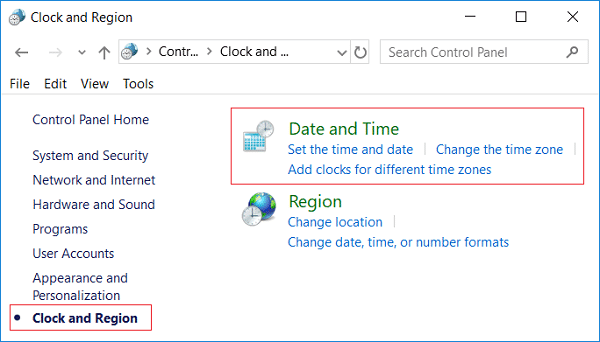
1. Vrsta kontrola in Windows 10 Search then click on Control Panel iz rezultata pretraživanja.

2. Sada kliknite na "Sat, jezik i regija” zatim kliknite na “Datum i vrijeme".
3.Under Date and Time window click “Promijenite datum i vrijeme".
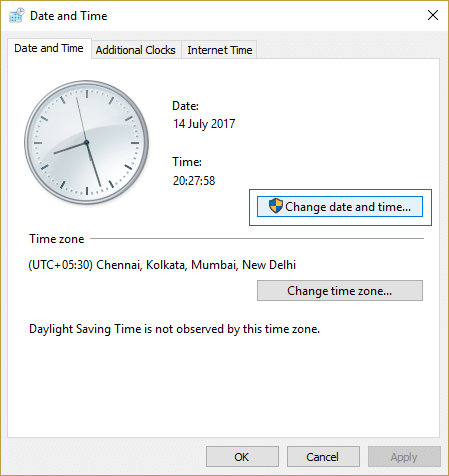
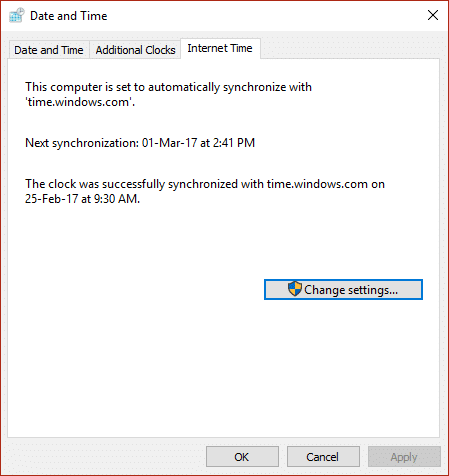
4.Switch to Internet Time then click on “Promijeniti postavke".
5. Obavezno označite "Sinkronizirajte s internetskim vremenskim poslužiteljem” box, then select a time server from the Server drop-down and click Update Now.
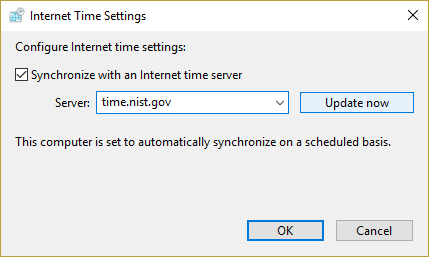
6.Click Ok then click Apply followed by OK again.
7.If the time is not updated then choose a different Internet time server and again click Update now.

8. Ponovno pokrenite računalo da biste spremili promjene.
Method 2: Synchronize Windows 10 Clock with an Internet Time Server in Command Prompt
1.Pritisnite tipku Windows + X i zatim odaberite Naredbeni redak (Admin).

2. Upišite sljedeću naredbu u cmd i pritisnite Enter:
w32tm /resinc
net time /domain
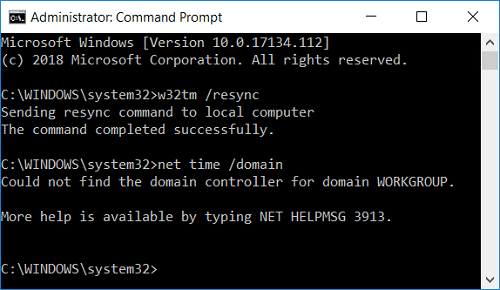
3. Ako dobijete a The service has not been started. (0x80070426) error, onda to trebate start Windows Time service.
4.Type the following command to start Windows Time service then again try to synchronize Windows Clock:
neto početak w32time
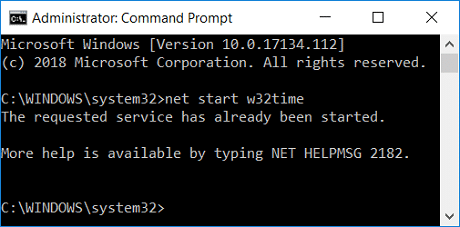
5.Close Command Prompt and restart your PC.
Method 3: Change the Internet Time Synchronization Update Interval
1. Pritisnite tipku Windows + R, a zatim upišite regedit i pritisnite Enter da otvorite uređivač registra.

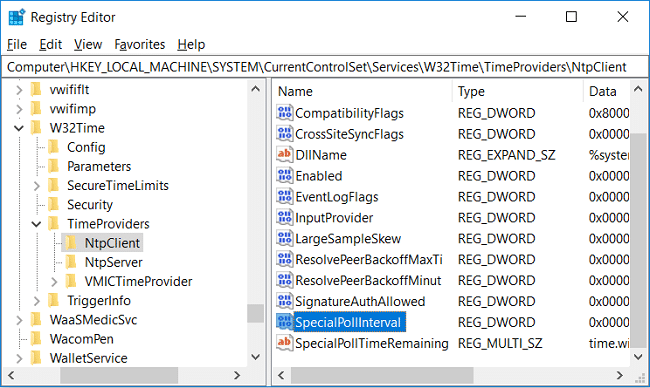
2. Idite do sljedećeg ključa registra:
ComputerHKEY_LOCAL_MACHINESYSTEMCurrentControlSetServicesW32TimeTimeProvidersNtpClient
3.Odaberi NtpcClient then in right window pane double-click on SpecialPollInterval promijeniti svoju vrijednost.
4. Sada odaberite Decimal from the Base then in the Value date change the value to 86400.
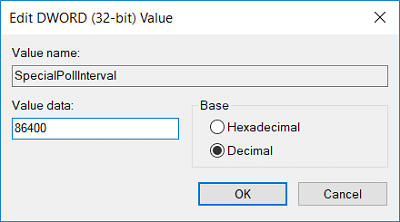
Bilješka: 86400 seconds (60 seconds X 60 minutes X 24 hours X 1 day) which means that the time will be updated every day. The default time is every 604800 seconds (7 days). Just make sure not use the time interval less than 14400 seconds (4 hours) as your computer’s IP will get banned from the time server.
5.Click Ok then close Registry Editor.
6. Ponovno pokrenite računalo da biste spremili promjene.
Method 4: Add a new Internet time server on Windows 10
1.Type control in Windows 10 Search then click on Control Panel iz rezultata pretraživanja.
2. Sada kliknite na "Sat, jezik i regija” zatim kliknite na “Datum i vrijeme".
3.Under Date and Time window click “Promijenite datum i vrijeme".
4.Prebaci na Internet vrijeme zatim kliknite na "Promijeniti postavke".
5. Označite "Sinkronizirajte s internetskim vremenskim poslužiteljem” box then under Server type the address of the time server and click Ažurirati sada.
Bilješka: Pogledajte ovdje for a list of the Simple Network Time Protocol (SNTP) time servers that are available on the Internet.
6.Click Ok then click Apply followed by OK again.
7. Ponovno pokrenite računalo da biste spremili promjene.
Method 5: Add a new Internet time server on Windows 10 using Registry
1. Pritisnite tipku Windows + R, a zatim upišite regedit i pritisnite Enter za otvaranje Urednik registra.
2. Idite do sljedećeg ključa registra:
HKEY_LOCAL_MACHINESOFTWAREMicrosoftWindowsCurrentVersionDateTimeServers
3. Desnom tipkom miša kliknite na Poslužitelji zatim odaberite Novo > Vrijednost niza.
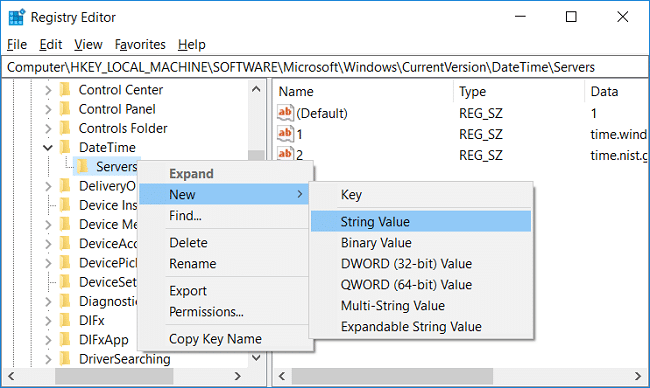
4.Type a number according to the position of the new server, for example, if there are already 2 entries then you have to name this new string as 3.
5.Now double-click on this newly created String Value to change its value.
6. Dalje, type the address of the time server then click OK. For example, if you want to use Google Public NTP server then enter time.google.com.
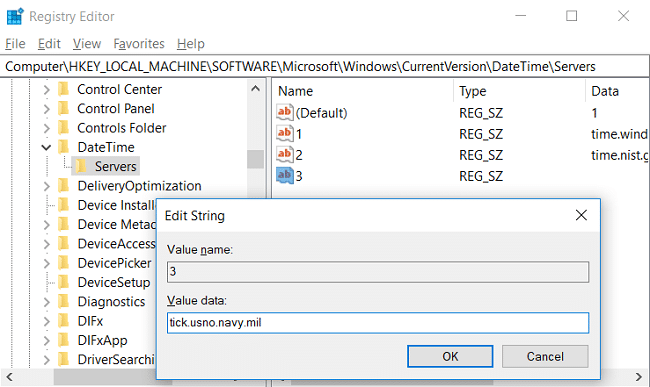
Bilješka: Pogledajte ovdje for a list of the Simple Network Time Protocol (SNTP) time servers that are available on the Internet.
7. Ponovno pokrenite računalo da biste spremili promjene.
If you’re still facing in synchronizing Windows 10 Clock then fix them using the below-listed steps:
Bilješka: This will remove all your custom servers from Registry.
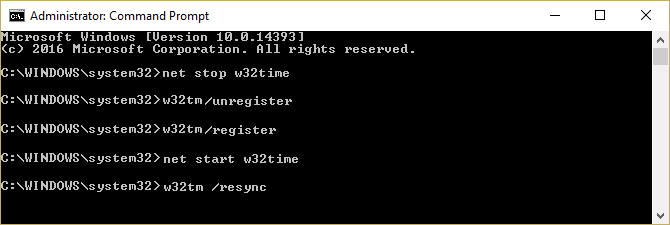
1.Pritisnite tipku Windows + X i zatim odaberite Command Prompt (Admin).

2. Upišite sljedeću naredbu u cmd i pritisnite Enter:
netstop w32time
w32tm /odjava
w32tm /registar
neto početak w32time
w32tm /resync /nowait
3. Ponovno pokrenite računalo da biste spremili promjene.
Preporučena:
To je to što ste uspješno naučili How to Synchronize Windows 10 Clock with an Internet Time Server but if you still have any queries regarding this tutorial then feel free to ask them in the comment’s section.