Users who have updated to latest Windows 10 Creators Update seems to be having a lot of issues with their system such as missing photos or pictures icons, desktop icon issue, no wifi etc. but today we are going to deal with specific issues which are Audio problems in their system. Users are complaining about the sound quality issues after installing Windows 10 Creators Update.
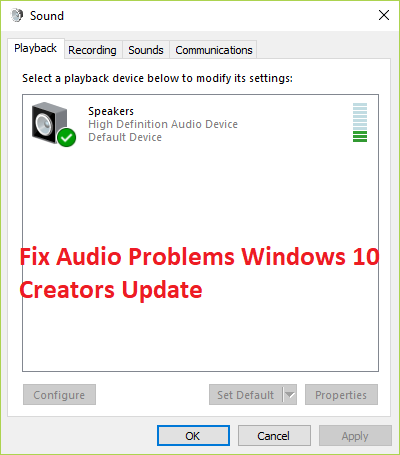
Many factors are responsible for this sound problem which includes incompatible, outdated or corrupt Sound/Audio drivers, problematic sound configuration, 3rd party app conflict, etc. So without wasting any time let’s see how to actually Fix Audio Problems Windows 10 Creators Update with the below-listed troubleshooting steps.
Fix Audio Problems Windows 10 Creators Update
Győződjön meg arról, hogy hozzon létre egy helyreállítási pontot ha valami rosszul megy.
Method 1: Re-Install the Audio Application
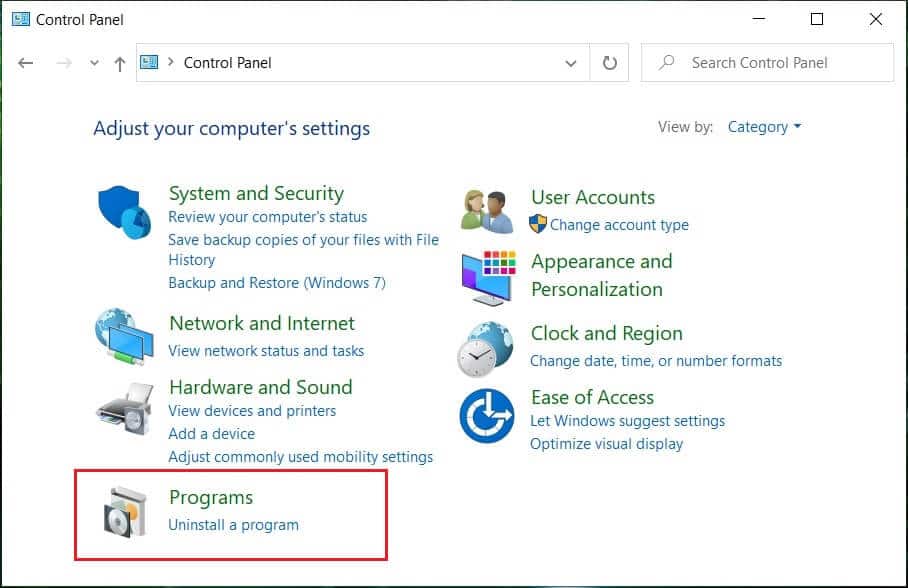
1. Search for the control panel from the Start Menu search bar és kattintson rá a megnyitásához Kezelőpanel.

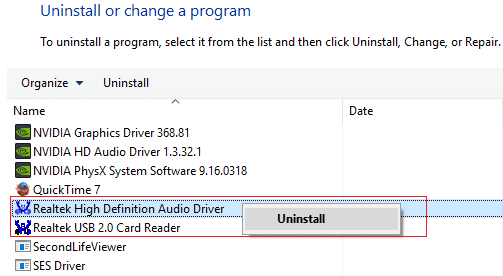
2. Kattintson Uninstall a program majd keresse meg Realtek High Definition Audio Driver entry.
3. Kattintson rá a jobb gombbal, és válassza ki Eltávolítás.
4. Restart your PC and open Eszközkezelő.
5. Click on Action then “Vizsgálja meg a hardver változásait."

6. Your system will automatically install the Realtek High Definition Audio Driver again.
Method 2: Enable Windows Sound Services
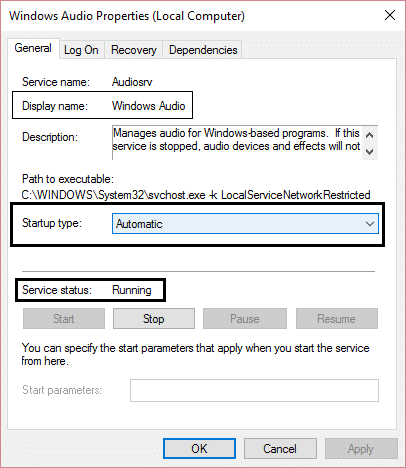
1. nyomja meg Windows gomb + R majd írja be services.msc és nyomja meg az Enter billentyűt a Windows szolgáltatások listájának megnyitásához.

2. Now locate the following services:
Windows Audio Windows Audio Endpoint Builder Plug and Play
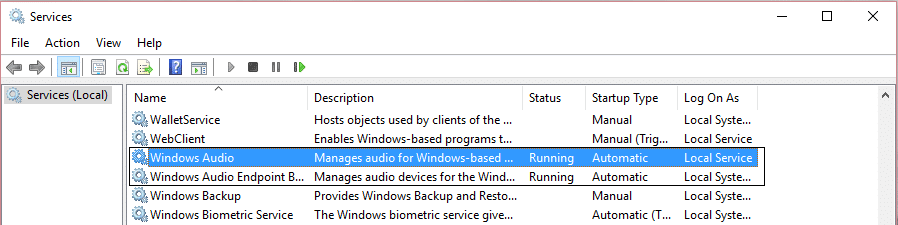
3. Make sure their Indítás típusa be van állítva Automatikus és a szolgáltatások futás, akárhogy is, indítsa újra mindegyiket.
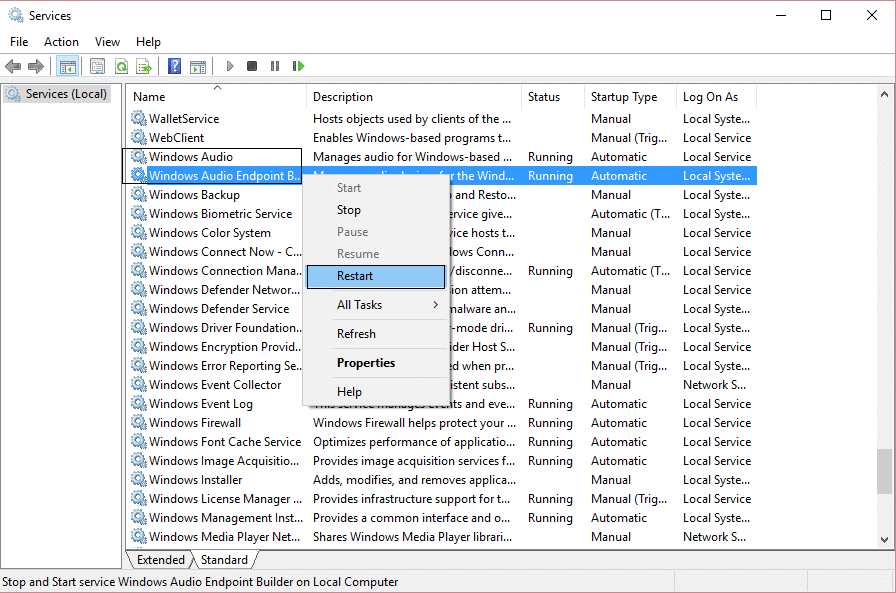
4. If Startup Type is not Automatic, then double click the services, and inside the property, window set them to Automatikus.
5. Make sure the above services are checked in msconfig.exe
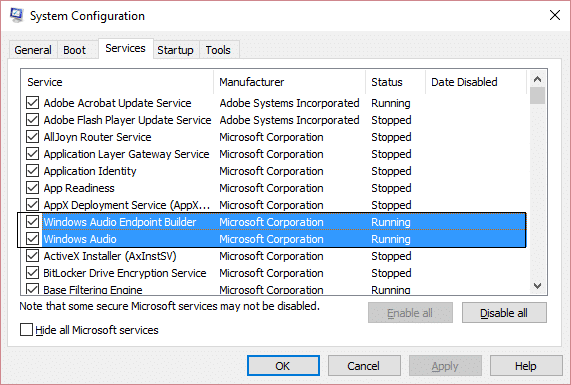
6. Újraindítás your computer to apply these changes and see if you can Fix Audio Problems Windows 10 Creators Update.
Method 3: Disable and then Re-enable Sound Controller
1. Press Windows Key + R then type devmgmt.msc and hit Enter.

2. Expand Sound, video and game controllers then right-click on your Audio vezérlő és válassza ki a Disable.
3. Similarly again right-click on it and select Engedélyezze.
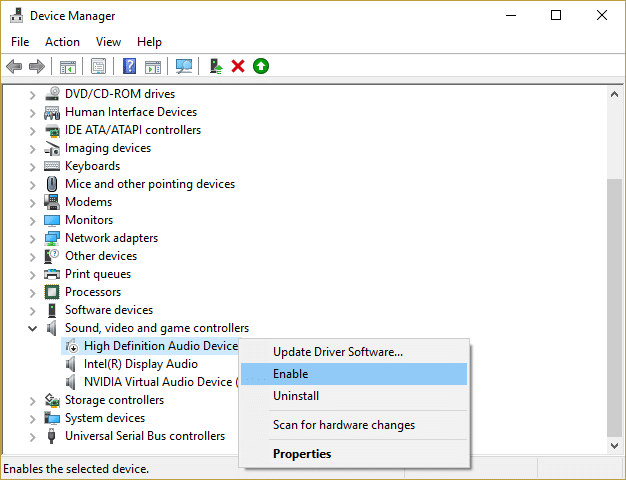
4. Again see if you can Fix Audio Problems Windows 10 Creators Update.
Method 4: Update Sound Controller’s drivers
1. Press Windows Key + R then type ‘Devmgmt.msc' és nyomja meg az Enter billentyűt az Eszközkezelő megnyitásához.
2. Expand Sound, video and game controllers and right-click on your Audio Device, select engedélyezése (Ha már engedélyezve van, hagyja ki ezt a lépést).
2. If your audio device is already enabled then right-click on your Audio eszköz majd válassza ki Frissítse az illesztőprogramot.
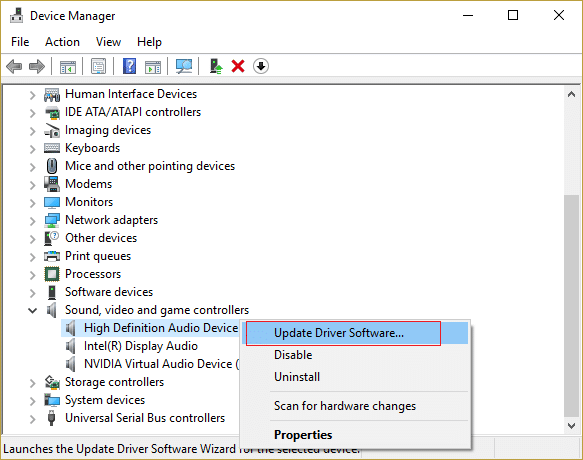
3. Most válassza a „Automatikus keresés a frissített illesztőprogramok számára” és hagyja befejezni a folyamatot.

4. If it wasn’t able to update your Audio drivers, then again select Update Driver Software.
5. This time, select "Keresse meg a számítógépemet az illesztőprogramokhoz."

6. Next, select “Hadd válasszak a számítógépem illesztőprogramjai közül."

7. Select the appropriate driver from the list and click Next.
8. Let the process complete and then restart your PC.
9. Alternatively, go to your gyártó honlapján és töltse le a legújabb illesztőprogramokat.
Method 5: Uninstall Sound Controller’s drivers
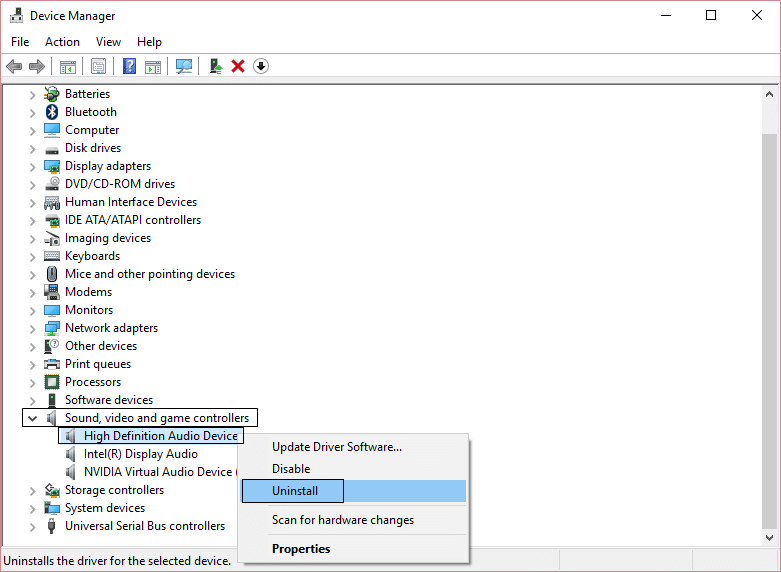
1. Nyomja meg a Windows Key + R billentyűket, majd írja be devmgmt.msc és a megnyitáshoz nyomja meg az Enter billentyűt Eszközkezelő.
2. Bontsa ki Hang-, video- és játékvezérlők és kattintson a hangeszközre, majd válassza ki Eltávolítás.
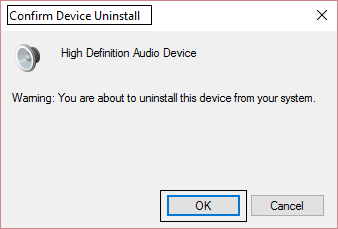
3. Most erősítse meg az eltávolítást az OK gombra kattintva.
4. Finally, in the Device Manager window, go to Action and click on Vizsgálja meg a hardver változásait.
5. Restart to apply changes.
6. módszer: Futtassa a Windows Audio hibaelhárítót
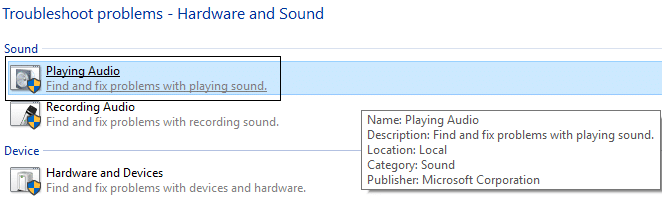
1. Open control panel and in the search box type “hibaelhárítás."
2. In the search results, click on Hibaelhárítás majd válassza ki Hardver és hang.

3. Now in the next window, click on “Audio lejátszása” a Hang alkategórián belül.
4. Végül kattintson Speciális beállítások a Hang lejátszása ablakban, és jelölje be a „A javításokat automatikusan alkalmazza”És kattintson a Tovább gombra.
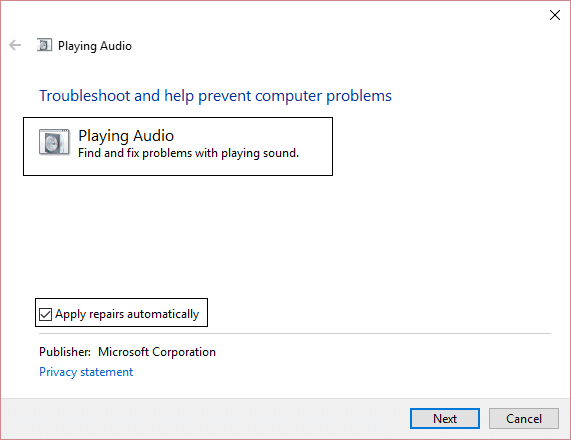
5. Troubleshooter will automatically diagnose the issue and ask you if you want to apply the fix or not.
6. Kattintson a Javítás alkalmazása és az Újraindítás gombra to apply changes and see if you’re able to Fix Audio Problems Windows 10 Creators Update.
Method 7: Rollback to the previous Windows 10 build
1. First, go to the Login screen, click on the Bekapcsológomb, akkor tartsa lenyomva a Shift billentyűt majd kattintson rá Újraindul.
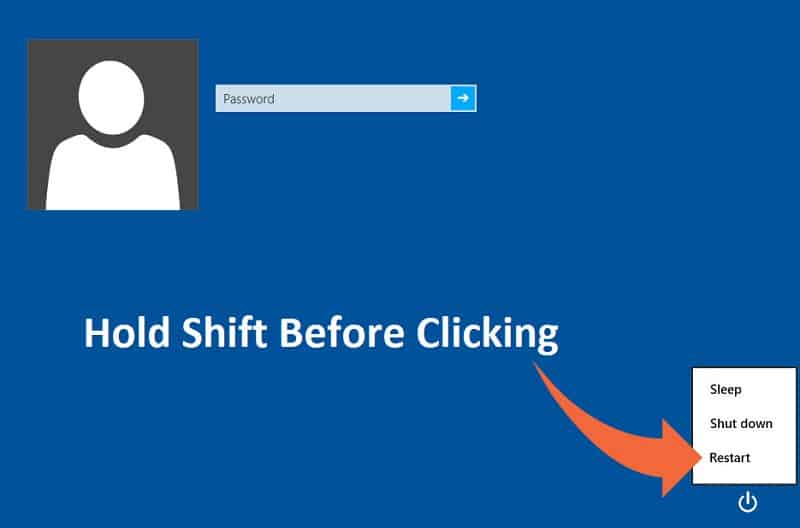
2. Make sure you don’t let go of the Shift button until you see the Speciális helyreállítási beállítások menü.

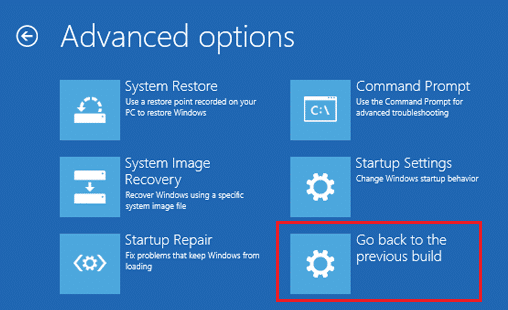
3. Now Navigate to the following in the Advanced Recovery Options menu:
Troubleshoot > Advanced options > Go back to the previous build.
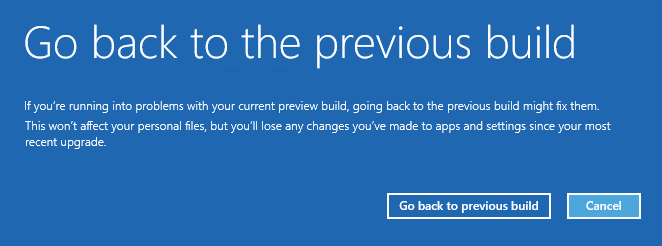
3. After a few seconds, you will be asked to choose your User Account. Click on the User Account, type in your password and click Continue. Once done, choose the option Go Back to the Previous Build again.
Ajánlott:
Ez az, ami sikeresen megvan Fix Audio Problems Windows 10 Creators Update de ha továbbra is kérdései vannak ezzel az útmutatóval kapcsolatban, nyugodtan kérdezze meg őket a megjegyzés részben.

