15 Ways to Speed Up a Slow Windows 10 PC

If your PC running Windows 10 is becoming slow or constantly lags, you’re at the right place as today we will fix the issue altogether. Although Windows 10 is one of the best-operating systems out there, with time it has become slow and now your PC lags a lot, worse of all it freezes suddenly. You will notice that when you installed a new copy of Windows, the system was a lot faster as compared to the current state.
Now the lagging or slow PC issue is generally caused by performance issues under Windows 10, but sometimes it can also be caused by bad memory (RAM), damaged hard disk, virus or malware etc. So without wasting any time let’s see how to actually Seed Up a Slow Windows 10 PC with the help of below-listed methods.
15 Ways to Speed Up a Slow Windows 10 PC
Համոզվեք, որ ստեղծեք վերականգնման կետ, եթե ինչ-որ բան սխալ լինի:
Method 1: Disable Animation and adjust for best performance
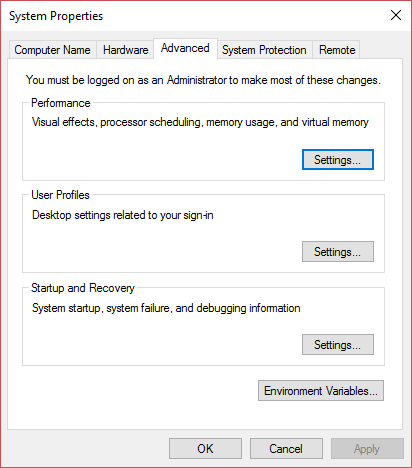
1. Սեղմեք Windows Key + R, ապա մուտքագրեք sysdm.cpl և սեղմեք Enter՝ համակարգի հատկությունները բացելու համար:

2. Անցնել Ընդլայնված էջանիշ ապա կտտացրեք Կարգավորումներ տակ Կատարումը:
3. Under Visual Effects checkmark “Կատարեք լավագույն կատարման համար” would automatically անջատել բոլոր անիմացիաները:
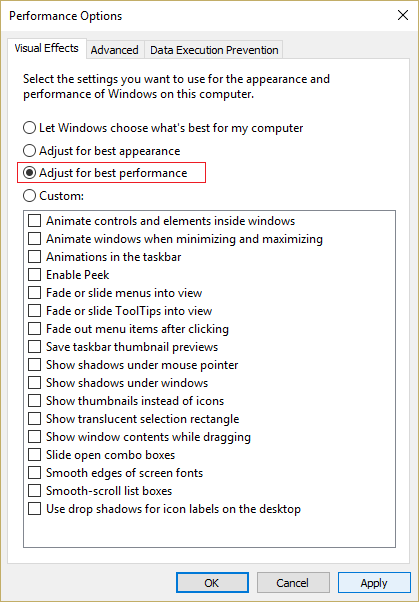
4. Սեղմեք Դիմել, որին հաջորդում է OK:
5. Վերագործարկեք ձեր համակարգիչը, որպեսզի պահպանեք փոփոխությունները և տեսնեք, թե արդյոք կարող եք դա անել Արագացրեք դանդաղ Windows 10 համակարգչի աշխատանքը:
Method 2: Disable Unnecessary Startup Programs
1. Press Ctrl + Shift + Esc keys together to open Task Manager and then switch to Գործարկման
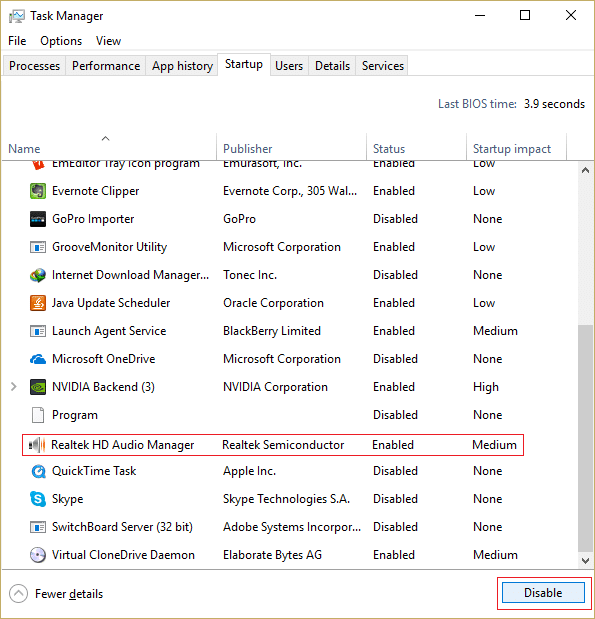
2. From the list, select the programs you don’t use and then click on the Անջատել կոճակը:
3. Do this for every unnecessary program, as you will only be able to disable one program at a time.

4. Close Task Manager and reboot your PC to save changes.
Մեթոդ 3. Գործարկել CCleaner-ը և Malwarebytes-ը
1. Ներբեռնեք եւ տեղադրել CCleaner & Malwarebytes.
2. Գործարկեք Malwarebytes-ը և թույլ տվեք, որ այն սկանավորի ձեր համակարգը վնասակար ֆայլերի համար: Եթե հայտնաբերվի չարամիտ ծրագիր, այն ավտոմատ կերպով կհեռացնի դրանք:

3. Այժմ գործարկեք CCleaner-ը և ընտրեք Պատվերով մաքուր.
4. Պատվերով մաքրման տակ ընտրեք Windows ներդիր և նշեք կանխադրվածները և սեղմեք Վերլուծել.

5. Վերլուծության ավարտից հետո համոզվեք, որ ջնջվող ֆայլերը կհեռացնեք:

6. Ի վերջո, սեղմեք Գործարկել Cleaner-ը կոճակը և թույլ տվեք CCleaner-ին գործարկել իր ընթացքը:
7. Ձեր համակարգը հետագայում մաքրելու համար, ընտրեք Ռեեստրի ներդիրըև համոզվեք, որ ստուգված են հետևյալը.

8. Սեղմեք Սկանավորեք խնդիրների համար կոճակը և թույլ տվեք CCleaner-ին սկանավորել, այնուհետև կտտացրեք կոճակին Ուղղել ընտրված խնդիրները կոճակը:

9. Երբ CCleaner-ը հարցնում է.Ցանկանու՞մ եք ռեեստրի կրկնօրինակ փոփոխություններ:" ընտրել Այո.
10. Երբ ձեր կրկնօրինակումն ավարտվի, սեղմեք կոճակի վրա Ուղղել բոլոր ընտրված խնդիրները կոճակը:
11. Վերագործարկեք ձեր համակարգիչը՝ փոփոխությունները պահպանելու համար:
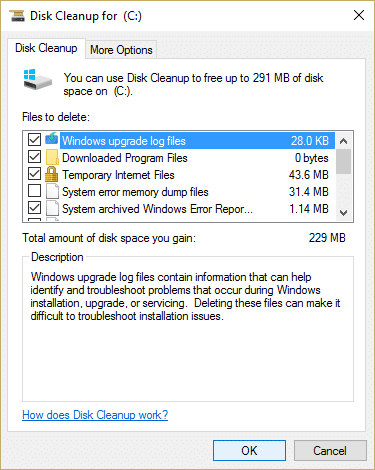
Method 4: Run Disk Cleanup and Error Checking
1. Go to This PC or My PC and right-click on the C: drive to select Հատկություններ:
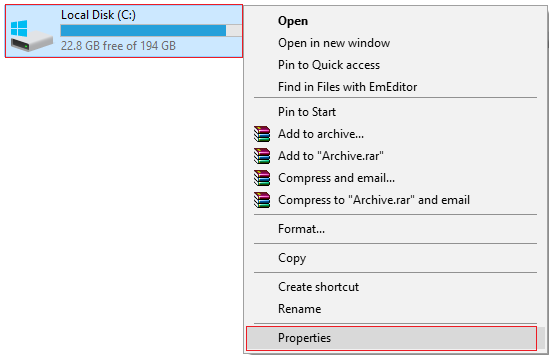
2. Այժմ սկսած Հատկություններ պատուհանը սեղմեք Disk Մաքրում under capacity.
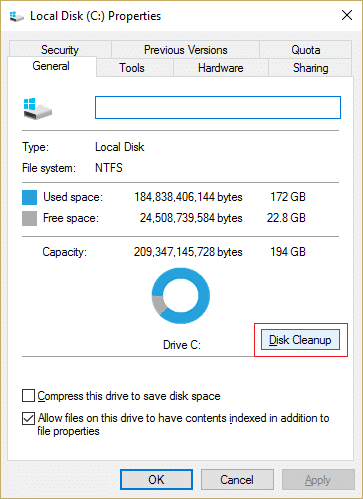
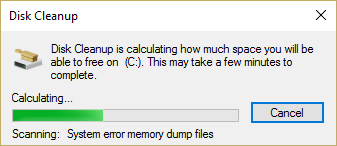
3. It will take some time to calculate how much space Disk Cleanup will free.
4. Այժմ կտտացրեք Մաքրել համակարգի ֆայլերը in the bottom under Description.
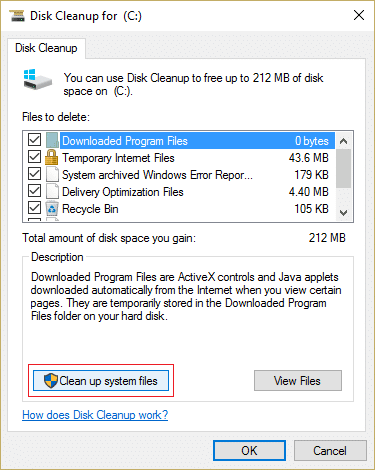
5. In the next window, make sure to select everything under Ֆայլեր ջնջելու համար and then click OK to run Disk Cleanup. Նշում: We are looking for “Previous Windows Installation(s)"Եւ"Windows-ի տեղադրման ժամանակավոր ֆայլեր” if available, make sure they are checked.
6. Wait for Disk Cleanup to complete and see if you can Speed Up a Slow Windows 10 PC, եթե ոչ, ապա շարունակիր:
7. Բաց Հրահանգ արագ. Օգտագործողը կարող է կատարել այս քայլը՝ որոնելով «cmd» եւ ապա սեղմեք Enter:

8. In the cmd window type the following command and hit Enter:
chkdsk C: / f / r / x

Նշում: Վերոնշյալ հրամանում C: այն սկավառակն է, որի վրա մենք ցանկանում ենք ստուգել սկավառակը, /f-ը նշանակում է դրոշ, որը chkdsk թույլ է տալիս շտկել սկավառակի հետ կապված սխալները, /r թույլ է տալիս chkdsk-ին փնտրել վատ հատվածներ և կատարել վերականգնում և /x: հրահանգում է ստուգիչ սկավառակին ապամոնտաժել սկավառակը նախքան գործընթացը սկսելը:
9. Այն կխնդրի պլանավորել սկանավորումը համակարգի հաջորդ վերագործարկման ժամանակ, տեսակ Y եւ հարվածեց:
Please keep in mind that CHKDSK process can take up a lot of time as it has to perform many system-level functions, so be patient while it fixes system errors and once the process is finished it will show you the results.
Մեթոդ 5. Անջատել արագ գործարկումը
1. Սեղմեք Windows Key + R, ապա մուտքագրեք Control և սեղմեք Enter՝ բացելու համար Վերահսկիչ խորհուրդը:

2. Սեղմիր Սարքավորումներ եւ հնչյուններ ապա կտտացրեք Power Options- ը.
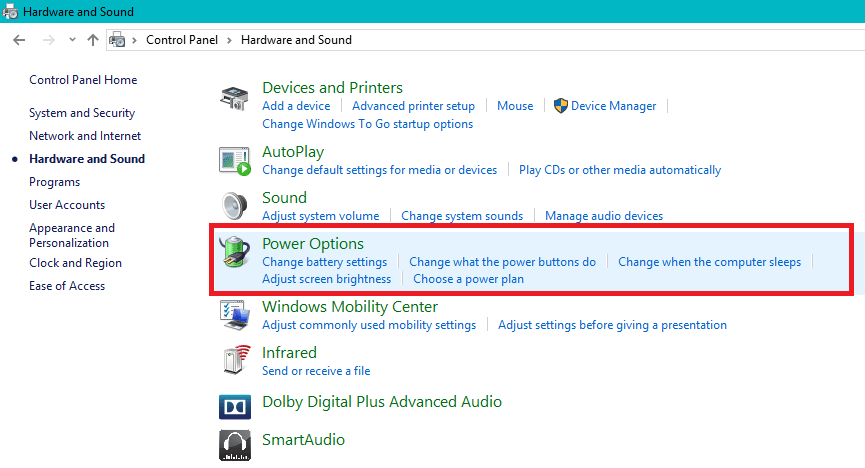
3. Then from the left window pane select "Ընտրեք, թե ինչ է անում իշխանության կոճակները:"

4: Այժմ կտտացրեք "Փոխեք կարգավորումները, որոնք ներկայումս անհասանելի են:"

5. Անջատեք «Միացրեք արագ գործարկման» և սեղմեք Պահպանել փոփոխությունները:
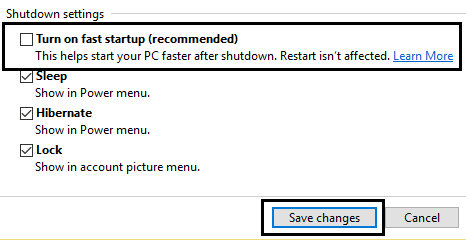
6. Վերագործարկեք ձեր համակարգիչը, որպեսզի պահպանեք փոփոխությունները և տեսնեք, թե արդյոք կարող եք դա անել Արագացրեք դանդաղ Windows 10 համակարգչի աշխատանքը:
Մեթոդ 6. Թարմացրեք վարորդներին
1. Սեղմեք Windows Key + R, ապա մուտքագրեք devmgmt.msc և սեղմեք Enter՝ Սարքի կառավարիչը բացելու համար:

2. Next, make sure to աջ սեղմեք on any device with a yellow exclamation mark next to it.
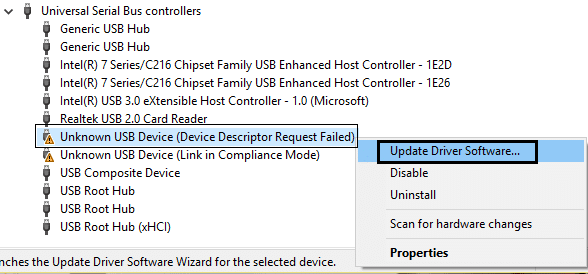
3. Ընտրեք Թարմացրեք վարորդը եւ ապա սեղմեք Ավտոմատ որոնեք վարորդի թարմացված ծրագրակազմը:

4. After the update, restart your PC and see if you’re able to fix the issue.
5. If not, then again right-click and select Թարմացնել վարորդը:
6. This time, select “Տեսեք իմ համակարգիչը վարորդների համար:"

7. Այնուհետև կտտացրեք «Թույլ տվեք ընտրել իմ համակարգչի վրա առկա վարորդների ցանկից:"

8. Ցանկից ընտրեք համապատասխան դրայվերը և սեղմեք Հաջորդը:
Նշում: It’s recommended you try the above process with each listed device driver.
9. Վերագործարկեք ձեր համակարգիչը և տեսեք, թե արդյոք կարող եք դա անել Արագացրեք դանդաղ Windows 10 համակարգչի աշխատանքը:
Method 7: Run System Maintenance
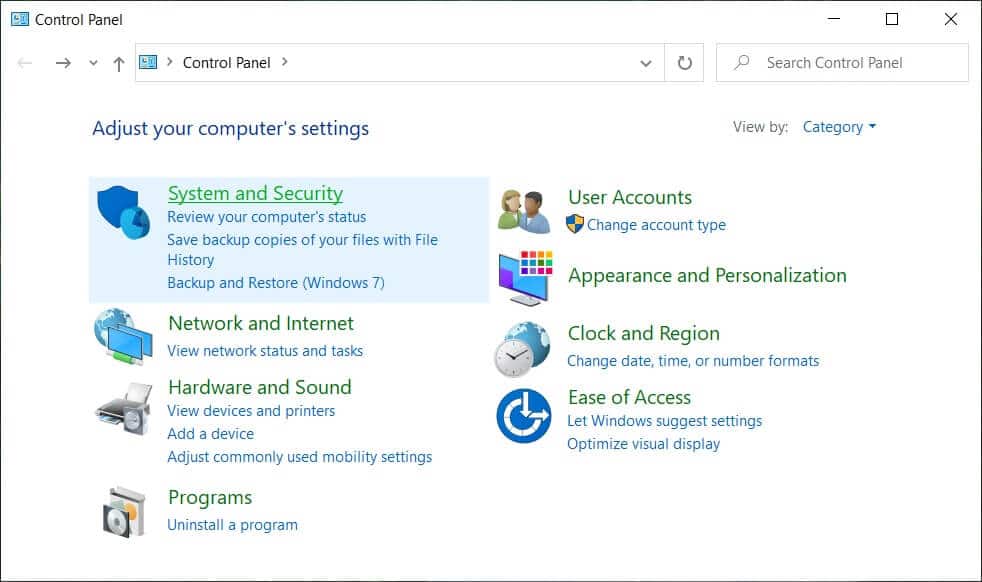
1. Որոնել Կառավարման վահանակ from the Start Menu search bar and click on it to open the Control Panel.

2: Այժմ կտտացրեք Համակարգ և անվտանգություն:
3. Հաջորդը, կտտացրեք Security and Maintenance.
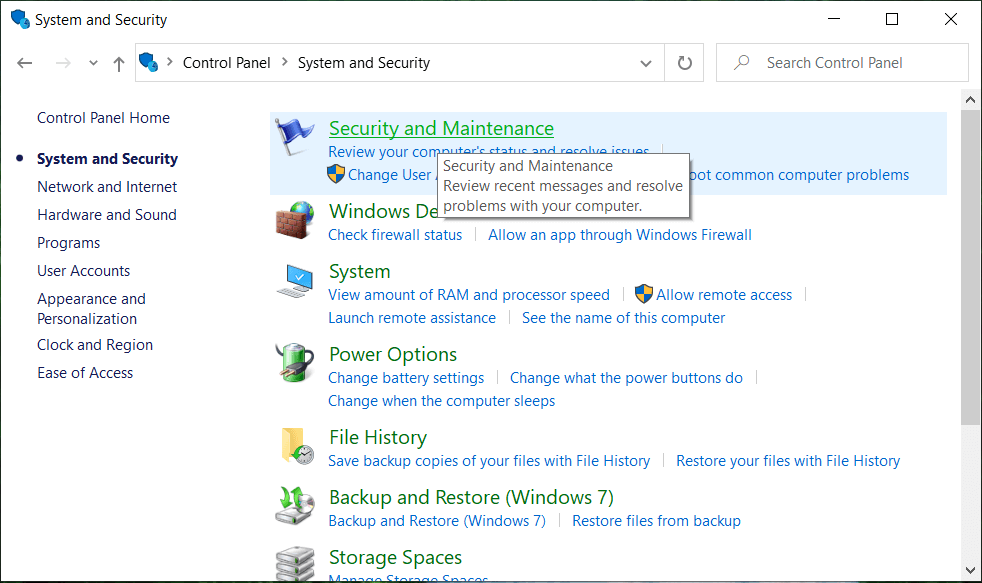
4. Expand Maintenance and under Automatic Maintenance click on “Սկսեք սպասարկումը".
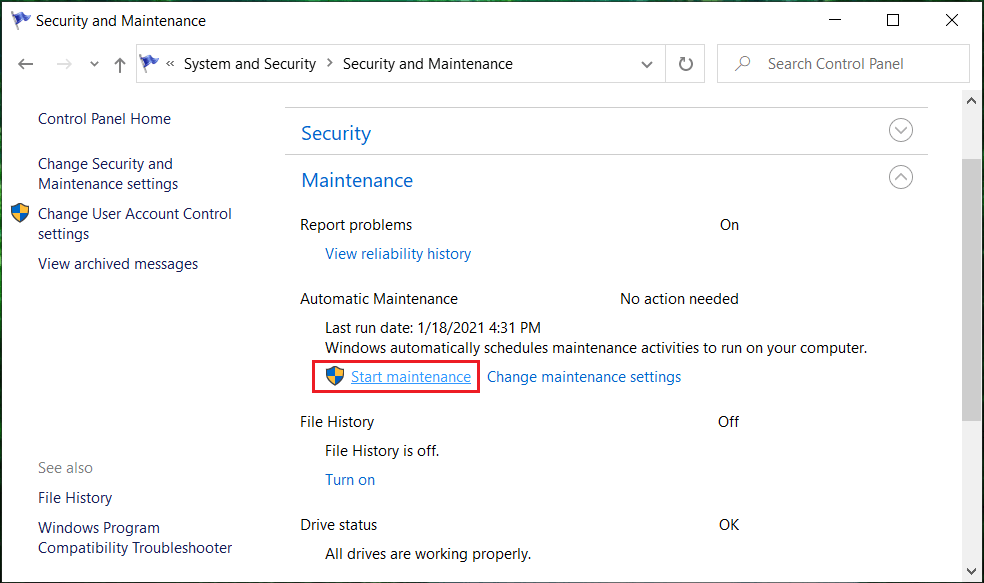
5. Let System Maintenace runs and sees if you’re able to Արագացրեք դանդաղ Windows 10 համակարգչի աշխատանքը, եթե ոչ, ապա շարունակեք։
Method 8: Defragment Your Hard Disk
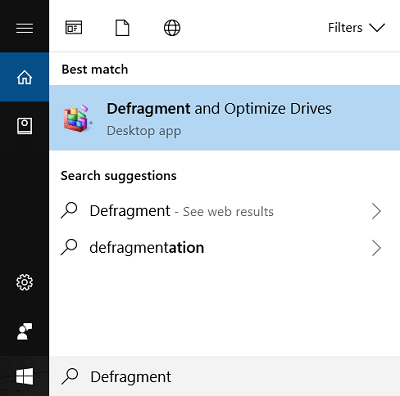
1. Տիպ Դեֆրագրում Windows Որոնման դաշտում, ապա սեղմեք Դիֆրագրում և օպտիմիզացում կրիչներ:
2. Ընտրել Մեծ սմայլիկներ one by one and click Վերլուծեք:
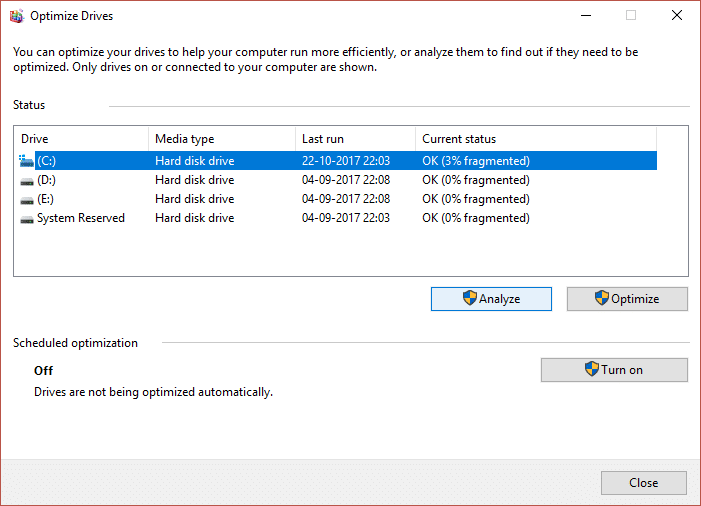
3. Similarly, for all the listed drives click Օպտիմալացնել:
Նշում: Մի ապաֆրագեք SSD սկավառակը, քանի որ դա կարող է նվազեցնել դրա կյանքը:
4. Վերագործարկեք ձեր համակարգիչը, որպեսզի պահպանեք փոփոխությունները և տեսնեք, թե արդյոք կարող եք դա անել Արագացրեք դանդաղ Windows 10 համակարգչի աշխատանքը, եթե ոչ, ապա շարունակեք։
Մեթոդ 9. Գործարկել համակարգի սպասարկման անսարքությունները
1. Որոնել Կառավարման վահանակ from the Start Menu search bar and click on it to open the Control Panel.
2. Որոնել Troubleshoot և սեղմել Խնդիրների լուծում:

3. Այնուհետև սեղմեք «Դիտել բոլորը» ձախ վահանակում:
4. Սեղմեք և գործարկեք Համակարգի սպասարկման անսարքությունների լուծում.

5. The Troubleshooter may be able to Speed Up a Slow Windows 10 PC.
Method 10: Disable Unwanted Extensions (Web Browser)
Extensions are a handy feature in chrome to extend its functionality, but you should know that these extensions take up system resources while they run in the background. In short, even though the particular extension is not in use, it will still use your system resources. So it’s a good idea to remove all the unwanted/junk extensions you might have installed earlier.
1. Բացեք Google Chrome-ը, ապա մուտքագրեք քրոմ ՝ // ընդարձակում հասցեում և սեղմեք Enter:
2. Այժմ նախ անջատեք բոլոր անցանկալի ընդլայնումները, ապա ջնջեք դրանք՝ սեղմելով ջնջման պատկերակը:
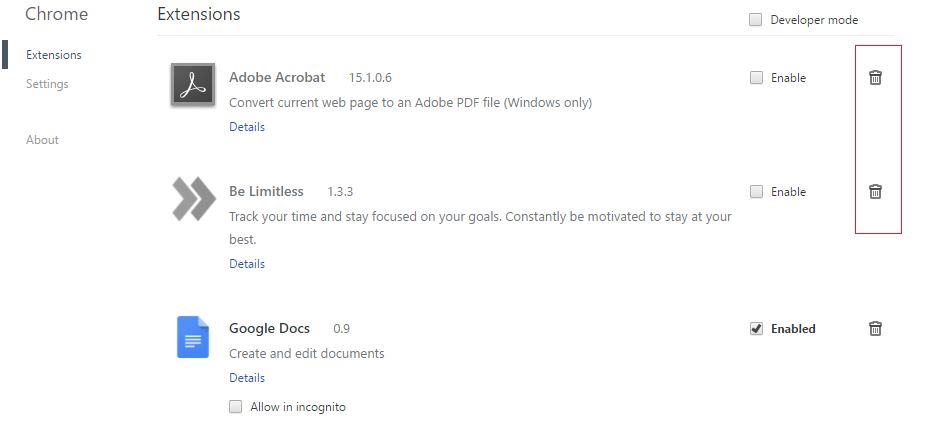
3. Restart Chrome and see if this help in making your PC faster.
Method 11: Change PageFile Size
1. Տիպ կատարումը in the Windows Search box and then click on “Կարգավորեք Windows- ի արտաքին տեսքը և կատարումը:"
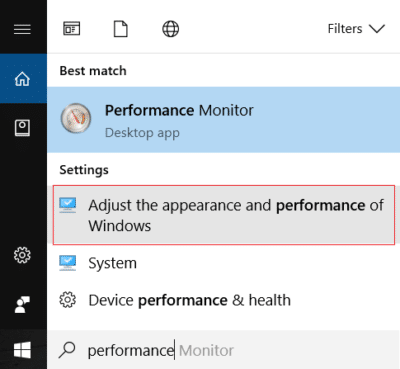
2. Switch to the Advanced tab and then click the Փոփոխություն կոճակը ներքեւում Վիրտուալ հիշողություն.

3. Անջատեք նշումը "Ավտոմատ կերպով կառավարել էջի ֆայլի չափը բոլոր վարորդների համար».
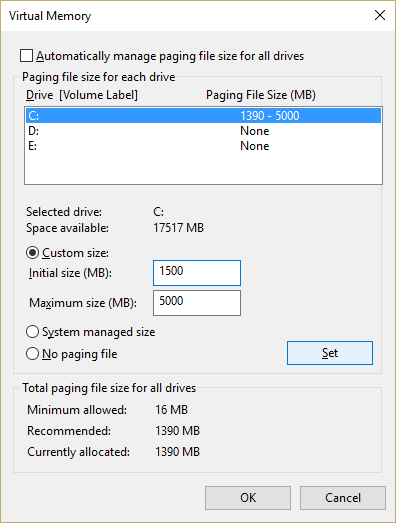
4. Highlight the drive on which Windows 10 is installed and then select the Պատվերով չափս.
5. Սահմանել Recommended values for fields: Initial size (MB) and Maximum size (MB).
6. Click OK, then click Apply followed by OK
7.Restart your PC and see if you’re able to Արագացրեք դանդաղ Windows 10 համակարգչի աշխատանքը:
Method 12: Disable Windows 10 Tips
1. Սեղմեք Windows Key + I՝ Settings բացելու համար, այնուհետև սեղմեք System.

2. Ձախ կողմի ընտրացանկից ընտրեք Ծանուցումներ և գործողություններ:
3. Անջատել անջատիչը «Get tips, tricks, and suggestions as you use WindowS "
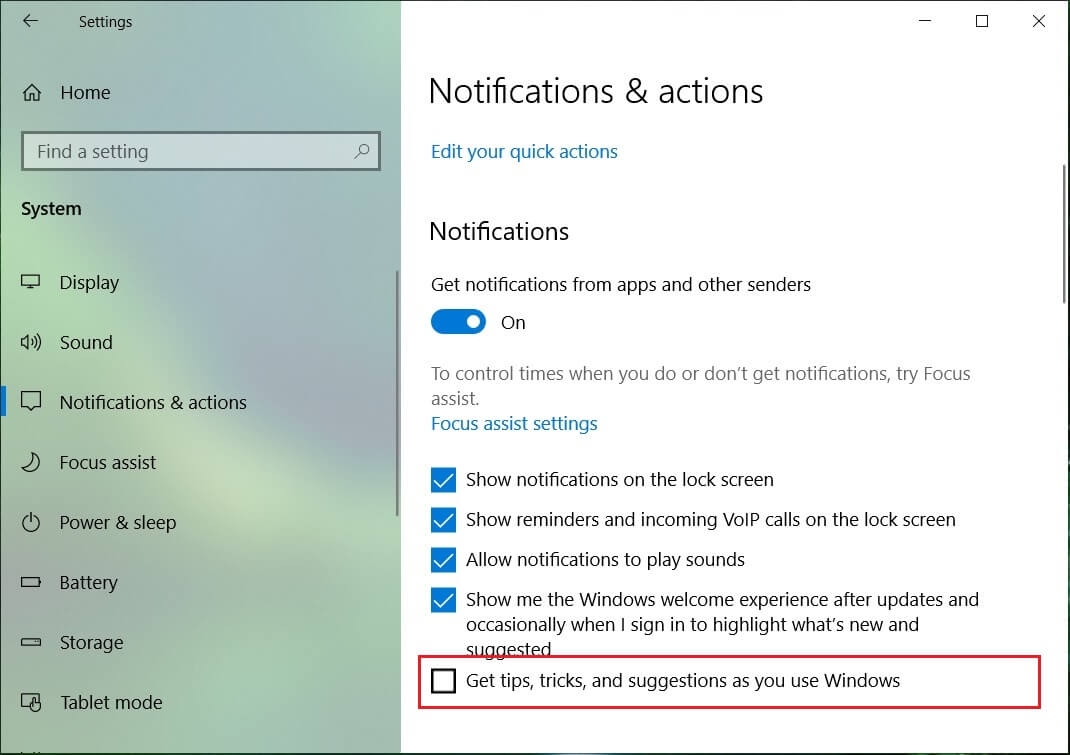
4. Վերագործարկեք ձեր համակարգիչը:
Method 13: Set your Power Plan to High Performance
1. Սեղմեք աջով Իշխանության պատկերակ ապա ընտրում է Power Options- ը:

2. Սեղմիր Show additionals plans եւ ընտրել Բարձր կատարողական.
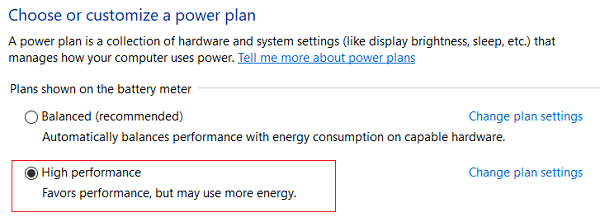
3. Close Settings and restart your PC.
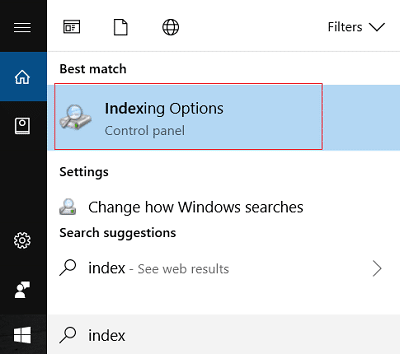
Մեթոդ 14. Անջատեք որոնման ինդեքսավորումը
1. Տիպ ինդեքս in Windows Search then clicks on Ինդեքսավորման ընտրանքներ.
2. Սեղմիր Փոփոխել եւ սեղմեք Show all locations.
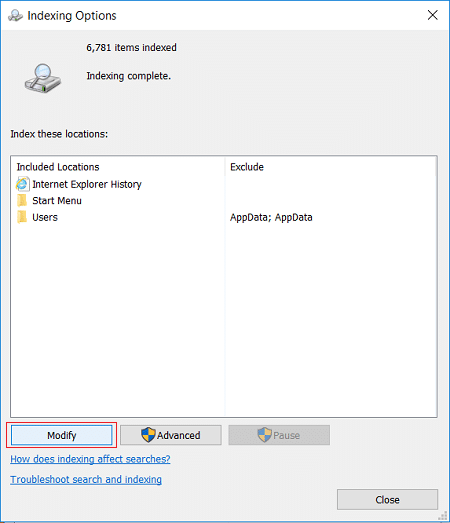
3. Համոզված եղեք uncheck all of your disk drives and click OK.

4. Then click Close and reboot your PC. Also, see if you’re able to Արագացրեք դանդաղ Windows 10 համակարգչի աշխատանքը, եթե ոչ, ապա շարունակեք։
Method 15: Add more RAM and SSD
If your PC is still running slow and have tried all other options, you may need to consider adding more RAM. Please remove the old RAM and then install the new RAM’s to increase your system performance.
But if you are still facing the occasional lags or system freezes, then you may also consider adding an external SSD to speed up your PC.
Խորհուրդ է տրվում:
Դա այն է, ինչ դուք հաջողությամբ ունեք Seed Up a Slow Windows 10 PC բայց եթե դեռևս հարցեր ունեք այս գրառման հետ կապված, ապա ազատ զգալ հարցրեք դրանք մեկնաբանությունների բաժնում: