Ուղղել Microsoft Teams տեսազանգը, որը չի աշխատում

If your camera is not working with Teams, don’t worry! This is a common issue faced by most users who handle meetings and conferences. Despite the fact that Microsoft թիմերը is one of the best video conferencing and chatting applications, it is not perfect at times. Suddenly, you may detect Microsoft Teams video call not working issue, so you will be struck with paused video or black screen only. This problem may be associated with an in-built camera or an external web camera. Also, if you cannot start the camera, incompatible app settings may contribute to Teams video not working problem. We bring to you a perfect guide that will teach you how to fix Microsoft Teams video call not working issue. So, continue reading the article.
How to Fix Microsoft Teams Video Call Not Working
Before you get into the troubleshooting section, you must learn the reasons that cause this issue. And so, you can easily resolve the same appropriately.
- Corrupt/incompatible camera drivers.
- Additional camera devices are configured to your Windows 10 PC.
- Camera permission is not granted on your computer.
- A third-party antivirus program or Firewall is interfering with the Teams software.
- Some other applications in your device are using your inbuilt camera.
- VPN/Proxy interference.
- Հնացած օպերացիոն համակարգ.
Now, move ahead to the next section to resolve this issue. Analyze the reason to implement selective troubleshooting methods to attain quick results.
We have compiled a list of methods that will help you fix this problem in this section. The methods are arranged from basic to advanced steps to attain easier and faster results. Follow them in the same order to attain perfect results.
Խնդիրների հիմնական լուծում
Before trying the advanced troubleshooting methods, here are some simple hacks that will resolve all temporary glitches associated with Microsoft Teams application.
1. Replug Webcam
- If you are using an external web camera, the first thing you have to do is to Անջատեք the web camera from the USB port, reboot your computer, and կրկին միացնել վարդակից it again after some time.
- If you are using an inbuilt camera, ensure it is out of hardware glitches and failure.
2. Remove Other Hardware Devices
- Some other hardware devices plugged into your PC may interfere with the inbuilt camera or webcam. Temporarily, disable all other devices and check if this helps you.
- If you do not face this issue after disconnecting all other hardware devices, then plug them one by one to sort out the culprit.
- Always buy genuine peripherals from official or reliable stores for your Windows 10 computer.
3. Փակեք ֆոնային հավելվածները
Մեթոդ 1. Գործարկել ապարատային և սարքերի անսարքությունները
Windows 10 computers come with inbuilt troubleshooter tools to fix any problems associated with all of their components. The functionality of your camera can be affected by numerous factors. So, we recommend troubleshooting hardware and devices as instructed below.
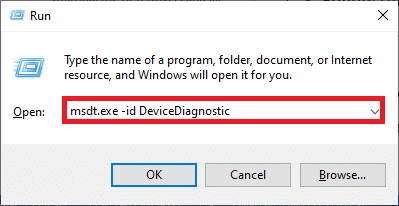
1. Մամուլ Windows + R ստեղներ միասին գործարկելու համար Վազում երկխոսության վանդակում:
2. Տիպ msdt.exe –id DeviceDiagnostic եւ հարվածեց Մտնել.
3. Դրանից հետո կտտացրեք հաջորդ.

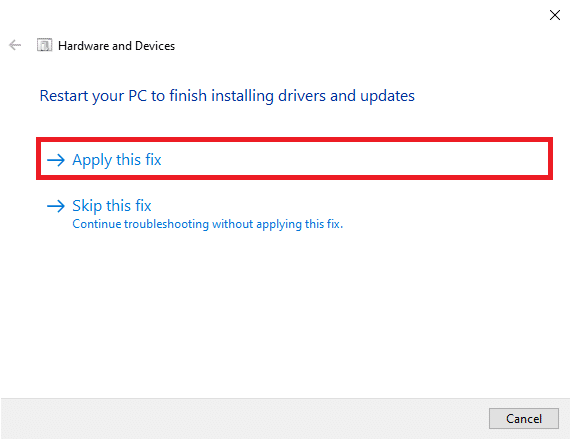
4A. If there is an issue and your device is not set up with the latest drivers, you will receive the following prompt. Select Կիրառեք այս ամրագրումը and follow the on-screen instructions. Then, մեքենայական ծրագրի կրկնական գործարկումը ձեր սարքը:
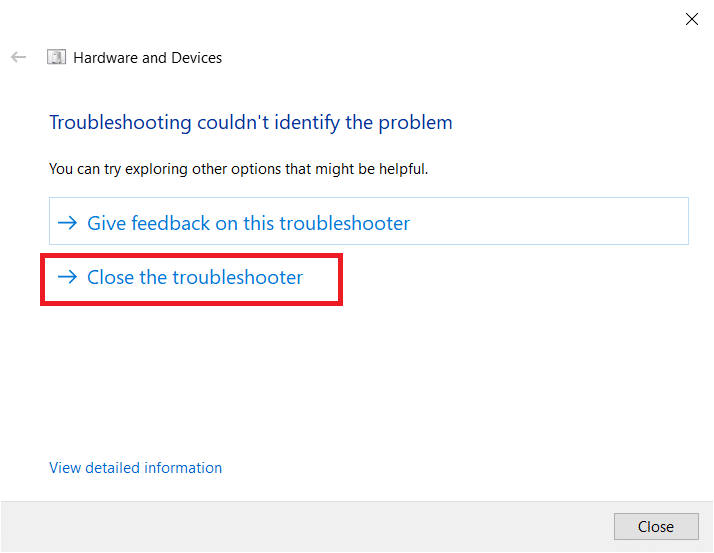
4B. If there is no issue with the drivers, click Փակեք անսարքիչը հաջորդ էկրանին:
Method 2: Choose the Right Camera in Teams
Teams must access your camera, and for that, you have to choose the correct camera. If Teams faces any issue while accessing the camera, you will face so many conflicts. For the Desktop version of Teams, follow the below-mentioned steps to choose the right camera in your Windows 10 PC.
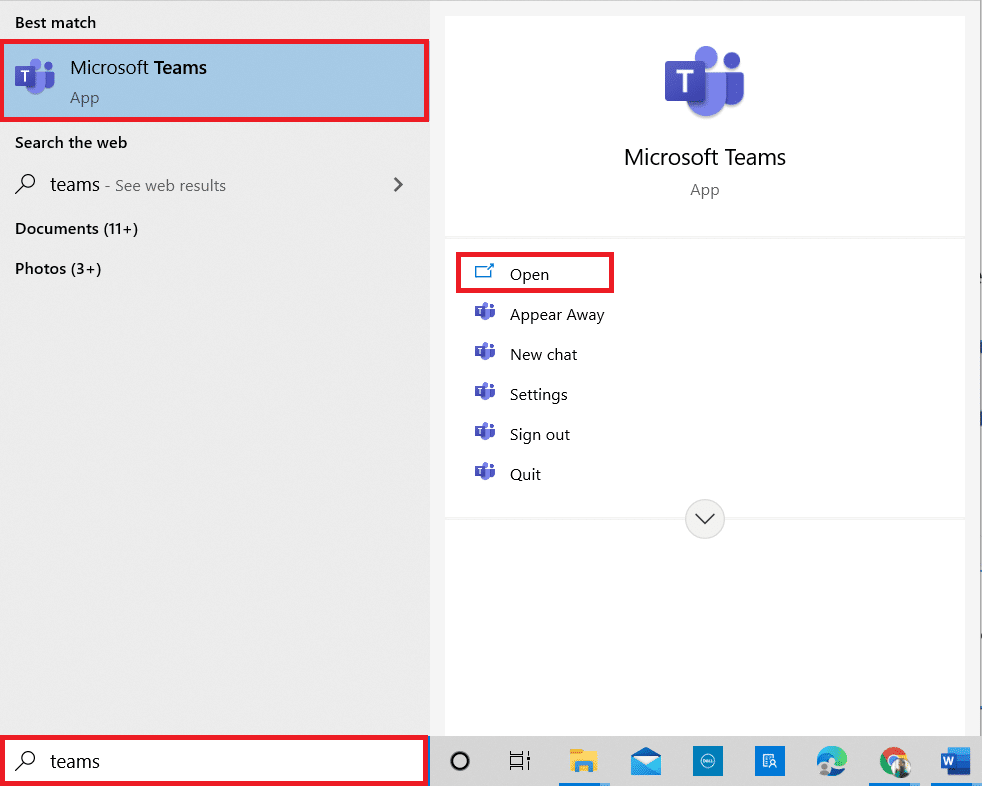
1. Հարվածեք Windows բանալին. Տիպ Microsoft թիմերը և գործարկել այն:
2. Սեղմեք երեք կետավոր պատկերակ քո կողքին Օգտվողի Picture Թիմերում։
![]()
3. Անցնել դեպի Սարքեր tab in the left pane and scroll down the right screen.
4. Այժմ, Ֆոտոխցիկ menu, expand the drop-down menu.
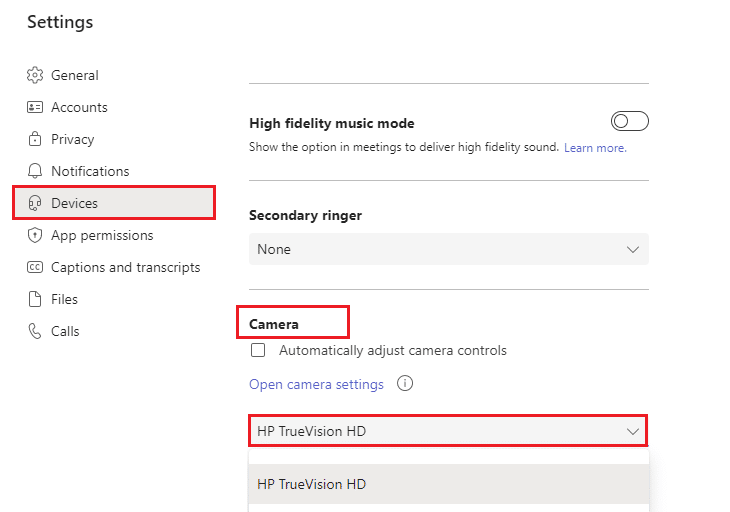
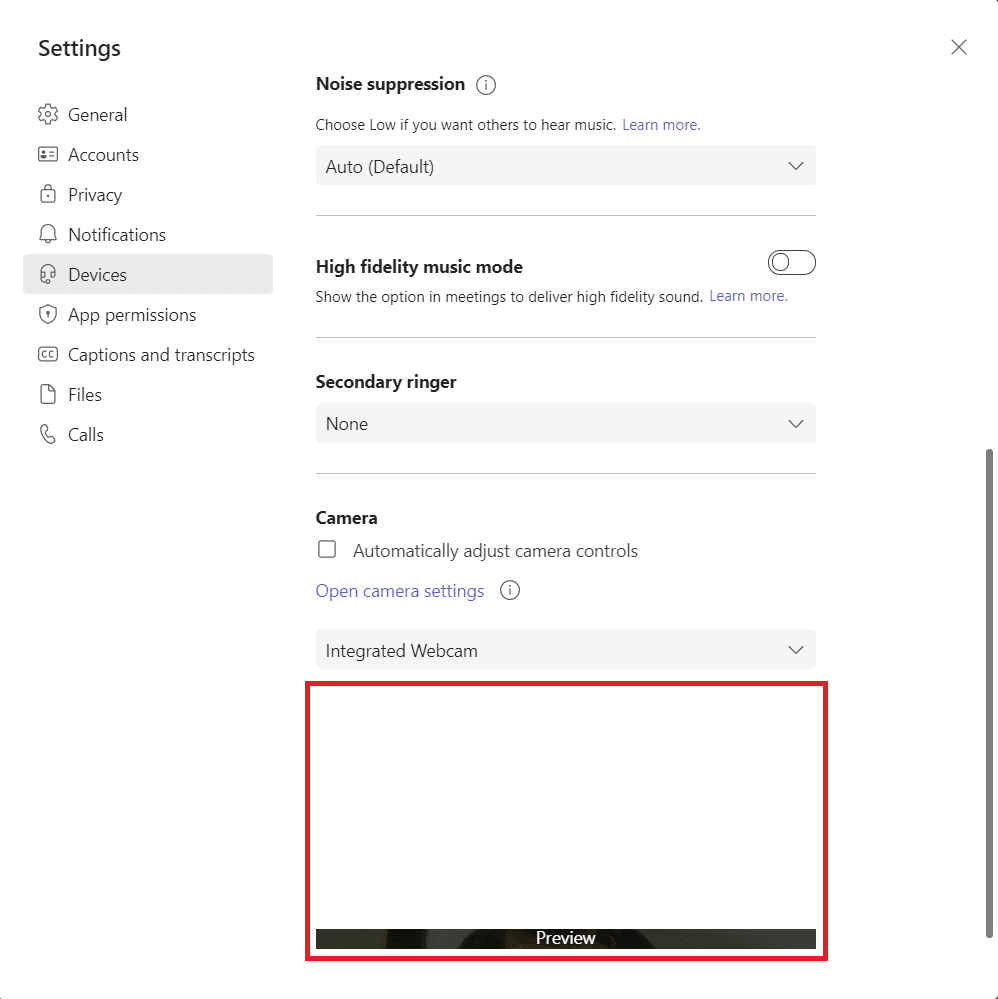
5. Այնուհետև ընտրեք ֆոտոխցիկ you want to use and make sure you save the changes. Check if you have fixed the Microsoft Teams video call not working issue by confirming the video in the preview space.
Նաեւ Կարդալ: Ինչպես փոխել Microsoft Teams պրոֆիլի ավատարը
Method 3: Clear Microsoft Teams Cache
Teams collect temporary memory in the form of a cache to process the tasks easily within the app. If this temporary memory is over bulged or corrupt in your Windows 10 PC, then it might interfere with its main functions like camera, voice, noise, and a lot more. To solve the Teams video not working issue, consider clearing the cache as instructed below.
1. Ելք թիմեր և գործարկել Task Manager սեղմելով Ctrl + Shift + Esc ստեղներ միաժամանակ:
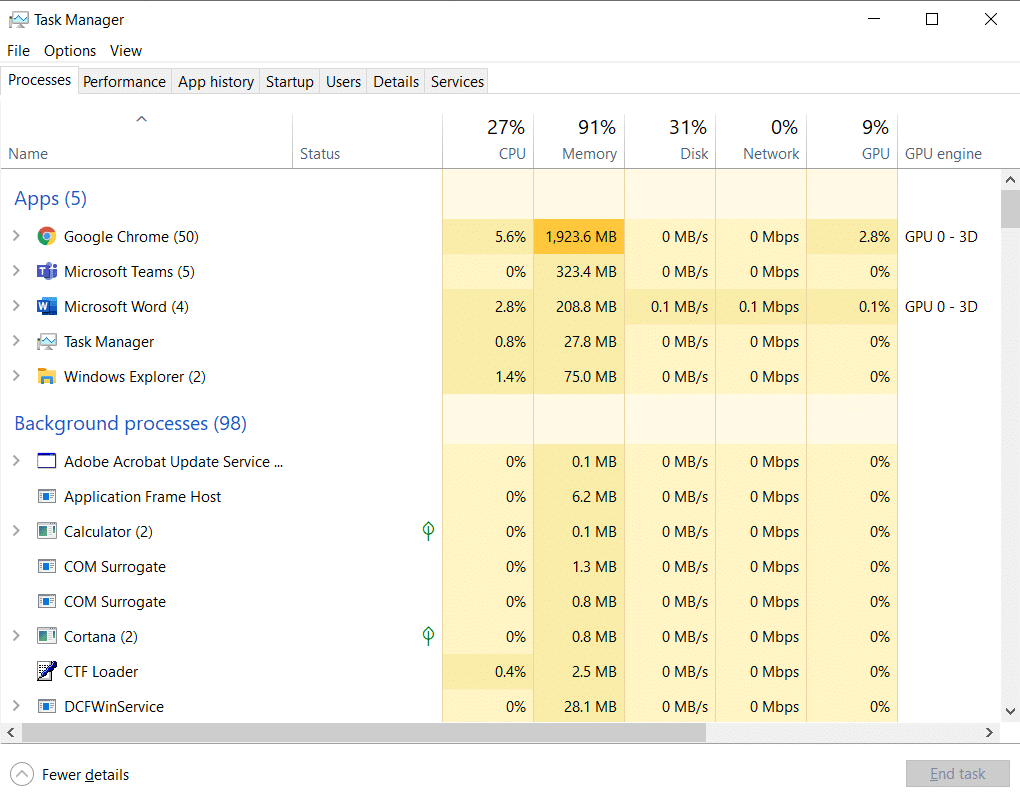
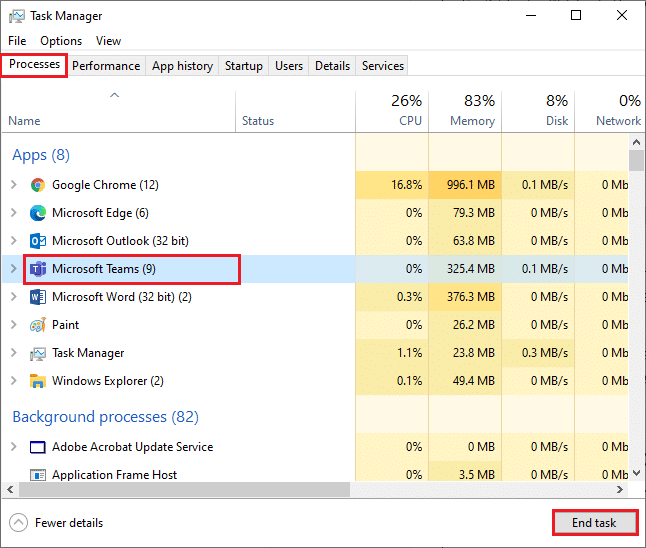
2. Մեջ Գործընթացները էջանիշը, ընտրեք Microsoft թիմերը programs that are running in the background and select Վերջնական հանձնարարություն.
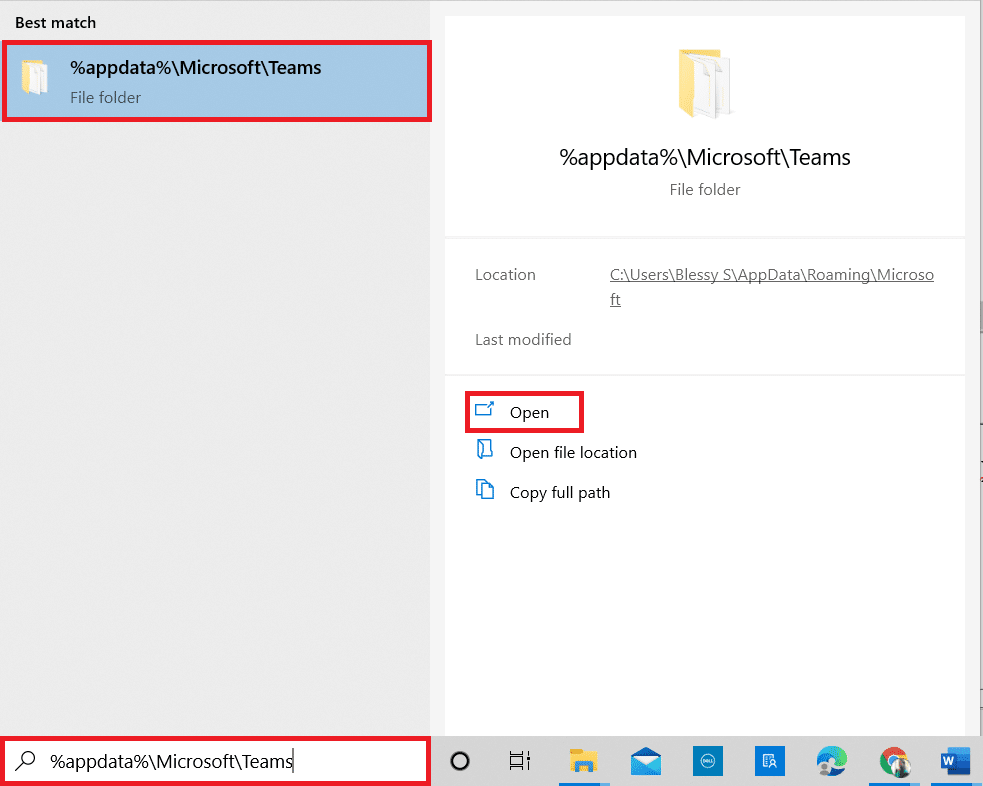
3. Այնուհետև հարվածեք Windows բանալին եւ տեսակը % appdata% MicrosoftTeams որոնման սանդղակում:
4. Սեղմիր բաց Ինչպես ցույց է տրված.
5. Այժմ ընտրեք all the files and folders within the folder and select the ջնջել տարբերակ.
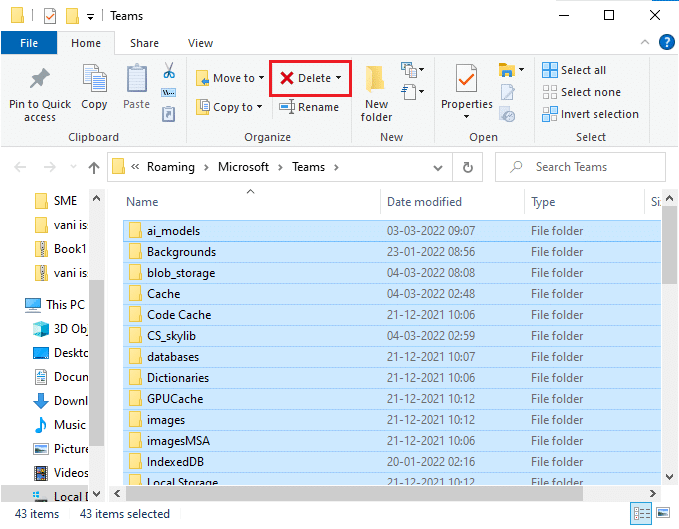
6. Վերաբեռնում your Windows 10 PC.
Method 4: Disable Other Additional Devices
If you are using an external webcam or two or more cameras, your default camera might interfere with them. To fix the problem, disable all other additional devices as instructed below.
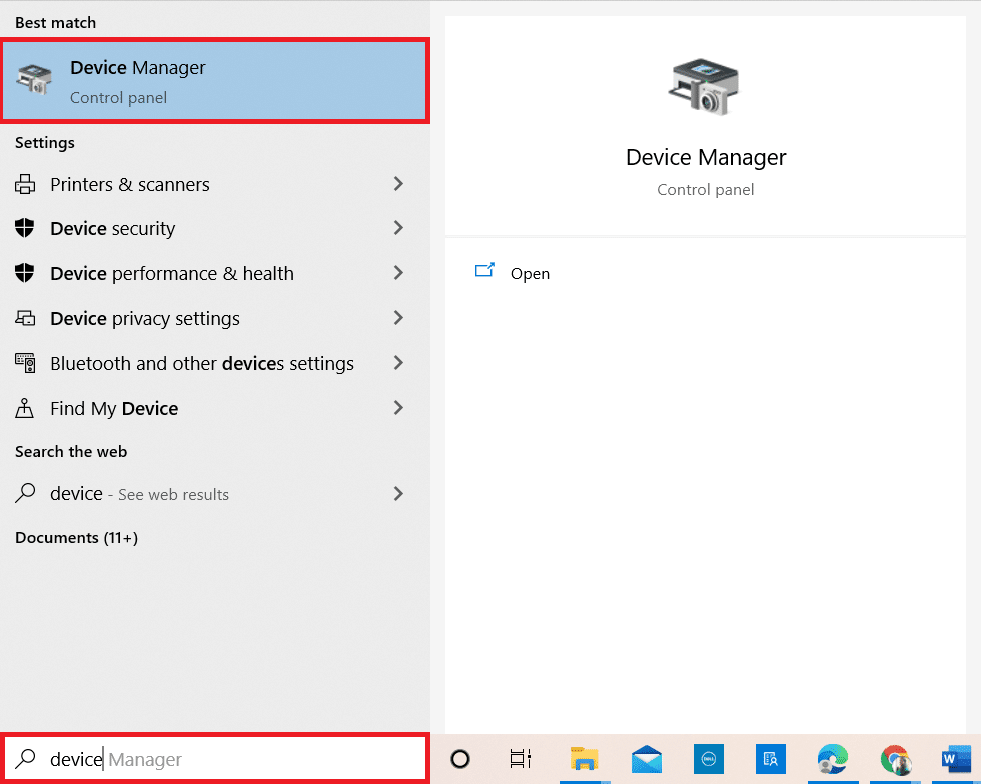
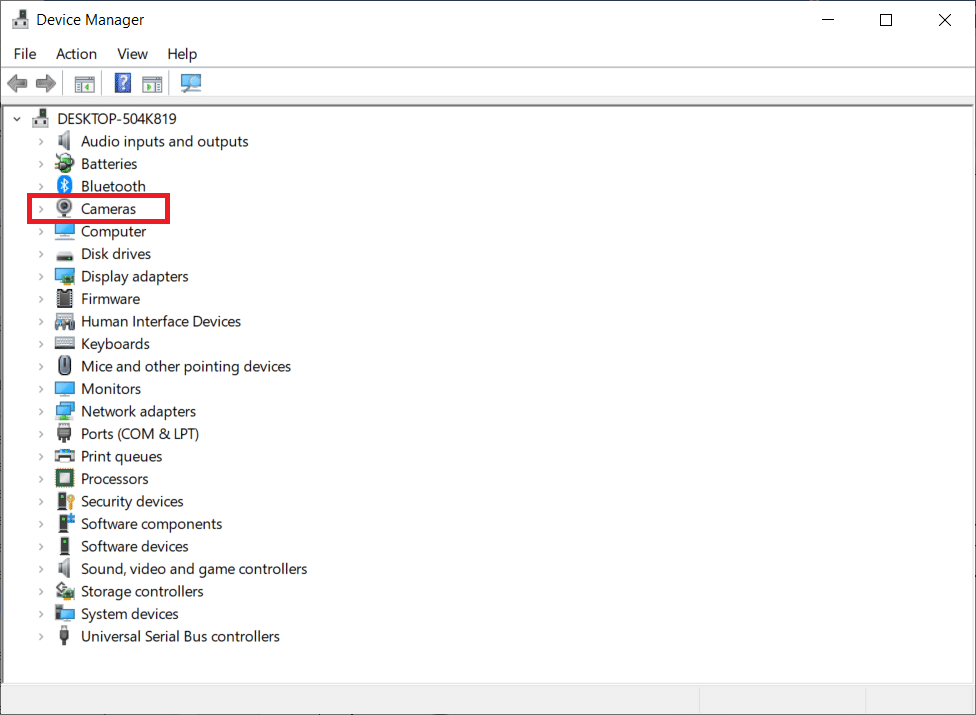
1. Տիպ Device Manager է Windows 10 որոնման ընտրացանկ եւ բացեք այն:
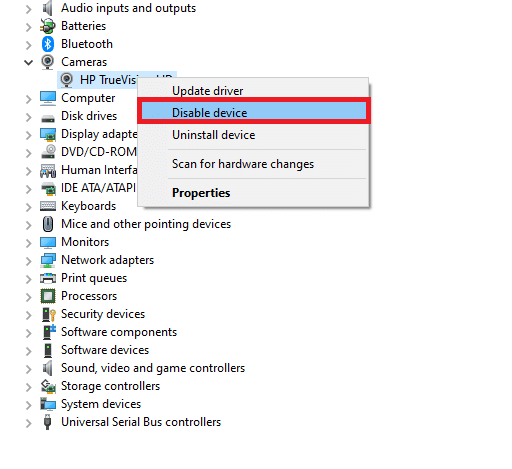
2. Այժմ կրկնակի սեղմեք Տեսախցիկներ ընդլայնել այն:

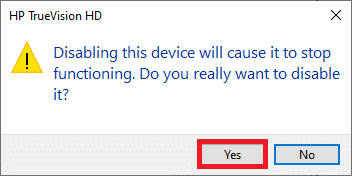
3. Այնուհետև աջ սեղմեք վրա camera device (HP TrueVision HD, for example) and select the Անջատել սարքը տարբերակ, ինչպես ցույց է տրված:
Նշում: Ensure you select a camera that you are not currently using in Teams.
4. Հաստատեք հուշումը սեղմելով վրա այո.
5. Follow these steps for all other additional devices and check if you have resolved Teams video call not working issue.
Նշում: Make sure you re-enable the default camera adapter again after fixing the issue.
Նաեւ Կարդալ: Ինչպես միացնել կամ անջատել Microsoft Teams Push to Talk-ը
Method 5: Allow Camera Permissions for Browsers
If you are using the browsing version of Teams, check if you have appropriate permissions for camera access. If not, you cannot access the camera for any browser-related applications, or you will be prompted for the same. Here are a few instructions to allow camera permissions for browsers. Google Chrome is taken as an example.
1. Սեղմեք Windows բանալի. Տիպ Google Chrome և գործարկել այն:

2. Սեղմեք երեք կետավոր պատկերակ եւ ընտրեք Կարգավորումներ տարբերակ.
![]()
3. Այժմ ընտրեք Անվտանգության եւ Գաղտնիություն in the left pane and choose Կայքի կարգավորումներ from the main page.
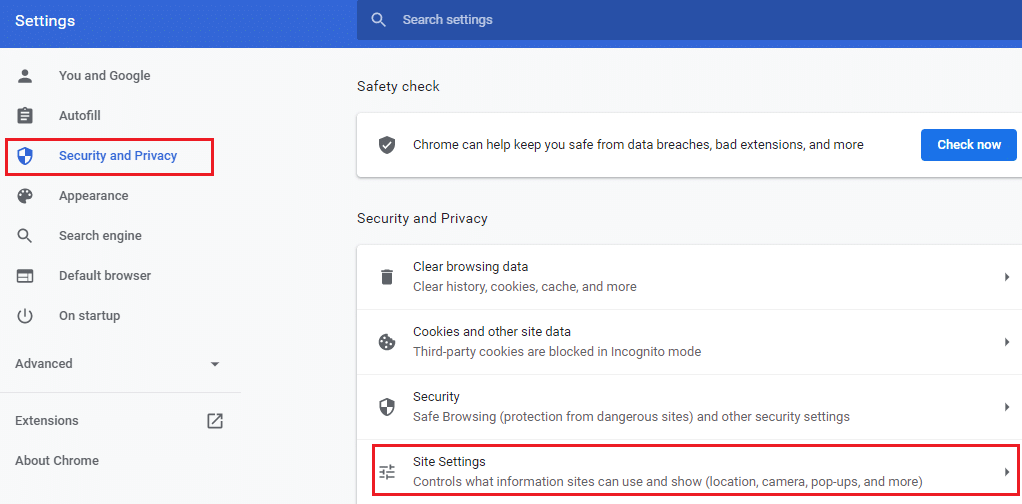
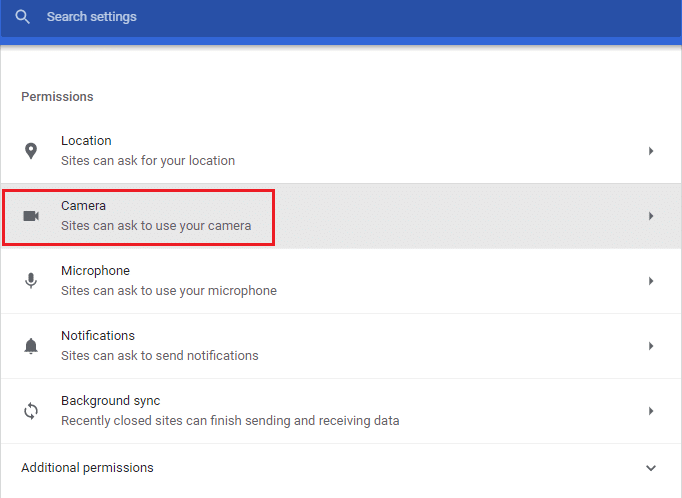
4. Scroll down the main screen and select the Ֆոտոխցիկ տարբերակով Թույլտվությունները մենյու, ինչպես ցույց է տրված:
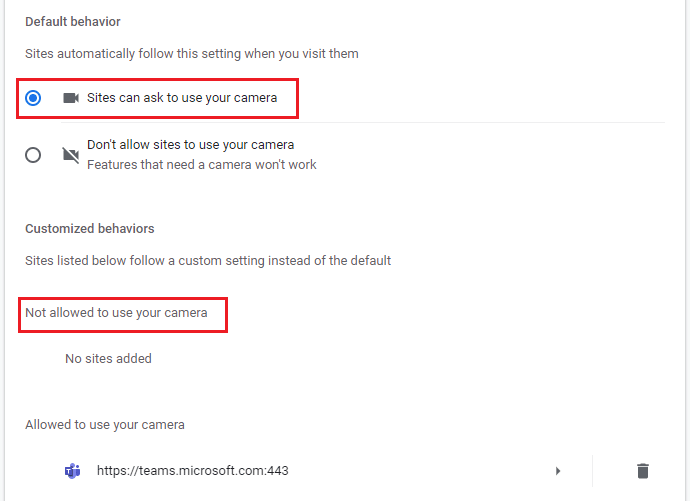
5. Այստեղ ընտրեք Կայքերը կարող են խնդրել օգտագործել ձեր տեսախցիկը option and make sure թիմեր is not added in Not allowed to use your camera ցուցակը:
6. Relaunch your բրաուզերը and check if you have fixed the Teams video not working issue.
Մեթոդ 6. Թարմացրեք Windows-ը
If you are using an outdated version of Windows 10 PC, then you may face common hardware problems in it, especially for cameras. Fortunately, you can update your Operating System with these simple steps.
1. Սեղմեք Windows + I ստեղներ միասին բացել Կարգավորումներ Ձեր համակարգչում:
2. Այժմ ընտրեք Թարմացում և անվտանգություն.
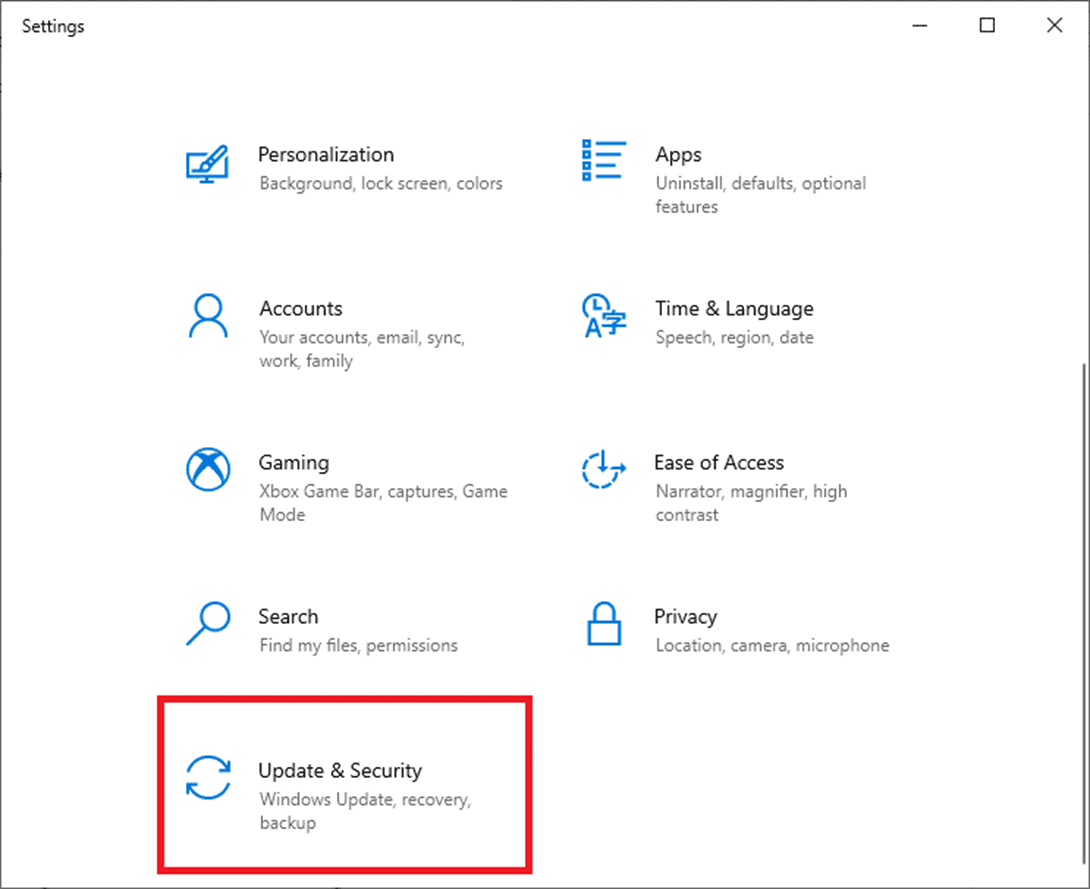
3. Ընտրեք Ստուգել թարմացումները աջ վահանակից:
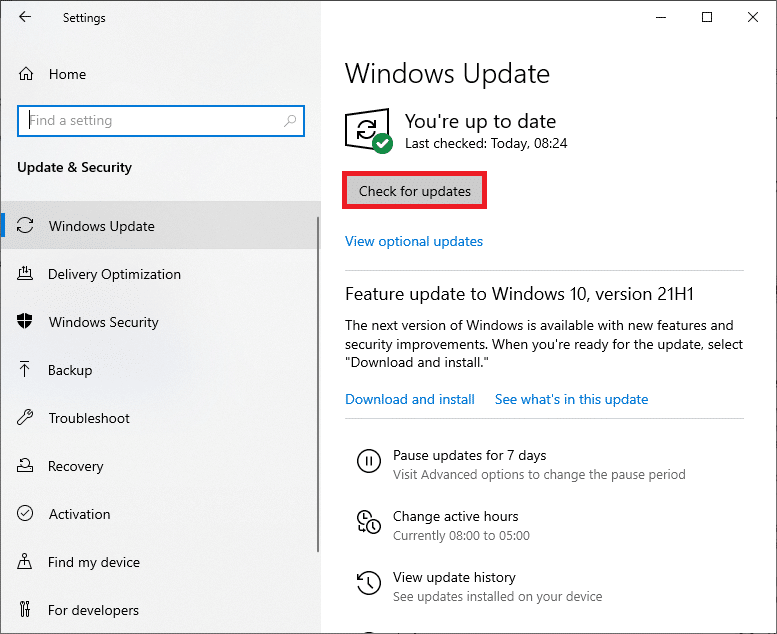
4A. If your system is outdated, click Տեղադրել Հիմա վերջին տարբերակը ներբեռնելու և տեղադրելու համար:
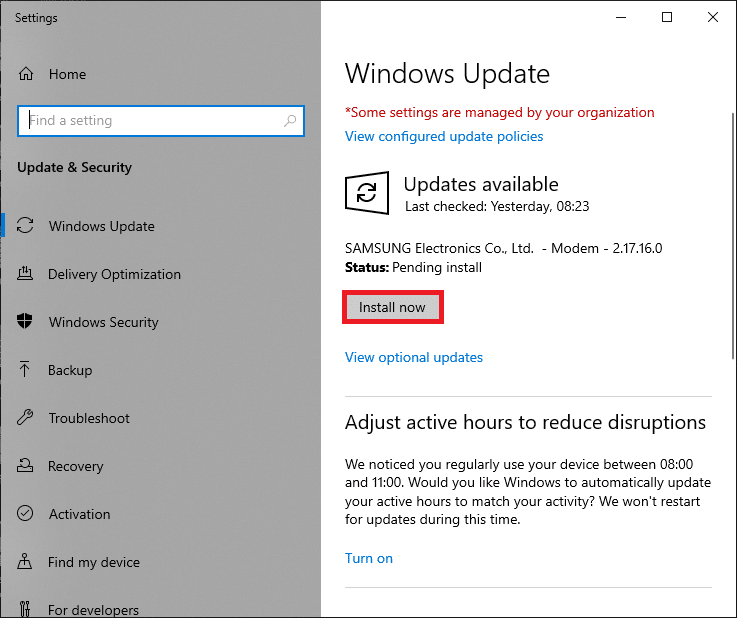
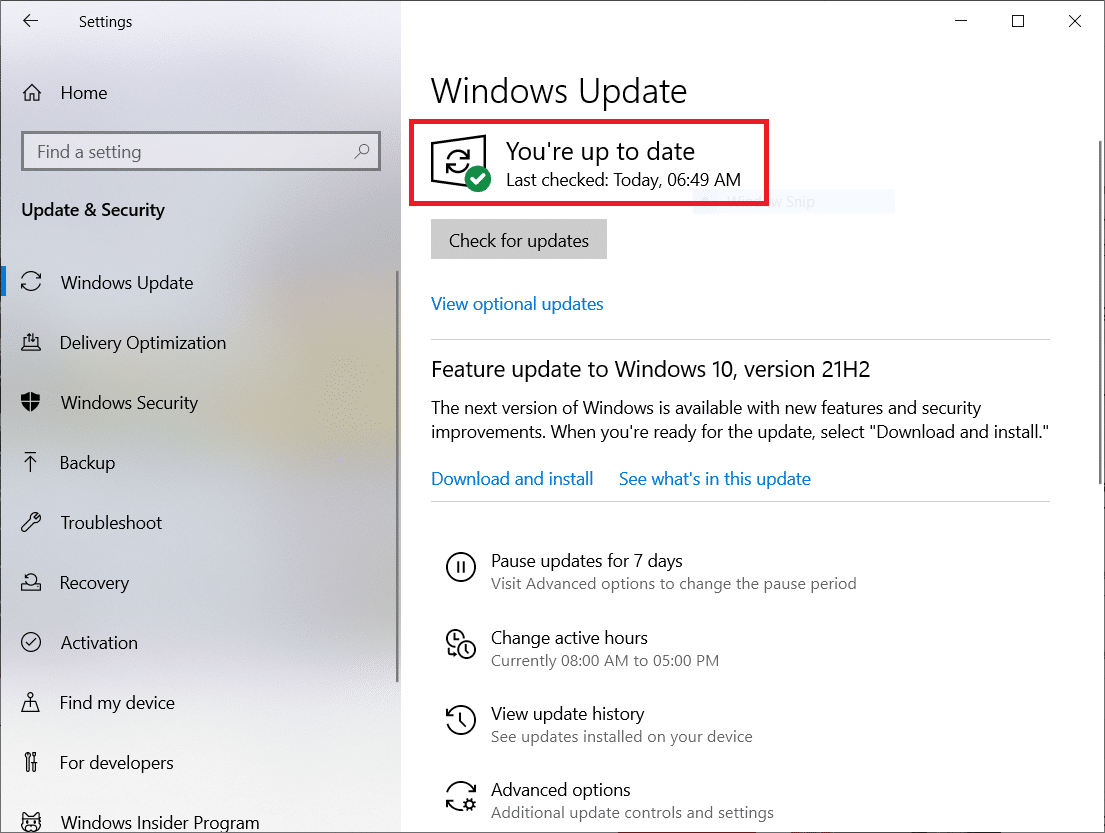
4Բ. Եթե ձեր համակարգն արդեն արդիական է, ապա այն կցուցադրվի Դուք արդի եք հաղորդագրություն:
Նաեւ Կարդալ: Where are Microsoft Teams Recordings Stored?
Method 7: Disable Firewall (Not Recommended)
If the security suite of Windows Defender Firewall is blocking the camera access of Microsoft Teams, here are a few options to deal with the issue.
Option I: Whitelist Teams in Firewall
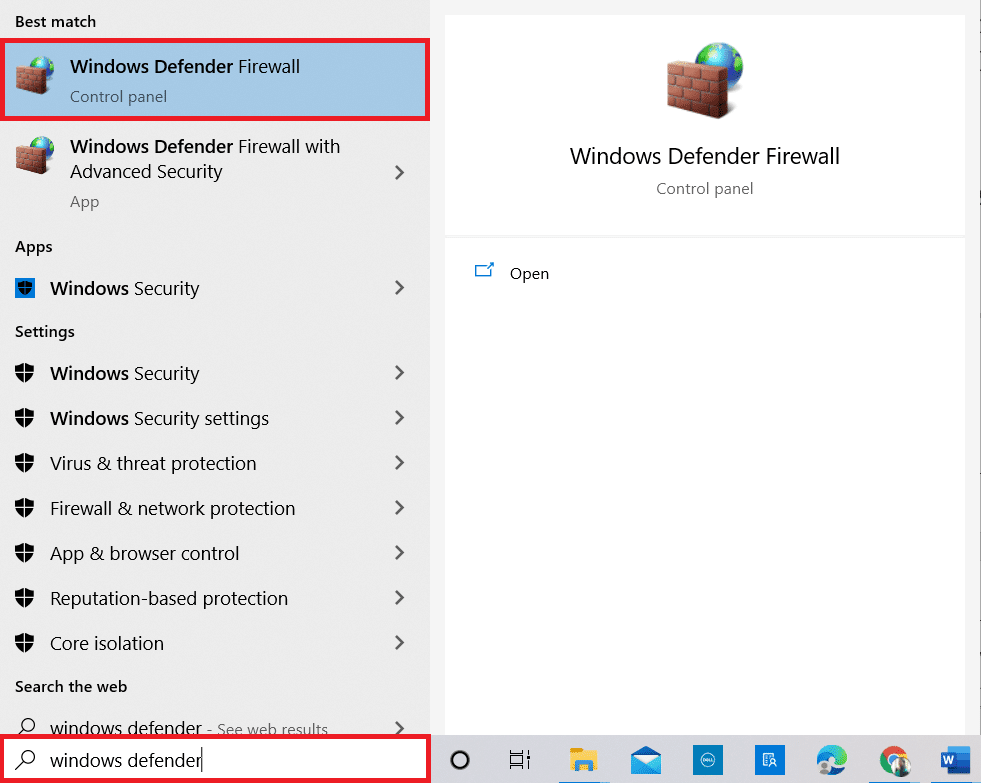
1. Հարվածեք Windows բանալին եւ տեսակը Windows Defender Firewall. Open the best results.
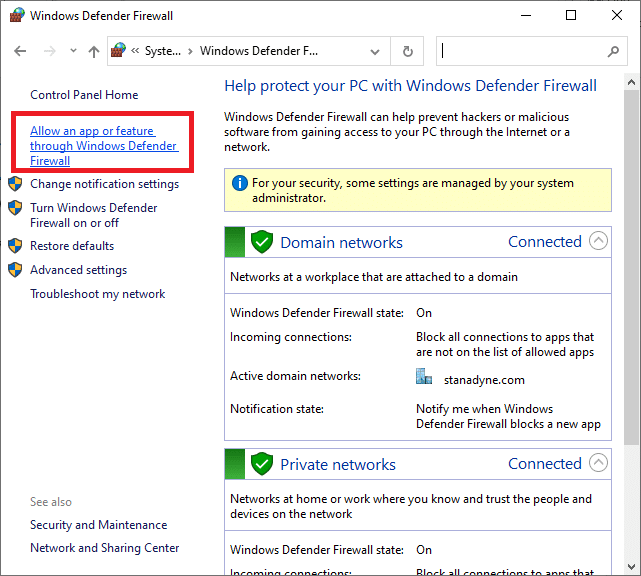
2. In the pop-up window, click on Windows Defender Firewall- ի միջոցով թույլ տվեք ծրագիր կամ հատկություն.
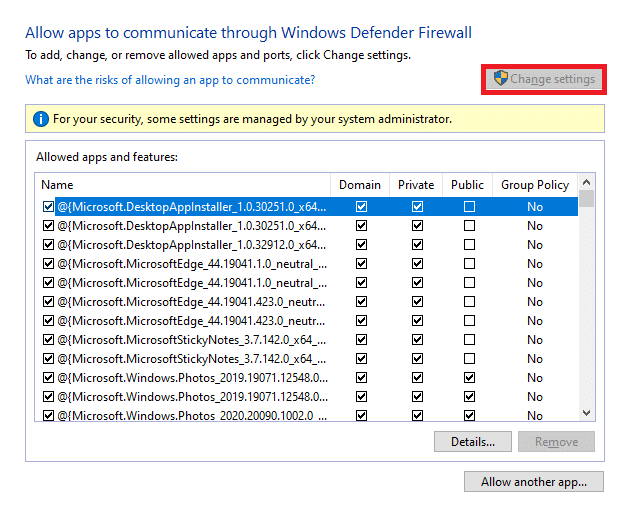
3. Դրանից հետո կտտացրեք Փոխել կարգավորումները. Finally, check for Microsoft թիմերը to allow through the Firewall.
Նշում: Դուք կարող եք օգտվել Թույլատրել մեկ այլ հավելված… to browse your program if your desired application or program does not exist in the list.
4. Վերջապես սեղմեք OK փոփոխությունները պահպանելու համար:
Option II: Disable Firewall Temporarily
Նշում: If you disable the Firewall, it makes your computer more vulnerable to malware or virus attacks. Hence, if you choose to do so, make sure to enable it soon after fixing the issue.
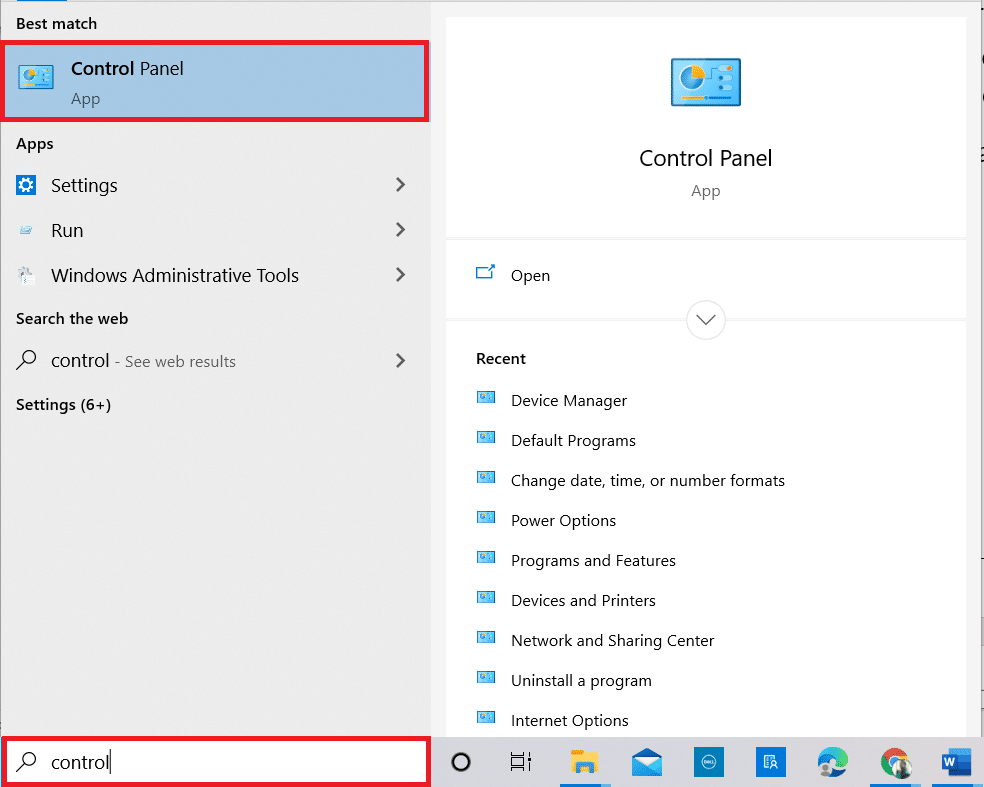
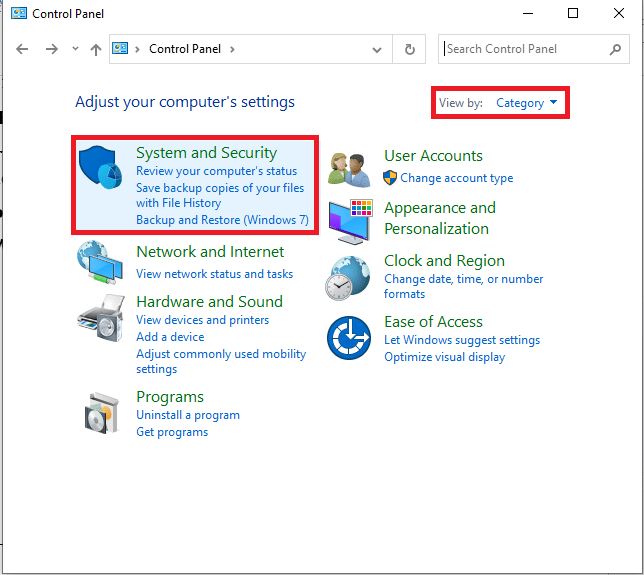
1. Սեղմեք Windows բանալի. Տիպ Control Panel եւ բացեք այն:
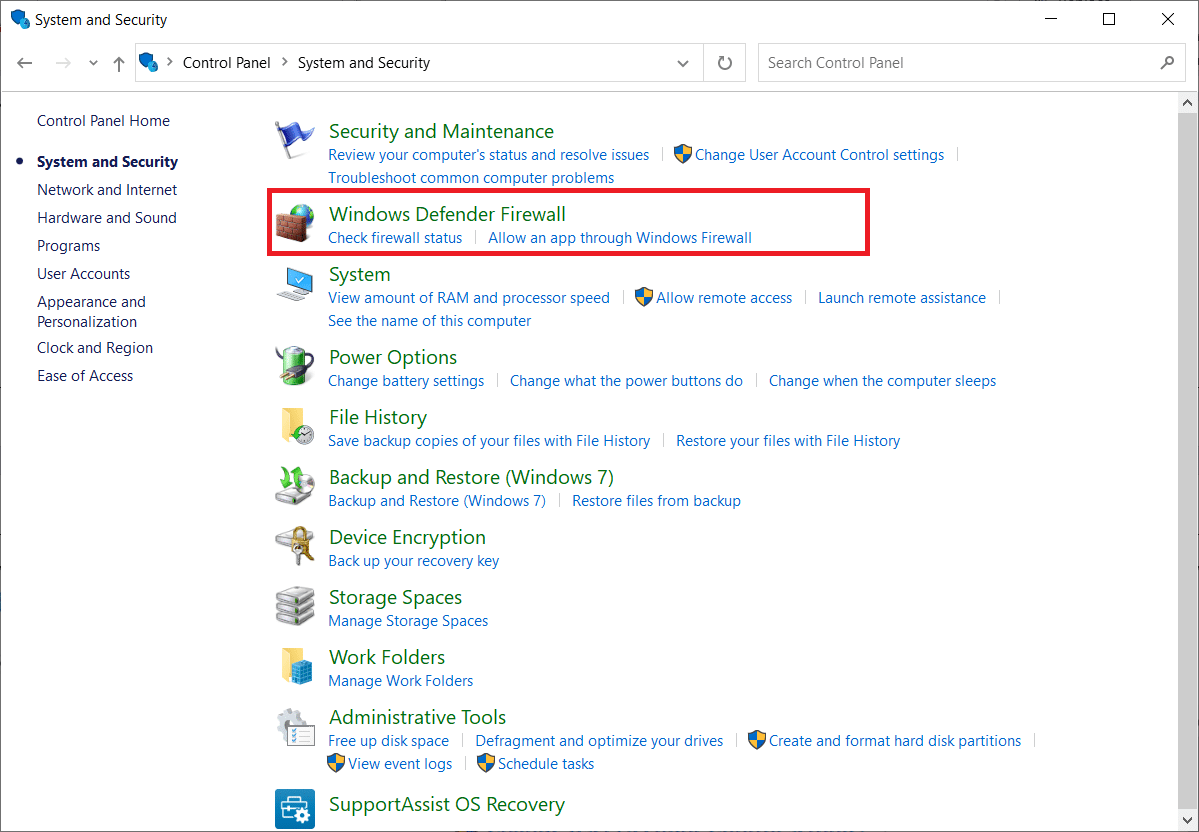
2: Սահմանել Դիտել կողմից as կատեգորիա եւ ընտրել Համակարգ եւ անվտանգություն.
3. Այժմ կտտացրեք Windows Defender Firewall, ինչպես ցույց է տրված այստեղ:
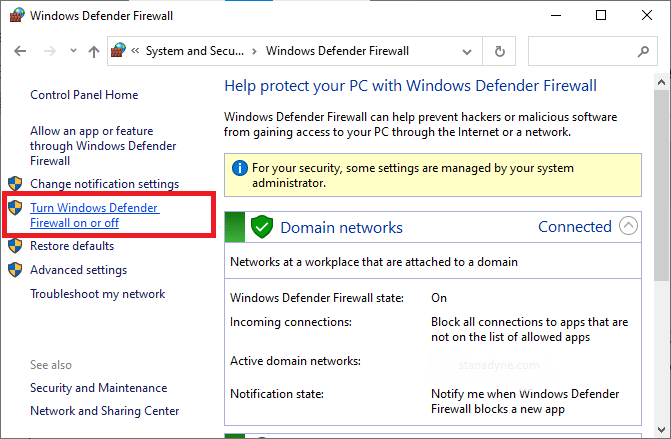
4. Ընտրել Միացնել Windows Defender Firewall- ին կամ անջատել ձախ մենյուից:
5. Now, check the boxes next to the Անջատեք Windows Defender Firewall- ը (խորհուրդ չի տրվում) option wherever available on this screen.
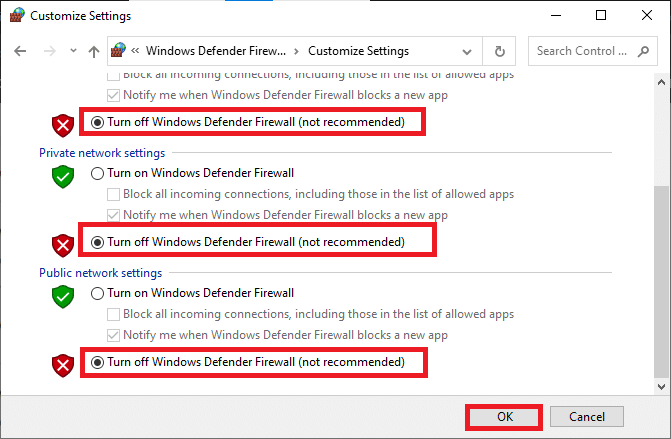
6: սեղմեք OK և Վերաբեռնում ձեր ԱՀ.
Մեթոդ 8. Անջատել VPN-ը
Virtual Private Networks are used to prevent data stealing from a private network, and it is used as a gateway between the client and the server. Sometimes, using VPN servers might cause issues in online video conferencing applications. We recommend you disable the VPN client as instructed below.
1. Հարվածեք Windows բանալին եւ տեսակը VPN պարամետրեր որոնման սանդղակում:
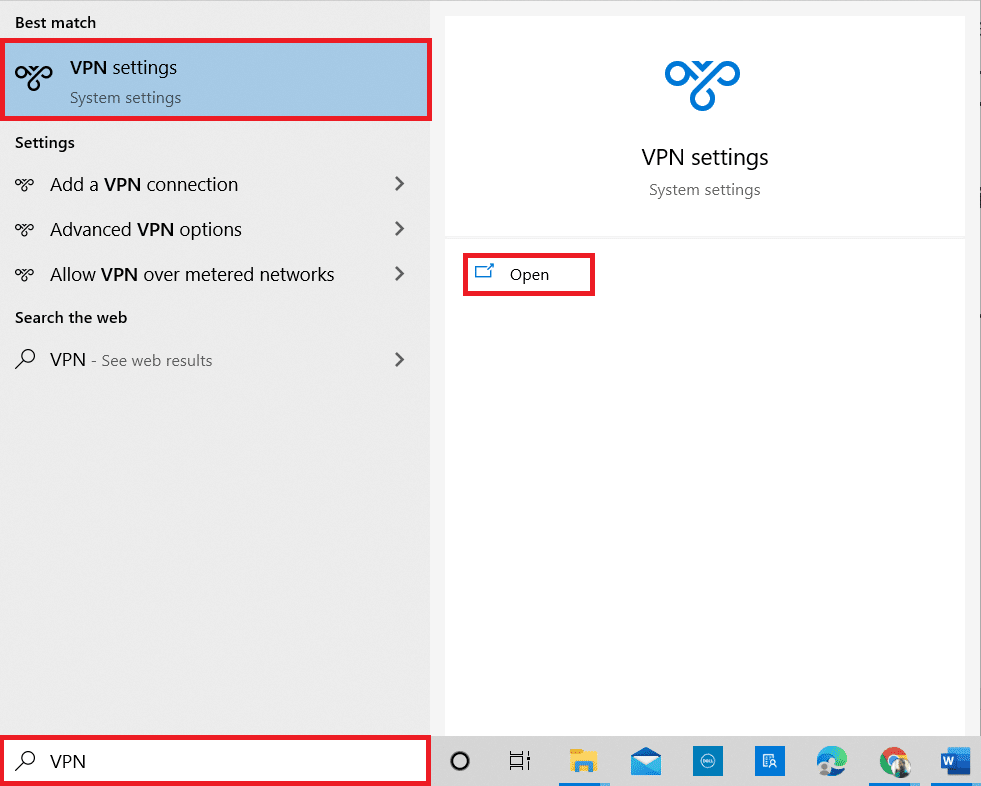
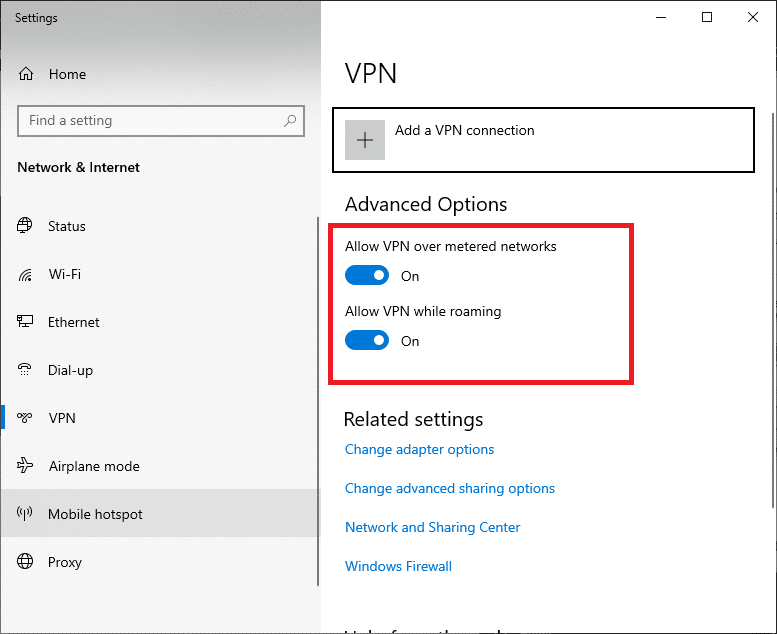
2. Մեջ Կարգավորումներ window, disconnect the active VPN ծառայություն
3. Անջատեք VPN ընտրանքներ տակ Ընդլայնված Options.
Նաեւ Կարդալ: Ուղղել Microsoft Teams Keeps Retarting-ը
Method 9: Reinstall Camera Drivers
The old and incompatible camera drivers you use will often lead to Microsoft Teams video call not working issue. To remain on the safer side, always ensure you use an updated version of drivers. Here are a few instructions to reinstall camera drivers.
1. Գործարկել Device Manager using the steps mentioned above and expand the Տեսախցիկներ կրկնակի սեղմելով դրա վրա:
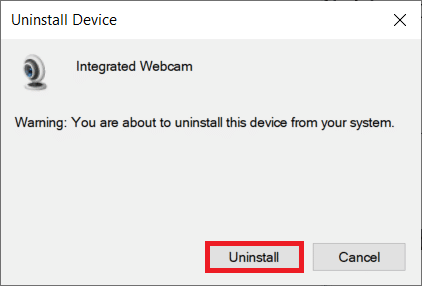
2. Այժմ, աջ սեղմեք վրա վարորդ եւ ընտրել Հեռացնել սարքը.
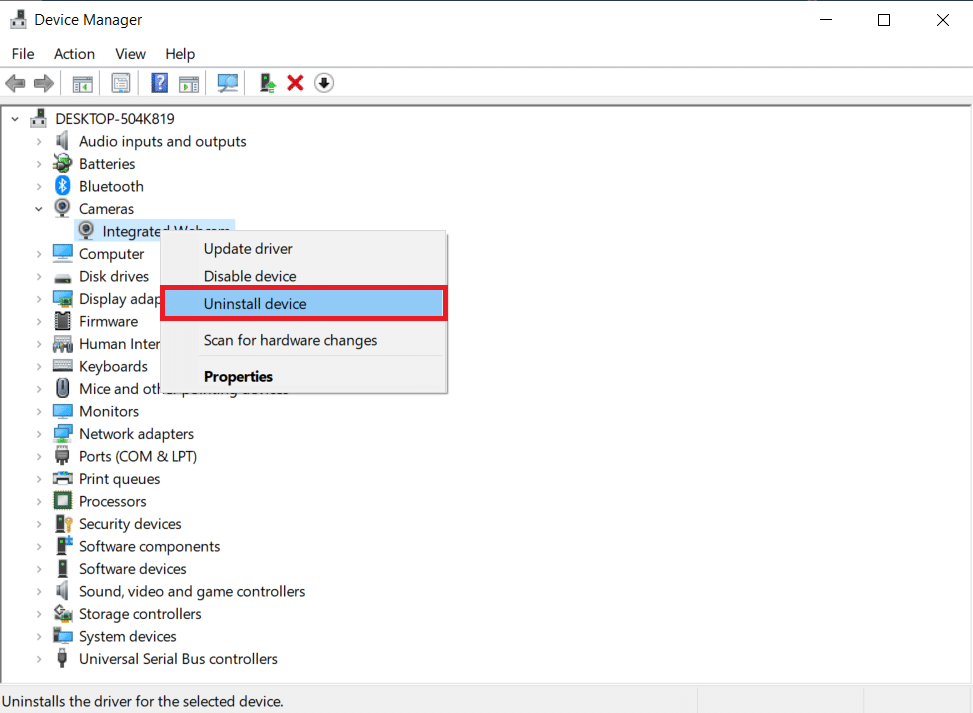
3: սեղմեք Տեղահանել հուշման մեջ։
4. Now, visit the manufacturer’s website (e.g. Lenovo).
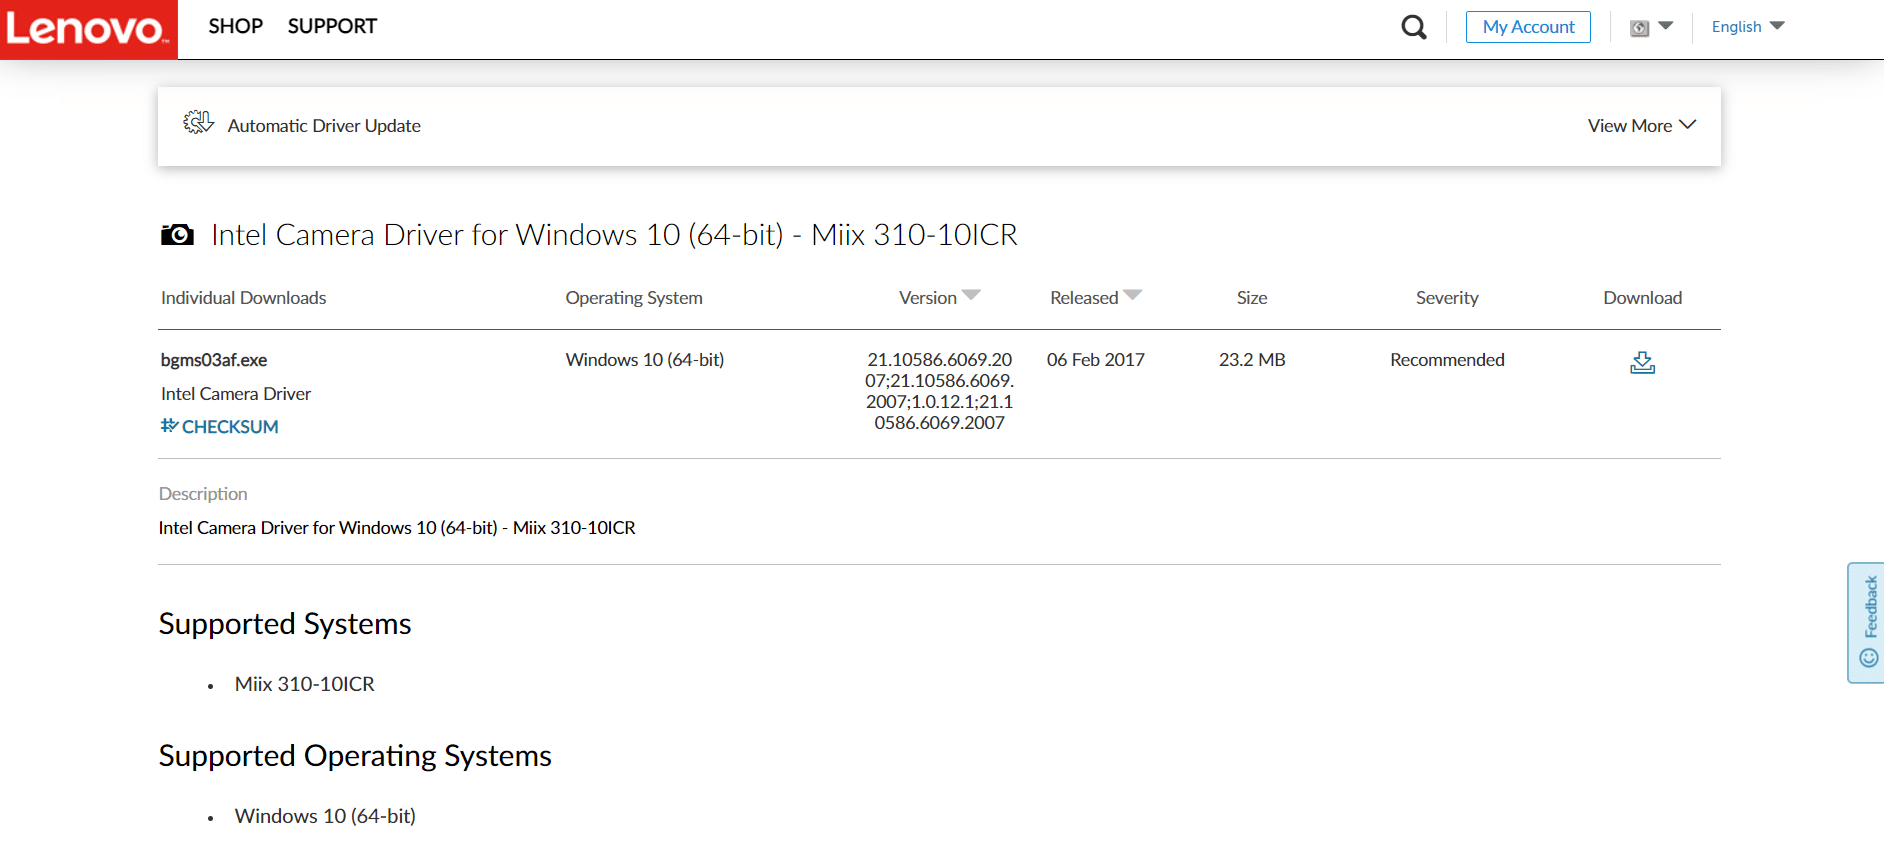
5. Գտնել և Բեռնել ձեր համակարգչի Windows-ի տարբերակին համապատասխան դրայվերները:
6. Ներբեռնվելուց հետո կրկնակի սեղմեք դրա վրա ներբեռնված ֆայլ և այն տեղադրելու համար հետևեք էկրանի հրահանգներին:
Method 10: Use Browser Version of Teams
If you have not attained any fix for this Microsoft Teams video call not working issue in the desktop version of Teams, then you can try a browser of Teams. This is an alternative to the issue and makes sure you have enabled access to media services enabled in your Windows 10 PC.
- If you are using the browsing version of Teams, check if you have appropriate permissions for camera access as done in Մեթոդ 5.
- If not, you cannot access the camera for any browser-related applications, or you will be prompted for the same.
Նաեւ Կարդալ: How To Set Microsoft Teams Status As Always Available
Method 11: Contact Microsoft Teams Technical Support
Still, if you cannot access Teams in both desktop and web versions of Teams, then take the last chance to submit a query on the official Microsoft support page.
1. Գնալ Microsoft-ի աջակցության էջ.
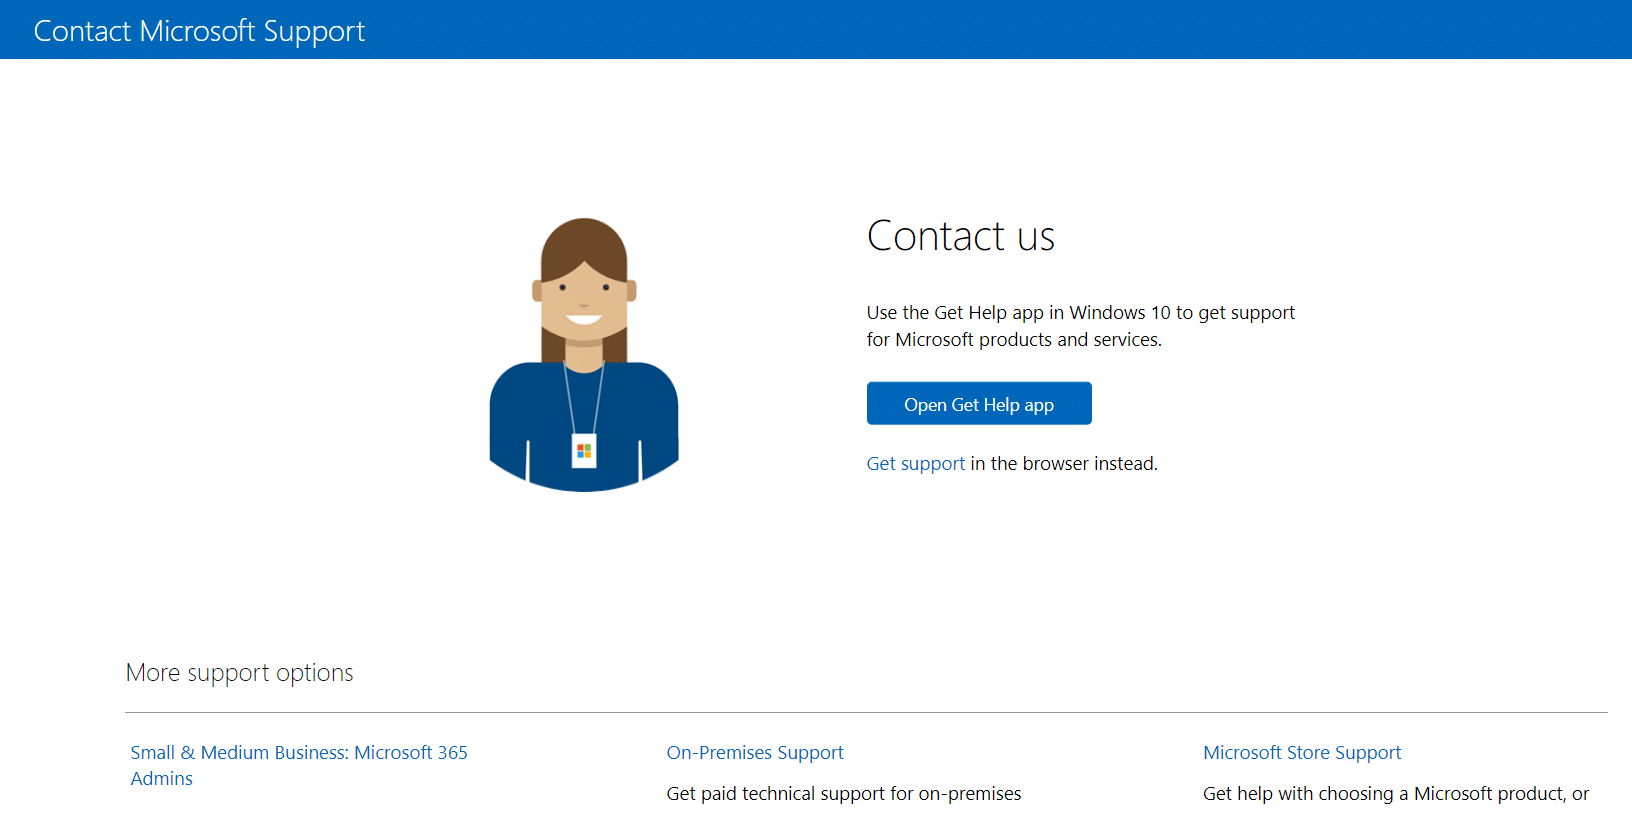
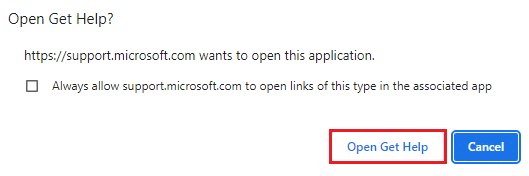
2A. You can use the Ստացեք Օգնության հավելվածը in your Windows 10 system to submit your query. For this, click on the Open Get Help app button and confirm the prompt by clicking on the Բացեք Ստացեք օգնություն կոճակը:
2B. Also, you could use the բրաուզերի տարբերակը to submit your problem. To do so, click on the Ստացեք աջակցություն ՈՒղեցույց.

3. Այժմ մուտքագրեք your problem է Tell us your problem so we can get you the right help and support դաշտ և հարվածել Մտնել.
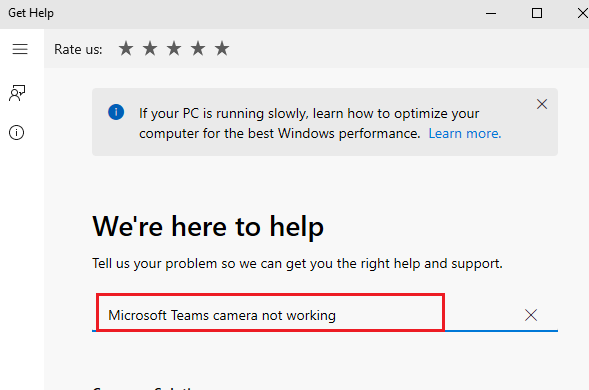
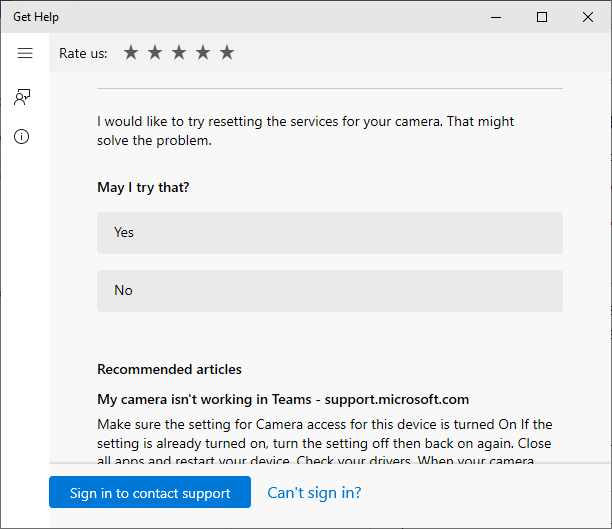
4. Then, answer the questions according to your convenience, and finally, you would have resolved the Microsoft Teams video call not working issue.
Խորհուրդ է տրվում:
Հուսով ենք, որ այս ուղեցույցը օգտակար էր, և դուք կարող եք ուղղել Microsoft Teams video call not working. Feel free to reach out to us with your queries and suggestions. Keep visiting our page for more cool tips & tricks, and leave your comments below. Let us know what you want to learn next.