Ուղղել «Սկսել» ընտրացանկը, որը չի աշխատում Windows 10-ում

If you have recently updated or upgraded to Windows 10, then chances are your Start Menu may not work properly, making it impossible for users to navigate around Windows 10. Users are experiencing various issues with Start Menu such as Start Menu does not open, Start Button is not working, or Start Menu freezes etc. If your Start Menu isn’t working then don’t worry as today we will see a way to fix this issue.
This exact cause is different for different users because each user has a different system configuration and environment. But the problem can be related to anything like corrupted user account or drivers, damaged system files, etc. So without wasting any time, let’s see How to Fix Start Menu Not Working in Windows 10 with the help of the below-listed tutorial.
Համոզվեք, որ ստեղծեք վերականգնման կետ, եթե ինչ-որ բան սխալ լինի:
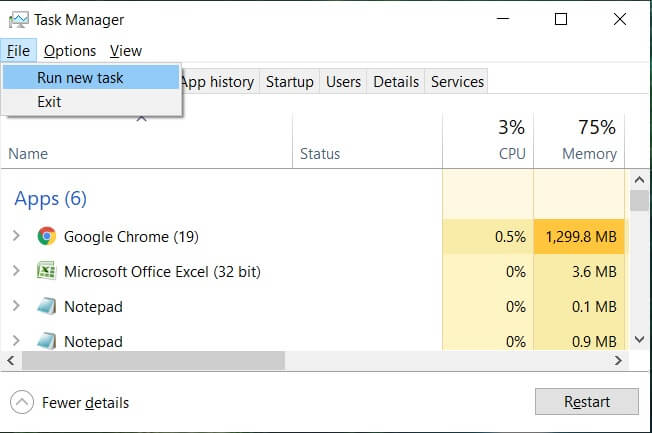
To run Command Prompt as an administrator, press Ctrl + Shift + Esc to open Task Manager. Then click on Ֆայլ Ապա ընտրեք Գործարկել նոր առաջադրանք. Տիպ cmd.exe և նշեք «Ստեղծել այս խնդիրը վարչական արտոնություններով” then click OK. Similarly, to open PowerShell, type powershell.exe and again checkmark the above field then hit Enter.

Մեթոդ 1. Վերագործարկեք Windows Explorer- ը
1. Մամուլ Ctrl + Shift + Esc ստեղները միասին գործարկելու համար Առաջադրանքների ղեկավար:
2. Գտեք explorer.exe- ն ցանկում, ապա աջ սեղմեք դրա վրա և ընտրեք Ավարտել առաջադրանքը:

3. Այժմ սա կփակի Explorer-ը և այն նորից կաշխատի, սեղմեք Ֆայլ > Գործարկել նոր առաջադրանքը:
4. Տիպ explorer.exe- ն և սեղմեք OK՝ Explorer-ը վերագործարկելու համար:

5. Exit Task Manager and see if you’re able to Fix Start Menu Not Working in Windows 10.
6. If you’re still facing the issue, then log out from your account and re-login.
7. Մամուլ Ctrl+Shift+Del key at the same time and click on Signout.
8. Type in your password to login to Windows and see if you’re able to fix the issue.
Method 2: Create a new local administrator account
Եթե դուք ստորագրված եք ձեր Microsoft հաշվի հետ, ապա նախ հեռացրեք այդ հաշվի հղումը հետևյալ կերպ.
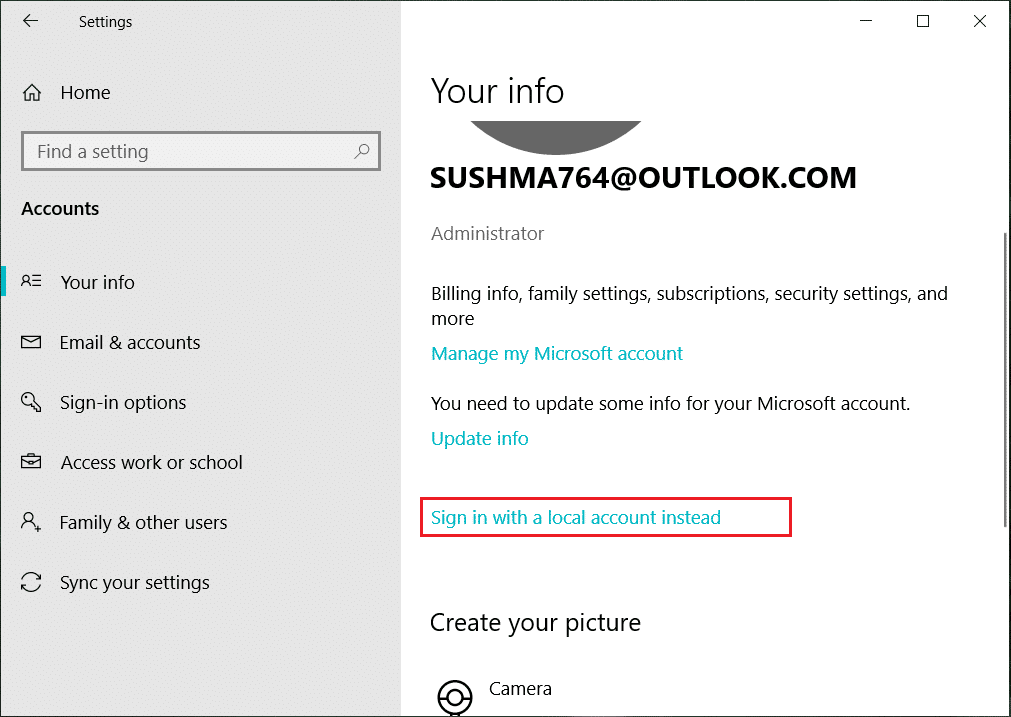
1. Սեղմեք Windows Key + R, ապա մուտքագրեք «ms-settings:» (առանց չակերտների) և սեղմեք Enter:
2. Ընտրեք Հաշիվ > Մուտք գործեք տեղական հաշվի փոխարեն:
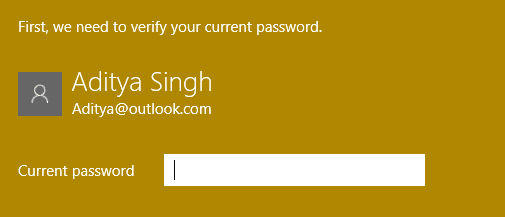
3. Մուտքագրեք ձեր Microsoft- ի հաշվի գաղտնաբառը եւ սեղմեք Next.
4. Ընտրեք ա նոր հաշվի անուն և գաղտնաբառ, այնուհետև ընտրեք Ավարտել և դուրս գալ:
#1. Create the new administrator account:
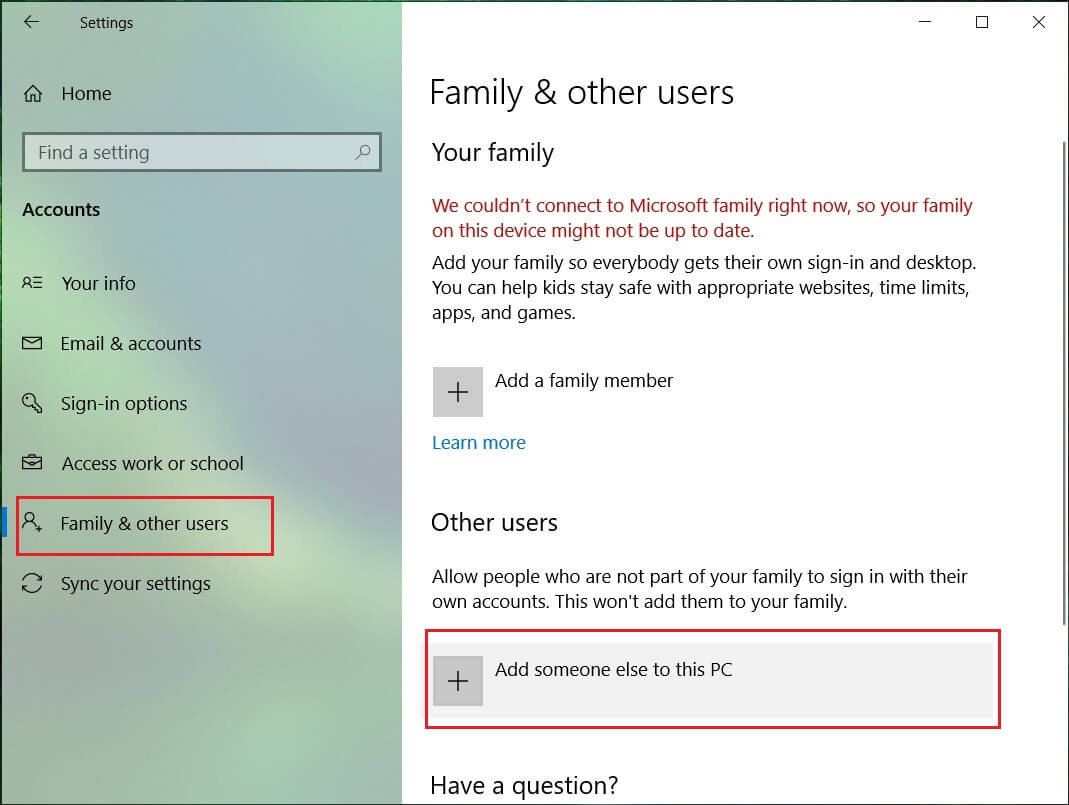
1. Սեղմեք Windows Key + I՝ Settings բացելու համար, այնուհետև սեղմեք Հաշիվներ:
2. Այնուհետև անցեք դեպի Ընտանիք և այլ մարդիկ:
3. Այլ մարդիկ կտտացրեք «Ավելացրեք մեկ ուրիշին այս ԱՀ-ում:"
4. Հաջորդը, նշեք անունը user and a password then select Next.
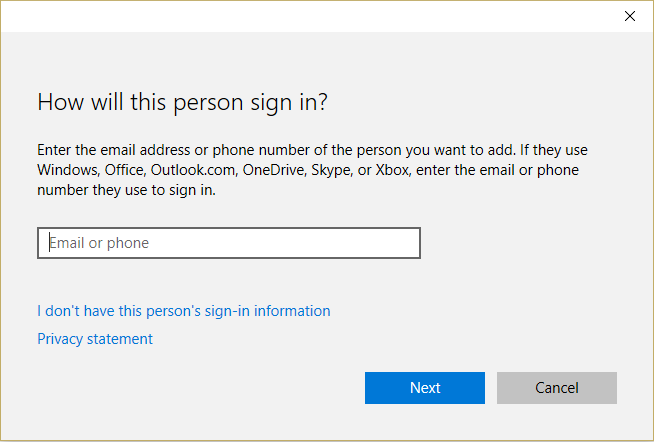
5. Սահմանել ա օգտագործողի անունը եւ գաղտնաբառը, Ապա ընտրեք Հաջորդ> Ավարտել
#2. Next, make the new account an administrator account:
1. Կրկին բաց Windows- ի կարգավորումները եւ սեղմեք Հաշիվ:

2. Գնալ Ընտանիք և այլ մարդիկ ներդիր.
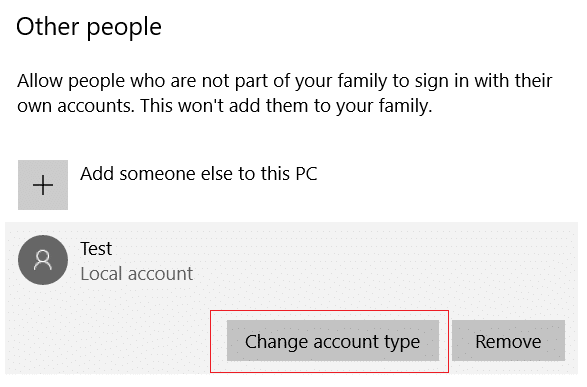
3. Այլ մարդիկ ընտրում են ձեր նոր ստեղծած հաշիվը, այնուհետև ընտրում են a Փոխել հաշվի տեսակը:
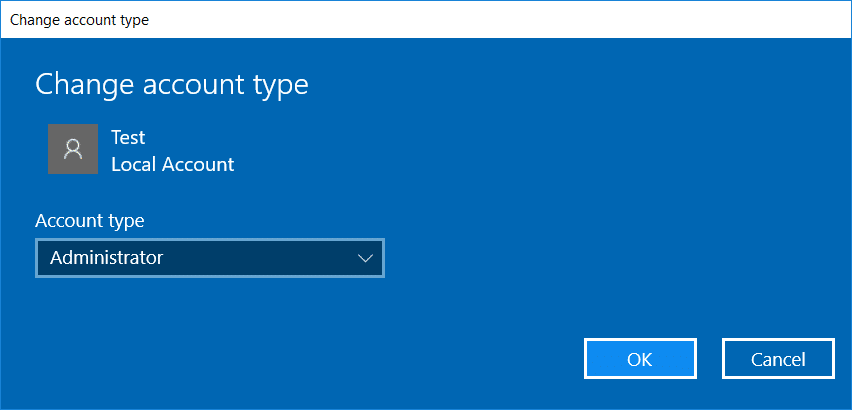
4. Հաշվի տեսակից ընտրեք Ադմինիստրատոր ապա սեղմեք OK.
#3. If the issue persists try deleting the old administrator account:
1. Այնուհետև նորից գնացեք Windows-ի կարգավորումներ Հաշիվ > Ընտանիք և այլ մարդիկ:
2. Այլ օգտվողների տակ ընտրեք հին ադմինիստրատորի հաշիվը, սեղմեք Հեռացնել, եւ ընտրել Ջնջել հաշիվը և տվյալները:

3. If you were using a Microsoft account to sign in before, you can associate it with the new administrator by following the next step.
4. Մեջ Windows-ի Կարգավորումներ > Հաշիվներ, փոխարենը ընտրեք Մուտք գործեք Microsoft հաշիվ և մուտքագրեք ձեր հաշվի տվյալները:
Ի վերջո, դուք պետք է կարողանաք Ուղղել «Սկսել» ընտրացանկը, որը չի աշխատում Windows 10-ում as this step seems to fix the issue in most cases.
If you continue to experience Start Menu’s issue, it’s recommended to download and run Start Menu Troubleshooter.
1. Download and run Start Menu Troubleshooter.
2. Կրկնակի սեղմեք վրա ներբեռնված ֆայլ եւ ապա սեղմեք Next.
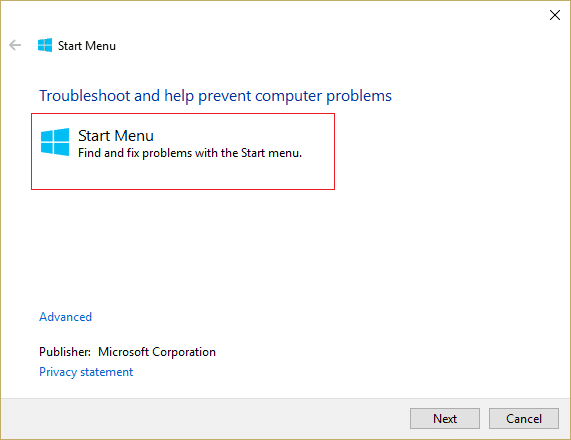
3. Let it finds and automatically Fixes Start Menu Not Working in Windows 10.
Method 4: Run System File Checker (SFC) and Check Disk
1. Բացեք հրամանի տողը: Օգտագործողը կարող է կատարել այս քայլը՝ որոնելով «cmd» եւ ապա սեղմեք Enter:

2. Այժմ cmd-ում մուտքագրեք հետևյալը և սեղմեք enter.
sfc /scannow sfc /scannow /offbootdir=c: /offwindir=c:windows

3. Սպասեք, մինչև վերը նշված գործընթացը ավարտվի, և երբ ավարտվի, վերագործարկեք ձեր համակարգիչը:
4. Հաջորդը գործարկեք CHKDSK-ից Ուղղեք ֆայլային համակարգի սխալները Check Disk Utility (CHKDSK) միջոցով:
5. Թող վերը նշված գործընթացը ավարտվի և նորից վերագործարկեք ձեր համակարգիչը՝ փոփոխությունները պահպանելու համար:
Method 5: Force Cortana to Rebuild Settings
Open Command Prompt with administrative rights then type the following one by one and hit Enter after each command:
CD /d "%LOCALAPPDATA%PackagesMicrosoft.Windows.Cortana_cw5n1h2txyewy"
Taskkill /F /IM SearchUI.exe
RD /S /Q Settings
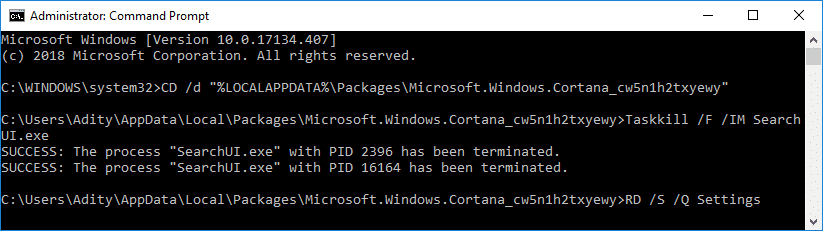
This will force Cortana to rebuild the settings and will Fix Start Menu and Cortana Not Working in Windows 10.
If the issue is still not resolved, follow this guide to fix any issues related to Cortana.
Method 6: Re-Register Windows App
1. Տիպ PowerShell Windows Search-ում, ապա աջ սեղմեք PowerShell-ի վրա և ընտրեք Գործարկեք որպես ադմինիստրատոր:
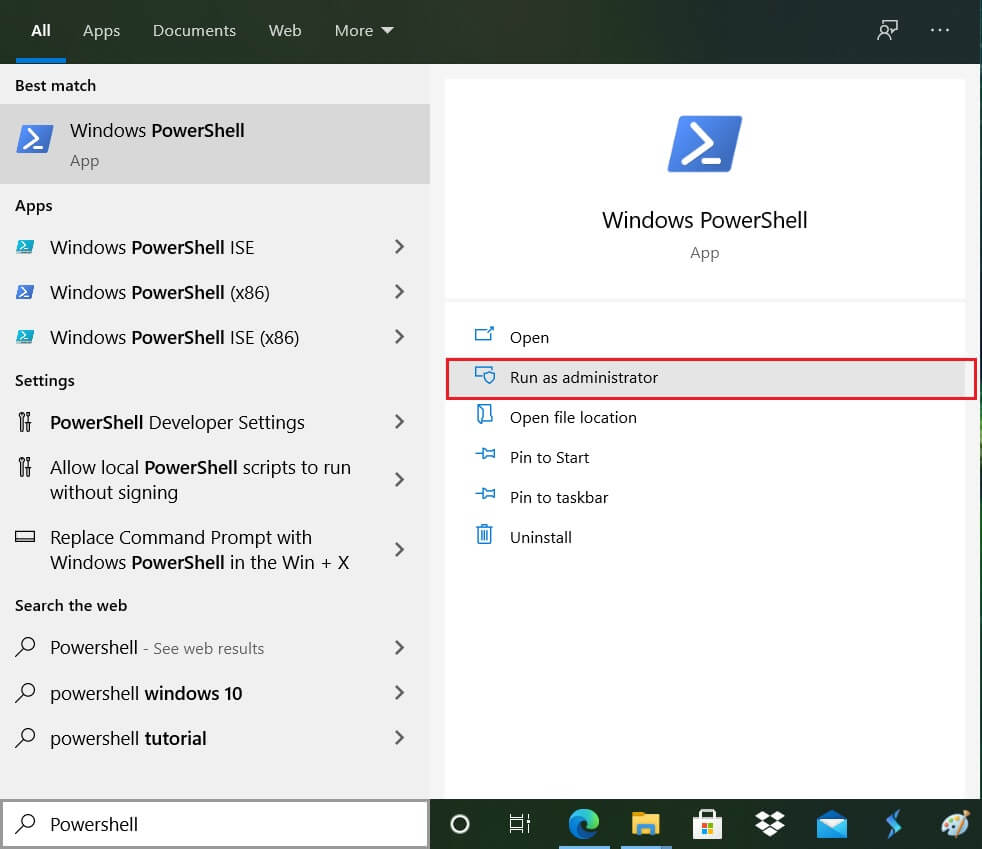
2. Այժմ մուտքագրեք հետևյալ հրամանը PowerShell պատուհանում.
Get-AppXPackage-AllUsers | Forex {Add-AppxPackage -DisableDevelopmentMode -Register "$ ($ _. Տեղադրման տեղադրություն) AppXManifest.xml"}

3. Սպասեք մինչև Powershell-ը կատարի վերը նշված հրամանը և անտեսեք այն մի քանի սխալները, որոնք կարող են առաջանալ:
4. Վերագործարկեք ձեր համակարգիչը՝ փոփոխությունները պահպանելու համար:
Մեթոդ 7. ռեեստրի ուղղում
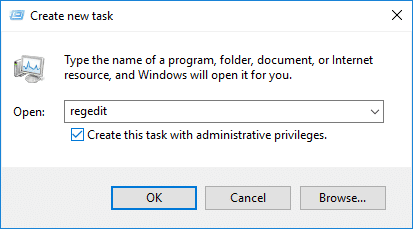
1. Press Ctrl + Shift + Esc to open Task Manager then click on Ֆայլ եւ ընտրել Գործարկել նոր առաջադրանք:
2. Տիպ regedit և նշեք «Ստեղծել այս խնդիրը վարչական արտոնություններով” then click OK.
3. Now navigate to the following registry key in the Registry Editor:
ComputerHKEY_LOCAL_MACHINESYSTEMCurrentControlSetServicesWpnUserService
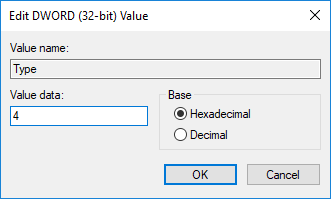
4. Համոզվեք, որ ընտրել եք WpnUserService then in the right window double-click on the Սկսեք DWORD-ը:
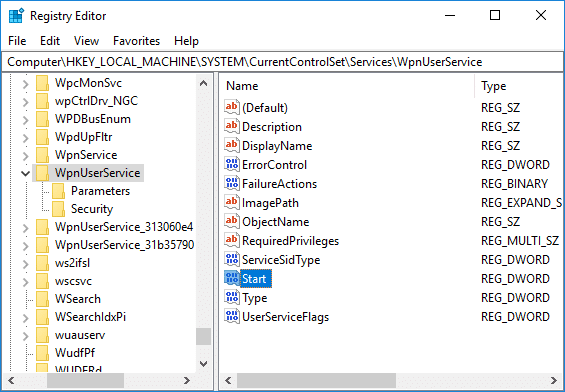
5. Change its value to 4 then click OK.
6. Վերագործարկեք ձեր համակարգիչը՝ փոփոխությունները պահպանելու համար:
Մեթոդ 8. Թարմացրեք կամ վերակայեք Windows 10-ը
Նշում: If you can’t access your PC, restart your PC a few times until you start Ավտոմատ վերանորոգում. Այնուհետև անցեք դեպի Անսարքությունների վերացում > Վերականգնել այս համակարգիչը > Հեռացնել ամեն ինչ:
1. Սեղմեք Windows Key + I՝ Settings բացելու համար, այնուհետև սեղմեք Թարմացում և անվտանգության պատկերակ:
![]()
2. Ձախ ընտրացանկում ընտրեք Վերականգնում:
3. Համաձայն Վերականգնել այս համակարգիչը, սեղմեք «Սկսել"Կոճակը:

4. Ընտրեք տարբերակը Պահեք իմ ֆայլերը.

5. For the next step, you might be asked to insert Windows 10 installation media, so ensure you have it ready.
6. Now, select your Windows version and click միայն սկավառակի վրա, որտեղ տեղադրված է Windows-ը > remove my files.

5. Սեղմեք Վերականգնել կոճակը:
6. Հետևեք էկրանի ցուցումներին՝ զրոյացումն ավարտելու համար:
Խորհուրդ է տրվում:
Դա այն է, ինչ դուք հաջողությամբ ունեք Ուղղել «Սկսել» ընտրացանկը, որը չի աշխատում Windows 10-ում բայց եթե դեռևս ունեք հարցեր այս ձեռնարկի վերաբերյալ, ապա ազատ զգալ հարցրեք նրանց մեկնաբանությունների բաժնում: