If you are a person who loves to play around with the programs on your phone, you might be aware of the TWRP mount internal storage. This is an official app from the Google Play Store and can help in installing third-party apps and software.
One of the issues with the mode is TWRP internal storage 0MB. Though you might have enough space to flash new files on your phone, you may see this error message pop up on your phone. In this case, you might be unable to mount storage TWRP on your Android phone. There are various reasons for this issue and you might be denied access to the unofficial software files and other custom ROMs. You can use the method in the article to fix TWRP unable to mount storage issue.
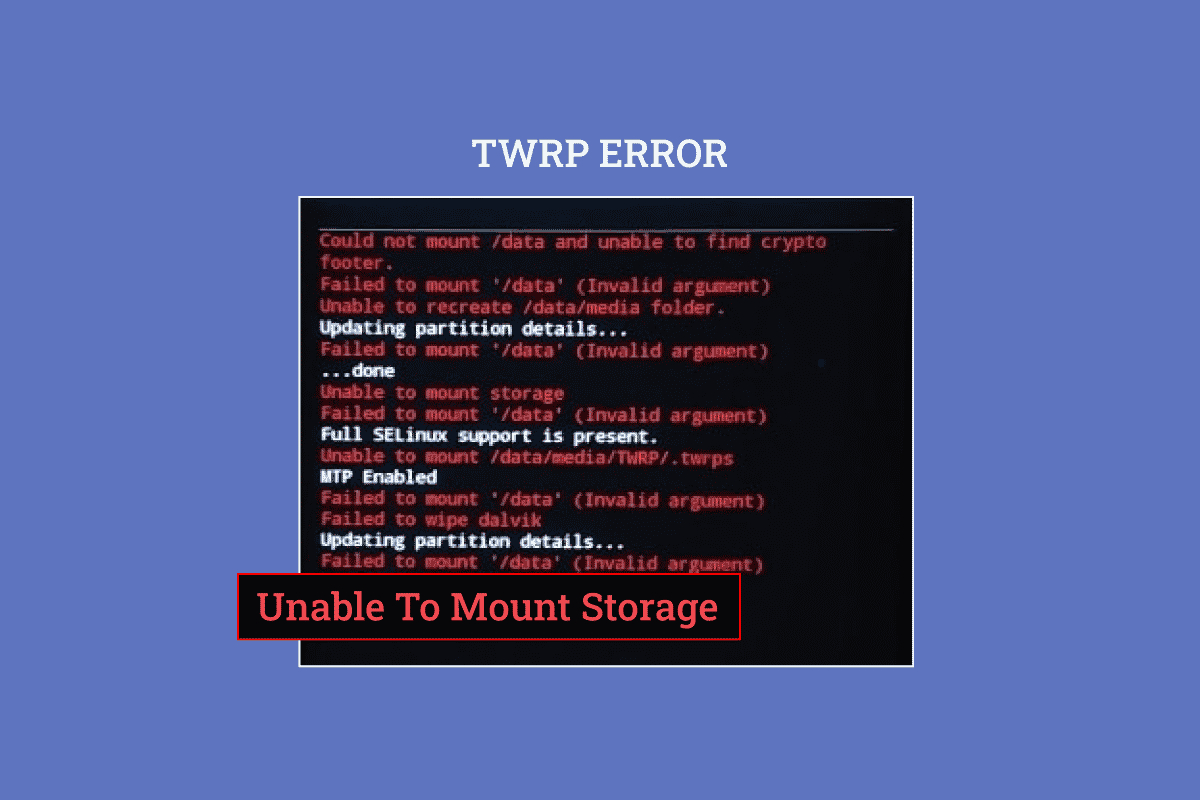
How to Fix Unable to Mount Storage TWRP on Android
TWRP Recovery mode is used to install and back up the files on your phone instantly. It is available as an app in the Google Play Store and is a trusted app.
Նշում: The steps mentioned correspond to the Samsung Galaxy A21 s model and the settings are bound to differ according to the phone model and manufacturer.
How to Install TWRP Recovery Mode App
Here are the steps to install TWRP recovery mode application.
Տես նաեւ,
Ուղղեք Google Լուսանկարները, որոնք չեն վերբեռնում լուսանկարներ Android-ով
Ուղղեք «Tinder Matches» անհետացած Android-ում
Spotify-ի անհաջող մուտք գործելու սխալը շտկելու 10 եղանակ
Ուղղեք Netflix 5.7 սխալը Android-ում
Ինչպես իմանալ, արդյոք AirPods-ը լիցքավորվում է Android-ում
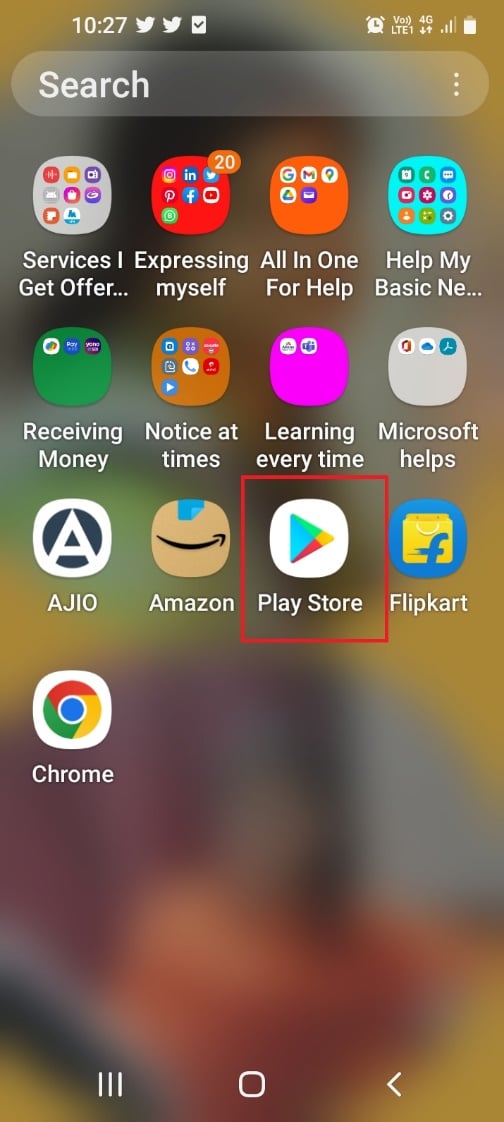
1. From the menu, open the Play Store ծրագիրը:
2. Հպեք վրա որոնման բար գլխավոր էջի վերևում:
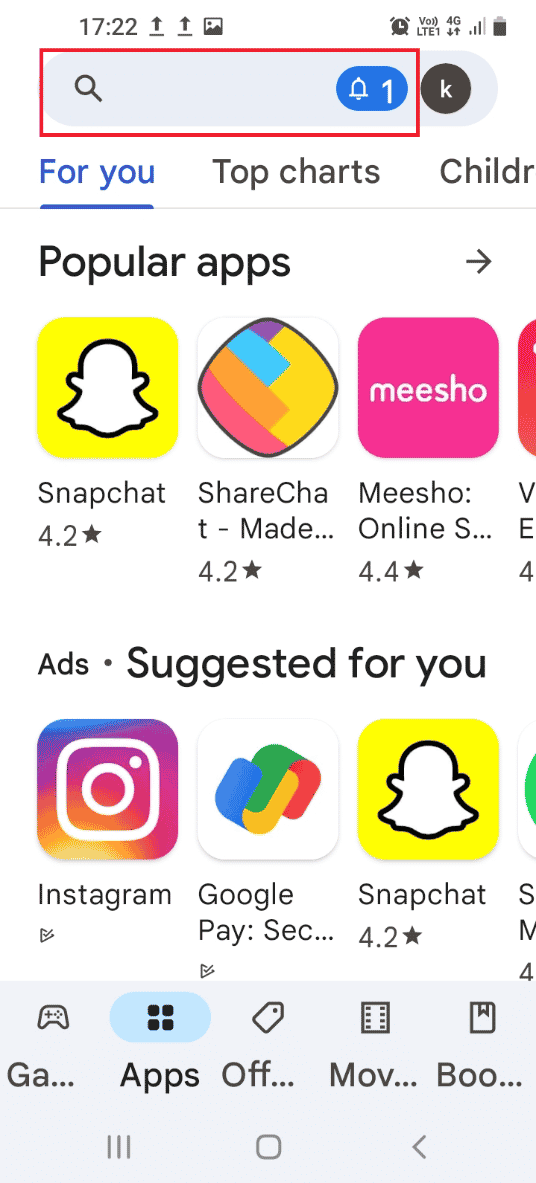
3. Որոնել TWRP recovery mode և թակել է որոնում icon.
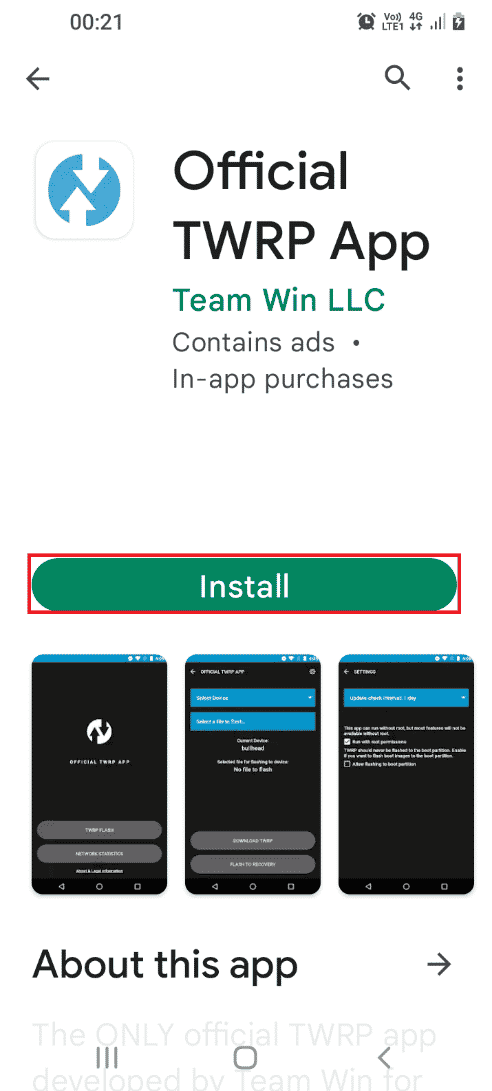
4. Հպեք վրա Տեղադրեք կոճակը TWRP պաշտոնական հավելված.
What Causes TWRP Unable to Mount Storage Issue?
The issue of being unable to mount internal storage may be due to the following reasons as below.
- Security Password- The security password or the lock password on your phone may not allow you to mount the storage files.
- Unsupported File is installed- A zip file that is unsupported with your phone model installed on your phone may be a reason for this issue.
- Unable to decrypt files in partition- Your phone may not able to decrypt the files in the Partition drives on your phone.
- Flashing a wrong file in Partition drive- An incorrect or wrong file may be flashed to the Partition drives on your phone.
- Corrupt Files in Partition drive- The files in the partition drives on your Phone may be corrupt or have some malware.
- Factory reset option is corrupt- The issue may occur if the Factory reset option on your phone is corrupt.
Նաեւ Կարդալ: Ուղղել Android-ը սկսում է օպտիմիզացնել հավելված 1-ը 1-ից
Following are the troubleshooting methods to fix unable to mound storage TWRP on your Android device.
Method 1: Change Screen Security Password
The simplest approach to fix the unable to mount storage TWRP issue is to change the security password of your phone.
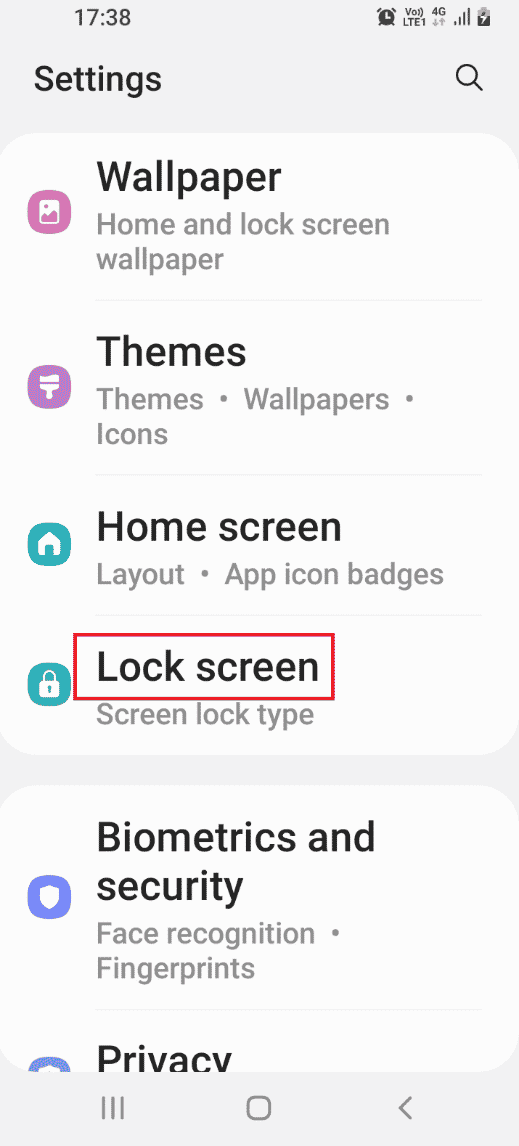
1. From the menu, open the Կարգավորումներ ծրագիրը:
2. Հպեք վրա Կողպեք էկրան էջանիշը.
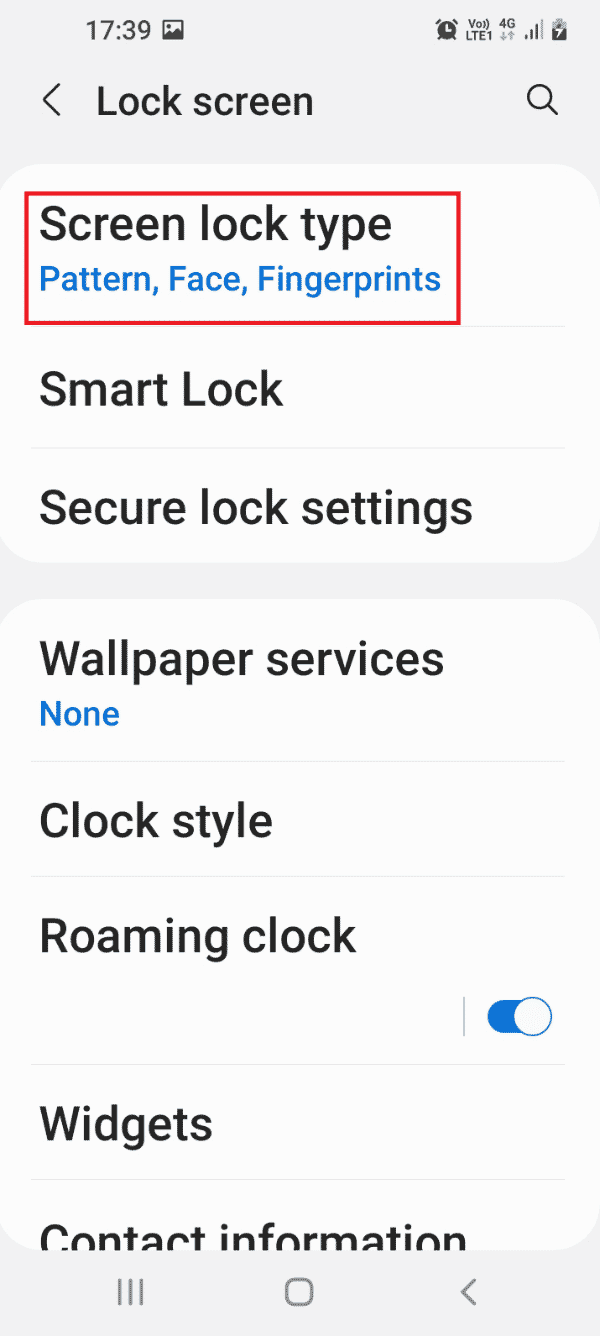
3. Հպեք վրա Screen lock type էջանիշը.
4. Enter your current password or draw your current pattern on the confirmation screen.
5. Հպեք վրա Գաղտնաբառ էջանիշը.
Նշում: Որպես այլընտրանք, դուք կարող եք թակել վրա PIN էջանիշը.

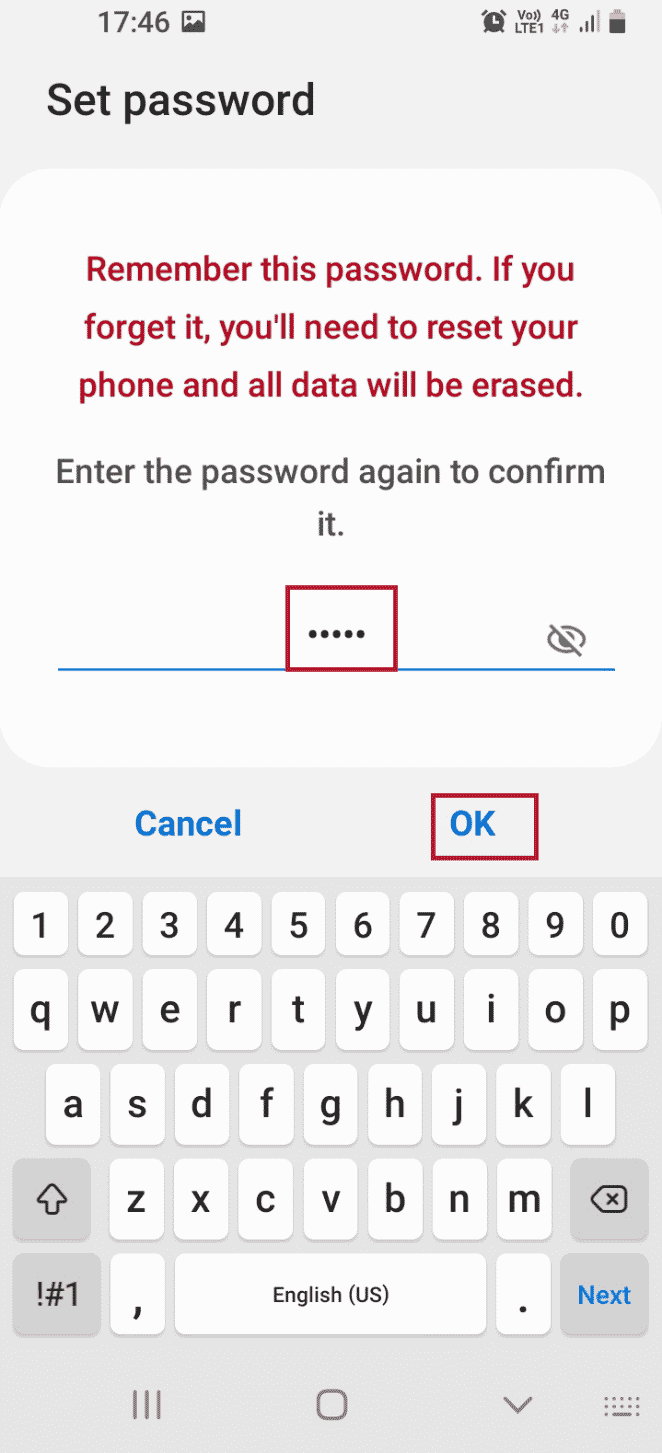
6. Type any alpha-numeric password and tap on the Շարունակել տարբերակ.

7. Type the same alpha-numeric password and tap on the OK տարբերակ.
Now, check if TWRP internal storage 0mb is resolved.
Method 2: Use Micro SD Card
This method is a little workaround but can be used to fix the issue of TWRP mount internal storage. Using this method, you can move the files of the partition drives to a Micro SD Card on your phone.
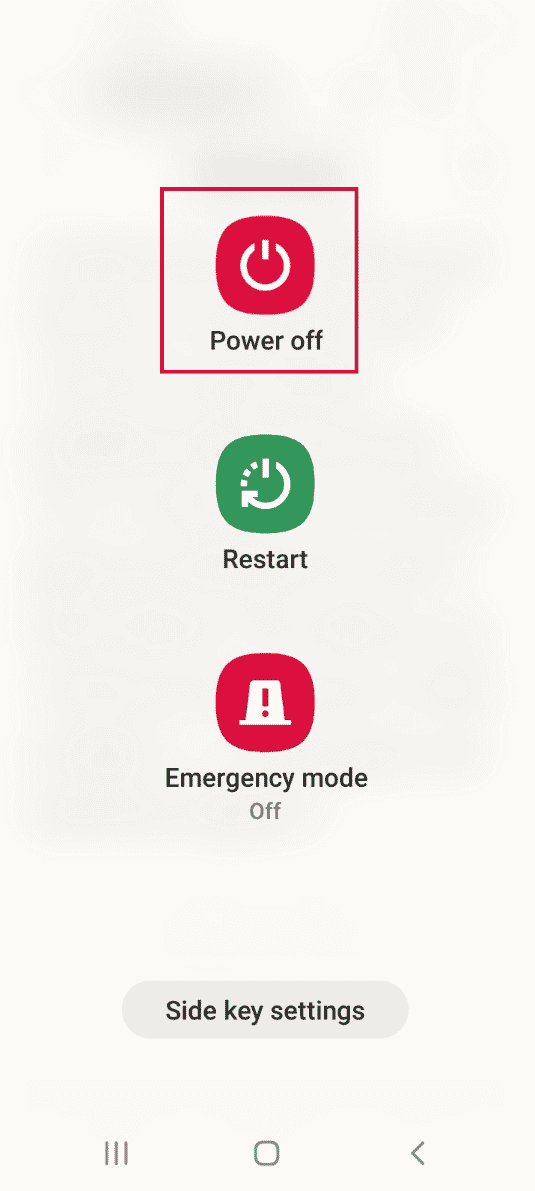
1. Երկար սեղմեք կոճակը Ուժ կոճակը և կտտացրեք Անջատել տարբերակ.
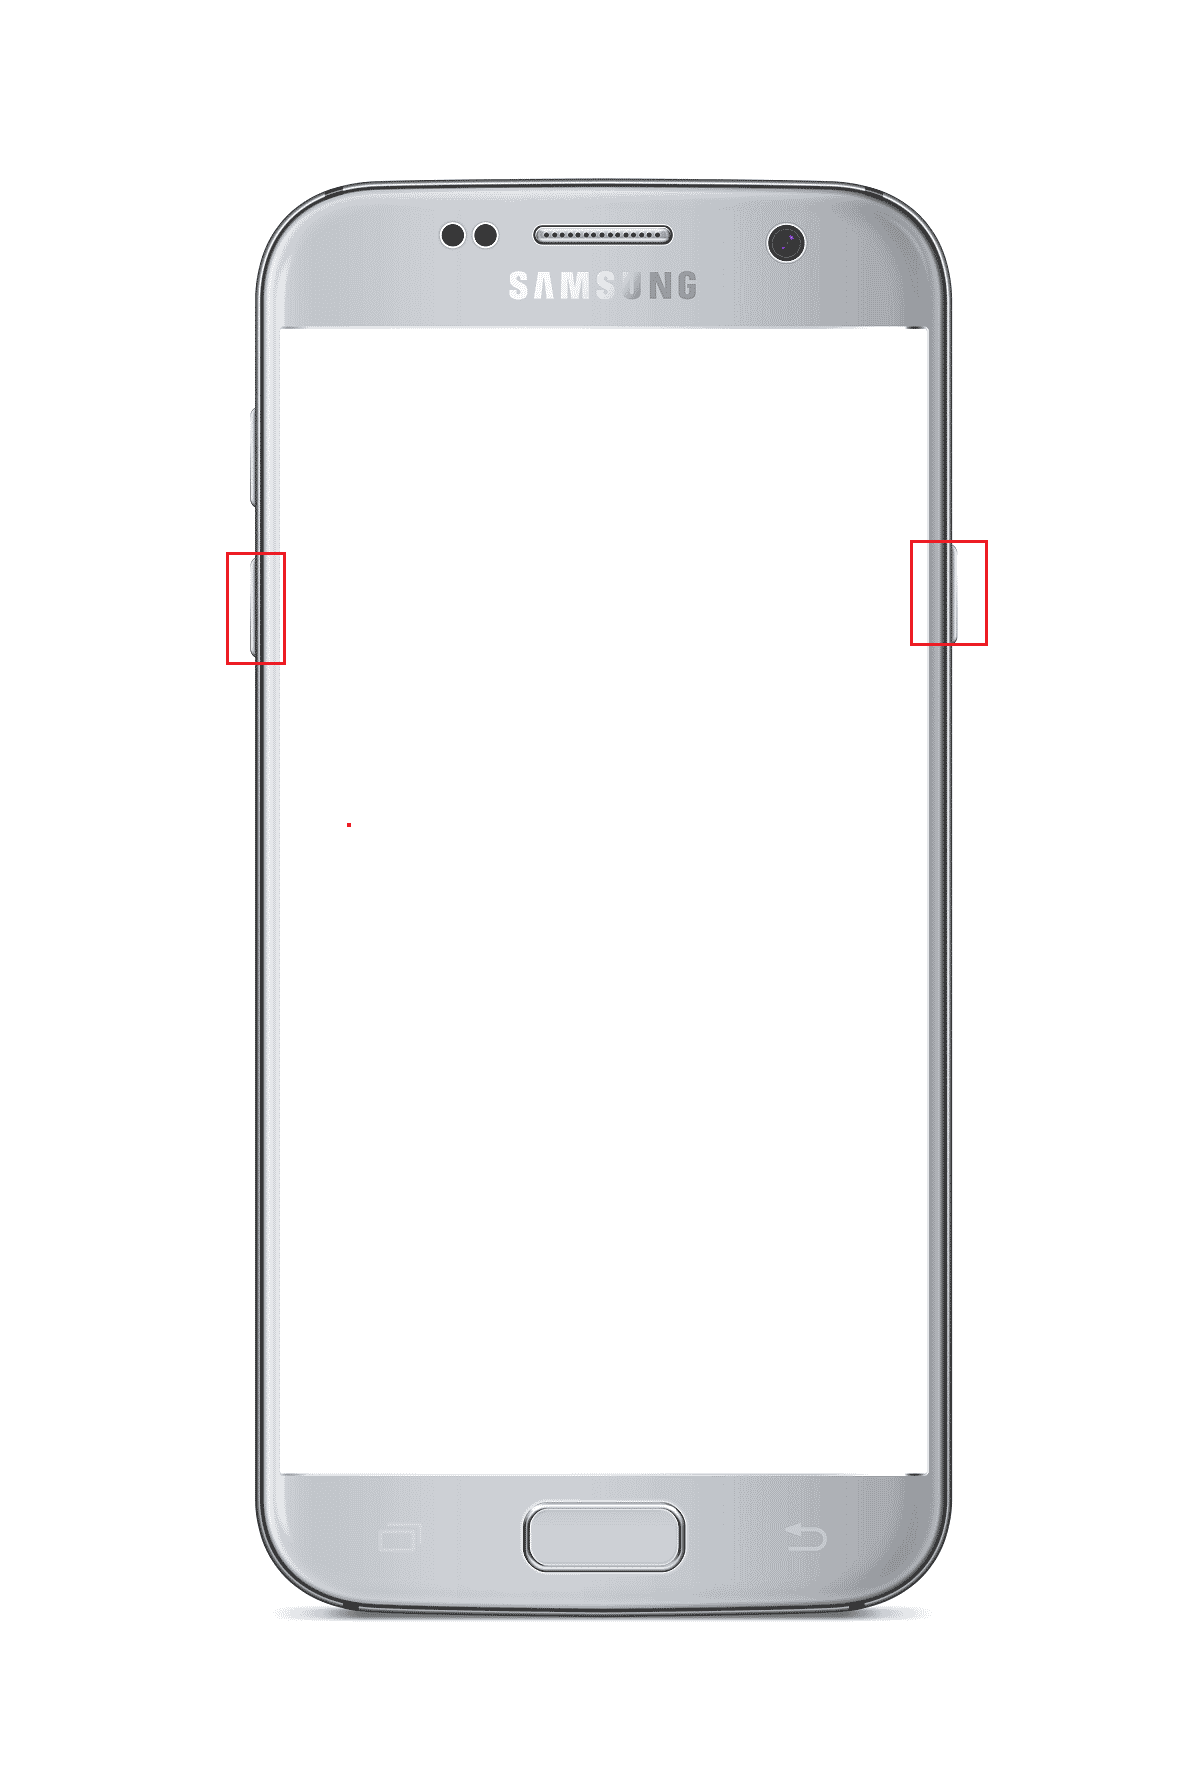
2. Սեղմեք Power + Volume Down- ը կոճակներ՝ TWRP վերականգնման ռեժիմում գործարկելու համար:
3. Հպեք վրա Keep Read Only button and swipe the triple arrow icon or the Swipe to Allow Modifications տարբերակ դեպի աջ:
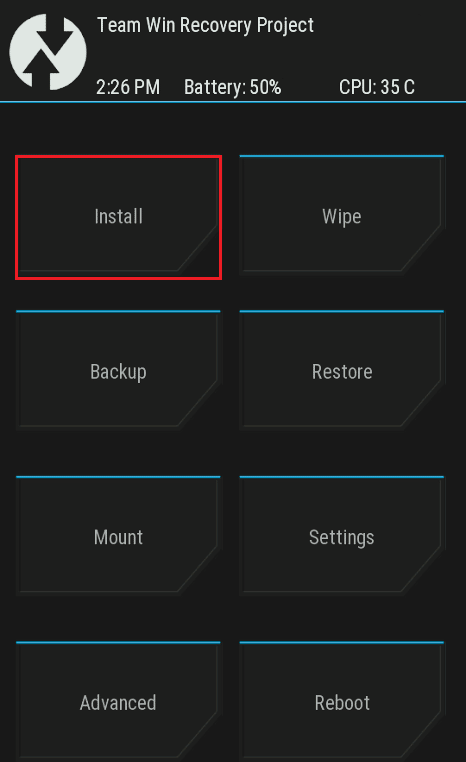
4. Հաջորդը, թակել է Տեղադրեք տարբերակը Team Win շահագործման ծրագիրը էկրան:
5. Այնուհետև հպեք կոճակին Ընտրեք Պահպանում էջանիշը.
6. Ընտրել Միկրո SD քարտ option in the menu. Then, check if TWRP unable to mount storage is resolved.
Նաեւ Կարդալ: Ինչպես փոխել IMEI համարը Android-ում առանց արմատի
Method 3: Format Data
If you are not able to fix unable to mount storage TWRP issue, you can format the data on your phone in the Team Win Recovery Project mode.
Նշում: You can back up the files on your Phone to Google Drive before proceeding with this method to avoid loss of data.
1. Անցկացնել Ուժ կոճակը և կտտացրեք Անջատել տարբերակ.

2. Սեղմեք Հզորություն + umeավալն իջնում է կոճակներ՝ TWRP վերականգնման ռեժիմում գործարկելու համար:
3. Հպեք վրա Keep Read Only button and swipe the triple arrow icon or the Swipe to Allow Modifications տարբերակ դեպի աջ:
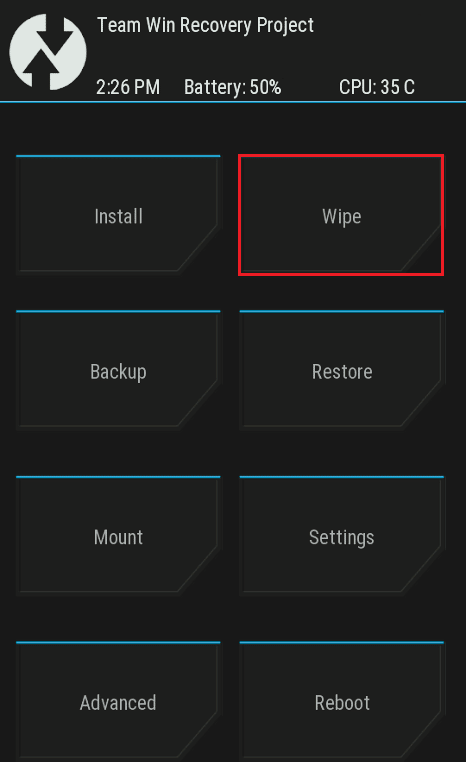
4. Հպեք վրա սրբել տարբերակը Team Win շահագործման ծրագիրը էկրան:
5. Հպեք վրա Տվյալների ձևաչափում կոճակը:
6. Տիպ այո է Wipe Format Data screen and tap on the Մտնել տարբերակ.
7. Վերադարձ դեպի Team Win շահագործման ծրագիրը screen and tap on the Վերաբեռնում տարբերակ.
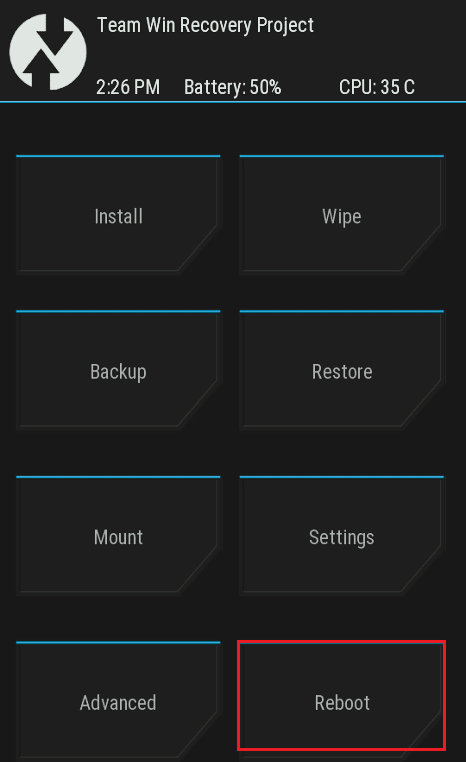
8. Հպեք վրա համակարգ option to turn on your phone.
Finally, check if TWRP internal storage 0mb issue is resolved.
Method 4: Format Internal Storage
Another option to fix unable to mount storage TWRP issue is to format the internal storage on your phone.
Step I: Backup Files on Internal Storage
The first step is to back up the files on your Internal Storage partition drive in the twrp recovery mode.
1. Սեղմեք Ուժ կոճակը և կտտացրեք Անջատել տարբերակ.

2. Սեղմեք Power + Volume Down- ը կոճակներ՝ TWRP վերականգնման ռեժիմում գործարկելու համար:
3. Հպեք վրա Keep Read Only button and swipe the triple arrow icon or the Swipe to Allow Modifications տարբերակ դեպի աջ:
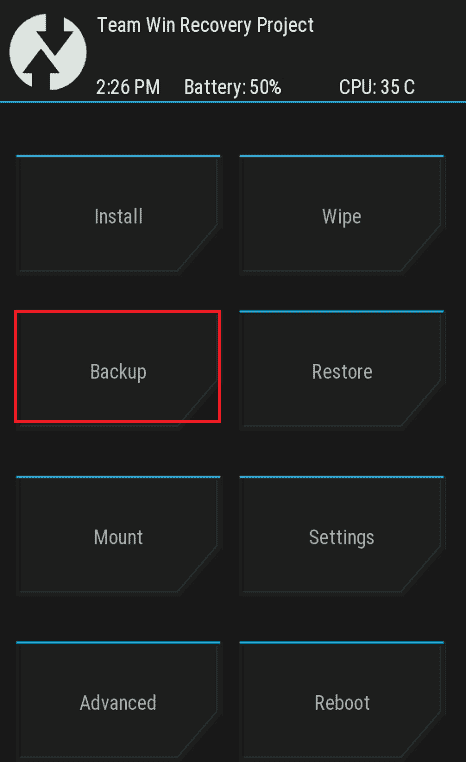
4. Այնուհետև հպեք կոճակին Կրկնօրինակեք տարբերակը Team Win շահագործման ծրագիրը էկրան:
5. Ընտրել Ներքին Պահպանման տարբերակը Ընտրեք Պահպանում screen and tap on the OK կոճակը:
6. Select all the partitions and swipe the triple arrow icon or the Սահեցրեք՝ ջնջելու համար option to the right to confirm the selection.
Step II: Format Internal Storage
The next step is to format the files on the Internal Storage partition drive in the TWRP recovery mode.
1: բացել Team Win շահագործման ծրագիրը հավելվածը և հպեք դրա վրա սրբել տարբերակ.
2. Հպեք վրա Ընդլայնված մաքրում տարբերակ.
3. Ընտրել Ներքին Պահպանման տարբերակը Select Partition to Wipe section and swipe the triple arrow icon or the Սահեցրեք՝ ջնջելու համար option to the right to confirm the selection.
Նաեւ Կարդալ: What is HTC S-OFF?
Մեթոդ 5. Վերականգնել համակարգի ֆայլերը
To fix the unable to mount storage TWRP issue, you can repair the system files on your phone in the TWRP recovery mode.
1. Անցկացնել Ուժ կոճակը և կտտացրեք Անջատել տարբերակ.

2. Այնուհետև սեղմեք կոճակը Power + Volume Down- ը կոճակներ՝ TWRP վերականգնման ռեժիմում գործարկելու համար:
3. Հպեք վրա Keep Read Only button and swipe the triple arrow icon or the Swipe to Allow Modifications տարբերակ դեպի աջ:
4. Հպեք վրա սրբել տարբերակը Team Win շահագործման ծրագիրը էկրան:
5. Հպեք վրա Ընդլայնված մաքրում տարբերակ.
6. Ընտրել Ամսաթիվ տարբերակը Select Partition to Wipe բաժինը և հպեք դրա վրա Repair or Change File System տարբերակ.
7. Հպեք վրա Change File System կոճակը:
8. Հպեք վրա exFAT- ը option and swipe the triple arrow icon or the Swipe to Change option to the right on the screen.
If TWRP mount internal storage issue is still not resolved, you can follow the steps below to repair further files (Optional).
9. Վերադարձ դեպի Repair or Change File System screen and tap on the Change File System տարբերակ.
10. Ընտրել EXT 2 option in the menu and swipe the triple arrow icon or the Swipe to Change option to the right to confirm the selection.
11. Return to the menu, select the EXT 4 option, and swipe the triple arrow icon or the Swipe to Change option to the right to confirm the selection.
12. Վերադարձ դեպի Team Win շահագործման ծրագիրը screen and tap on the Լեռ տարբերակ.
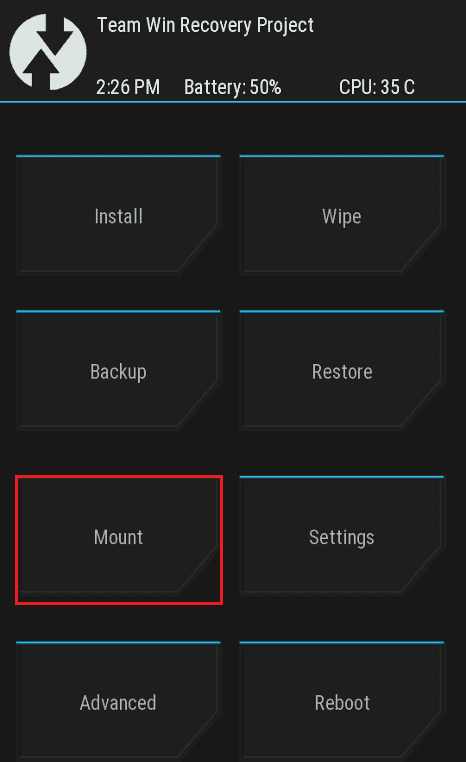
13. Ընտրել Ամսաթիվ և Միկրո SD քարտ ընտրանքներ Select Partition to Mount section and flash the files.
Method 6: Use ADB Command
The final resort to fix unable to mount storage TWRP issue is to use the ADB or Android Debug Bridge commands on your Windows PC.
Option I: Use Fastboot Command
The first option to fix TWRP internal storage 0mb issue is to use the fastboot command and format data on your phone.
Step I: Enable ADB devices on your PC
As a first step, you have to enable the ADB devices on your Windows PC using the official ADB tool.
1. Օգտագործելով ա USB մալուխի միջոցով, connect your phone to your Windows PC.
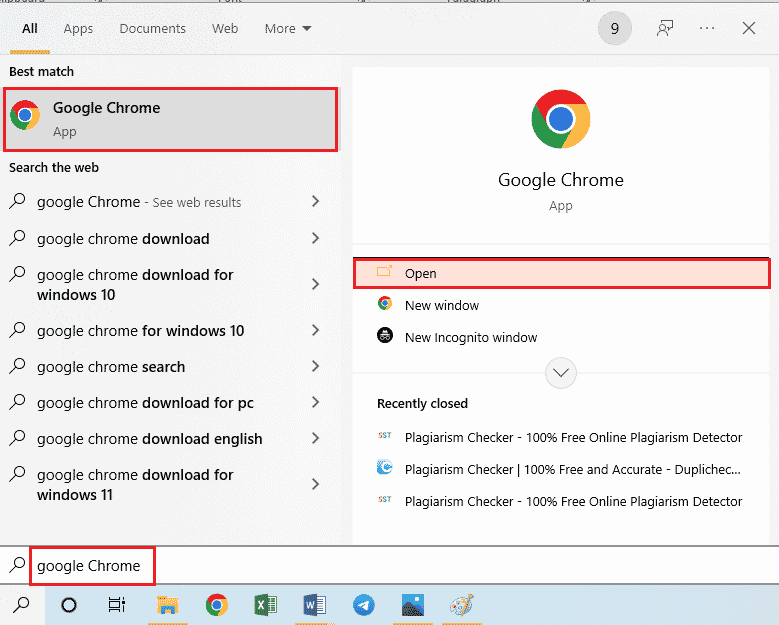
2. Հարվածեք Windows բանալին, տիպ Google Chromeեւ սեղմեք բաց.
3: բացել Android SDK պլատֆորմի գործիքներ կայք և սեղմեք Download SDK Platform- Tools for Windows հղումը Ներբեռնումներ բաժնում:
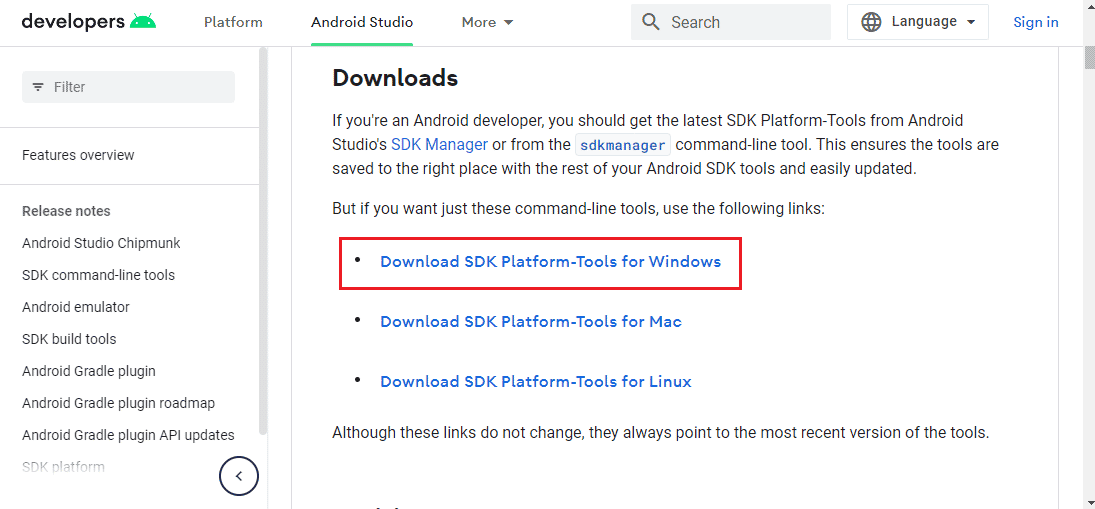
4. Using a data compression utility like WinZip, extract all the files of the ADB tool to the Տեղական Disk (C :) քշել:

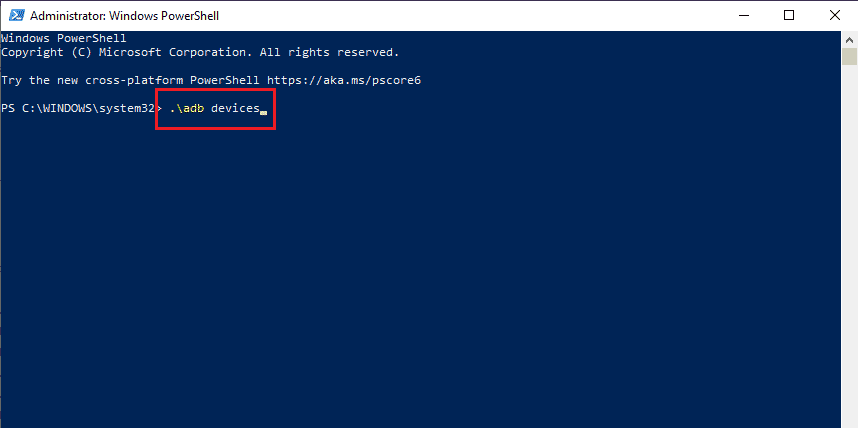
5. Սեղմեք Windows բանալին, տիպ Windows PowerShell- ը, ապա սեղմեք Գործարկեք որպես ադմինիստրատոր.

6. Մուտքագրեք ./adb սարքեր հրամանը և սեղմեք Մուտքի բանալի to check the connected devices.
7. Հպեք վրա Ընդունել տարբերակ ձեր հեռախոսում:
Նաեւ Կարդալ: Fix System UI-ն դադարեցրել է սև էկրանը Android-ում
Step II: Enable USB Debugging
To enable the USB debugging option, you have to enable the Developer mode on your phone as follows.
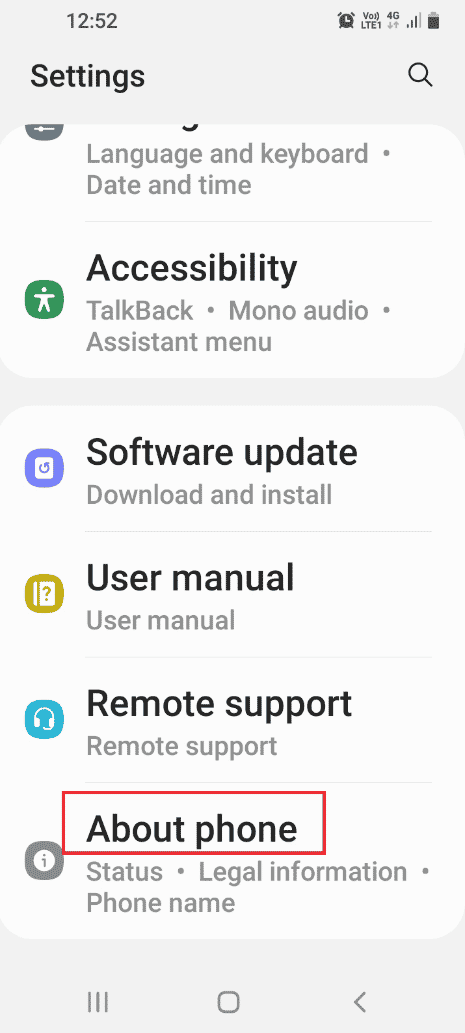
1. Գլխավոր մենյուից բացեք Կարգավորումներ ծրագիրը:

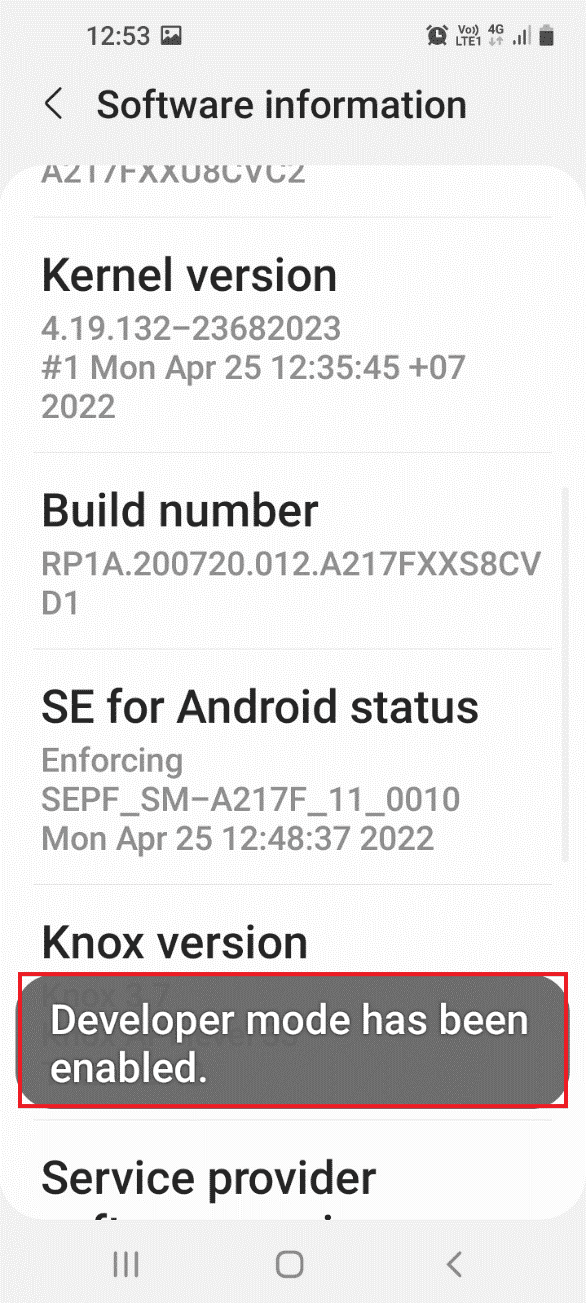
2. Tap on the tab Հեռախոսի մասին.
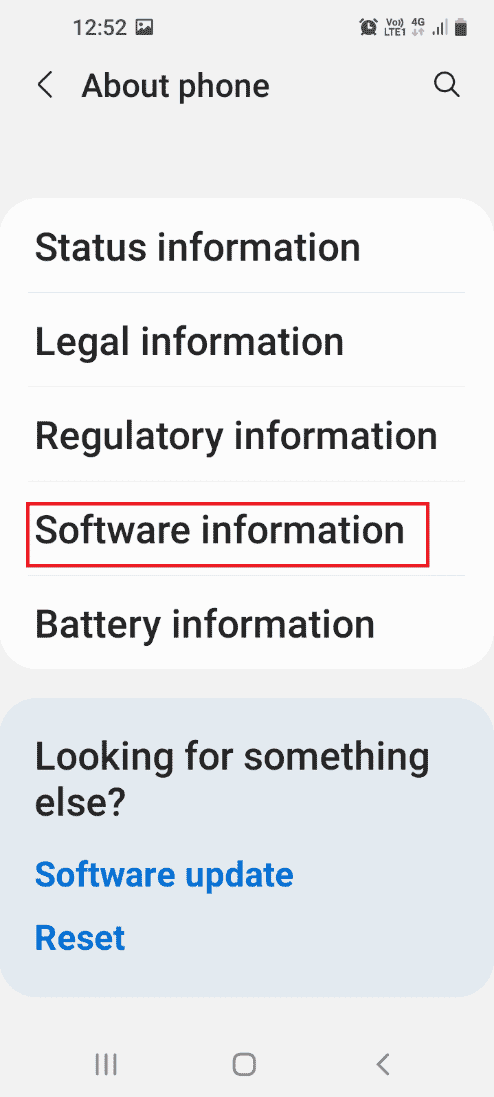
3. Tap on the tab Softwareրագրաշարի տեղեկատվություն.
4. Tap on the tab Շինության համարը 7 անգամ.
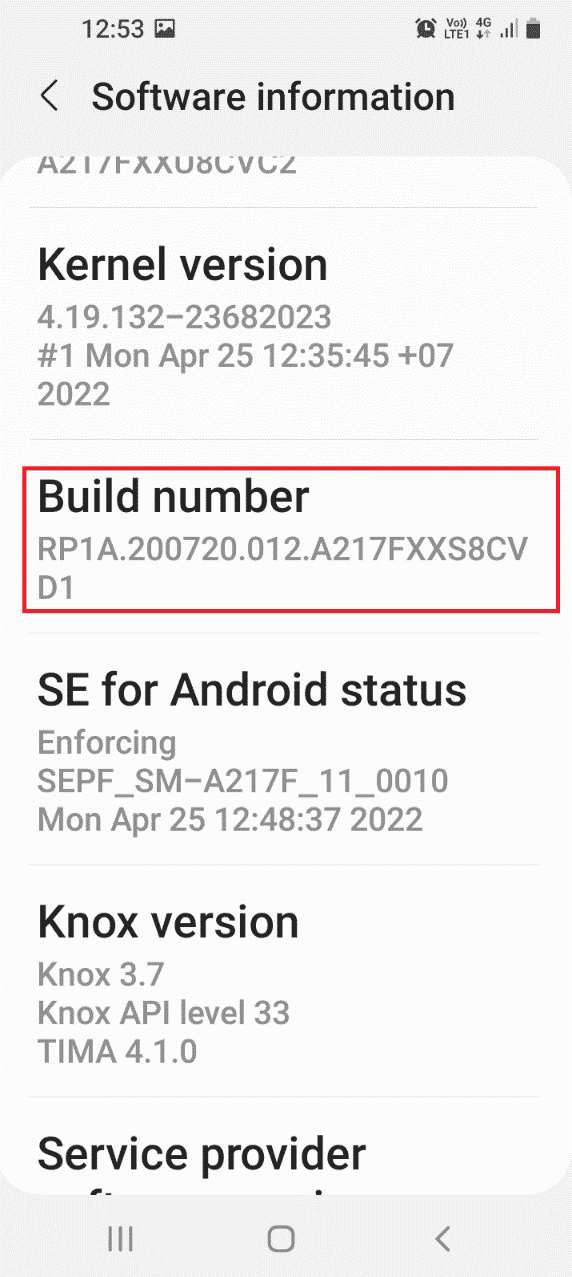
5. The message Developer mode has been enabled would be displayed.
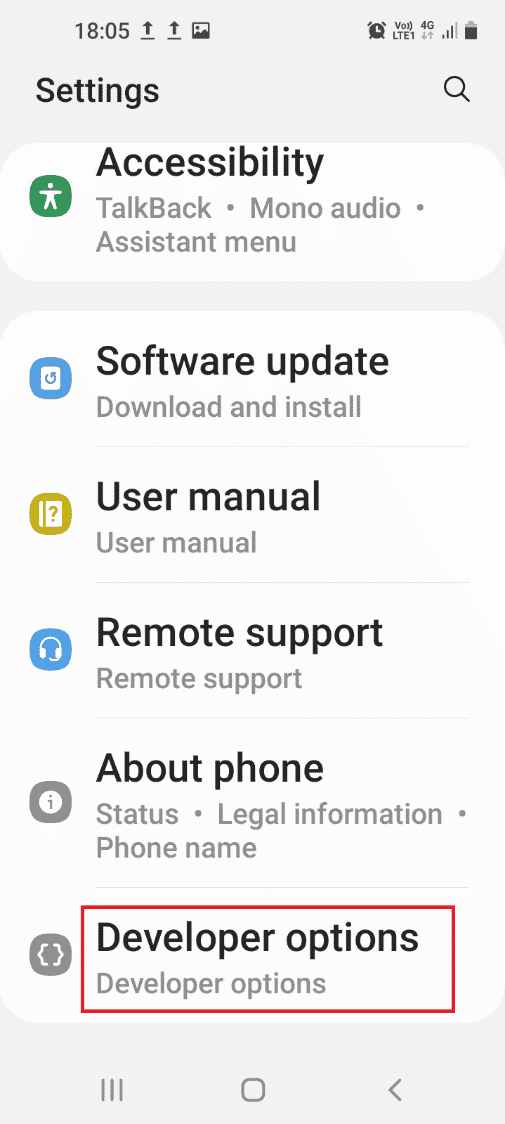
6. Վերադարձ դեպի Կարգավորումներ main page and tap on the tab Մշակողի ընտրանքներ.
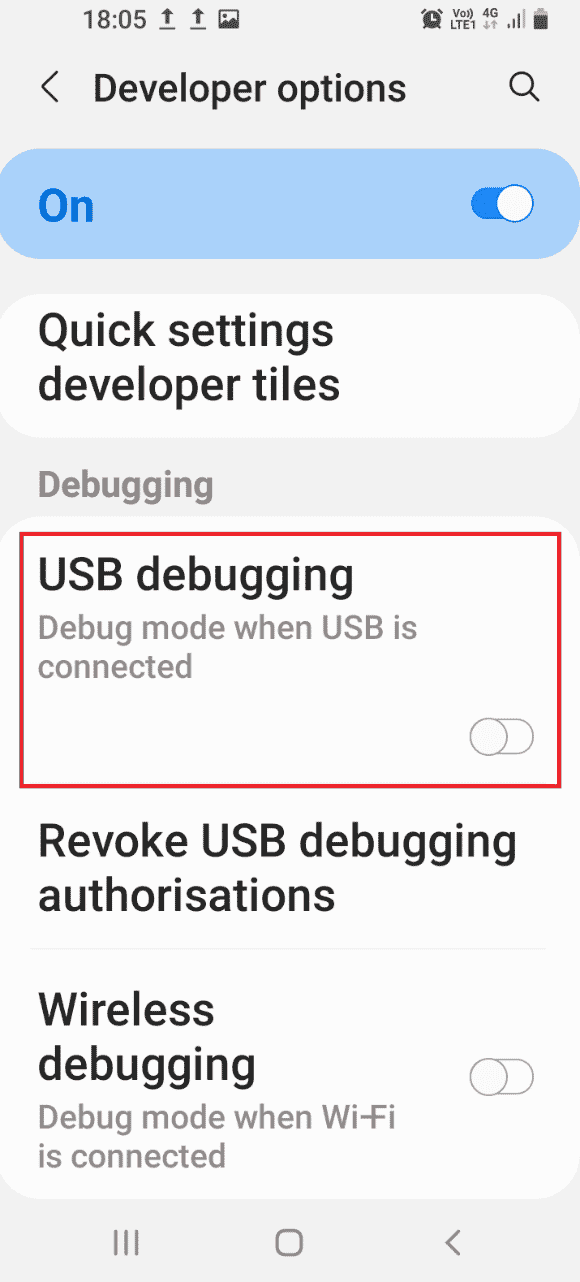
7. Մեջ Կարգաբերում section, toggle on the USB կարգաբերում տարբերակ.
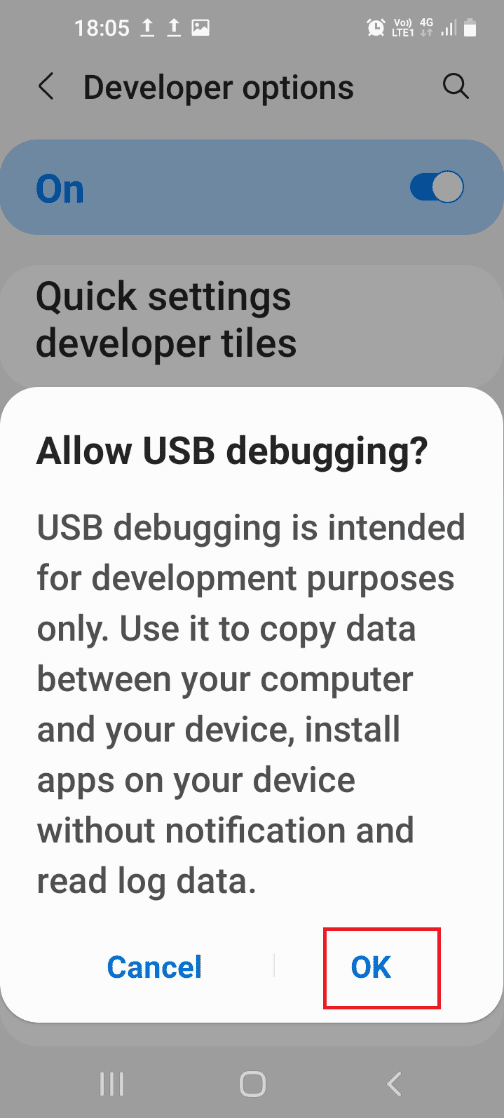
8. Մեջ Թույլատրե՞լ USB կարգաբերումը: confirmation message, tap on the OK տարբերակ.
Նաեւ Կարդալ: What is Odin Mode on Samsung Phone?
Step III: Enable Node Tree Debugging
To enable the Windows PC to make changes to the Android phone, you have to enable the additional feature called Node Tree Debugging as follows.
1. Վերադարձ դեպի Կարգավորումներ main page and tap on the tab Մատչելիությունը.
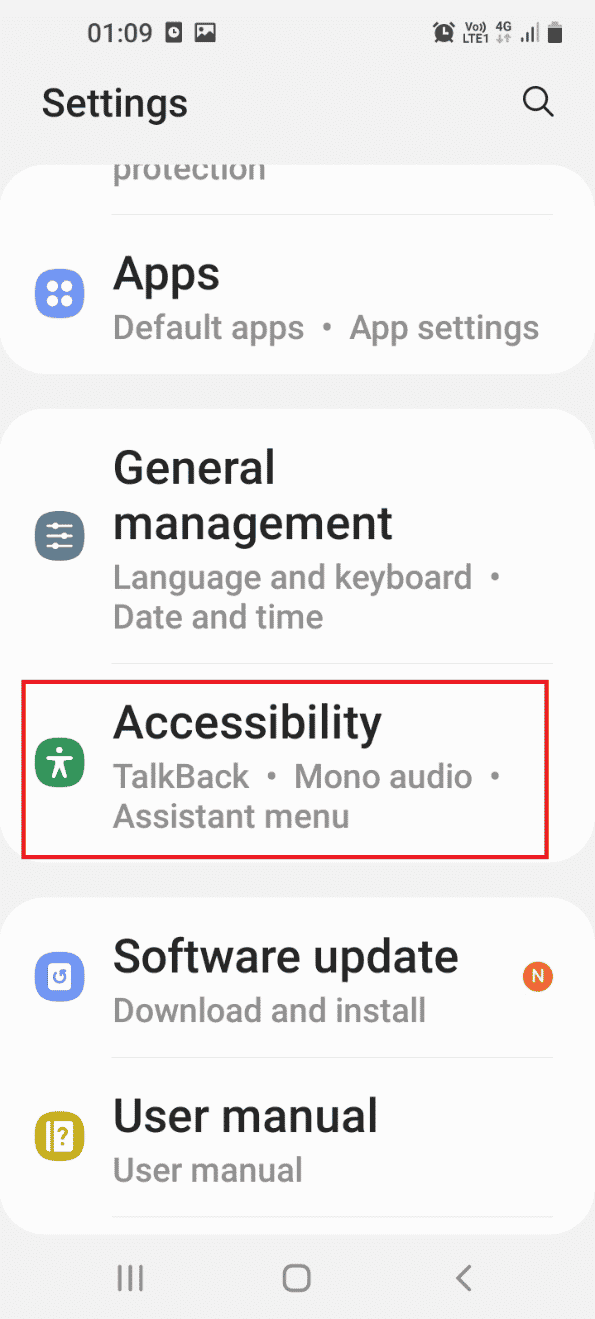
2. Հպեք վրա TalkBack տարբերակ.
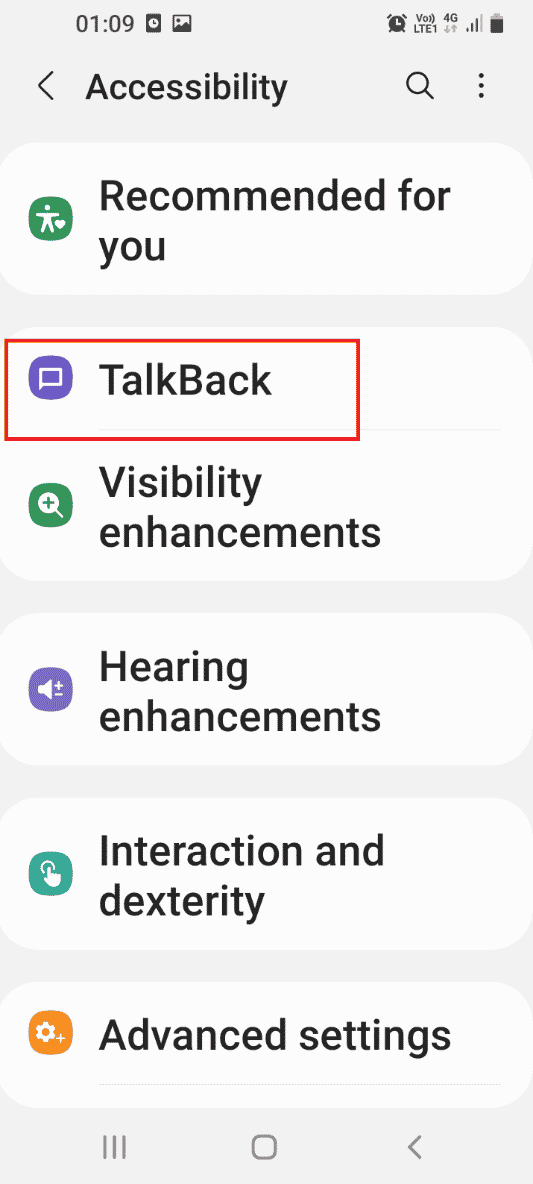
3. Այնուհետև հպեք կոճակին Կարգավորումներ տարբերակ.
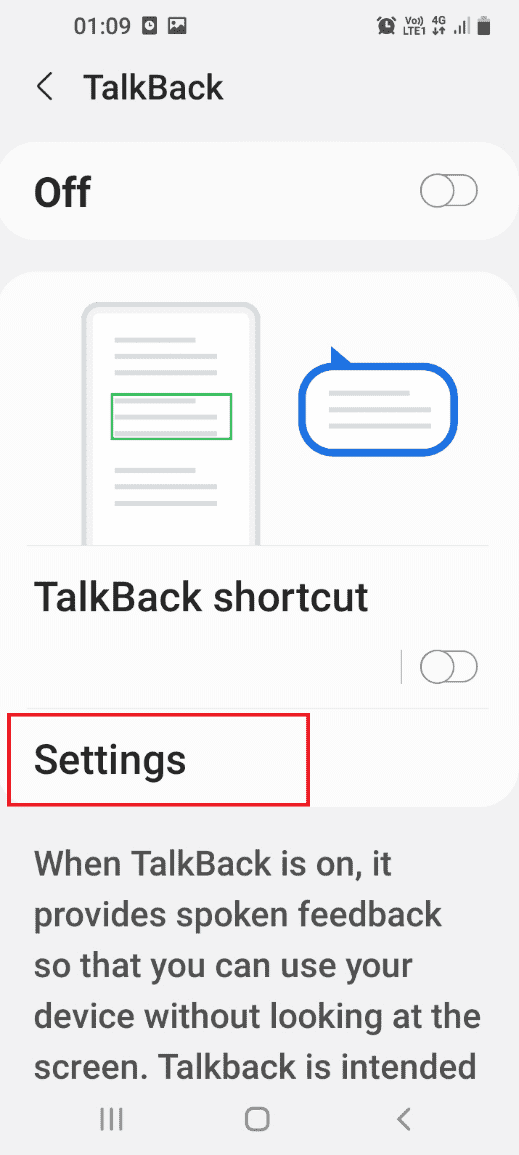
4. Հաջորդը, թակել է Ընդլայնված կարգավորումներ տարբերակ.

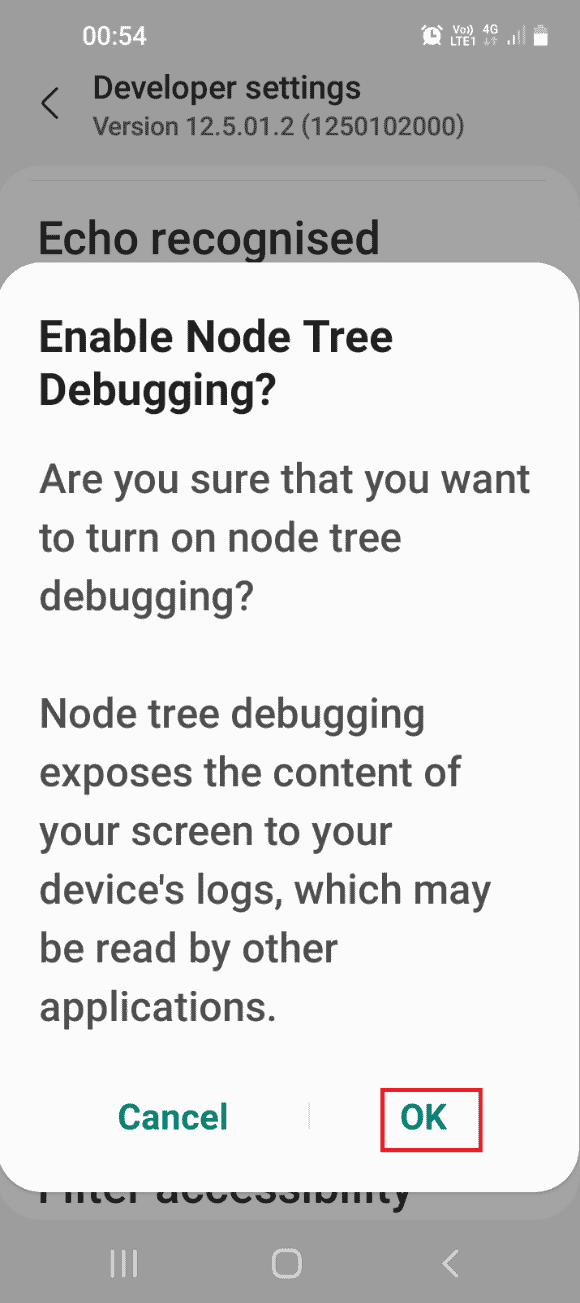
5. Հպեք վրա Մշակողի կարգավորումներ տարբերակ.
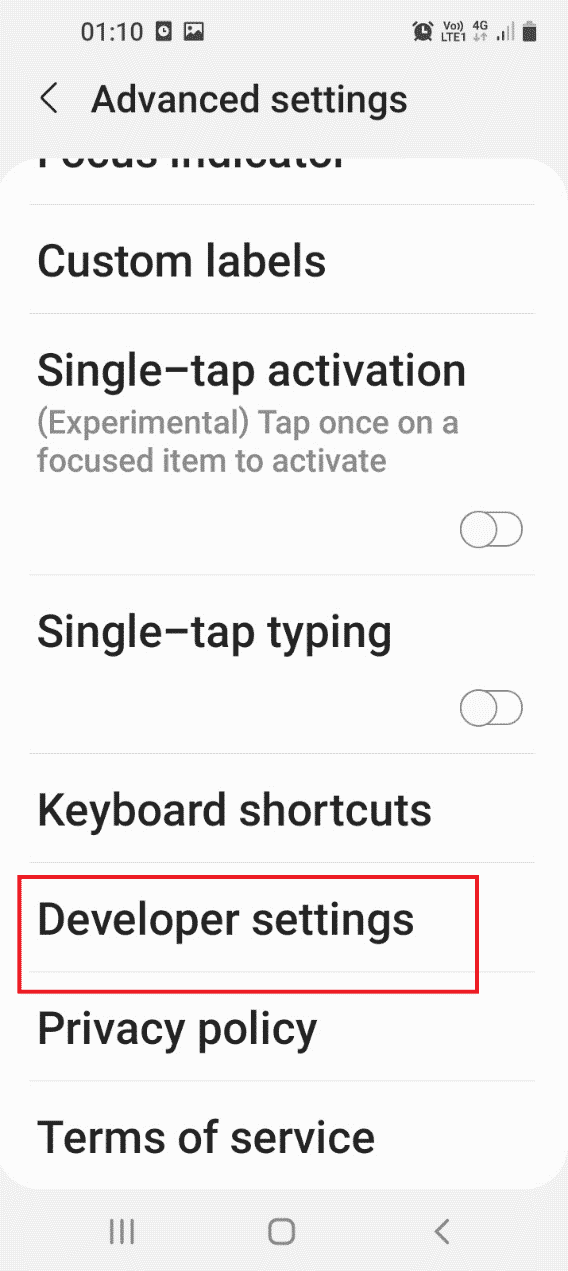
6. Միացնել Enable node tree debugging տարբերակ.
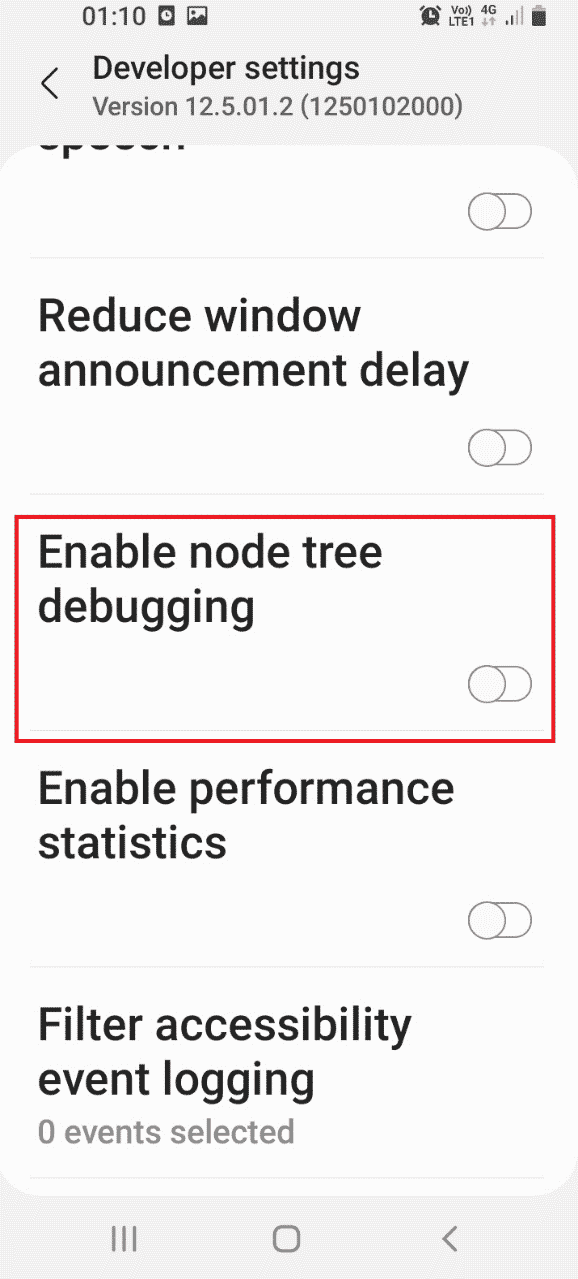
7. Մեջ Enable Node Tree Debugging? confirmation window, tap on the OK տարբերակ.

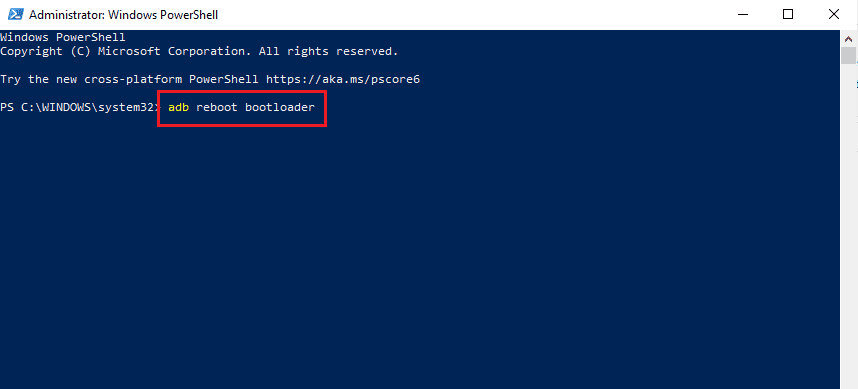
Step IV: Format Data Using Windows PowerShell
The last step to fix the unable to mount storage TWRP issue is to format the data on your phone using the Windows PowerShell app.
1. Հարվածեք Windows բանալին, տիպ Windows PowerShell- ըեւ սեղմեք Գործարկեք որպես ադմինիստրատոր.

2. Մուտքագրեք տրվածը հրաման եւ սեղմեք այն Մուտքի բանալի to reboot your phone into TWRP ռեժիմ:
adb վերաբեռնում bootloader
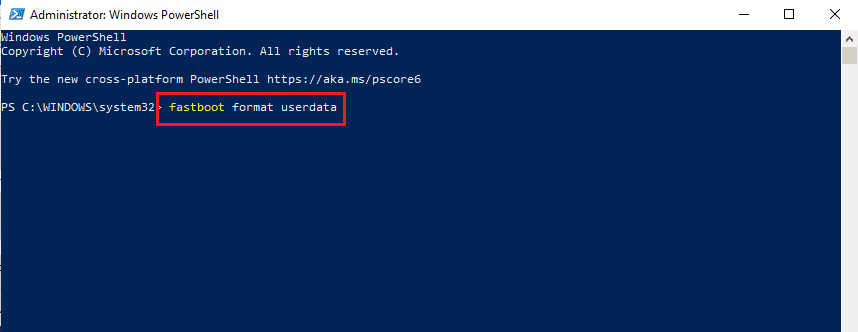
3. Then, type the following հրաման եւ հարվածեց Մուտքի բանալի to format the user data on your phone.
fastboot format userdata
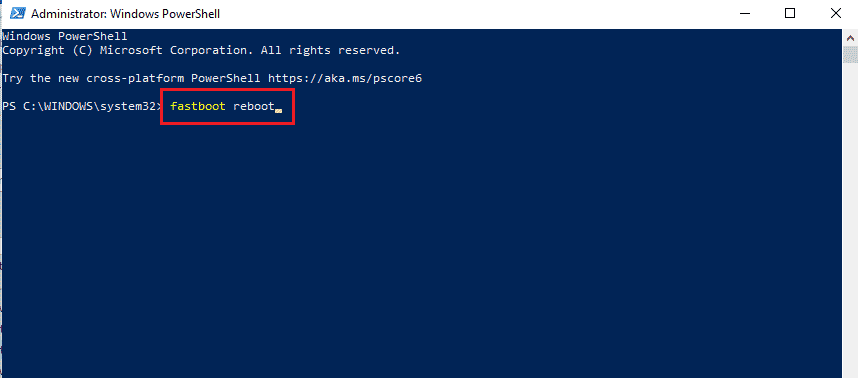
4. Մուտքագրեք fastboot reboot հրամանը և սեղմեք Մուտքի բանալի to reboot your phone in Fastboot mode.
Նաեւ Կարդալ: Ինչպես բացել հավելվածները Android-ում
Option II: Flash Recovery File
The second option to fix the issue is to flash the recovery file to your ADB folder on your Windows PC.
Step I: Rename Recovery File in adb Folder
As a first step, you have to rename the recovery file on the adb folder on your Windows PC to fix compatibility issues.
1. Enable ADB devices using your Windows PC.
2. Միացնել USB կարգաբերում և Node Tree Debugging options on your phone.
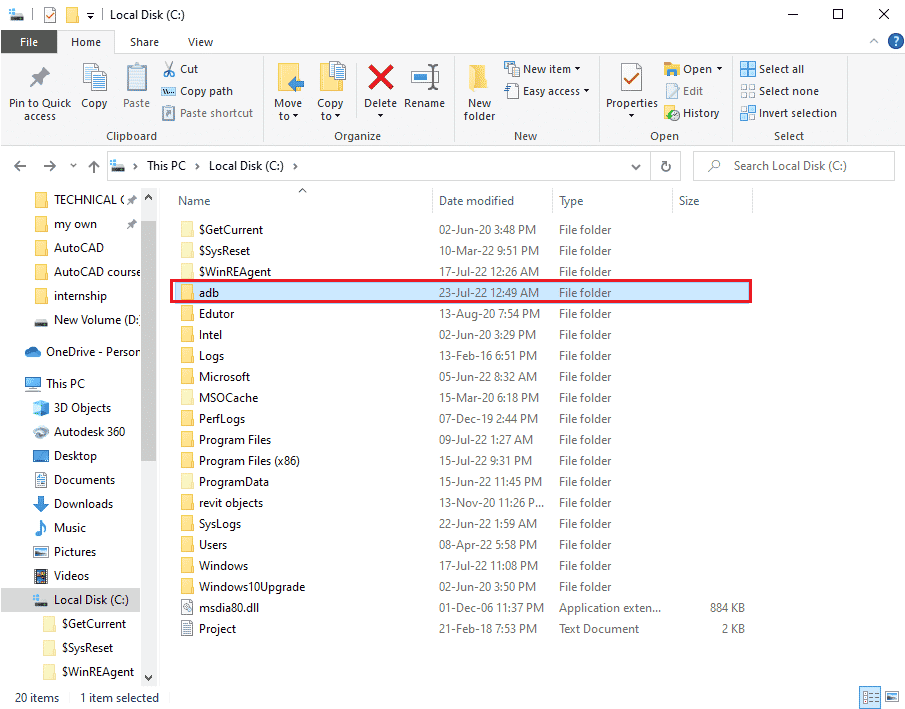
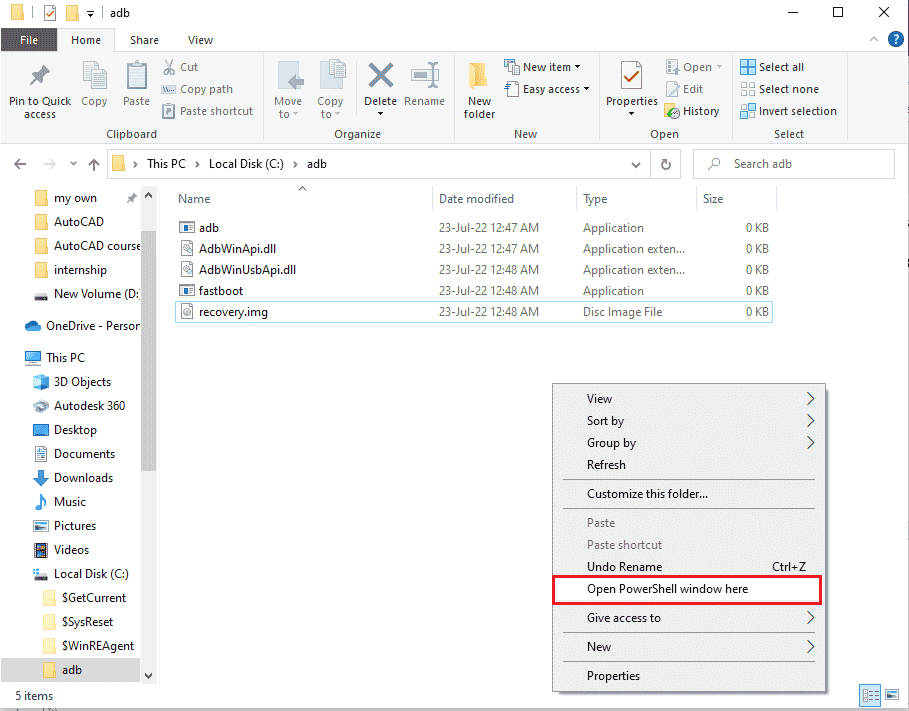
3. Բաց Պատկեր Explorer օգտագործելով Windows + E ստեղները simultaneously and navigate to the ԱԶԲ - folder using the location path as This PC > Local Disk (C:) > adb.
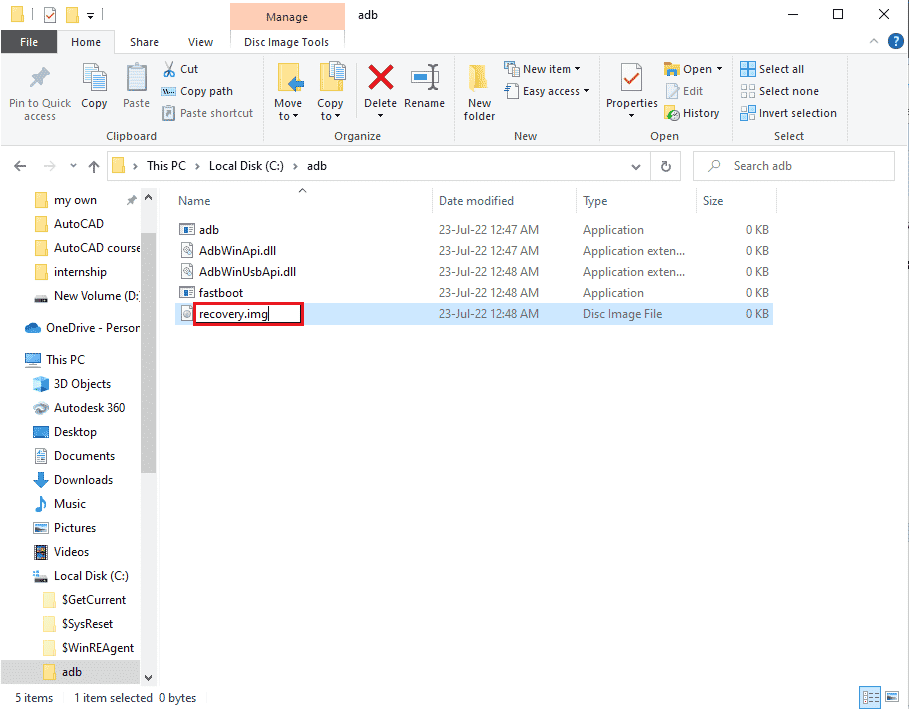
4. Right-click on the TWRP file and click on the Վերանվանել տարբերակ.
5. Տիպ recovery.img եւ սեղմեք այն Մուտքի բանալի.
Նշում: You have to copy the name of the recovery file on your phone and rename the file accordingly.
Step II: Flash Recovery File
The next step is to flash the recovery file on your phone using the Windows PowerShell app.
1. Սեղմեք Shift ստեղնը, right-click on a space, and click on the Open Windows PowerShell window here տարբերակ.
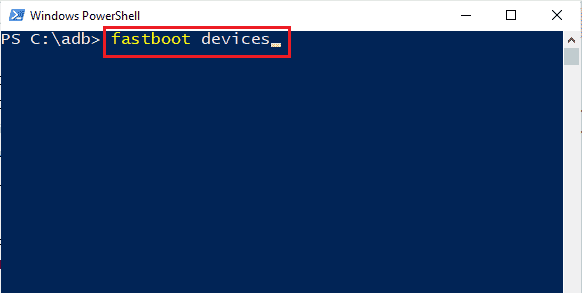
2. Մուտքագրեք հրամանը արագացված սարքեր եւ հարվածեց Մուտքի բանալի to check for adb devices in the fastboot mode.
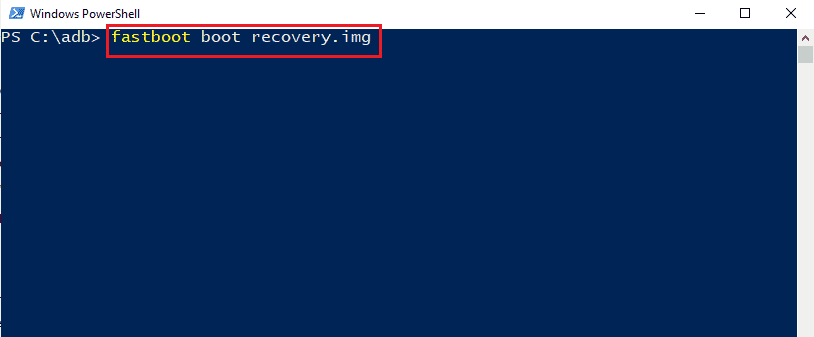
3. Մուտքագրեք հրամանը fastboot recovery.img եւ սեղմեք այն Մտնել key to flash the recovery file on the fastboot mode on your phone.
Խորհուրդ է տրվում:
The methods to fix the issue of being unable to mount storage TWRP are discussed in the article. Please let us know your suggestions and queries on the topic in the comments below for us to heed your doubts.

