Ուղղել Windows 10 ցանցի պրոֆիլի բացակայող խնդիրը

Whether connecting to a wired device, like a keyboard or speaker, or a wireless device, like a mouse, printer, or display, the computer and the device are connected through a network link and operate with the help of a medium like a USB port (Universal Serial Bus), Bluetooth, Wi-Fi, or radio frequency, and through network profile, wireless network adapter. Connecting a new device to a computer can be incredibly painful sometimes as it displays the message of Windows doesn’t have a network profile for this device. If you are also dealing with the same problem, you are at the right place. We bring you a perfect guide that will help you fix Windows 10 network profile missing problem. Before that, let’s quickly understand a little about Network Profile.
How to Fix Windows 10 Network Profile Missing Problem
Network profiles are used to set up how machines connect over networks. To establish a connection with other devices, a network profile is needed that interacts with the other devices and stores essential network settings, security, and other relevant data.
Below listed are some of the reasons behind the missing error problem:
- Outdated or faulty driver
- Change in the network profile type
- The problem could be the device itself or the USB port
But don’t worry, we have a few solutions to fix the Windows 10 Network Profile Missing. First and foremost, ensure that the device to which you are trying to connect is compatible with your system. For example, USB 3.0 devices will not function properly with the older USB 2.0 ports. Therefore, check the device’s website for system requirements.
Now, we have shown the troubleshooting methods to fix Windows doesn’t have a network profile for this device issue.
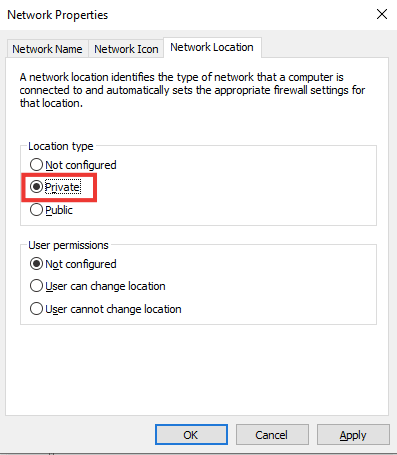
Method 1: Switch to Private Network Profile
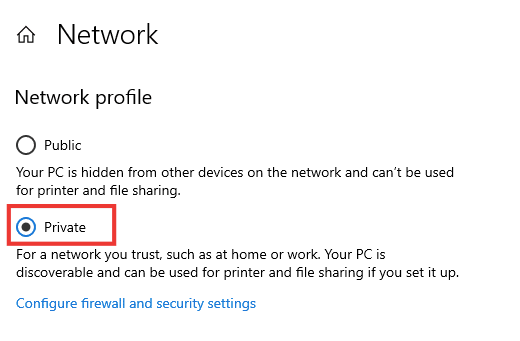
The PC is hidden from other devices on the same network when using the public network profile. Private network profiles, on the other hand, allow visibility to other nearby devices. Here’s how you can make your network profile visible:
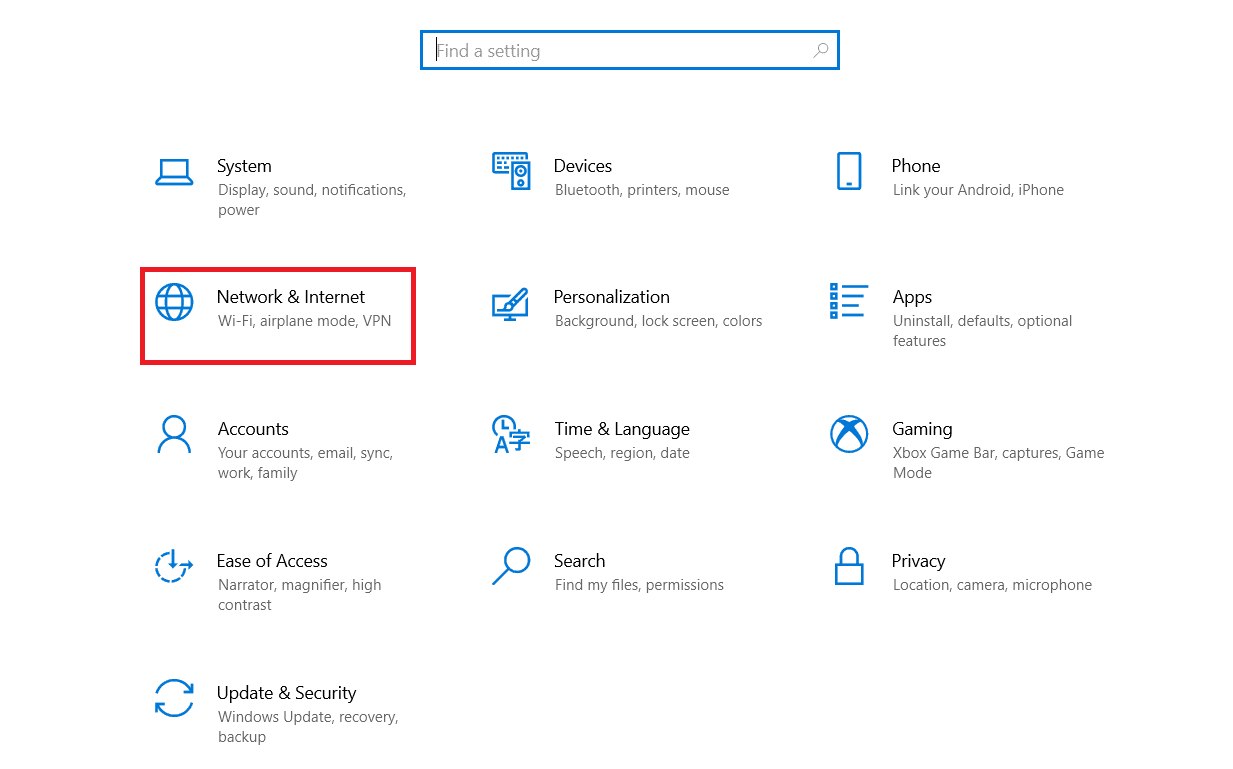
1. Հարվածեք Windows + I ստեղներ միաժամանակ գործարկել Կարգավորումներ.
2. Սեղմիր Networkանց և ինտերնետ կարգավորումը:
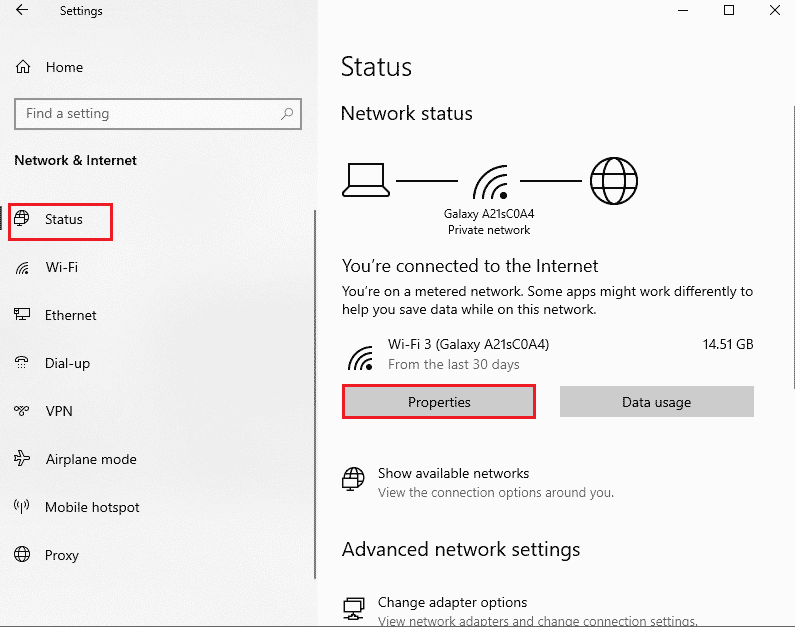
3. Select the connected network and then click on Հատկություններ.
4. Switch from Public դեպի Անձնական Network Profile.
5. Վերջապես, վերագործարկեք համակարգիչը.
Նաեւ Կարդալ: Ուղղեք Windows 10-ում ցանցում չցուցադրվող համակարգիչները
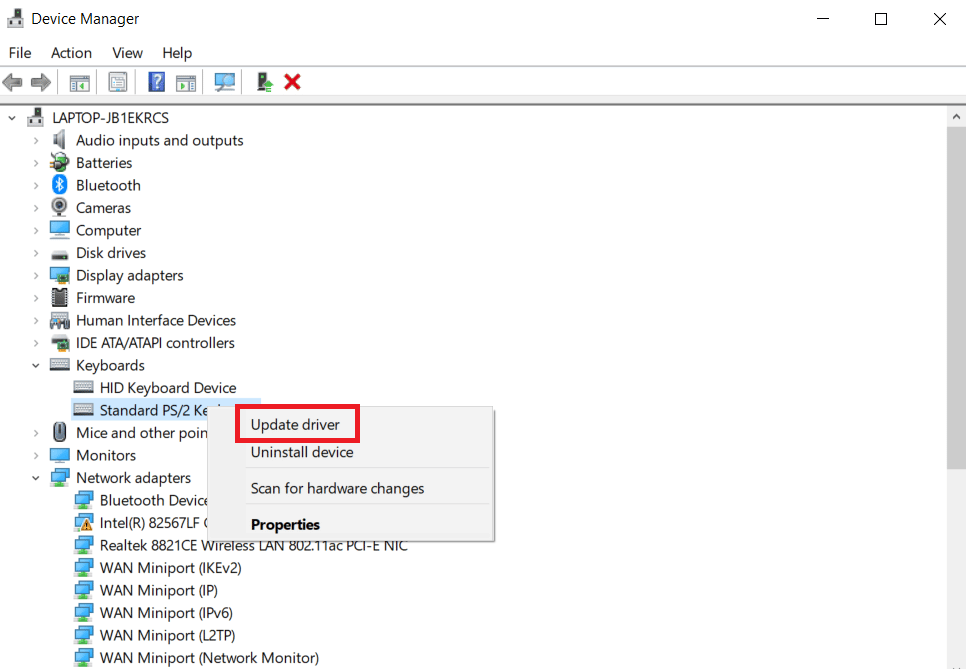
Մեթոդ 2. Սարքի վարորդի թարմացում
If the same error message appears of Windows doesn’t have a network profile for this device, the problem could also lie in the particular device driver. To fix the Windows 10 network profile missing, try updating the driver of the specific device. Read our guide on how to update Device Drivers on Windows 10.
Մեթոդ 3. Գործարկել ցանցային ադապտերների անսարքությունները
Still facing the Windows 10 network profile missing problem, you can try the network adapter troubleshooter. Read our guide on How to Troubleshoot Network Connectivity problems on Windows 10.

Մեթոդ 4. Գործարկել ապարատային և սարքի անսարքությունները
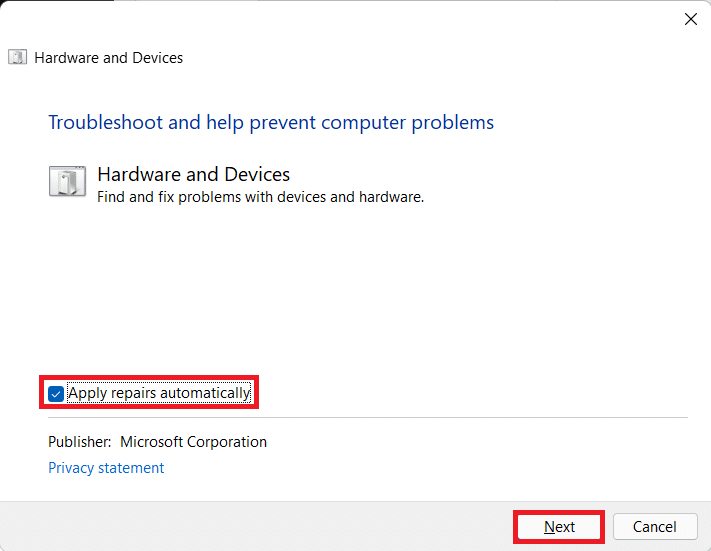
If after running the network troubleshooter, the said issue still persists, then you can run the appropriate troubleshooter for the device you are trying to connect to. For example, if you are having trouble connecting to a keyboard, select the keyboard troubleshooter, which will identify and resolve the issue. Get rid of the error message Windows doesn’t have a network profile for this device by performing this method. Read our guide Run Hardware and Devices troubleshooter to fix issues.
Նաեւ Կարդալ: Ինչպես վերականգնել ցանցի կարգավորումները Windows 10-ում
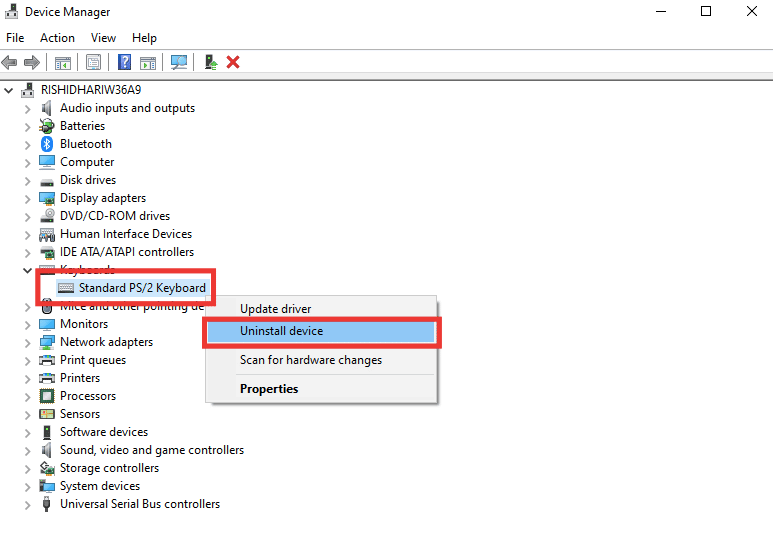
Մեթոդ 5. Սարքի վարորդը նորից տեղադրեք
Some problems go undetected because of corrupted data files or unknown causes. We recommend reinstalling the driver with fresh settings using this method. To uninstall and reinstall the driver, read our guide on how to uninstall and reinstall drivers on Windows 10.
Method 6: Modify Network Profile
If your network profile has not changed yet, or you can’t find the option to do so, here’s an alternative method to switch from a public to a private profile.
Option I: Through Registry Editor
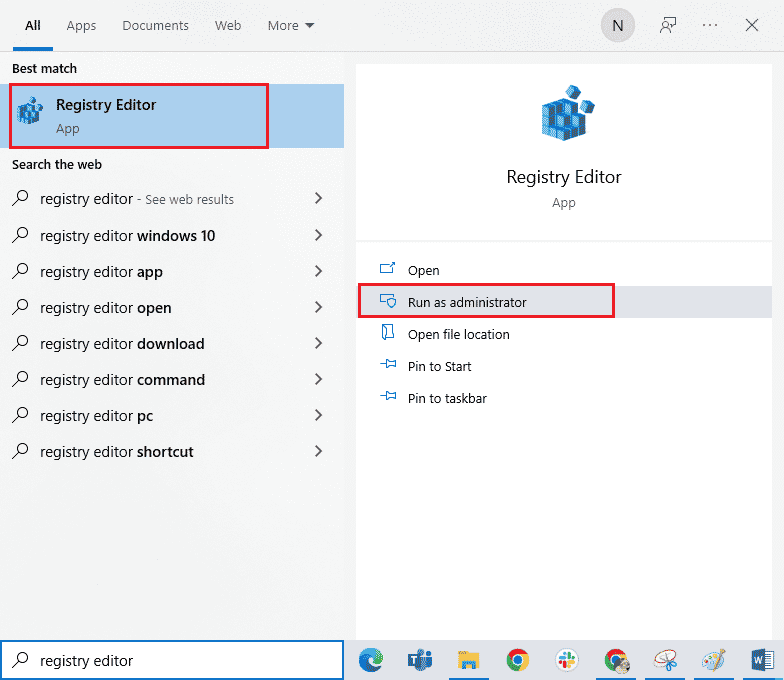
1. Սեղմեք Windows բանալին, տիպ ռեեստրի խմբագիրեւ սեղմեք Run որպես ադմինիստրատոր.
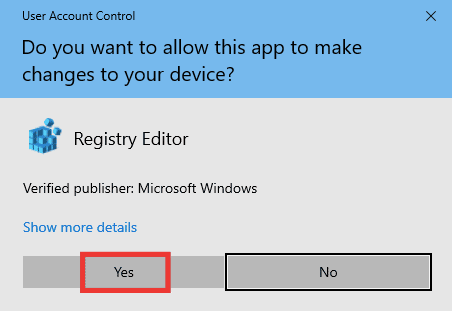
2. Սեղմիր այո է Օգտագործողների հաշիվների կառավարում արագությամբ:
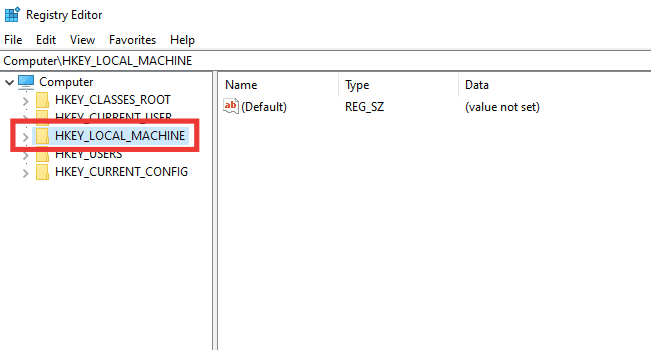
3. Կրկնակի սեղմեք այն HKEY_LOCAL_MACHINE թղթապանակ.
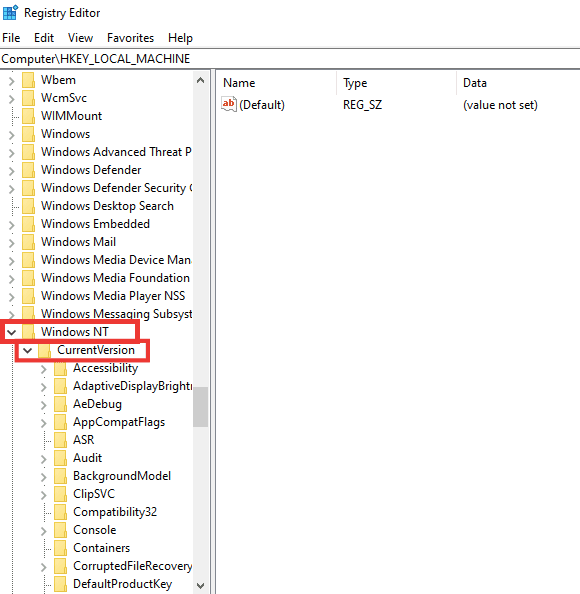
4. Ընդլայնել ԾՐԱԳՐԵՐ folder and then click on the Microsoft բանալի թղթապանակ:

5. Ոլորեք ներքև և գնացեք դեպի Windows NT > CurrentVersion բանալի թղթապանակ:
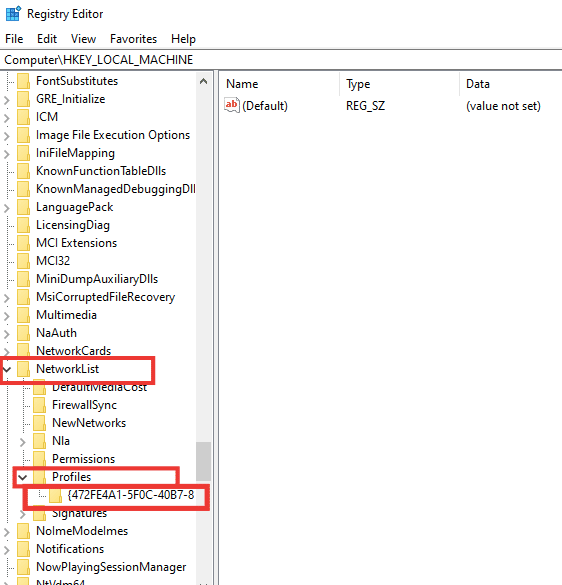
6. Scroll down again and expand the Lանցային ցուցակ key folder. Then expand Պրոֆիլներ folder and click on the profile name.
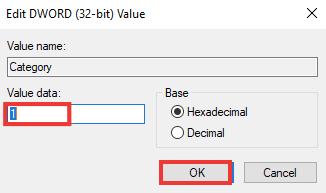
7. Կրկնակի սեղմեք այն կատեգորիա արժեքը:
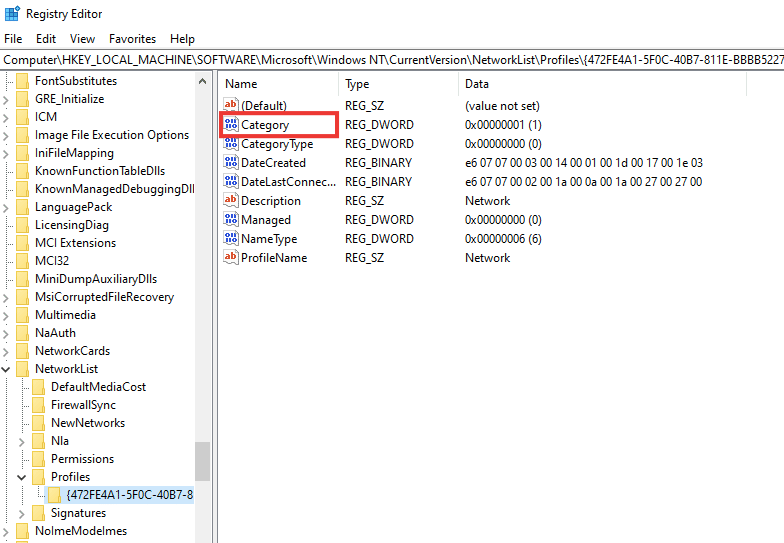
8. Փոխեք Արժեքի տվյալները - ից 0 դեպի 1, Դրանից հետո կտտացրեք OK.
Նաեւ Կարդալ: Ուղղել Windows 10 Netwtw04.sys կապույտ էկրանի սխալը
Option II: Through Windows PowerShell
Similar to the above method, this is also an alternative method to switch from a public to a private profile to fix Windows 10 network profile missing issue.
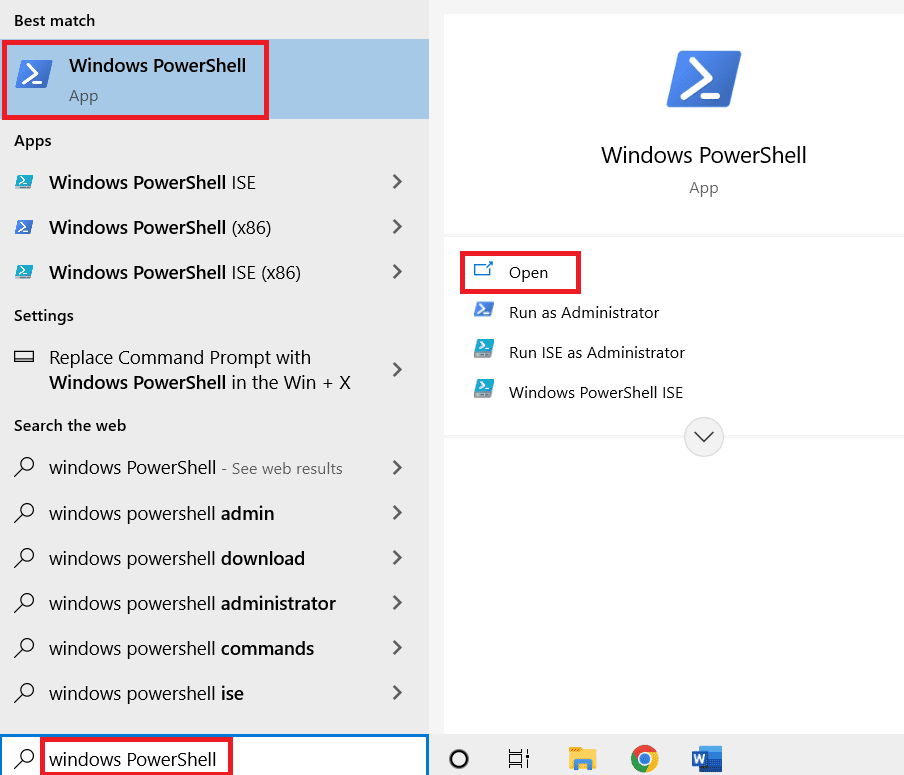
1. Սեղմեք Windows բանալին, տիպ PowerShellեւ սեղմեք բաց.
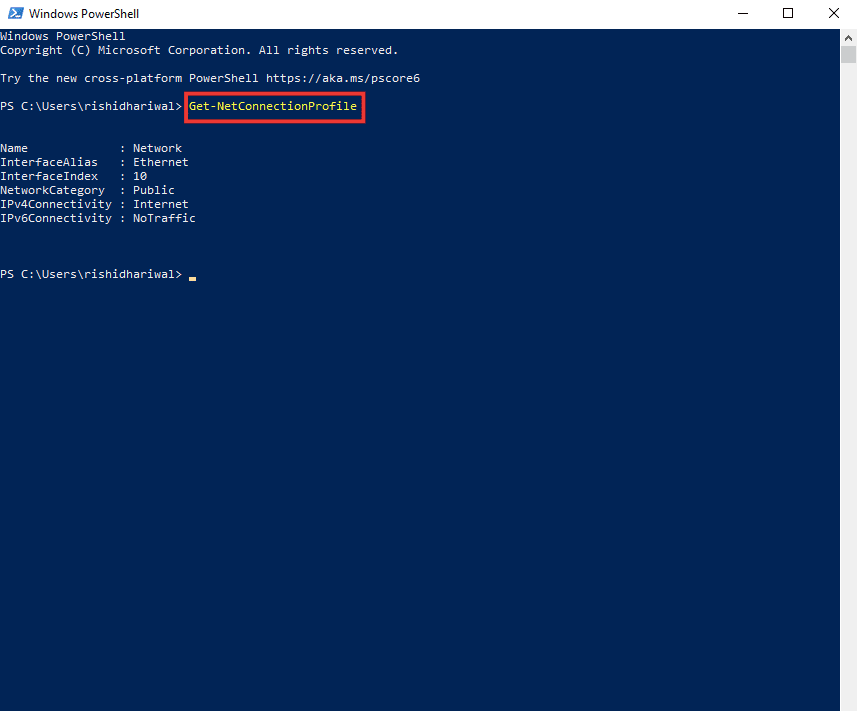
2. Մուտքագրեք Get-NetConnectionProfile հրամանը և սեղմեք Մուտքի բանալի to check your network profile.
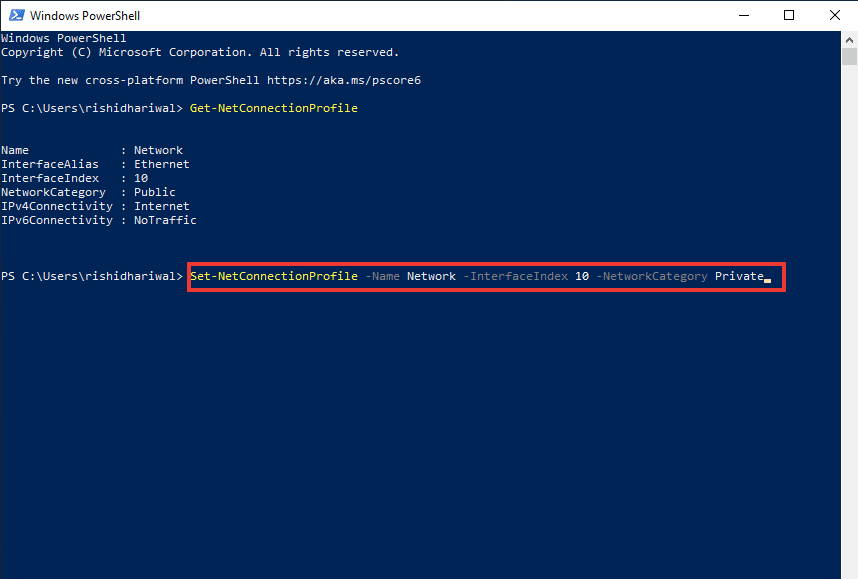
3. To change it to private, type the following command and press the Մուտքի բանալի.
Set-NetConnectionProfile -Name Network -InterfaceIndex 10 -NetworkCategory Private
Նշում: Փոխարինեք InterfaceIndex number in the command according to your system.
4. Finally, check if Windows doesn’t have a network profile for this device issue is resolved.
Option III: Through Local Security Policy
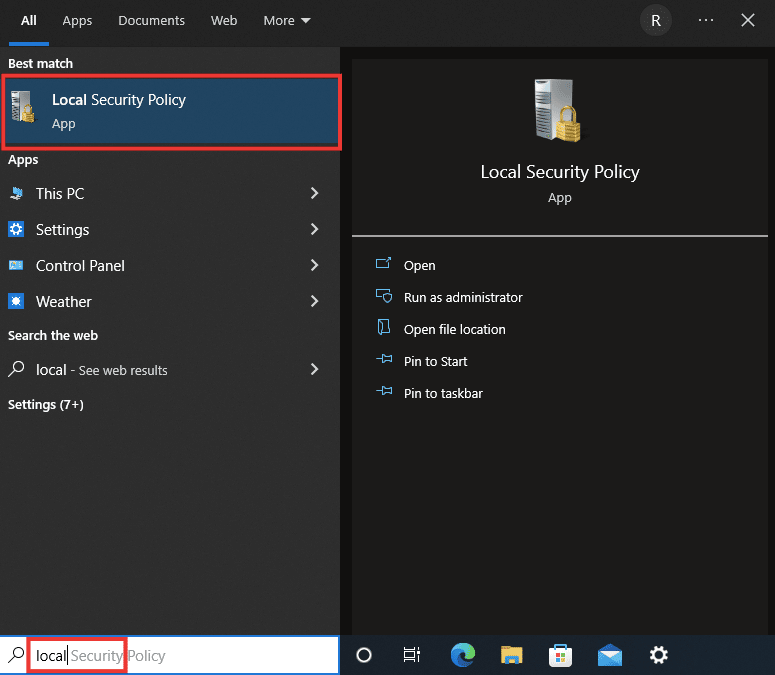
1. Սեղմեք Windows բանալին, տիպ Տեղական.եւ սեղմեք Տեղական անվտանգության քաղաքականություն.
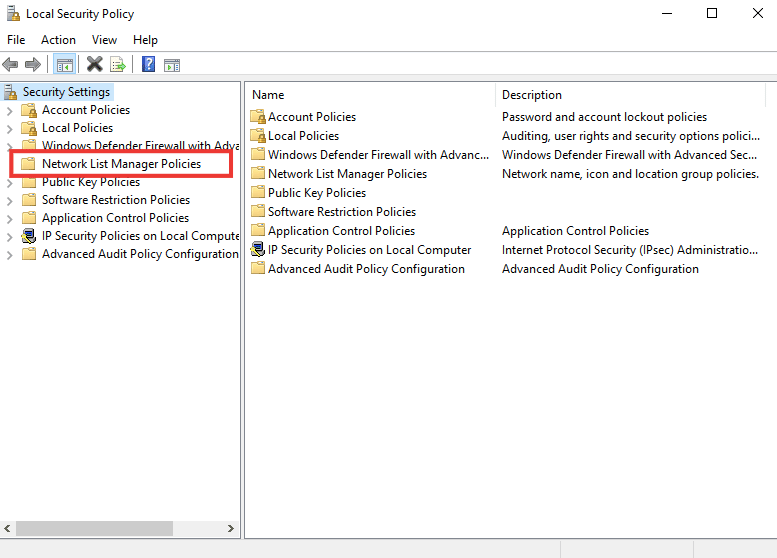
2. Սեղմիր Network List Manager Policies.
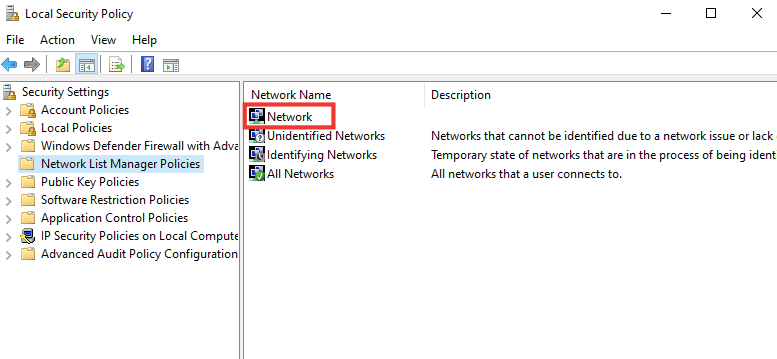
3. Select the connected Ցանց և կրկնակի սեղմեք դրա վրա:
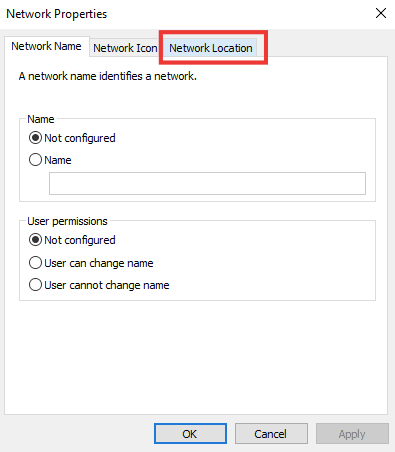
4. Գնալ Ցանցի գտնվելու վայրը բաժնում:
5. Ընտրեք այն Անձնական տարբերակ.
6. Սեղմիր Դիմել եւ ապա սեղմեք OK.
Նաեւ Կարդալ: Ուղղել Windows 10-ում WiFi ցանցեր չգտնված
Method 7: Modify SNMP Service Settings
SNMP (Simple Network Management Protocol) provides network managers with information about the devices that are connected to the network. To resolve the Windows 10 network profile missing issue, we will use this method to check the status of SNMP and enable automatic startup.
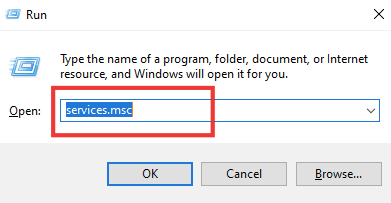
1. Սեղմեք Windows+ R ստեղներ միաժամանակ բացել Վազում երկխոսության վանդակում:
2. Տիպ services.msc եւ սեղմեք Մուտքի բանալի բացել Ծառայություններ պատուհան.
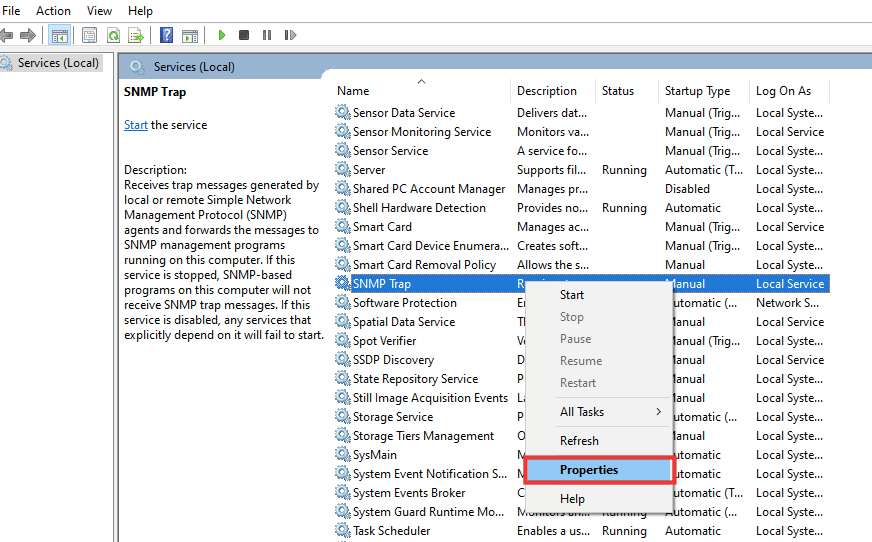
3. Սեղմեք աջով SNMP ծուղակ it and then click on Հատկություններ.
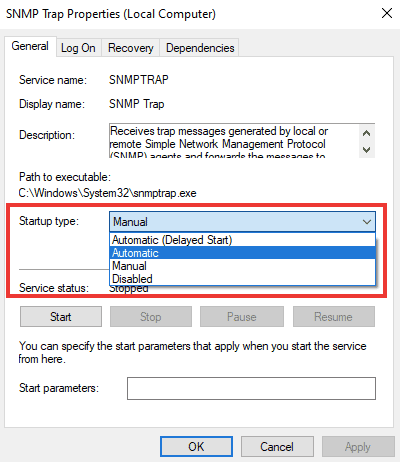
4. Ից Գործարկման տեսակը drop-down menu, switch to Ավտոմատ mode as illustrated below.
5. Սեղմիր Դիմել եւ ապա սեղմեք OK.
Խորհուրդ է տրվում:
Հուսով ենք, որ այս ուղեցույցը օգտակար էր, և դուք կարողացաք շտկել Windows 10 network profile missing problem. Let us know which method worked for you best. If you have any queries or suggestions, then feel free to drop them in the comments section below.