Ուղղել Windows Modules Installer Worker High CPU-ի օգտագործումը
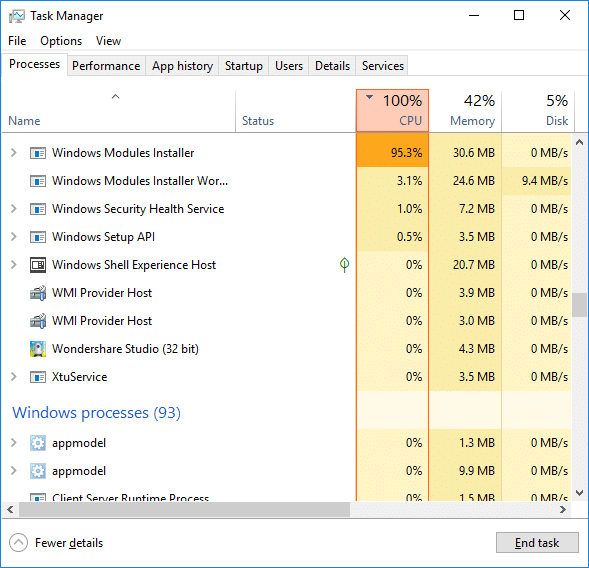
If you are facing the High CPU Usage by Windows Modules Installer Worker, then don’t worry as thousands of other users are also facing the similar problem and therefore, there are many working fixes which we will be discussing today in this article. To verify if you are facing this issue open Task Manager (Ctrl + Shift + Esc) and you will find that the Windows Modules Installer Worker is consuming High CPU or Disk Usage.

Pro Tip: You may leave your PC overnight or for a few hours to see the issue rectify itself once the Windows is finished downloading and installing updates.
What is Windows Modules Installer worker (WMIW)?
Windows Modules Installer worker (WMIW) is a service which takes cares of automatically installing Windows Update. According to its service description, WMIW is a system process that enables automatic installation, modification, and removal of Windows updates and optional components.
This process is responsible for finding new Windows Update automatically and installing them. As you might be aware that Windows 10 automatically install newer builds (i.e. 1803 etc.) via Windows Updates, so this process is responsible for installing these updates in the background.
Although this process is called Windows Modules Installer worker (WMIW) and you will see the same name in the Processes tab in the Task Manager, but if you switch to Details tab, then you will find the name of the file as TiWorker.exe.
Why Is Windows Modules Installer worker Using So Much CPU?
As Windows Modules Installer worker (TiWorker.exe) runs continuously in the background, sometimes it might utilize high CPU or disk usage when installing or uninstalling Windows Updates. But if its constantly using high CPU then the Windows Modules Installer worker may have become unresponsive while checking new updates. As a result, you may be experiencing lags, or your system might hang or freeze completely.
The first thing users do when they experience freezing, or lagging issues on their system is to restart their PC, but I assure you that this strategy won’t work in this case. This is because the issue will not resolve by itself until and unless you fix the underlying cause.
Ուղղել Windows Modules Installer Worker High CPU-ի օգտագործումը
Համոզվեք, որ ստեղծեք վերականգնման կետ, եթե ինչ-որ բան սխալ լինի:
Windows Modules Installer Worker (WMIW) is an important service, and it should not be disabled. WMIW or TiWorker.exe is not a virus or malware, and you cannot just delete this service from your PC. So without wasting any time let’s see How to Fix Windows Modules Installer Worker High CPU Usage ստորև թվարկված անսարքությունների վերացման ուղեցույցի օգնությամբ:
Մեթոդ 1. Գործարկել Windows Update Troubleshooter-ը
1. Բանալու համար սեղմեք Windows Key + I Կարգավորումներ ապա կտտացրեք Թարմացում և անվտանգության պատկերակ:
![]()
2. Ձախ կողմի ընտրացանկից ընտրեք Troubleshoot տակ «Ստացեք եւ վազում«սեղմեք Windows Update- ը:
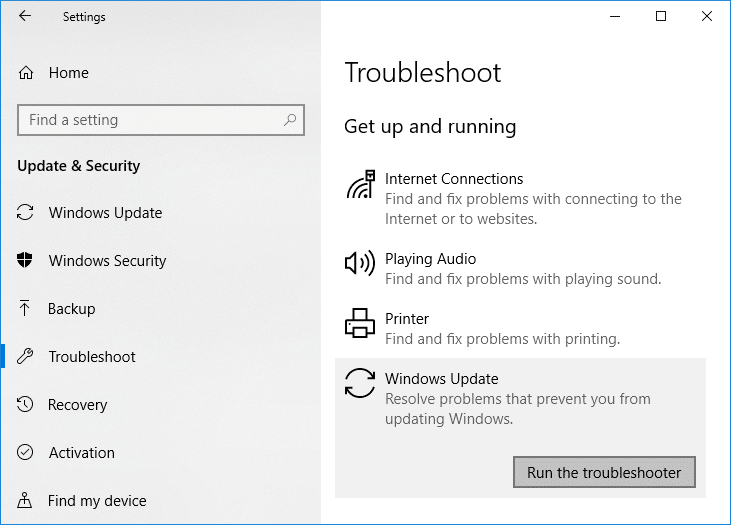
3. Այժմ կտտացրեք «Run the troubleshooterWindows Update-ի տակ:
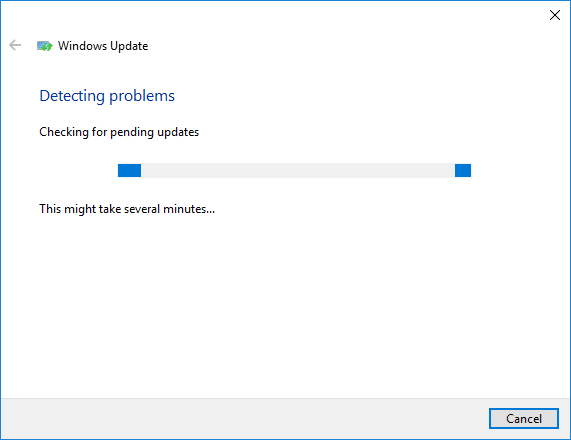
4. Let the troubleshooter run, and it will automatically fix any issues found with Windows Update taking forever.
Method 2: Manually Check for Windows Updates
1. Սեղմեք Windows Key + I, ապա ընտրեք Թարմացում և անվտանգություն
2. Ձախ կողմից ընտրացանկը սեղմվում է Windows Update- ը:
3. Այժմ սեղմեք «Ստուգել թարմացումները» կոճակը՝ հասանելի ցանկացած թարմացումները ստուգելու համար:

4. Եթե որևէ թարմացում սպասվում է, ապա սեղմեք Ներբեռնեք և տեղադրեք թարմացումները:

5. Թարմացումները ներբեռնվելուց հետո տեղադրեք դրանք, և ձեր Windows-ը կդառնա արդիական:
Method 3: Configure Windows Update to Manual
Զգույշ եղեք: This method will switch Windows Update from automatically installing the new updates to the manual. This means you have to manually check for Windows Update (weekly or monthly) to keep your PC secure. But follow this method, and you can again set the Updates to Automatic once the issue is resolved.
1. Սեղմեք Windows Key + R, ապա մուտքագրեք services.msc եւ հարվածել Enter:

2. Scroll down and find Windows- ի մոդուլներ տեղադրող service in the list.
3. Սեղմեք աջով Windows Modules Installer ծառայություն եւ ընտրել Հատկություններ:
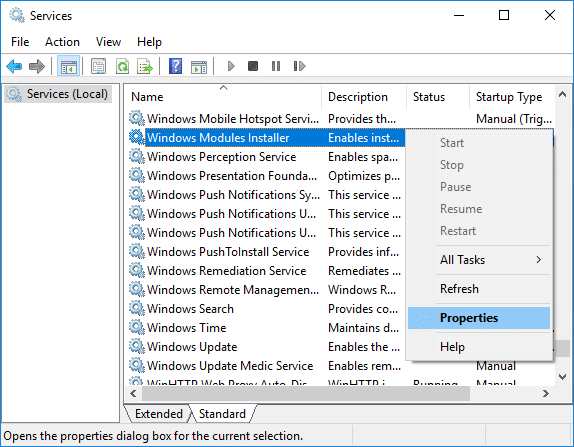
4: Այժմ կտտացրեք Դադարեցնել then from the Գործարկման տեսակը drop-down select Ձեռնարկը:
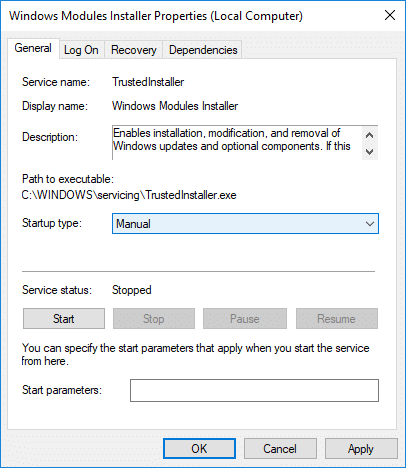
5. Սեղմեք Դիմել, որին հաջորդում է OK.
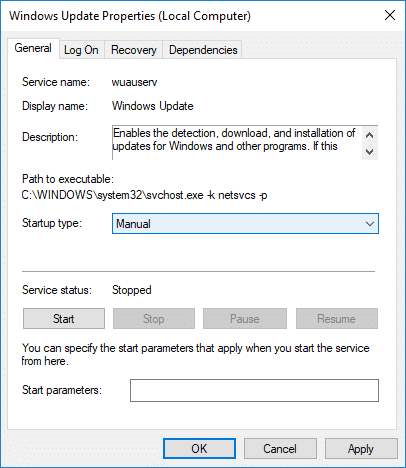
6. Similarly, follow the same step for the Windows Update ծառայություն:
7. Վերագործարկեք ձեր համակարգիչը՝ փոփոխությունները պահպանելու համար:
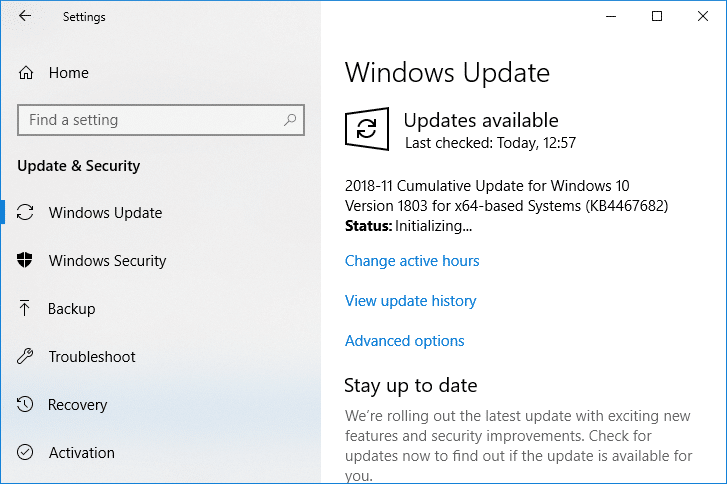
8. Կրկին ստուգել Windows Updates Manually և տեղադրեք սպասվող թարմացումները:
9. Once is done, again go back to services.msc window and open the Windows Modules Installer & Windows Update Properties պատուհան.
10. Սահմանել Գործարկման տեսակը դեպի Ավտոմատ եւ սեղմեք սկիզբ. Then click Apply followed by OK.
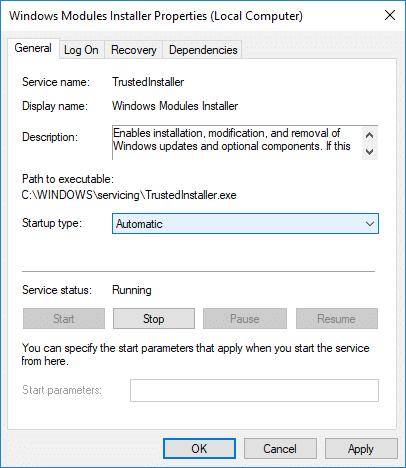
11. Վերագործարկեք ձեր համակարգիչը՝ փոփոխությունները պահպանելու համար:
Մեթոդ 4. Գործարկել համակարգի սպասարկման անսարքությունները
1. Սեղմեք Windows Key + R, ապա մուտքագրեք Control և սեղմեք Enter՝ բացելու համար Վերահսկիչ խորհուրդը:
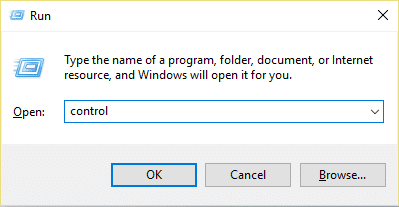
2. Որոնել Troubleshoot և սեղմել Խնդիրների լուծում:

3. Հաջորդը, կտտացրեք Դիտել բոլորը ձախ թաղամասում:
4. Սեղմիր “System Maintenance” գործելու համար System Maintenance Troubleshooter.

5. Troubleshooter-ը կարող է դա անել Fix Windows Modules Installer Worker High CPU Usage, but if it didn’t, then you need to run System Performance Troubleshooter.
6. Բացեք հրամանի տողը: Օգտագործողը կարող է կատարել այս քայլը՝ որոնելով «cmd» եւ ապա սեղմեք Enter:

7. Մուտքագրեք հետևյալ հրամանը cmd-ում և սեղմեք Enter:
msdt.exe / id PerformanceDiagnostic- ը
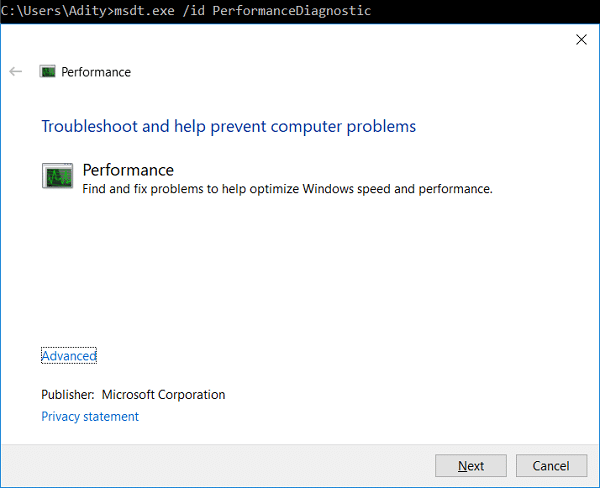
8. Follow the on-screen instruction to run the troubleshooter and fix any issues find the System.
9. Finally, exit the cmd and reboot your PC.
Method 5: Disable Automatic Maintenance
Sometimes Automatic Maintenance can conflict with the Windows Modules Installer Worker service, so try to disable Automatic Maintenance using this guide and see if this fixes your issue.
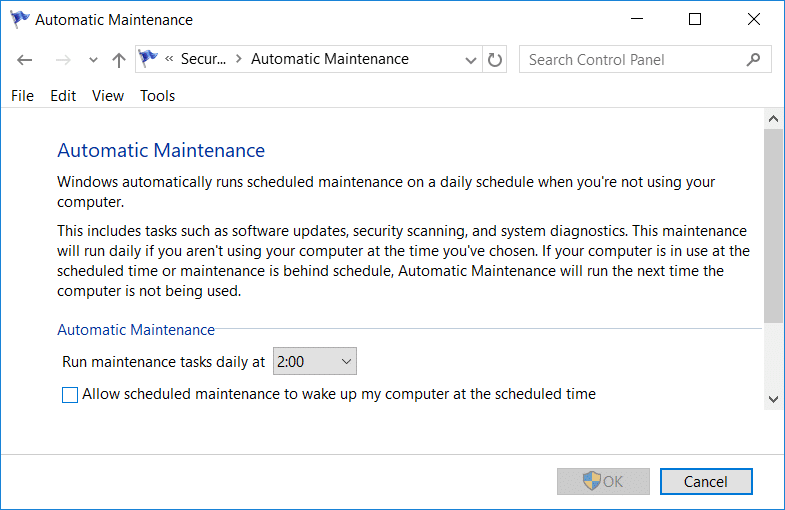
Although disabling Automatic Maintenance is not a good idea, but there might be some case where you need to actually disable it, for example, if your PC freezes during automatic maintenance or Windows Modules Installer Worker High CPU Usage issue then you should disable maintenance to troubleshoot the issue.
Method 6: Run System File Checker and DISM
1. Բացեք հրամանի տողը: Օգտագործողը կարող է կատարել այս քայլը՝ որոնելով «cmd» եւ ապա սեղմեք Enter:
2. Այժմ մուտքագրեք հետևյալը cmd-ում և սեղմեք enter.
Sfc /scannow sfc /scannow /offbootdir=c: /offwindir=c:windows (Եթե վերը նշվածը ձախողվի, ապա փորձեք սա)

3. Սպասեք, մինչև վերը նշված գործընթացը ավարտվի, և երբ ավարտվի, վերագործարկեք ձեր համակարգիչը:
4. Կրկին բացեք cmd և մուտքագրեք հետևյալ հրամանը և յուրաքանչյուրից հետո սեղմեք enter.
Dism /Առցանց /Cleanup-Image /CheckHealth Dism /Առցանց /Cleanup-Image /ScanHealth Dis /Առցանց /Cleanup-Image /RestoreHealth

5. Թողեք DISM հրամանը գործարկվի և սպասեք, որ այն ավարտվի:
6. Եթե վերը նշված հրամանը չի աշխատում, ապա փորձեք ստորև.
Dism /Image:C:offline /Cleanup-Image /RestoreHealth /Source:c:testmountwindows Dism /Առցանց /Cleanup-Image /RestoreHealth /Աղբյուր:c:testmountwindows /LimitAccess
Նշում: Փոխարինեք C:RepairSourceWindows-ը ձեր վերանորոգման աղբյուրով (Windows-ի տեղադրում կամ վերականգնման սկավառակ):
7. Վերագործարկեք ձեր համակարգիչը, որպեսզի պահպանեք փոփոխությունները և տեսնեք, թե արդյոք կարող եք դա անել Fix Windows Modules Installer Worker High CPU Usage.
Մեթոդ 7. Կատարել մաքուր կոշիկներ
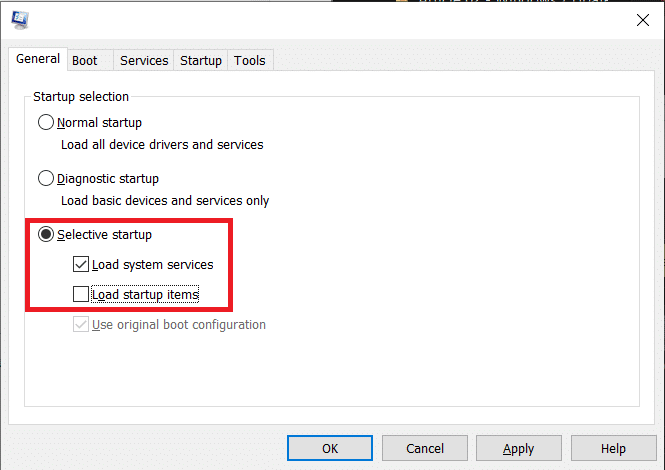
Sometimes 3rd party software can conflict with Windows and can cause the issue. To Fix Windows Modules Installer Worker High CPU Usage issue, you need to perform a clean boot on your PC and diagnose the issue step by step.
Method 8: Set your WiFi as Metered Connection
Նշում: This will stop Windows Automatic Update, and you will need to manually check for Updates.
1. Բանալու համար սեղմեք Windows Key + I Կարգավորումներ ապա կտտացրեք Ցանց և ինտերնետ.

2. Ձախ կողմի ընտրացանկից ընտրեք Wi-fi
3. Under Wi-Fi, սեղմել on your currently connected network (WiFi).
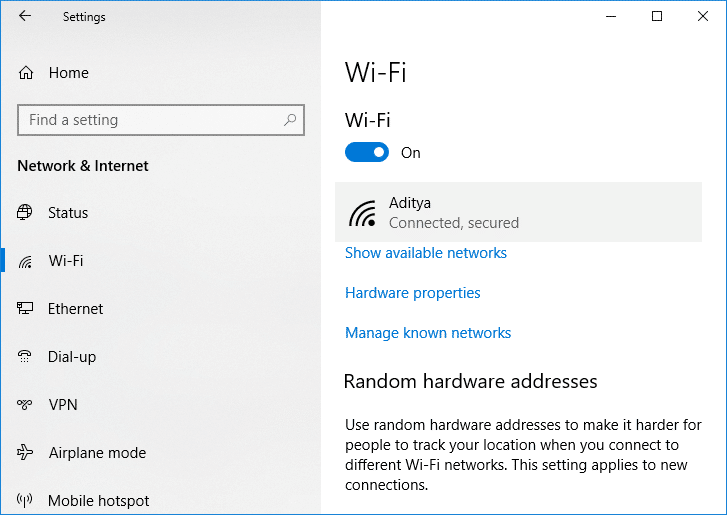
4. Scroll down to Metered connection and միացնել անջատիչը տակ «Սահմանել որպես չափիչ կապ".
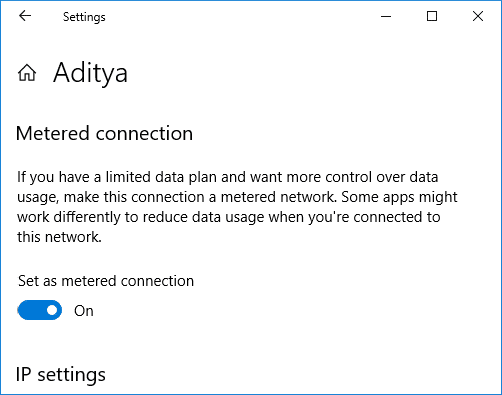
5. Close Settings and reboot your PC to save changes.
Խորհուրդ է տրվում:
Դա այն է, դուք հաջողությամբ Ուղղել Windows Modules Installer Worker High CPU-ի օգտագործումը բայց եթե դեռևս ունեք հարցեր այս ձեռնարկի վերաբերյալ, ապա ազատ զգալ հարցրեք նրանց մեկնաբանությունների բաժնում:
