Remove Administrative Tools in Windows 10

Remove Administrative Tools in Windows 10: Administrative Tool is a folder in Control Panel which contains tools for system administrators and advanced users. So it’s pretty safe to assume that the guest or novice Windows users should not have access to Administrative Tools and in this post, we will exactly see how to hide, remove or disable Administrative Tools in Windows 10. These tools are critical and messing with them can damage your system and that’s why restricting access to them is a good idea.
There are few ways via which you can easily disable or remove Administrative Tools for guest users but we are going to discuss each of them in detail. So without wasting any time let’s see how to Remove Administrative Tools in Windows 10 with the help of the below-listed guide.
Remove Administrative Tools in Windows 10
Համոզվեք, որ ստեղծեք վերականգնման կետ, միայն այն դեպքում, եթե ինչ-որ բան սխալ լինի:
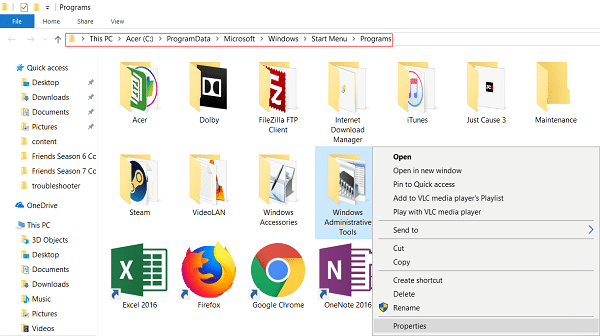
1. Սեղմեք Windows Key + R, ապա մուտքագրեք հետևյալը և սեղմեք Enter:
C: ProgramDataMicrosoftWindowsStart Մենյու Ծրագրեր
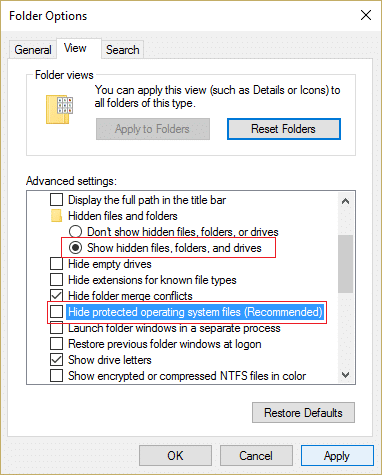
Նշում: Make sure show hidden files and folders are enable in File Explorer.
2. Տակ ծրագրեր folder search for Windows Administrative Tools, ապա աջ սեղմեք դրա վրա և ընտրեք Հատկություններ:
3. Անցնել Անվտանգության ներդիրը եւ սեղմեք Խմբագրել կոճակը:

4. Ընտրեք Ամեն մեկը from Group or user name and checkmark Deny next to Full Control.
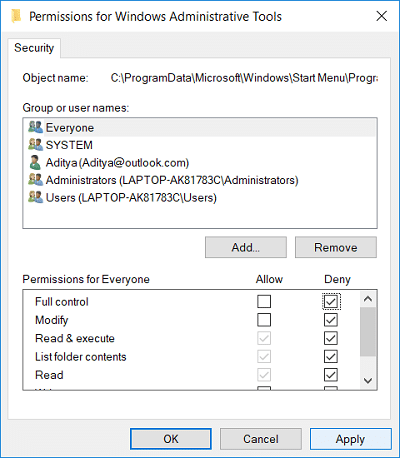
5.Do this for every account you want to restrict access to.
6.If this doesn’t work then you can simply select Everyone and select Remove.
7. Վերագործարկեք ձեր համակարգիչը՝ փոփոխությունները պահպանելու համար:
Method 2: Remove Administrative Tools Using Group Policy Editor
Նշում: This method won’t work for Windows 10 Home Edition users.
1. Սեղմեք Windows Key + R, ապա մուտքագրեք gpedit.msc եւ հարվածել Enter:

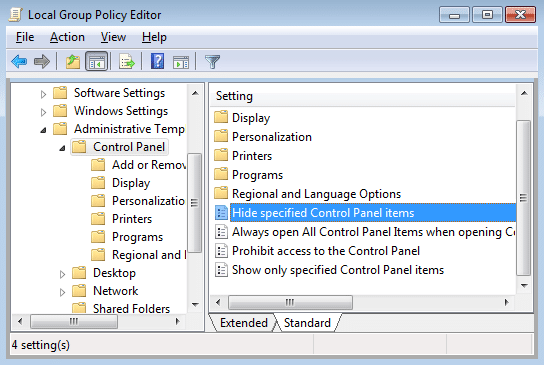
2.Next, navigate to the following path:
User Configuration > Administrative Template > Control Panel
3.Make sure to select Control Panel then in the right window double click on Hide Specified Control Panel Items.
4. Ընտրեք Միացված եւ սեղմեք այն Ցույց տալ կոճակը Ընտրանքների տակ:
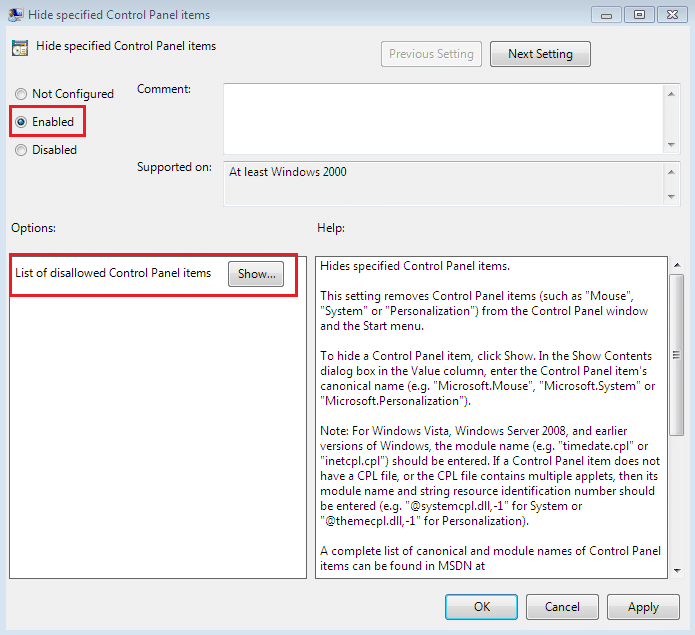
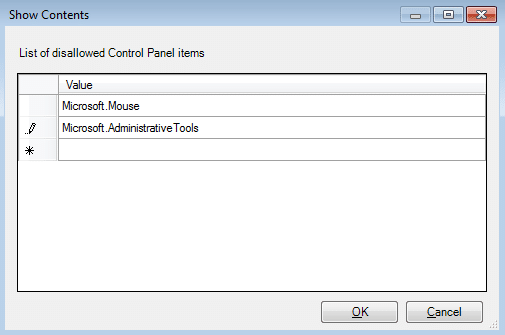
5.In the Show context box type the following value and click OK:
Microsoft.AdministrativeTools
6. Սեղմեք Դիմել, որին հաջորդում է OK:
7. Վերագործարկեք ձեր համակարգիչը՝ փոփոխությունները պահպանելու համար:
Method 3: Remove Administrative Tools Using Registry Editor
1. Սեղմեք Windows Key + R, ապա մուտքագրեք regedit եւ հարվածել Enter:

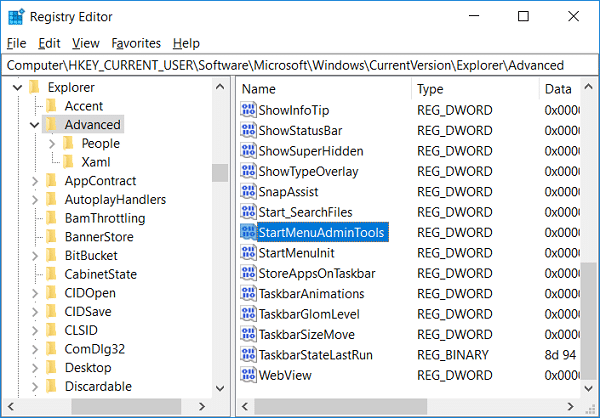
2. Նավարկեք հետևյալ ռեեստրի բանալի.
HKEY_CURRENT_USERS ծրագրային ապահովումMicrosoftWindowsCurrentVersionExplorerAdvanced
3. Ընտրեք Առաջադեմ then from the right window pane double-click on StartMenuAdminTools.
4.Set the value to 0 in the value data field in order to disable it.
To disable Administrative Tools: 0
To enable Administrative Tools: 1
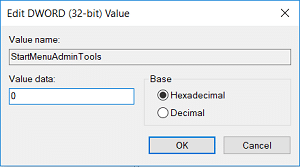
5.Click OK and close Registry Editor.
Խորհուրդ է տրվում:
Դա այն է, ինչ դուք հաջողությամբ ունեք Remove Administrative Tools in Windows 10 but if you still have any questions regarding this post then feel free to ask them in the comment’s section.