Synchronize Windows 10 Clock with an Internet Time Server

Synchronize Windows 10 Clock with an Internet Time Server: If you have set the Clock in Windows 10 to automatically set time then you may be aware that the current time is synchronized with an Internet Time Server in order to update time. This means that the clock on your PC’s Taskbar or Windows Settings is updated at regular intervals to match the time on the time server which ensures that your clock has accurate time. You need to be connected to the internet for time to automatically synchronize with an Internet time server without which the time won’t be updated.
Now Windows 10 uses the Network Time Protocol (NTP) to connect with the Internet time servers in order to synchronize Windows Clock. If the time in Windows Clock is not accurate then you could face network issues, corrupted files, and incorrect timestamps in documents & important files. With Windows 10 you could easily change the time servers or can even add a custom time server when necessary.
So now you know it’s important for your Windows to display the correct time in order to ensure proper functioning of your PC. Without which certain applications and Windows services will start experiencing issues. So without wasting any time let’s see How to Synchronize Windows 10 Clock with an Internet Time Server with the help of the below-listed tutorial.
How to Synchronize Windows 10 Clock with an Internet Time Server
Համոզվեք, որ ստեղծեք վերականգնման կետ, եթե ինչ-որ բան սխալ լինի:
Method 1: Synchronize Windows 10 Clock with an Internet Time Server in Internet Time Settings
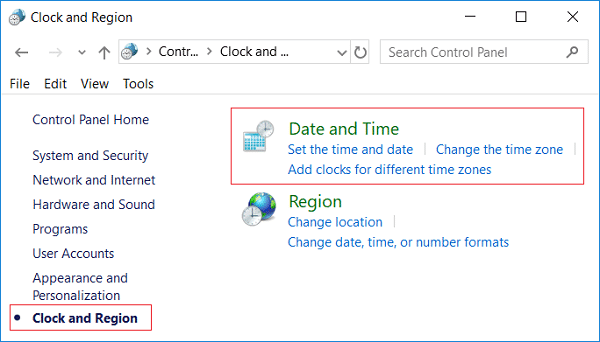
1.Տեսակ վերահսկել in Windows 10 Search then click on Control Panel որոնման արդյունքից։

2. Այժմ սեղմեք «Ժամացույց, լեզու եւ տարածաշրջան«այնուհետև սեղմեք»Ամսաթիվ եւ ժամ".
3.Under Date and Time window click “Փոխեք ամսաթիվը և ժամանակը".
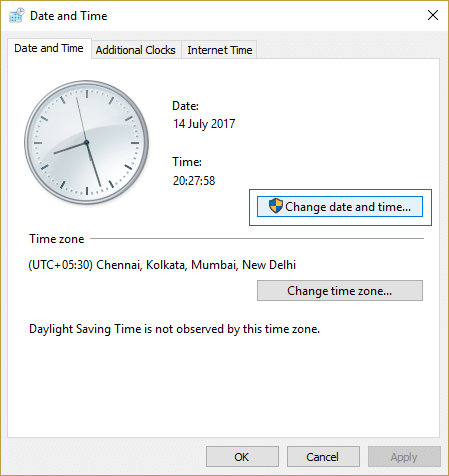
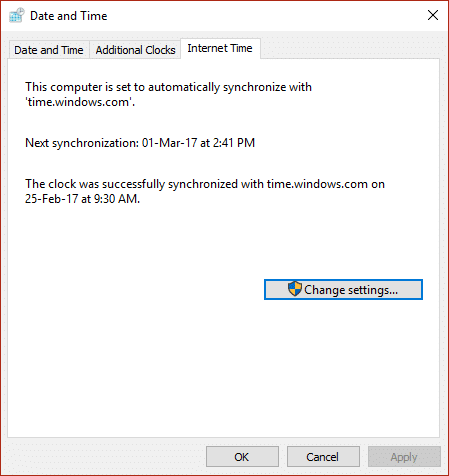
4.Switch to Internet Time then click on “Փոխել կարգավորումները".
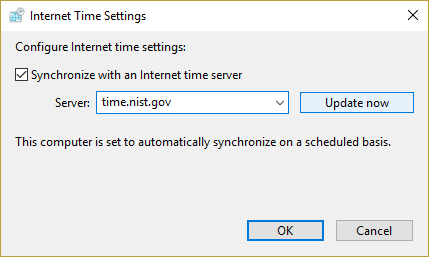
5.Make sure to checkmark “Համաժամեցեք ինտերնետի ժամանակի սերվերի հետ” box, then select a time server from the Server drop-down and click Update Now.
6.Click Ok then click Apply followed by OK again.
7.If the time is not updated then choose a different Internet time server and again click Update now.

8. Վերագործարկեք ձեր համակարգիչը՝ փոփոխությունները պահպանելու համար:
Method 2: Synchronize Windows 10 Clock with an Internet Time Server in Command Prompt
1. Սեղմեք Windows Key + X, ապա ընտրեք Հրահանգի հուշում (Admin):

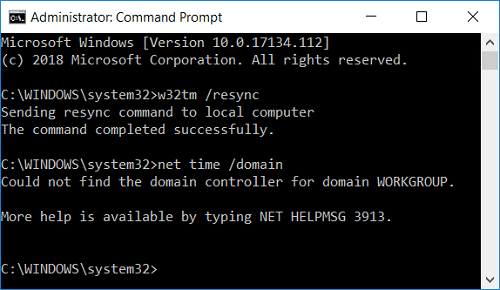
2. Մուտքագրեք հետևյալ հրամանը cmd-ում և սեղմեք Enter:
w32tm /համաժամացում
net time /domain
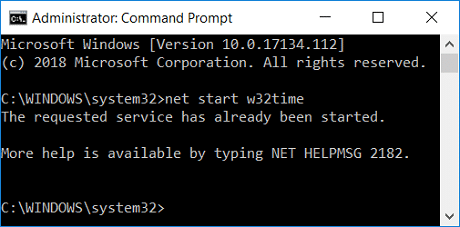
3. Եթե դուք ստանում եք ա The service has not been started. (0x80070426) error, ուրեմն պետք է start Windows Time service.
4.Type the following command to start Windows Time service then again try to synchronize Windows Clock:
զուտ սկիզբ w32time
5.Close Command Prompt and restart your PC.
Method 3: Change the Internet Time Synchronization Update Interval
1. Սեղմեք Windows Key + R, ապա մուտքագրեք regedit և սեղմեք Enter՝ ռեեստրի խմբագրիչը բացելու համար:

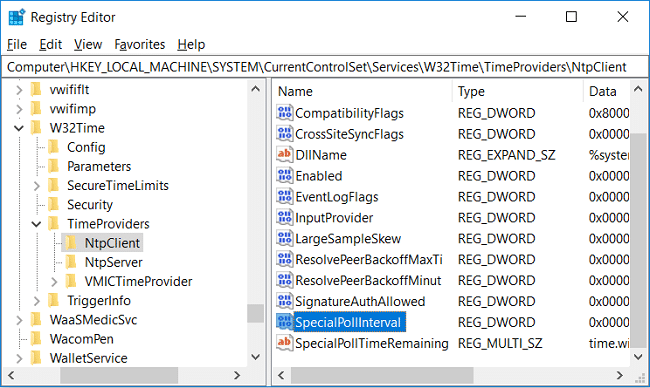
2. Նավարկեք հետևյալ ռեեստրի բանալի.
ComputerHKEY_LOCAL_MACHINESYSTEMCurrentControlSetServicesW32TimeTimeProvidersNtpClient
3. Ընտրեք NtpcClient then in right window pane double-click on SpecialPollInterval փոխել դրա արժեքը։
4. Այժմ ընտրեք Decimal from the Base then in the Value date change the value to 86400:
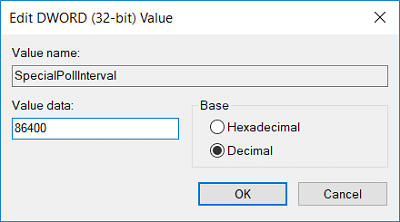
Նշում: 86400 seconds (60 seconds X 60 minutes X 24 hours X 1 day) which means that the time will be updated every day. The default time is every 604800 seconds (7 days). Just make sure not use the time interval less than 14400 seconds (4 hours) as your computer’s IP will get banned from the time server.
5.Click Ok then close Registry Editor.
6. Վերագործարկեք ձեր համակարգիչը՝ փոփոխությունները պահպանելու համար:
Method 4: Add a new Internet time server on Windows 10
1.Type control in Windows 10 Search then click on Control Panel որոնման արդյունքից։
2. Այժմ սեղմեք «Ժամացույց, լեզու եւ տարածաշրջան«այնուհետև սեղմեք»Ամսաթիվ եւ ժամ".
3.Under Date and Time window click “Փոխեք ամսաթիվը և ժամանակը".
4. Անցնել Ինտերնետ ժամանակ ապա սեղմեք «Փոխել կարգավորումները".
5. Նշեք «Համաժամեցեք ինտերնետի ժամանակի սերվերի հետ” box then under Server type the address of the time server and click Թարմացրեք հիմա:
Նշում: Անդրադարձեք այստեղ for a list of the Simple Network Time Protocol (SNTP) time servers that are available on the Internet.
6.Click Ok then click Apply followed by OK again.
7. Վերագործարկեք ձեր համակարգիչը՝ փոփոխությունները պահպանելու համար:
Method 5: Add a new Internet time server on Windows 10 using Registry
1. Սեղմեք Windows Key + R, ապա մուտքագրեք regedit և սեղմեք Enter ՝ բացելու համար Ռեեստրի խմբագիր:
2. Նավարկեք հետևյալ ռեեստրի բանալի.
HKEY_LOCAL_MACHINESOFTWAREMicrosoftWindowsCurrent VersionDateTimeServers
3. Աջ սեղմեք վրա Սերվերներ Ապա ընտրեք Նոր > Լարի արժեք:
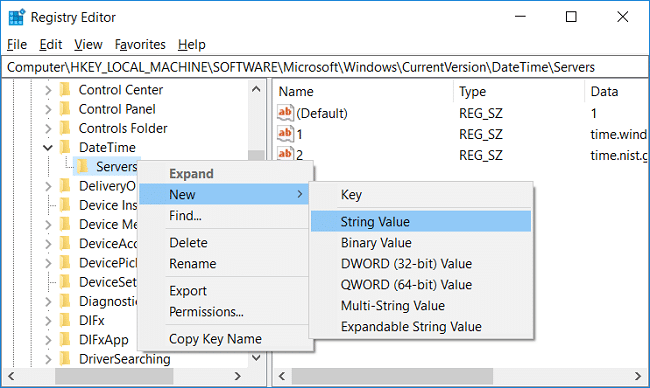
4.Type a number according to the position of the new server, for example, if there are already 2 entries then you have to name this new string as 3.
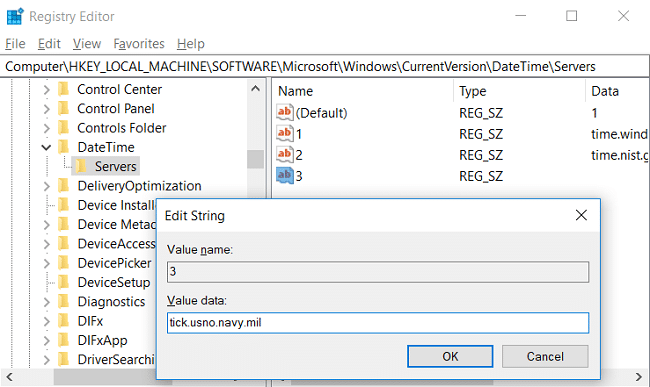
5.Now double-click on this newly created String Value to change its value.
6. Հաջորդը, type the address of the time server then click OK. For example, if you want to use Google Public NTP server then enter time.google.com.
Նշում: Անդրադարձեք այստեղ for a list of the Simple Network Time Protocol (SNTP) time servers that are available on the Internet.
7.Վերագործարկեք ձեր համակարգիչը՝ փոփոխությունները պահպանելու համար:
If you’re still facing in synchronizing Windows 10 Clock then fix them using the below-listed steps:
Նշում: This will remove all your custom servers from Registry.
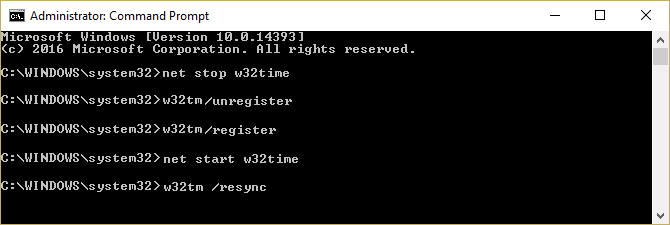
1. Սեղմեք Windows Key + X, ապա ընտրեք Հրահանգ արագ (Ադմինիստրատոր):

2. Մուտքագրեք հետևյալ հրամանը cmd-ում և սեղմեք Enter:
netstop w32time
w32tm /չգրանցել
w32tm /գրանցել
զուտ սկիզբ w32time
w32tm /resync /nowait
3.Վերագործարկեք ձեր համակարգիչը՝ փոփոխությունները պահպանելու համար:
Խորհուրդ է տրվում:
Դա այն է, որ դուք հաջողությամբ սովորել եք How to Synchronize Windows 10 Clock with an Internet Time Server but if you still have any queries regarding this tutorial then feel free to ask them in the comment’s section.