Bagaimana Photoshop Mengkonversi ke RGB

Adobe Photoshop offers many interesting & useful features to edit photos. Professional photographers utilize this software to edit their captured images. If you too want your pictures to have a professional touch, then editing them in Photoshop is the best choice. You can download Adobe Photoshop and use it for free for a week. After that, you need to pay US$19.99 per bulan to continue using its services. Today, we will discuss how to Photoshop convert image to RGB color mode to edit. Also read How to Convert Image to Grayscale Paint.. Also read How to Convert Image to Grayscale Paint..
How to Convert Image to RGB Mode using Adobe Photoshop
While editing an image in Adobe Photoshop, Photoshop convert to RGB is one of the simplest things to do. Here, you get only three color modes to edit an image. They are RGB, CMYK & Grayscale. Pictures that are to be published online are edited using RGB and photos that are for print are edited using CMYK. It makes your image bright and attractive. This mode utilizes the RGB model, selecting an intensity value for every pixel. In 8 bits per channel picture, the intensity values vary from 0 to 255 for each RGB (green, blue, red) segment in a color image.
Catatan: Di sini, Adobe Photoshop CC 2019 is used to illustrate the required steps.
Method 1: Use Adobe Photoshop App Settings
RGB images look great on digital media and websites. So, here are the steps to convert image to RGB color mode to edit these:
1. Meluncurkan Adobe Photoshop app on Windows Desktop.
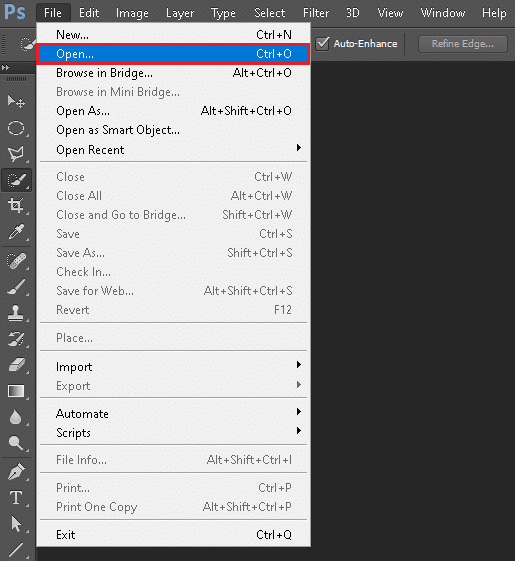
2. Klik File di sudut kiri atas layar.

3. Selanjutnya, klik Open, ditampilkan disorot.
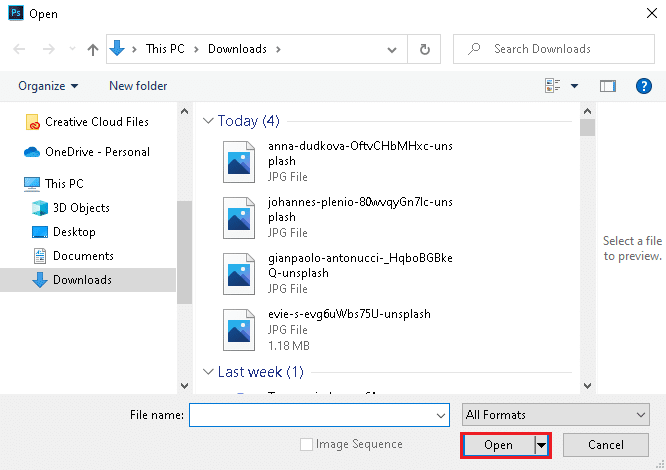
4. Sekarang, pilih gambar you want to convert to RGB and click Buka.
5. Once the picture opens in photoshop, click on Gambar di menu paling atas.

6. Memilih mode > Warna RGB seperti yang digambarkan di bawah ini.
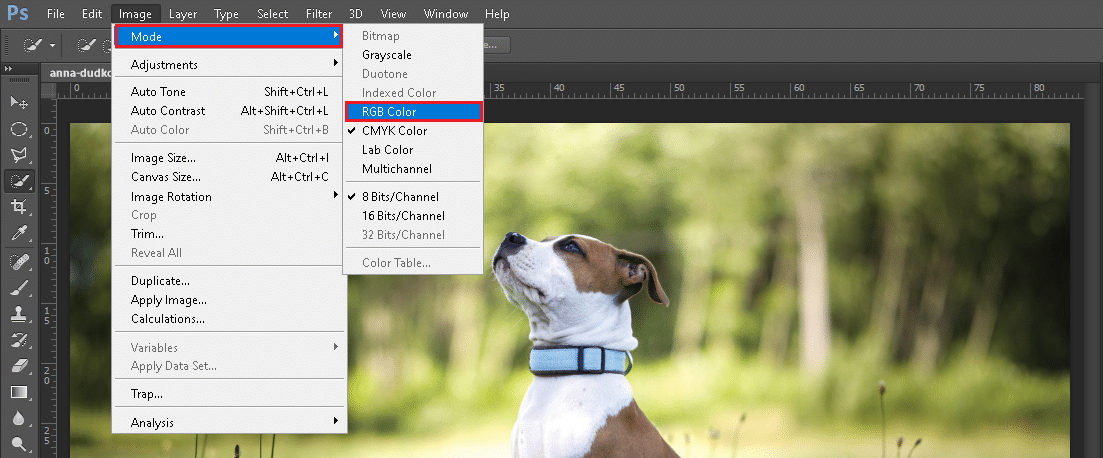
Catatan: You might see an on-screen prompt from Adobe Photoshop. Klik Meratakan tombol untuk melanjutkan.
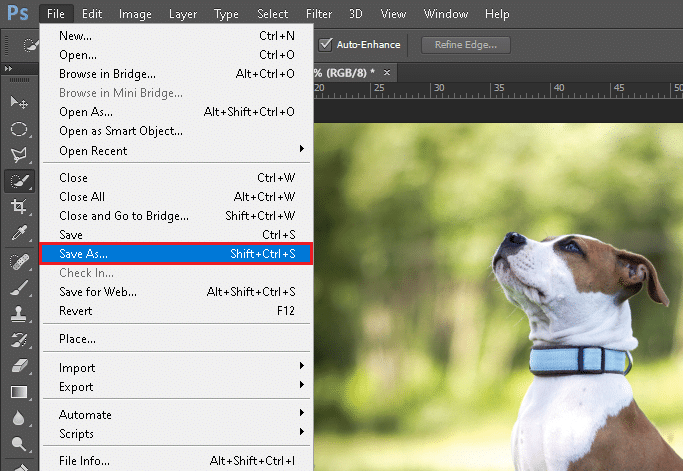
7. Selanjutnya, buka File dan klik Save As opsi dari daftar.
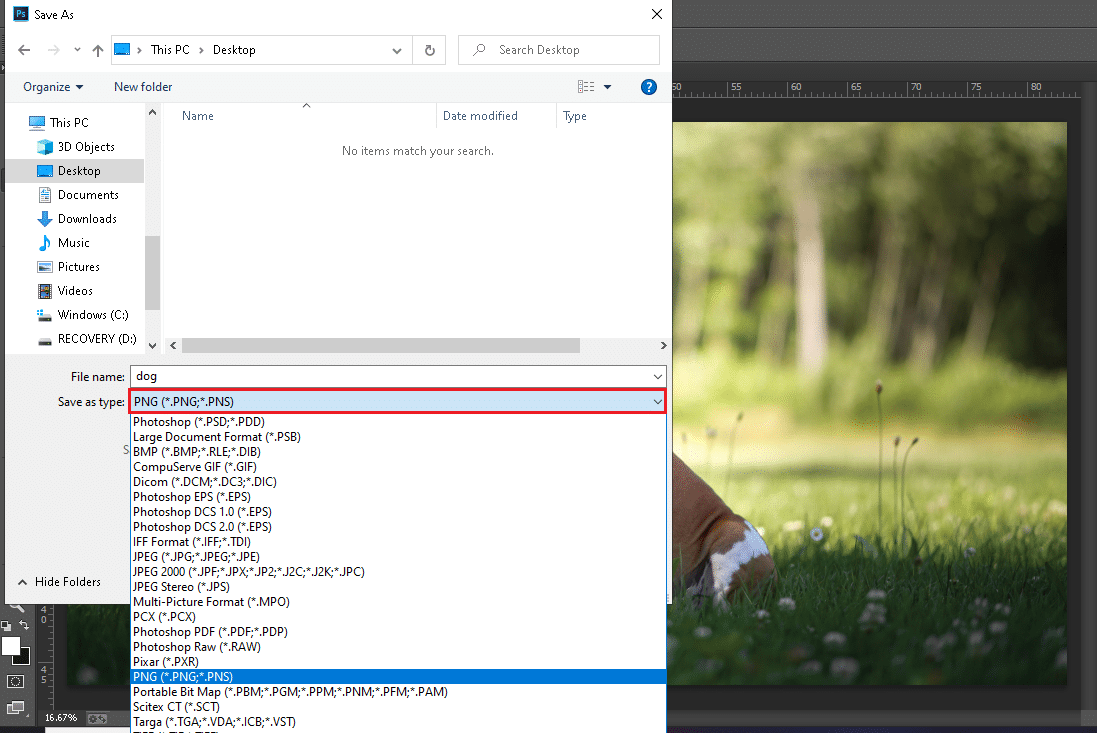
8. Sekarang, pilih Jenis berkas (e.g. PNG,JPG, JPEG etc.) from Save as type menu drop down. Rename the file if needed.
9. Terakhir, klik Simpan.
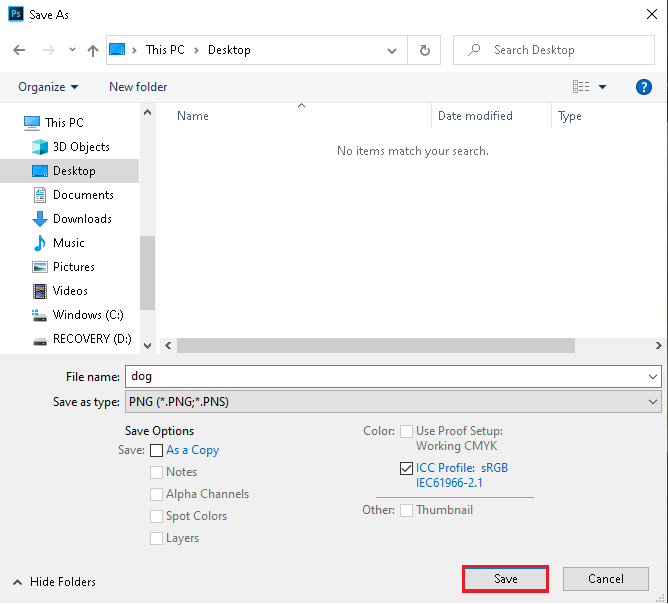
Now, your CMYK mode image is successfully converted into RGB mode.
Baca Juga: Cara Memperbaiki Scratch Disk yang Full Error di Photoshop
Method 2: Use CMYK to RGB Shortcut Keys
While editing a picture in Photoshop, it is tiresome to navigate to menus and options. So, using shortcut keys in Photoshop saves your time. Fortunately, there are shortcut keys to convert CMYK to RGB mode and vice-versa.
Method 2A: For Windows PC
If you are using Photoshop on Windows laptop/desktop, then follow the steps listed below:
1. klik on File > Open, ditampilkan disorot.
2. Pilih gambar you want to convert to RGB and click Buka.
3. Setelah itu CMYK Mode Image opens in Adobe Photoshop, press Alt + I + M + R keys simultaneously. This is Photoshop CMYK to RGB shortcut key.

Now, your CMYK mode image will change into an RGB mode image.
Note: To convert an image from RGB mode to CMYK mode, press Alt + I + M + C keys bersama-sama.
Juga Baca: How to Convert PNG to JPG without Losing Quality
Method 2B: For MacOS
If you are using Photoshop on Mac, then follow the given steps:
1. Buka CMYK mode image di Mac Anda.
2. tekan Opsi + I + M + R keys Photoshop shortcut to convert CMYK to RGB mode.
Note To convert RGB mode to CMYK mode, press Opsi + I + M + C kunci bersama
Pro Tip: Check if the image has converted or not by repeating langkah 5 & 6 of Metode 1 and see if the option Warna rgb is ticked or not.
Rekomendasi:
We hope that this guide on how to Photoshop convert to RGB color mode was helpful. Let us know which method worked for you best. If you have any queries or, suggestions then feel free to drop them in the comment section below.