Fix Microsoft Teams Video Call Not Working

If your camera is not working with Teams, don’t worry! This is a common issue faced by most users who handle meetings and conferences. Despite the fact that Microsoft Teams is one of the best video conferencing and chatting applications, it is not perfect at times. Suddenly, you may detect Microsoft Teams video call not working issue, so you will be struck with paused video or black screen only. This problem may be associated with an in-built camera or an external web camera. Also, if you cannot start the camera, incompatible app settings may contribute to Teams video not working problem. We bring to you a perfect guide that will teach you how to fix Microsoft Teams video call not working issue. So, continue reading the article.
How to Fix Microsoft Teams Video Call Not Working
Before you get into the troubleshooting section, you must learn the reasons that cause this issue. And so, you can easily resolve the same appropriately.
- Corrupt/incompatible camera drivers.
- Additional camera devices are configured to your Windows 10 PC.
- Camera permission is not granted on your computer.
- A third-party antivirus program or Firewall is interfering with the Teams software.
- Some other applications in your device are using your inbuilt camera.
- VPN/Proxy interference.
- Úrelt stýrikerfi.
Now, move ahead to the next section to resolve this issue. Analyze the reason to implement selective troubleshooting methods to attain quick results.
We have compiled a list of methods that will help you fix this problem in this section. The methods are arranged from basic to advanced steps to attain easier and faster results. Follow them in the same order to attain perfect results.
Grundvallar bilanaleit
Before trying the advanced troubleshooting methods, here are some simple hacks that will resolve all temporary glitches associated with Microsoft Teams application.
1. Replug Webcam
- If you are using an external web camera, the first thing you have to do is to taktu úr sambandi the web camera from the USB port, endurræsa your computer, and stinga aftur í samband it again after some time.
- If you are using an inbuilt camera, ensure it is out of hardware glitches and failure.
2. Remove Other Hardware Devices
- Some other hardware devices plugged into your PC may interfere with the inbuilt camera or webcam. Temporarily, disable all other devices and check if this helps you.
- If you do not face this issue after disconnecting all other hardware devices, then plug them one by one to sort out the culprit.
- Always buy genuine peripherals from official or reliable stores for your Windows 10 computer.
3. Lokaðu bakgrunnsforritum
Aðferð 1: Keyrðu úrræðaleit fyrir vélbúnað og tæki
Windows 10 computers come with inbuilt troubleshooter tools to fix any problems associated with all of their components. The functionality of your camera can be affected by numerous factors. So, we recommend troubleshooting hardware and devices as instructed below.
1. Ýttu á Windows + R lyklar saman til að hleypa af stokkunum Hlaupa valmynd.
2. Gerð msdt.exe -id DeviceDiagnostic og högg Sláðu inn.
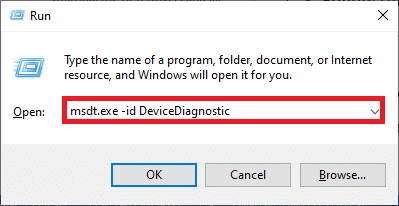
3. Smelltu svo á Næstu.

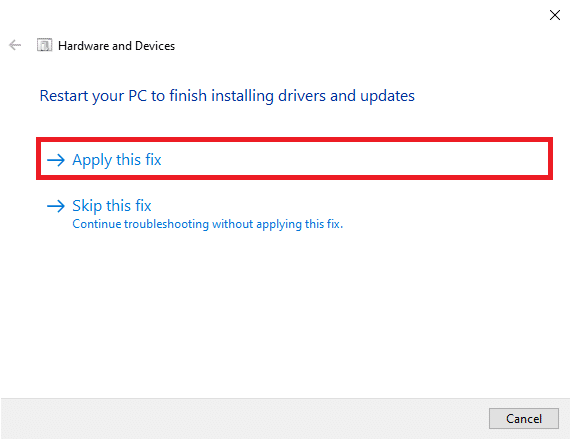
4A. If there is an issue and your device is not set up with the latest drivers, you will receive the following prompt. Select Sækja um þessa lagfæringu and follow the on-screen instructions. Then, endurræsa tækið þitt.
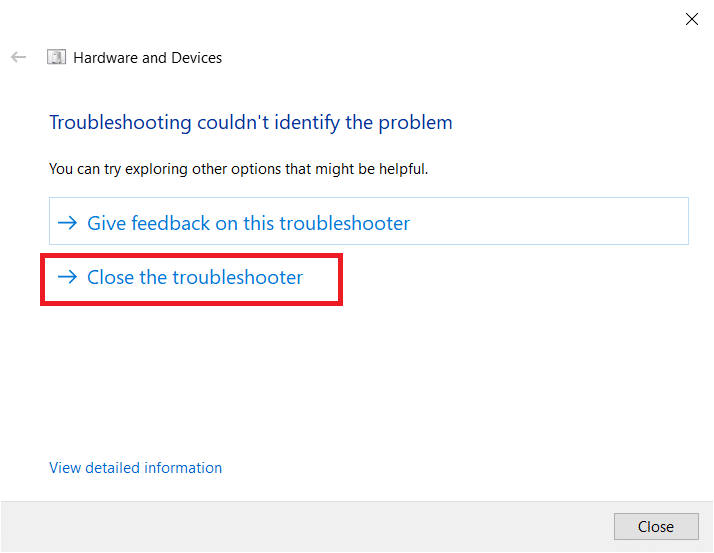
4B. If there is no issue with the drivers, click Lokaðu úrræðaleitinni á eftirfarandi skjá.
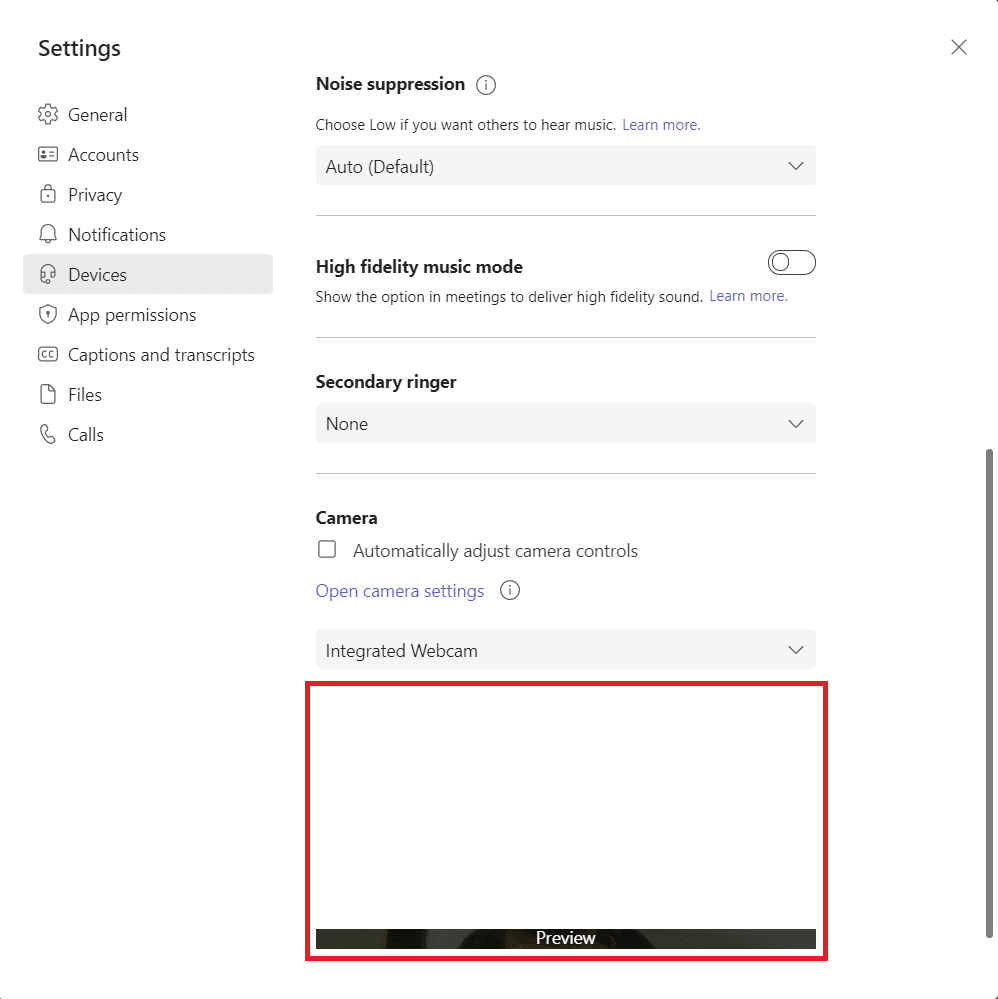
Method 2: Choose the Right Camera in Teams
Teams must access your camera, and for that, you have to choose the correct camera. If Teams faces any issue while accessing the camera, you will face so many conflicts. For the Desktop version of Teams, follow the below-mentioned steps to choose the right camera in your Windows 10 PC.
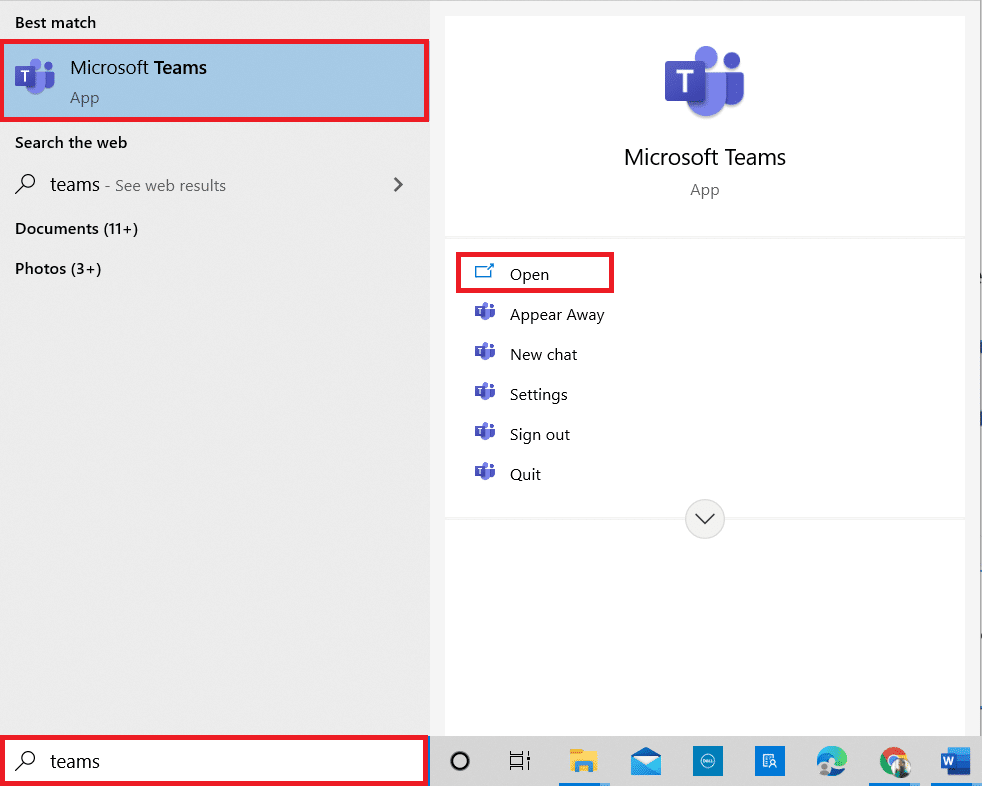
1. Sláðu á Windows lykill. Gerð Microsoft Teams og ræstu það.
2. Smelltu á þriggja punkta táknmynd við hliðina á þínum Forsíðumynd in Teams.
![]()
3. Skiptu yfir í Tæki tab in the left pane and scroll down the right screen.
4. Nú, í myndavél menu, expand the drop-down menu.
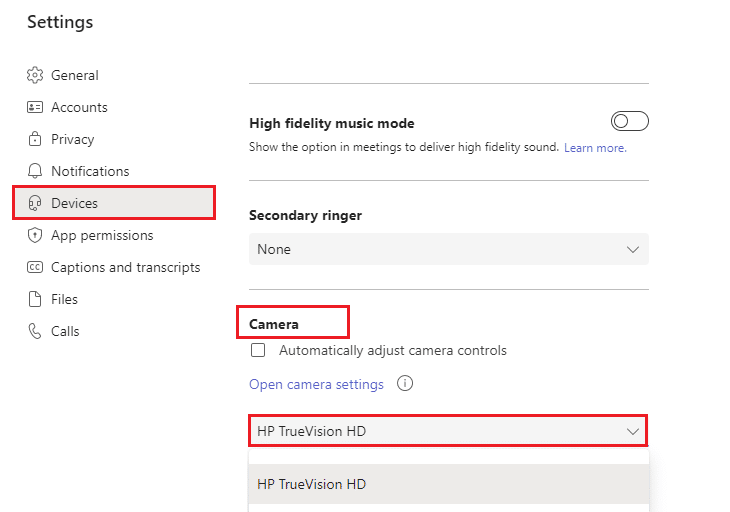
5. Veldu síðan myndavél you want to use and make sure you save the changes. Check if you have fixed the Microsoft Teams video call not working issue by confirming the video in the preview space.
Einnig lesið: Hvernig á að breyta Microsoft Teams Profile Avatar
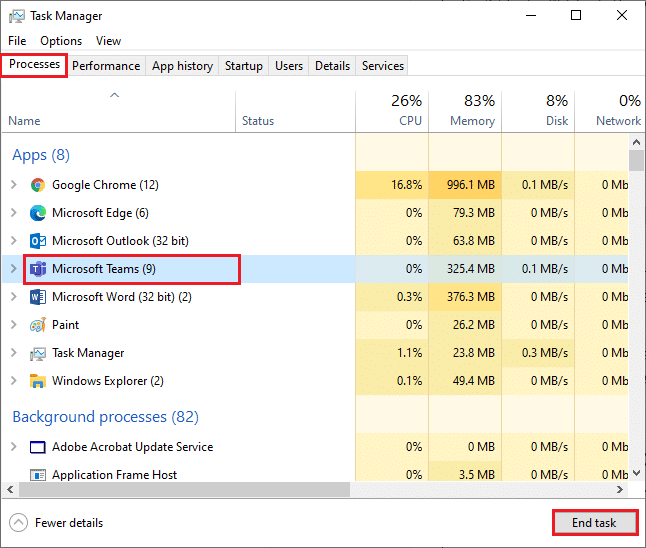
Method 3: Clear Microsoft Teams Cache
Teams collect temporary memory in the form of a cache to process the tasks easily within the app. If this temporary memory is over bulged or corrupt in your Windows 10 PC, then it might interfere with its main functions like camera, voice, noise, and a lot more. To solve the Teams video not working issue, consider clearing the cache as instructed below.
1. Útgangur teams og sjósetja Verkefnisstjóri með því að ýta á Ctrl + Shift + Esc lyklar samtímis.
2. Í Ferli flipann, velja Microsoft Teams programs that are running in the background and select Lokaverkefni.
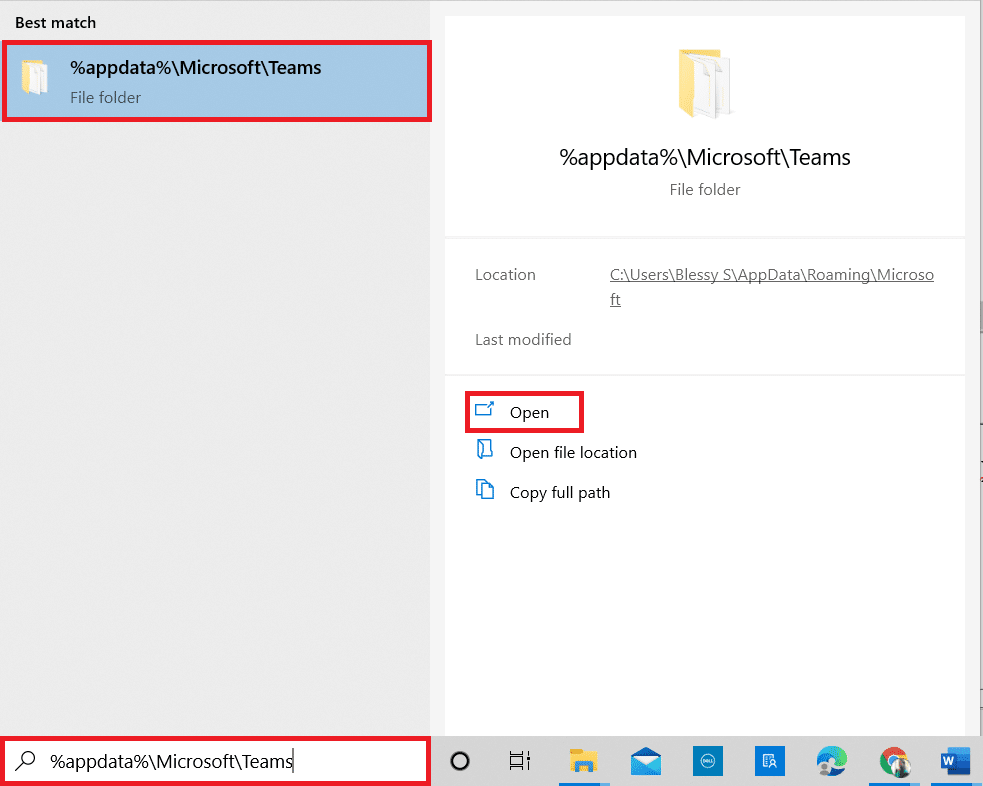
3. Smelltu síðan á Windows lykill og tegund % appdata% MicrosoftTeams í leitarreitnum.
4. Smelltu á Opna eins og sýnt er.
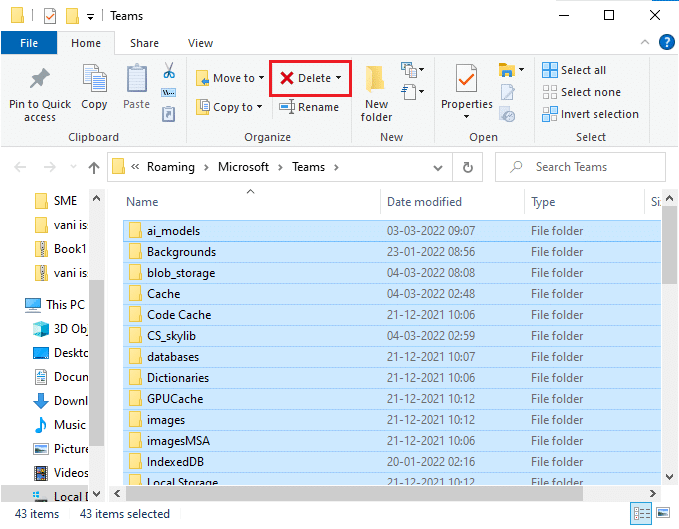
5. Veldu núna all the files and folders within the folder and select the eyða valkostur.
6. Endurræsa Windows 10 tölvunni þinni.
Method 4: Disable Other Additional Devices
If you are using an external webcam or two or more cameras, your default camera might interfere with them. To fix the problem, disable all other additional devices as instructed below.
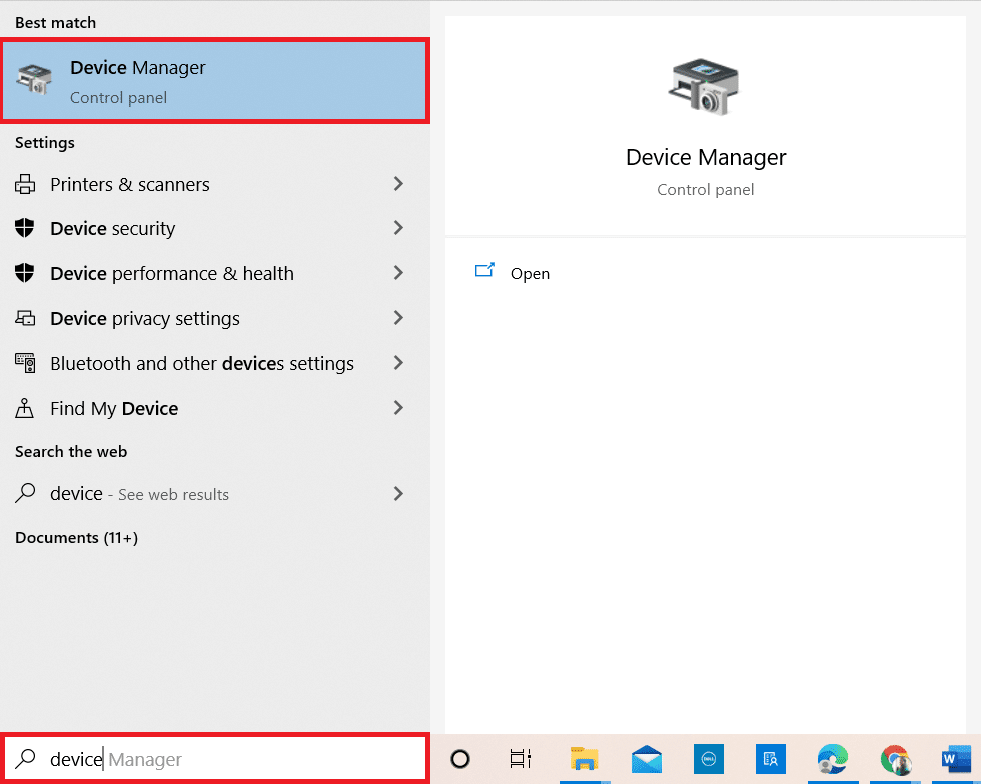
1. Gerð Tækjastjórnun í Windows 10 leitarvalmynd og opnaðu það.
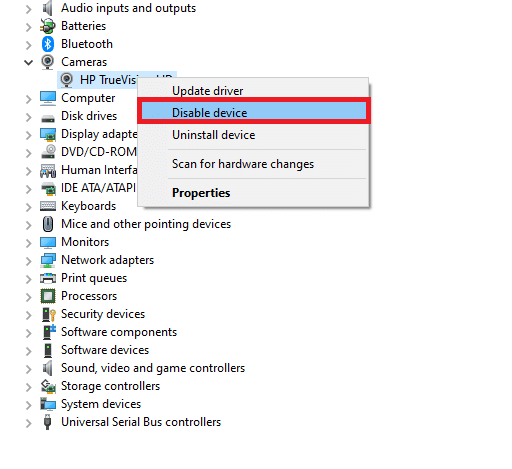
2. Nú, tvísmelltu myndavél að stækka það.

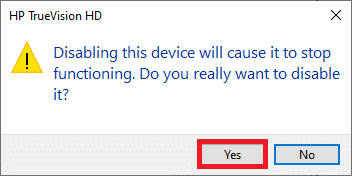
3. Hægrismelltu síðan á camera device (HP TrueVision HD, for example) and select the Slökktu á tækinu valmöguleika eins og sýnt er.
Athugaðu: Ensure you select a camera that you are not currently using in Teams.
4. Staðfestu kveðjuna með því að smella á Já.
5. Follow these steps for all other additional devices and check if you have resolved Teams video call not working issue.
Athugaðu: Make sure you re-enable the default camera adapter again after fixing the issue.
Einnig lesið: Hvernig á að virkja eða slökkva á Microsoft Teams Push to Talk
Method 5: Allow Camera Permissions for Browsers
If you are using the browsing version of Teams, check if you have appropriate permissions for camera access. If not, you cannot access the camera for any browser-related applications, or you will be prompted for the same. Here are a few instructions to allow camera permissions for browsers. Google Chrome is taken as an example.
1. Ýttu á Windows lykill. Gerð Google Króm og ræstu það.

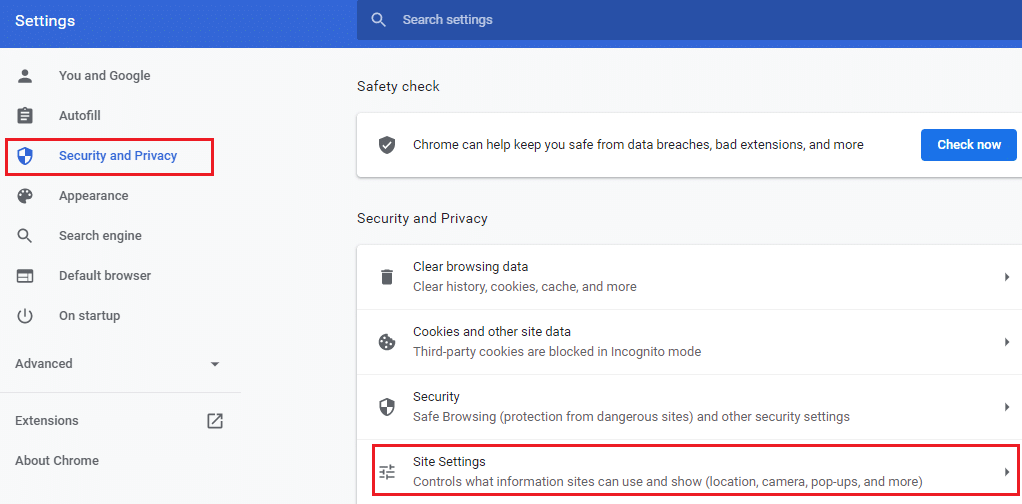
2. Smelltu á þriggja punkta táknmynd Og veldu Stillingar valkostur.
![]()
3. Veldu núna Öryggi og persónuvernd in the left pane and choose Vefstillingar from the main page.
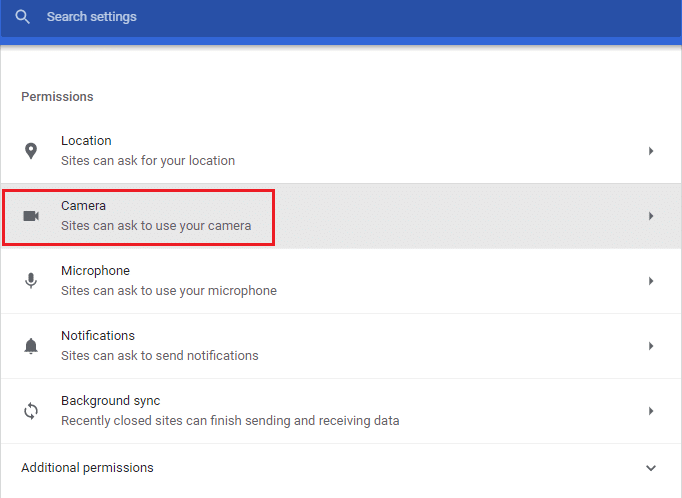
4. Scroll down the main screen and select the myndavél valkostur undir Heimildir valmynd eins og sýnt er.
5. Veldu hér Síður geta beðið um að nota myndavélina þína option and make sure teams is not added in Not allowed to use your camera listi.
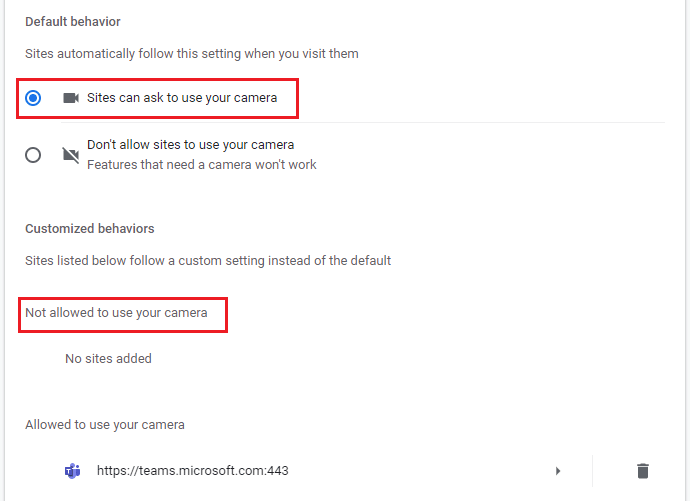
6. Relaunch your Vafrinn and check if you have fixed the Teams video not working issue.
Aðferð 6: Uppfærðu Windows
If you are using an outdated version of Windows 10 PC, then you may face common hardware problems in it, especially for cameras. Fortunately, you can update your Operating System with these simple steps.
1. Ýttu á Windows + I lyklar saman til að opna Stillingar á tölvunni þinni.
2. Veldu núna Uppfærsla og öryggi.
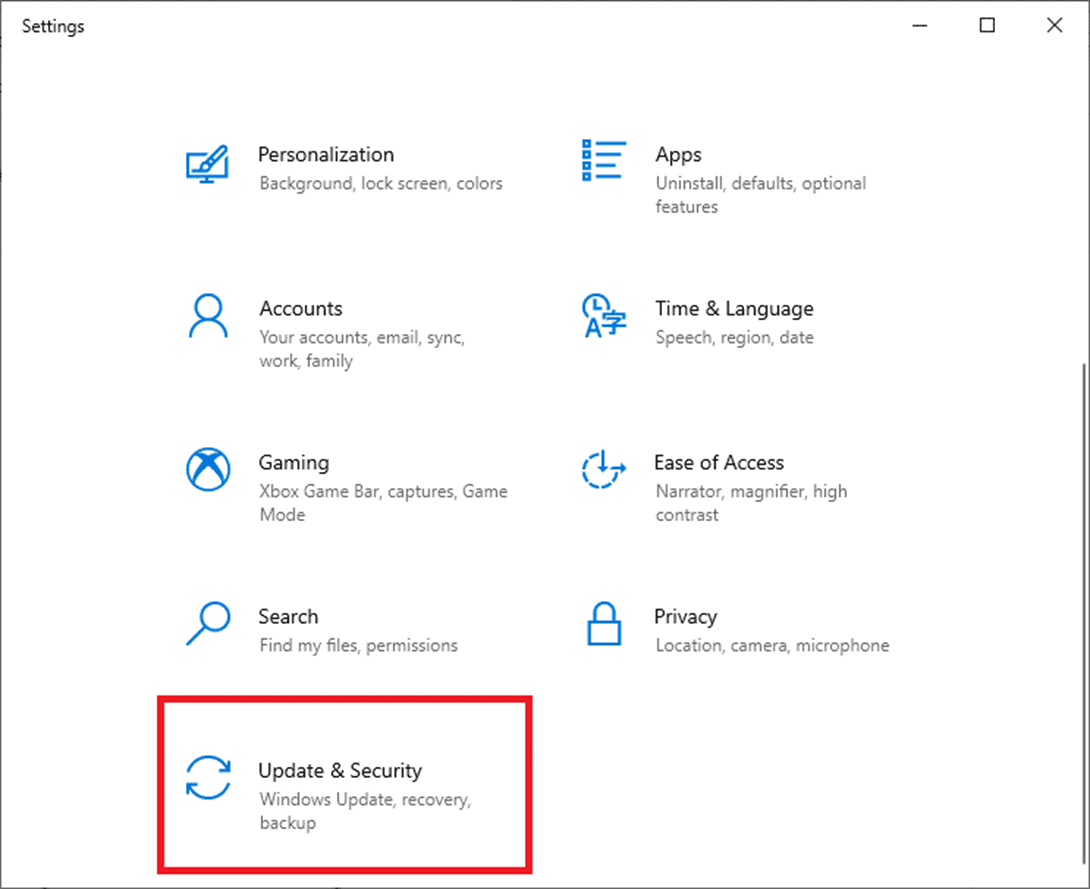
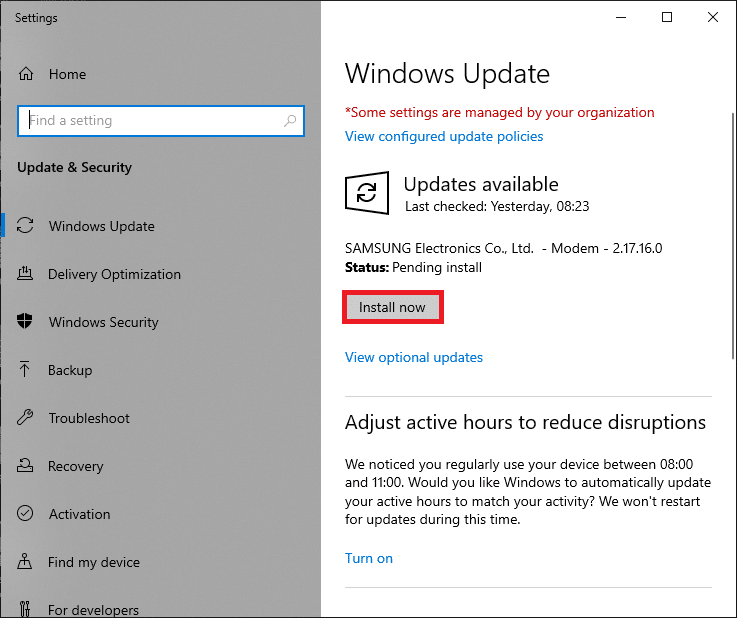
3. Veldu Athugaðu með uppfærslur frá hægri spjaldinu.
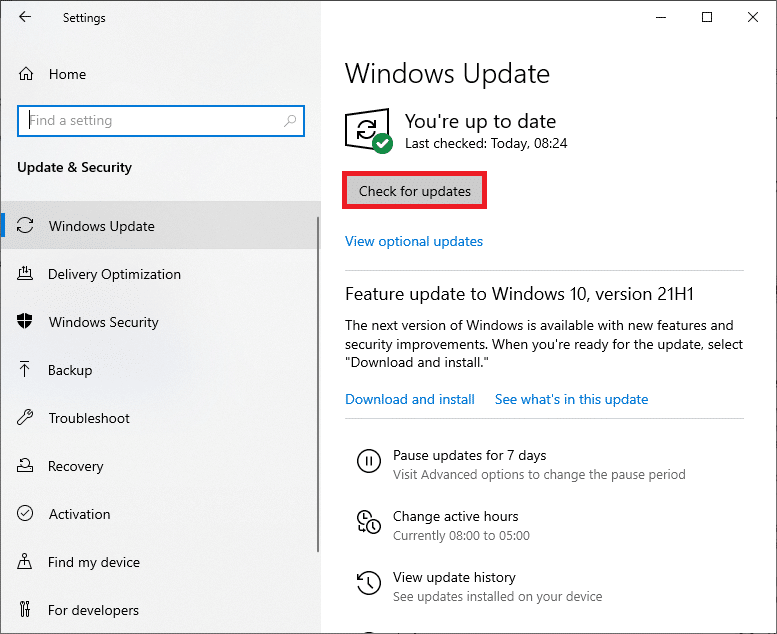
4A. If your system is outdated, click Setja nú til að hlaða niður og setja upp nýjustu útgáfuna.
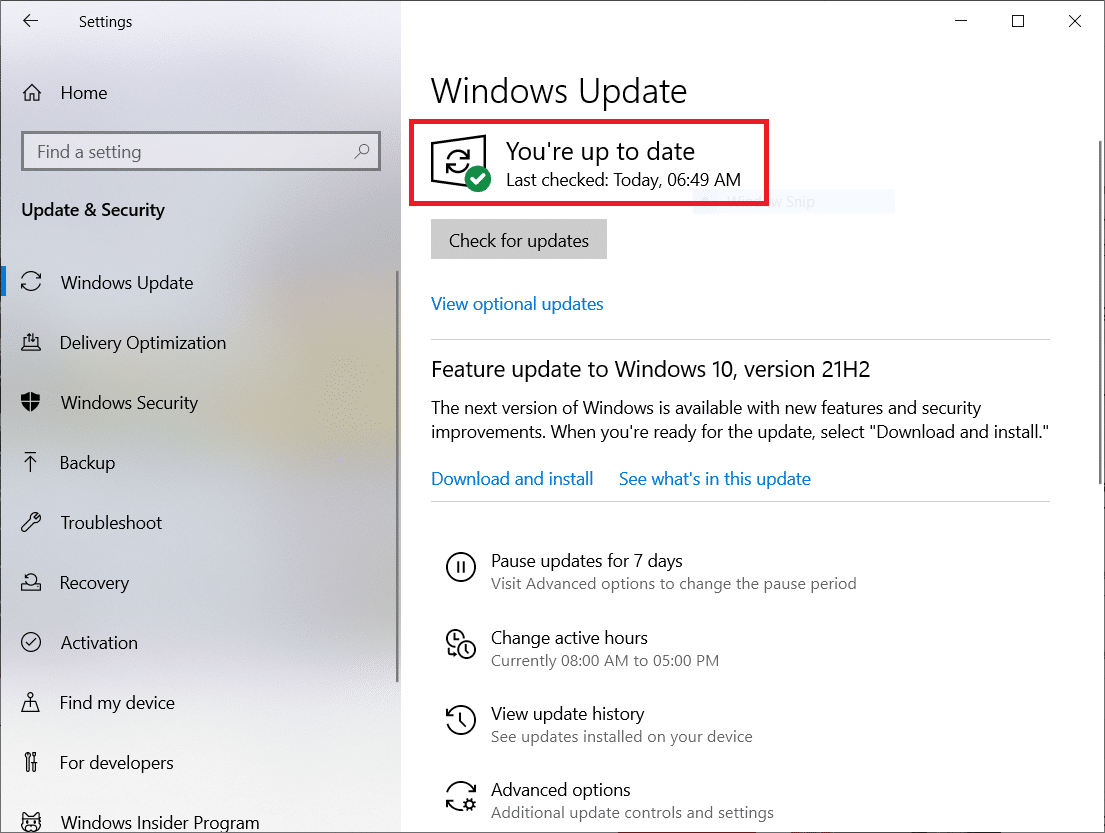
4B. Ef kerfið þitt er þegar uppfært, þá mun það birtast Þú ert uppfærður skilaboð.
Einnig lesið: Where are Microsoft Teams Recordings Stored?
Method 7: Disable Firewall (Not Recommended)
If the security suite of Windows Defender Firewall is blocking the camera access of Microsoft Teams, here are a few options to deal with the issue.
Option I: Whitelist Teams in Firewall
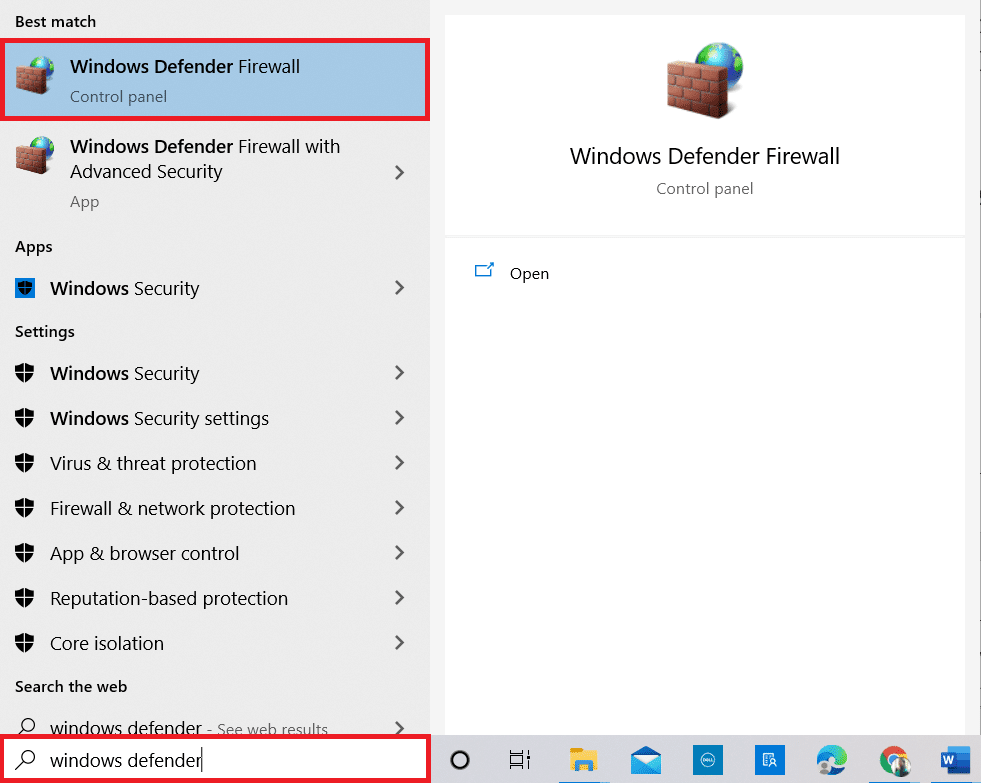
1. Sláðu á Windows lykill og tegund Windows Defender Firewall. Open the best results.
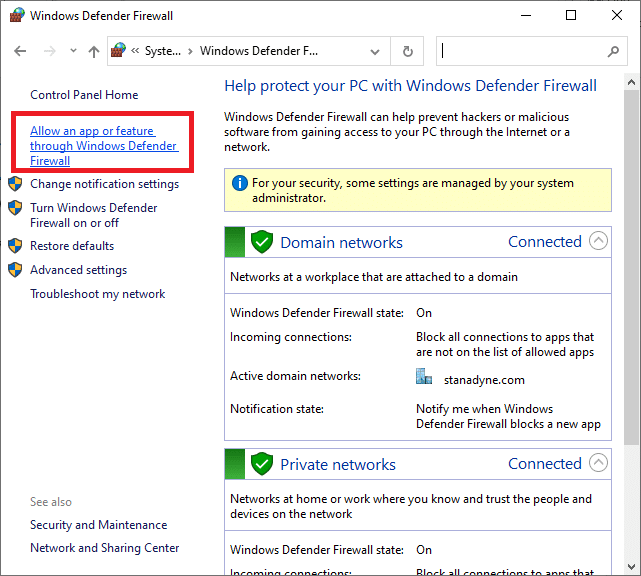
2. In the pop-up window, click on Leyfa forrit eða eiginleika í gegnum Windows Defender Firewall.
3. Smelltu síðan Breyta stillingum. Finally, check for Microsoft Teams to allow through the Firewall.
Athugaðu: Þú getur notað Leyfa öðru forriti... to browse your program if your desired application or program does not exist in the list.
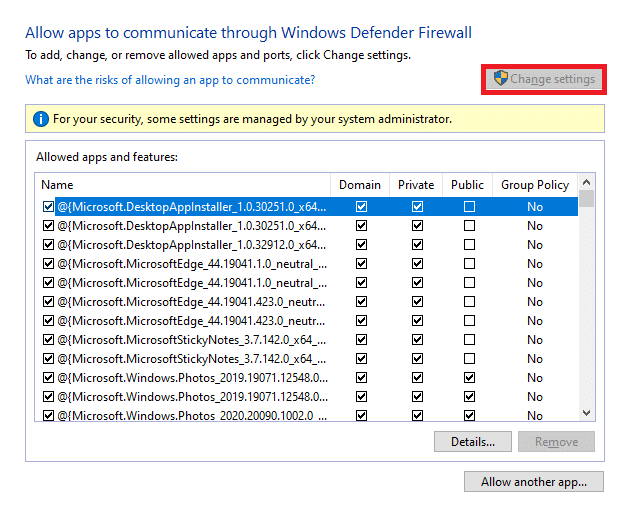
4. Smelltu að lokum OK til að vista breytingarnar.
Option II: Disable Firewall Temporarily
Athugaðu: If you disable the Firewall, it makes your computer more vulnerable to malware or virus attacks. Hence, if you choose to do so, make sure to enable it soon after fixing the issue.
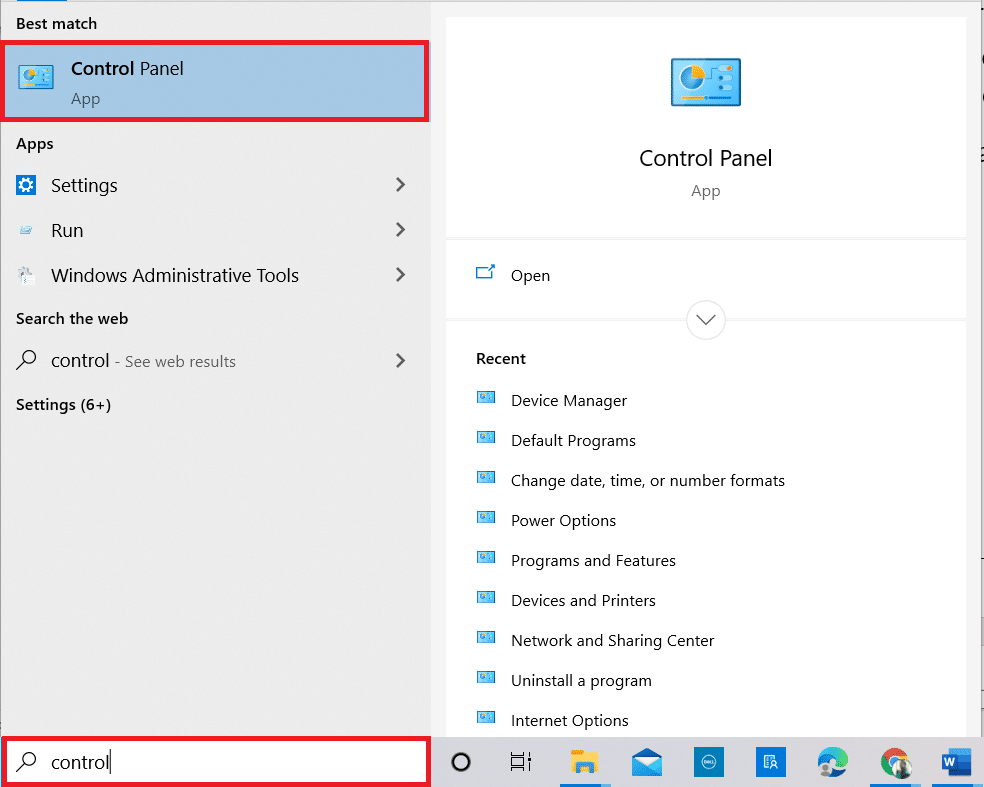
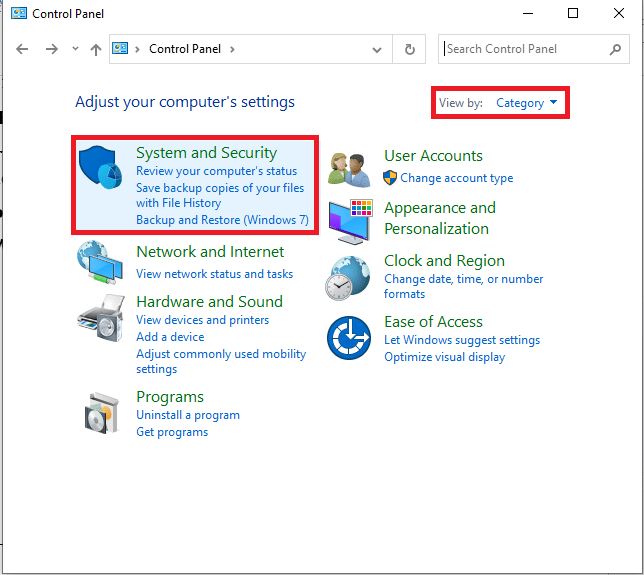
1. Ýttu á Windows lykill. Gerð Stjórnborð og opnaðu það.
2. Setja Skoða eftir as Flokkur og velja Kerfi og öryggi.
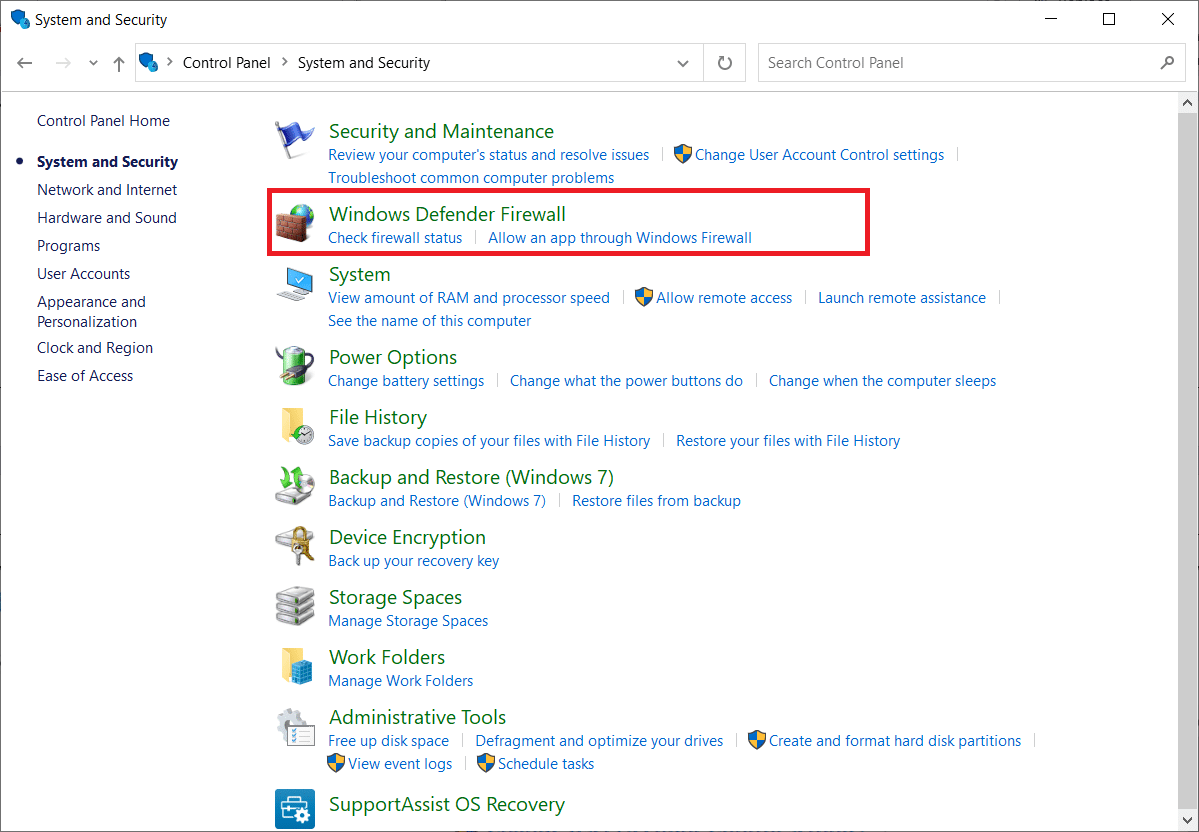
3. Nú skaltu smella á Windows Defender Firewall, eins og hér sést.
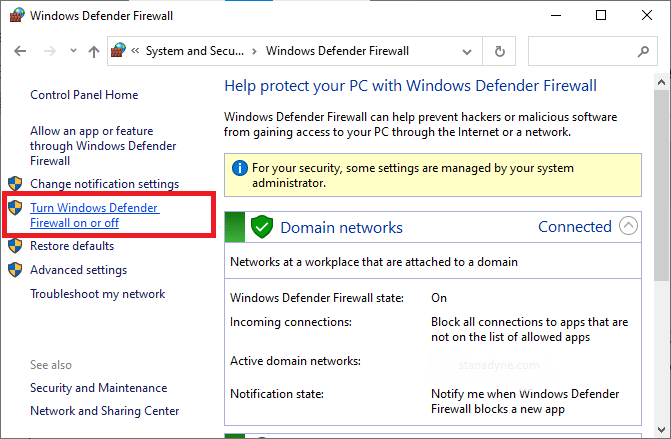
4. Veldu Kveiktu eða slökkva á Windows Defender Firewall valkostur frá vinstri valmyndinni.
5. Now, check the boxes next to the Slökktu á Windows Defender eldvegg (ekki mælt með) option wherever available on this screen.
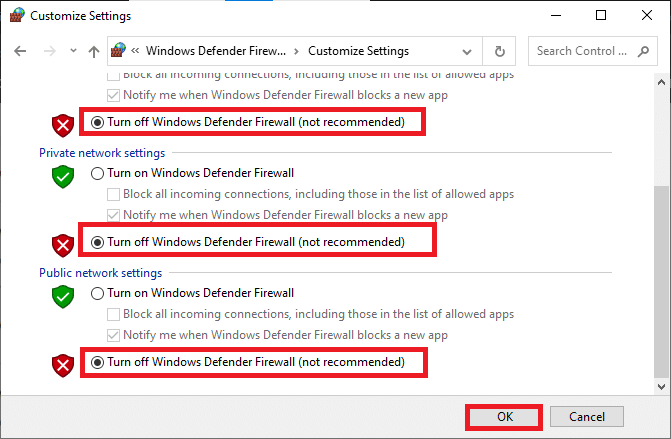
6. smellur OK og Endurræsa tölvunni þinni.
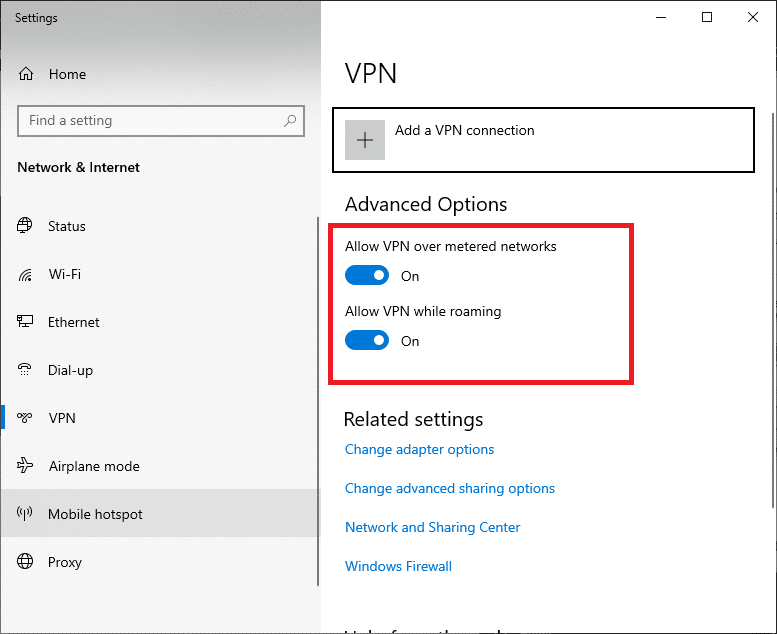
Aðferð 8: Slökktu á VPN
Virtual Private Networks are used to prevent data stealing from a private network, and it is used as a gateway between the client and the server. Sometimes, using VPN servers might cause issues in online video conferencing applications. We recommend you disable the VPN client as instructed below.
1. Sláðu á Windows lykill og tegund VPN stillingar í leitarreitnum.
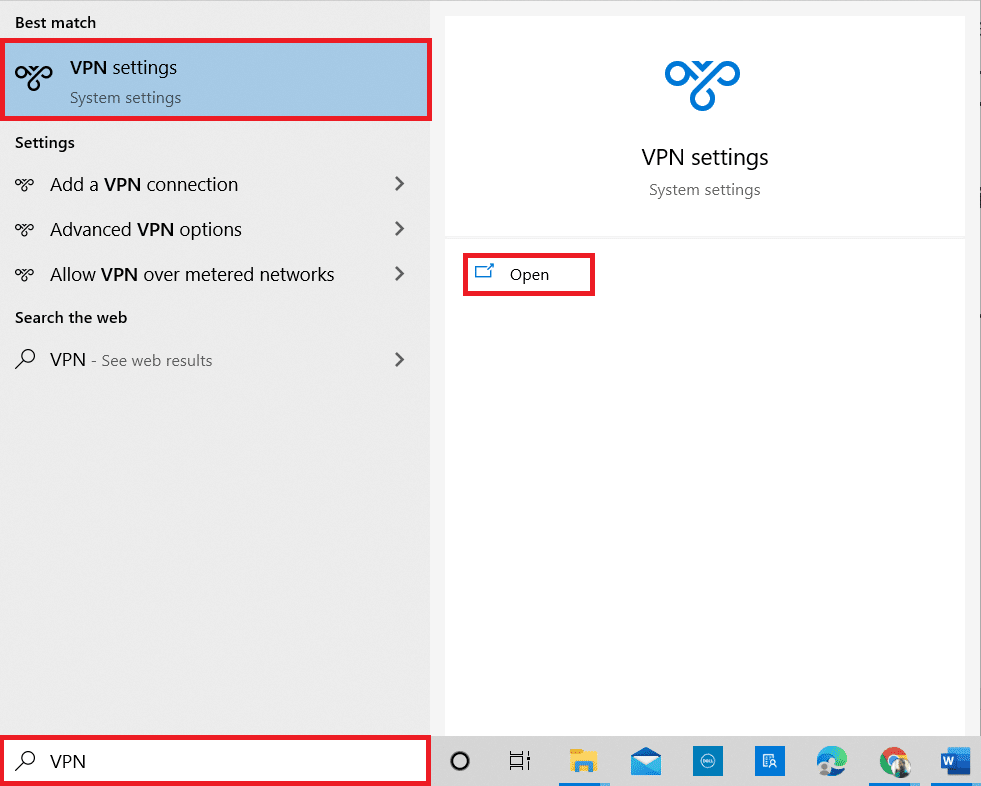
2. Í Stillingar glugga, aftengja virka VPN þjónustu.
3. Slökktu á VPN valkostir undir Ítarkostir.
Einnig lesið: Lagfærðu Microsoft Teams heldur áfram að endurræsa
Method 9: Reinstall Camera Drivers
The old and incompatible camera drivers you use will often lead to Microsoft Teams video call not working issue. To remain on the safer side, always ensure you use an updated version of drivers. Here are a few instructions to reinstall camera drivers.
1. Sjósetja Tækjastjórnun using the steps mentioned above and expand the myndavél með því að tvísmella á það.
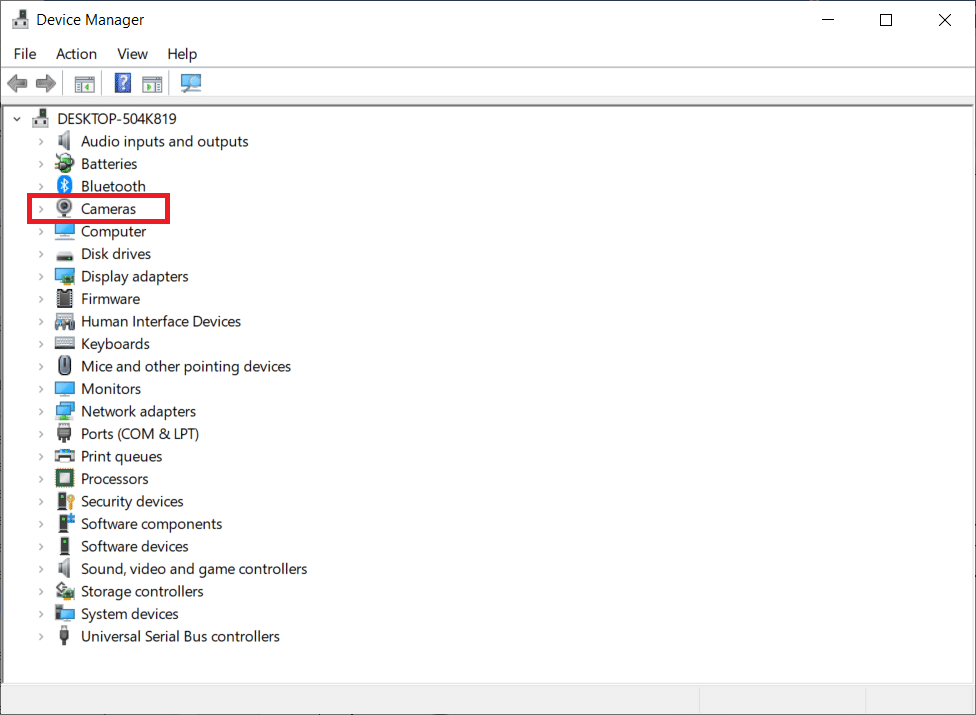
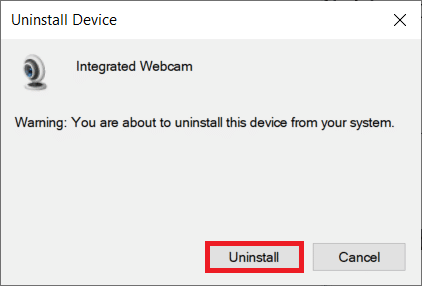
2. Nú, hægrismelltu á bílstjóri og velja Uninstall tæki.
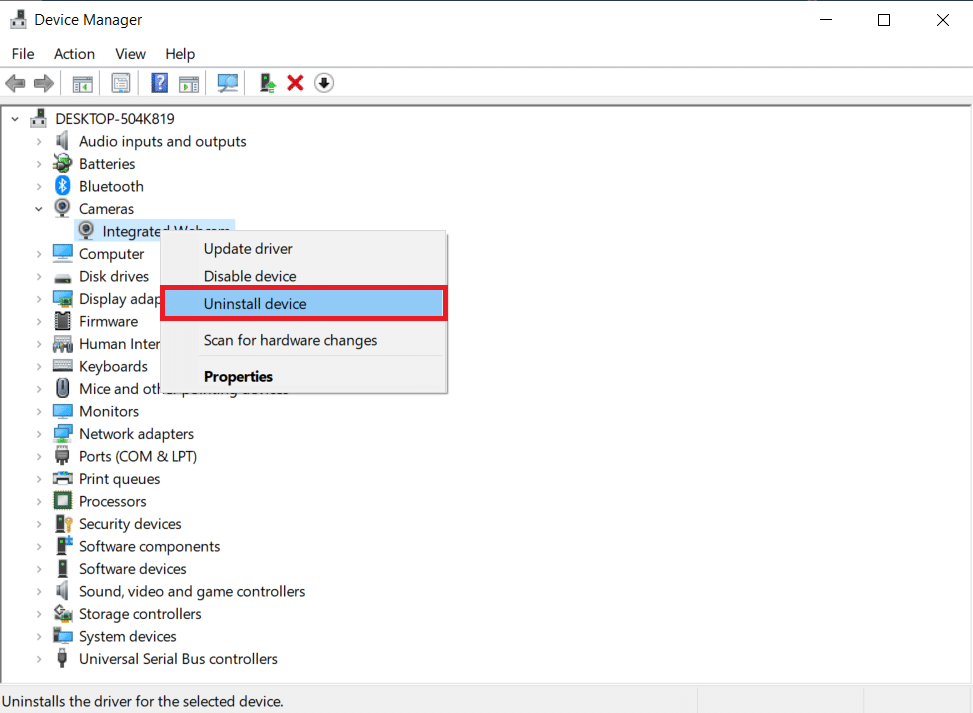
3. smellur Uninstall í tilvitnuninni.
4. Now, visit the manufacturer’s website (e.g. Lenovo).
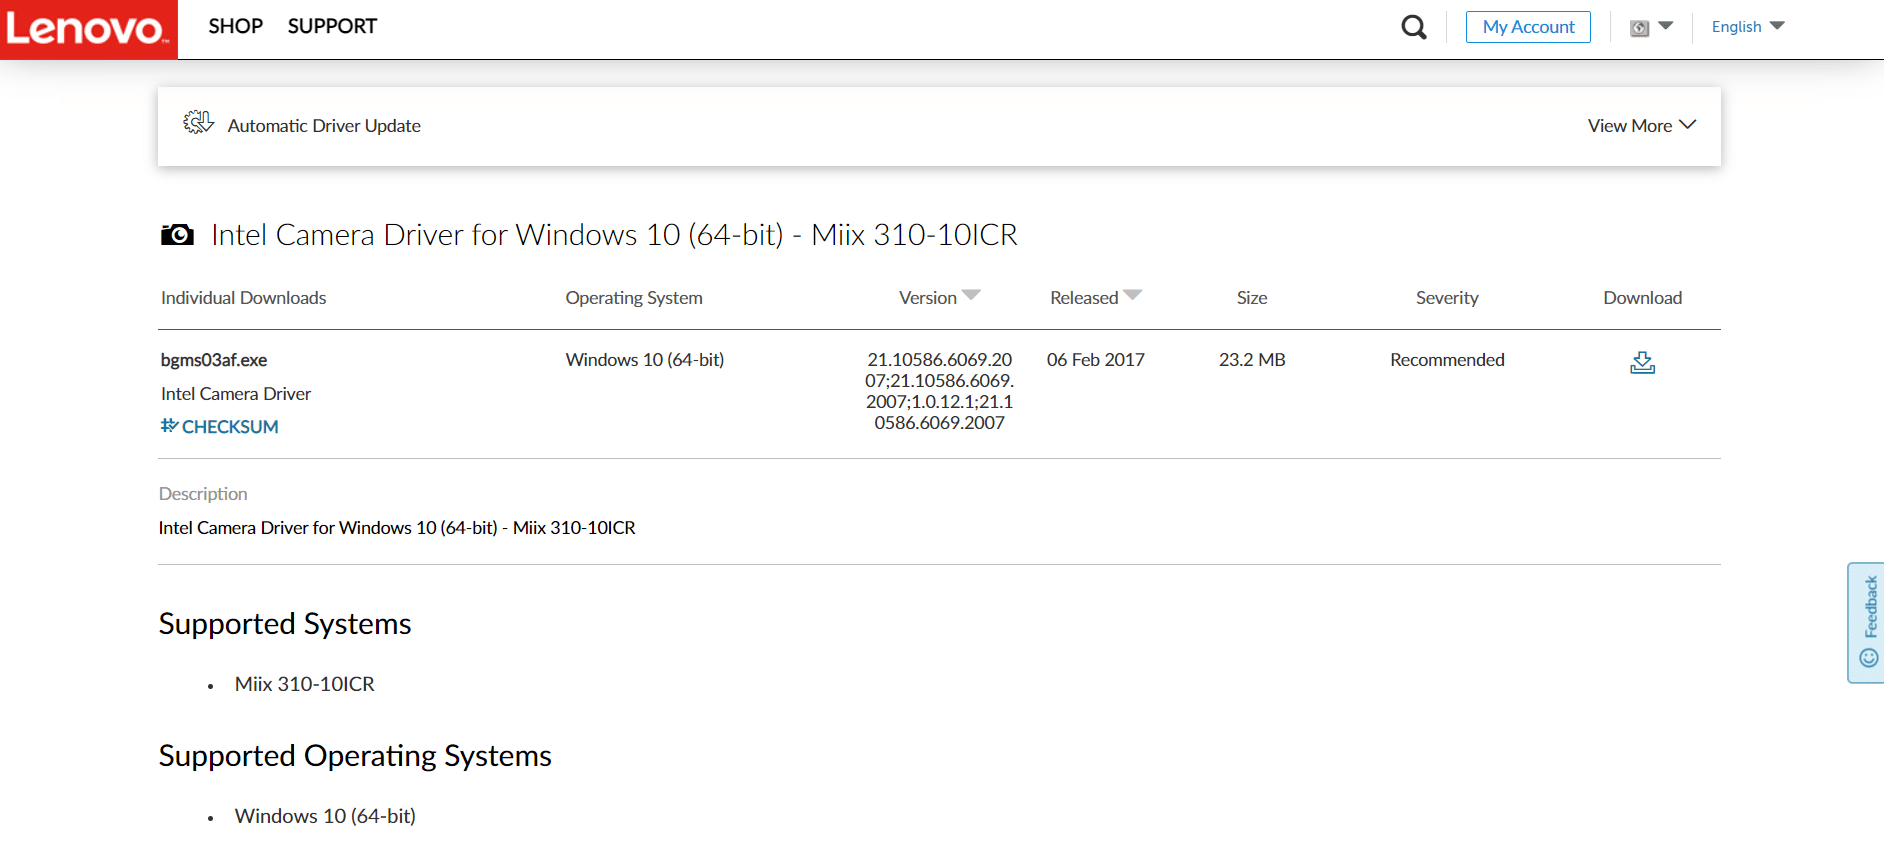
5. finna og Eyðublað rekla sem samsvara Windows útgáfunni á tölvunni þinni.
6. Þegar það hefur verið hlaðið niður, tvísmelltu á niðurhalaða skrá og fylgdu leiðbeiningunum á skjánum til að setja það upp.
Method 10: Use Browser Version of Teams
If you have not attained any fix for this Microsoft Teams video call not working issue in the desktop version of Teams, then you can try a browser of Teams. This is an alternative to the issue and makes sure you have enabled access to media services enabled in your Windows 10 PC.
- If you are using the browsing version of Teams, check if you have appropriate permissions for camera access as done in Aðferð 5.
- If not, you cannot access the camera for any browser-related applications, or you will be prompted for the same.
Einnig lesið: How To Set Microsoft Teams Status As Always Available
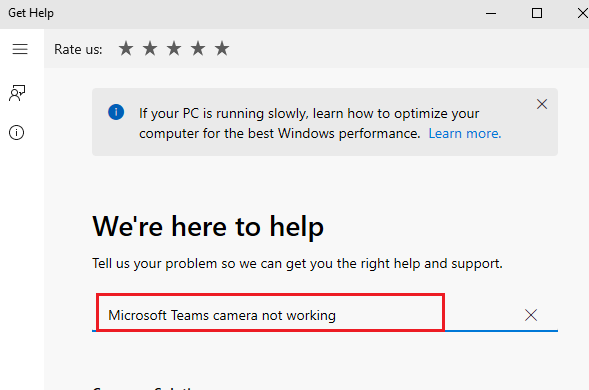
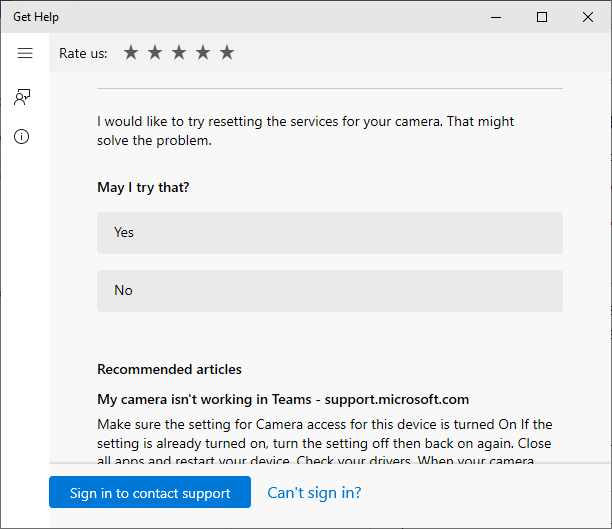
Method 11: Contact Microsoft Teams Technical Support
Still, if you cannot access Teams in both desktop and web versions of Teams, then take the last chance to submit a query on the official Microsoft support page.
1. Fara í Stuðningssíðu Microsoft.
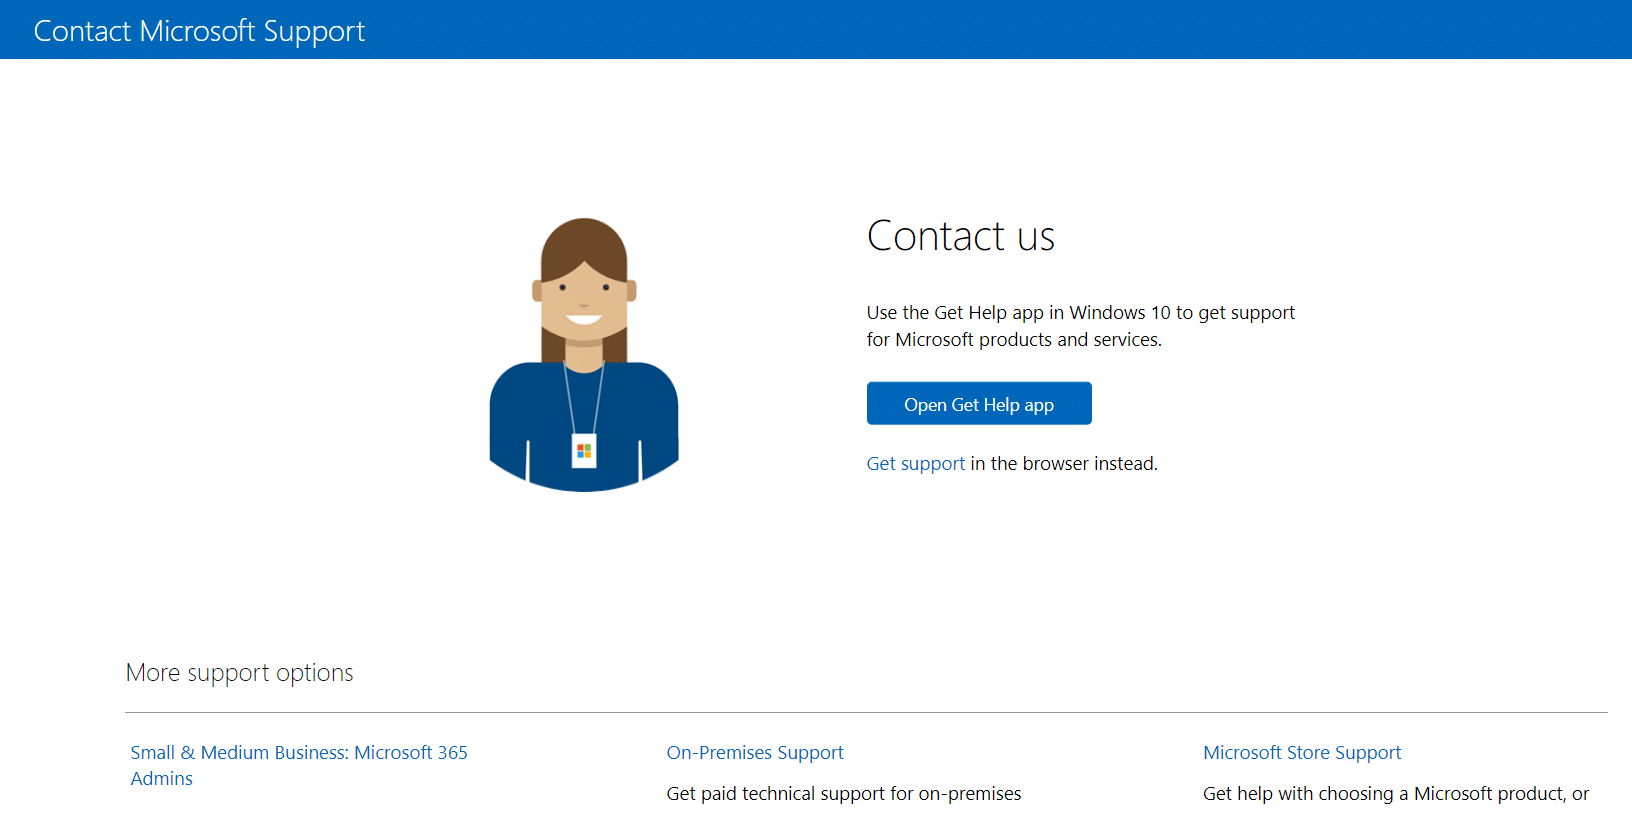
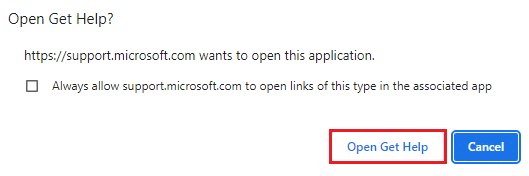
2A. You can use the Fáðu hjálparforrit in your Windows 10 system to submit your query. For this, click on the Open Get Help app button and confirm the prompt by clicking on the Opnaðu Fá hjálp hnappinn.
2B. Also, you could use the vafraútgáfa to submit your problem. To do so, click on the fá stuðning hlekkur.

3. Nú skaltu slá inn your problem í Tell us your problem so we can get you the right help and support sviði og lamdi Sláðu inn.
4. Then, answer the questions according to your convenience, and finally, you would have resolved the Microsoft Teams video call not working issue.
Mælt með:
Við vonum að þessi handbók hafi verið gagnleg og þú gætir lagað Microsoft Teams video call not working. Feel free to reach out to us with your queries and suggestions. Keep visiting our page for more cool tips & tricks, and leave your comments below. Let us know what you want to learn next.