Lagfærðu upphafsvalmyndina sem virkar ekki í Windows 10

If you have recently updated or upgraded to Windows 10, then chances are your Start Menu may not work properly, making it impossible for users to navigate around Windows 10. Users are experiencing various issues with Start Menu such as Start Menu does not open, Start Button is not working, or Start Menu freezes etc. If your Start Menu isn’t working then don’t worry as today we will see a way to fix this issue.
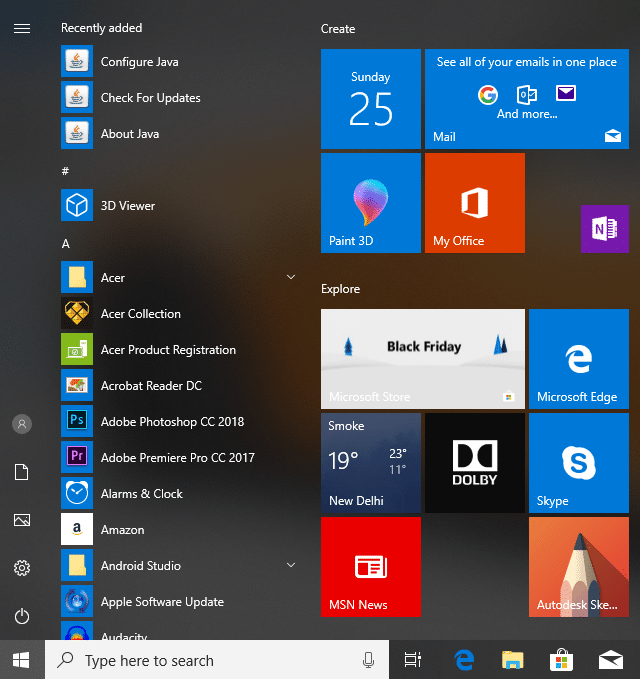
This exact cause is different for different users because each user has a different system configuration and environment. But the problem can be related to anything like corrupted user account or drivers, damaged system files, etc. So without wasting any time, let’s see How to Fix Start Menu Not Working in Windows 10 with the help of the below-listed tutorial.
Gakktu úr skugga um að búa til endurheimtarstað ef eitthvað fer úrskeiðis.
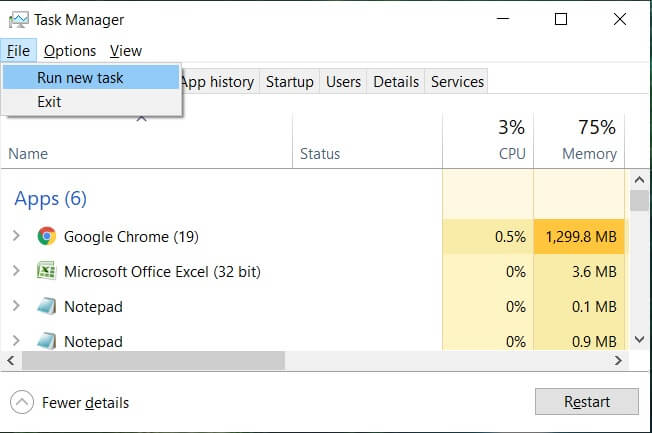
To run Command Prompt as an administrator, press Ctrl + Shift + Esc to open Task Manager. Then click on File veldu þá Hlaupa nýtt verkefni. Gerð cmd.exe og hakið "Búðu til þetta verkefni með stjórnunarréttindum” then click OK. Similarly, to open PowerShell, type powershell.exe and again checkmark the above field then hit Enter.

Aðferð 1: Endurræstu Windows Explorer
1. Ýttu á Ctrl + Shift + Esc lykla saman til að ræsa Verkefnastjóri.
2. Finndu explorer.exe í listanum þá hægrismelltu á hann og veldu Loka verkefni.

3. Nú mun þetta loka Explorer og keyra hann aftur, smelltu á File > Keyra nýtt verkefni.
4. Gerð explorer.exe og smelltu á OK til að endurræsa Explorer.

5. Exit Task Manager and see if you’re able to Fix Start Menu Not Working in Windows 10.
6. If you’re still facing the issue, then log out from your account and re-login.
7. Ýttu á Ctrl+Shift+Del key at the same time and click on Signout.
8. Type in your password to login to Windows and see if you’re able to fix the issue.
Method 2: Create a new local administrator account
Ef þú ert skráður með Microsoft reikningnum þínum skaltu fyrst fjarlægja tengilinn á þann reikning með því að:
1. Ýttu á Windows takkann + R og sláðu síðan inn “ms-stillingar:” (án gæsalappa) og ýttu á Enter.
2. Veldu Reikningur > Skráðu þig inn með staðbundnum reikningi í staðinn.
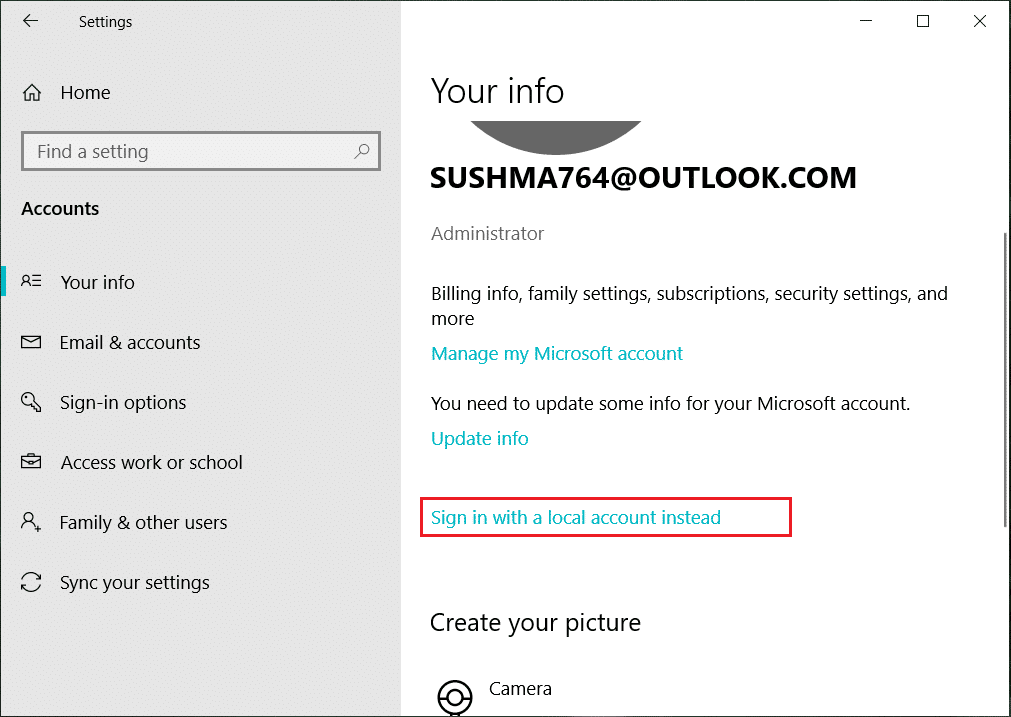
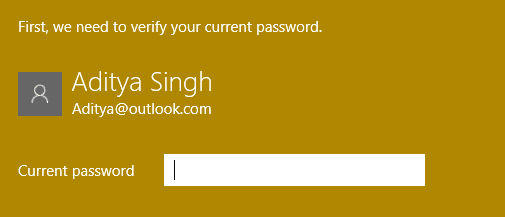
3. Sláðu inn þinn Microsoft lykilorð lykilorðs og smelltu Next.
4. Veldu a nýtt reikningsnafn og lykilorð, og veldu síðan Ljúka og skrá þig út.
#1. Create the new administrator account:
1. Ýttu á Windows Key + I til að opna Stillingar og smelltu svo Reikningar.
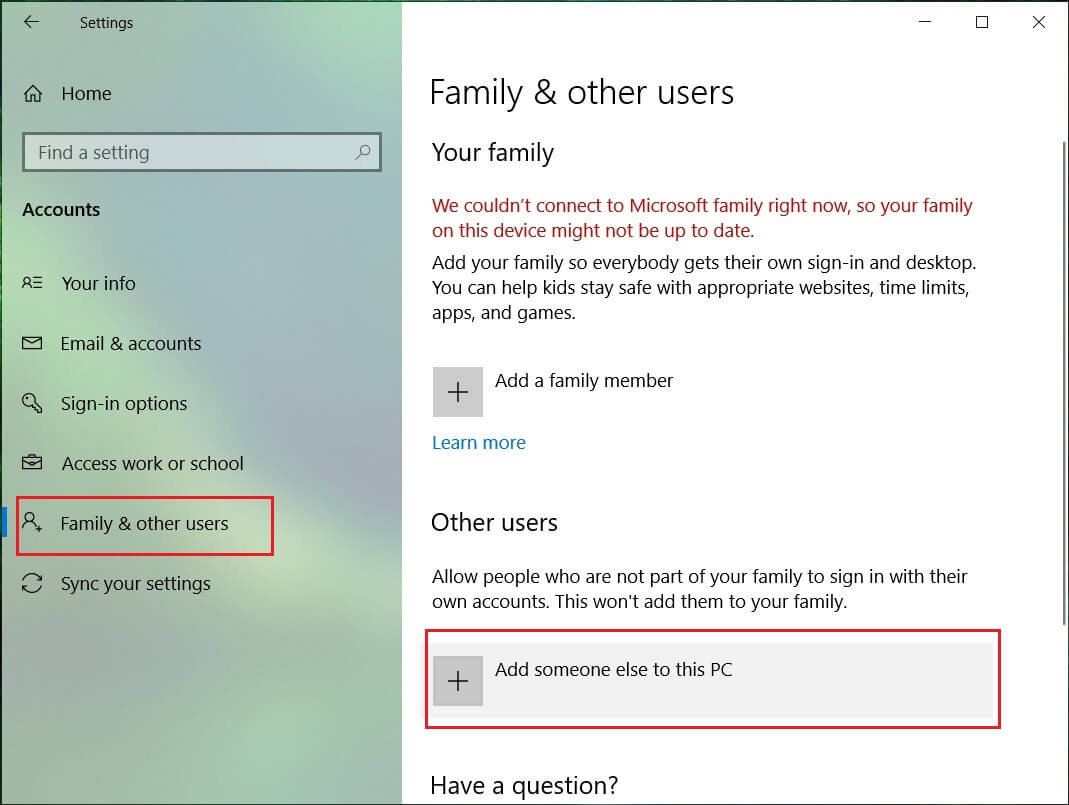
2. Farðu síðan að Fjölskylda og annað fólk.
3. Undir Annað fólk smelltu á “Bættu einhverjum öðrum við þessa tölvu."
4. Næst skaltu gefa upp nafn fyrir user and a password then select Next.
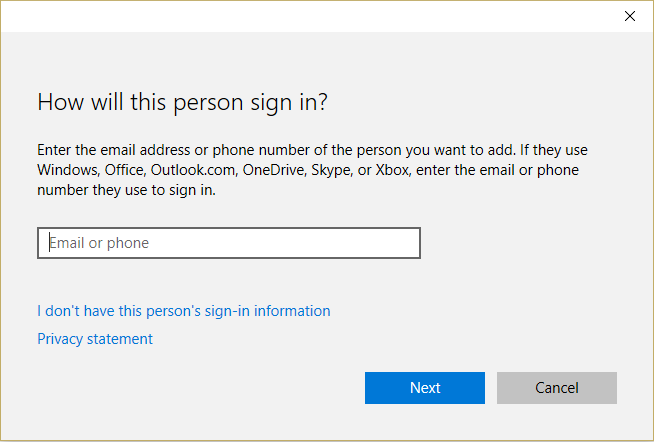
5. Setja a notendanafn og lykilorð, Veldu síðan Næst> Ljúka.
#2. Next, make the new account an administrator account:
1. Aftur opið Windows stillingar og smelltu á Reikningur.

2. Fara í Flipinn Fjölskylda og annað fólk.
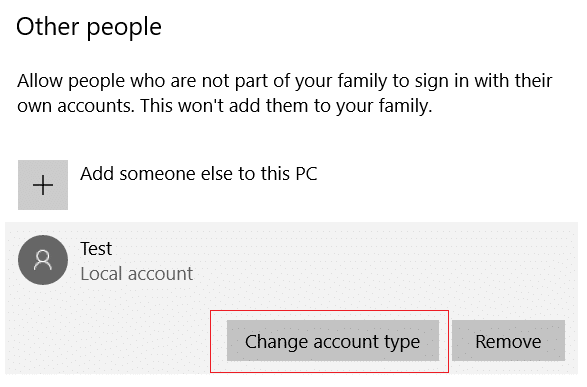
3. Annað fólk velur reikninginn sem þú bjóst til og valdi síðan a Breyta tegund reiknings.
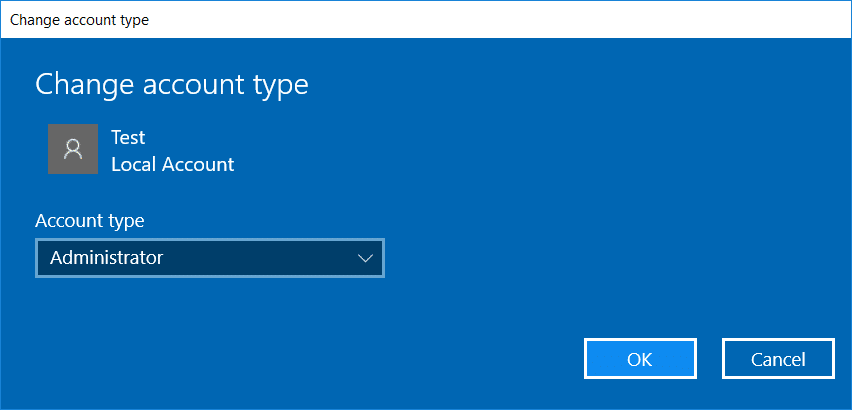
4. Undir Gerð reiknings velurðu stjórnandi smelltu svo á Lagi.
#3. If the issue persists try deleting the old administrator account:
1. Farðu aftur í Windows Stillingar þá Reikningur > Fjölskylda og annað fólk.
2. Undir Aðrir notendur, veldu gamla stjórnandareikninginn, smelltu á Fjarlægja, og velja Eyða reikningi og gögnum.

3. If you were using a Microsoft account to sign in before, you can associate it with the new administrator by following the next step.
4. Í Windows Stillingar > Reikningar, veldu Skráðu þig inn með Microsoft reikningi í staðinn og sláðu inn reikningsupplýsingarnar þínar.
Loksins ættir þú að geta það Lagfærðu upphafsvalmyndina sem virkar ekki í Windows 10 as this step seems to fix the issue in most cases.
If you continue to experience Start Menu’s issue, it’s recommended to download and run Start Menu Troubleshooter.
1. Download and run Start Menu Troubleshooter.
2. Tvísmelltu á niðurhalaða skrá og smelltu síðan á Next.
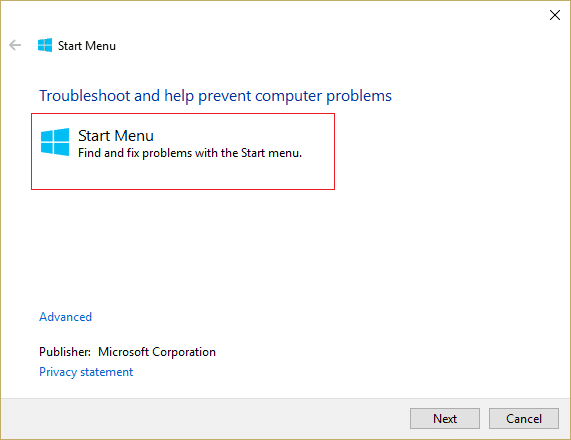
3. Let it finds and automatically Fixes Start Menu Not Working in Windows 10.
Method 4: Run System File Checker (SFC) and Check Disk
1. Opnaðu Command Prompt. Notandinn getur framkvæmt þetta skref með því að leita að 'cmd' Og ýttu síðan á Enter.

2. Sláðu nú inn eftirfarandi í cmd og ýttu á enter:
Sfc /scannow sfc /scannow /offbootdir=c: /offwindir=c:windows

3. Bíddu eftir að ferlinu hér að ofan lýkur og þegar því er lokið skaltu endurræsa tölvuna þína.
4. Næst skaltu keyra CHKDSK frá Lagfærðu villur í skráarkerfi með Check Disk Utility (CHKDSK).
5. Láttu ofangreind ferli ljúka og endurræstu tölvuna þína aftur til að vista breytingar.
Method 5: Force Cortana to Rebuild Settings
Open Command Prompt with administrative rights then type the following one by one and hit Enter after each command:
CD /d "%LOCALAPPDATA%PackagesMicrosoft.Windows.Cortana_cw5n1h2txyewy"
Taskkill /F /IM SearchUI.exe
RD /S /Q Settings
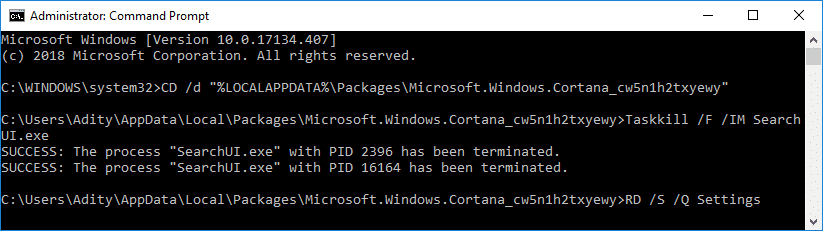
This will force Cortana to rebuild the settings and will Fix Start Menu and Cortana Not Working in Windows 10.
If the issue is still not resolved, follow this guide to fix any issues related to Cortana.
Method 6: Re-Register Windows App
1. Gerð PowerShell í Windows leit, hægrismelltu síðan á PowerShell og veldu Hlaupa sem stjórnandi.
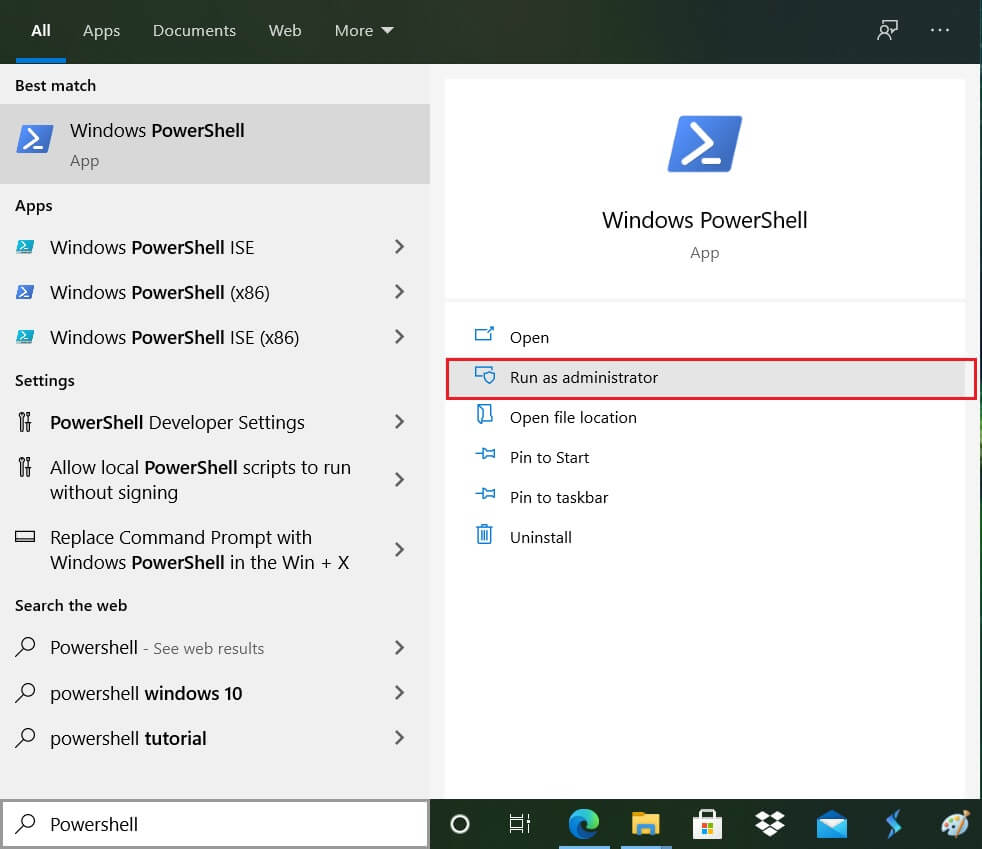
2. Sláðu nú inn eftirfarandi skipun í PowerShell gluggann:
Fá-AppXPackage -AllUsers | Foreach {Add-AppxPackage -DisableDevelopmentMode -Register "$ ($ _ .StaðsetningLocation) AppXManifest.xml"}

3. Bíddu eftir að Powershell keyrir ofangreinda skipun og hunsar þær fáu villur sem kunna að koma.
4. Endurræstu tölvuna þína til að vista breytingar.
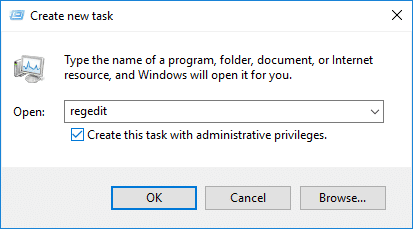
Aðferð 7: Registry Lagfæring
1. Press Ctrl + Shift + Esc to open Task Manager then click on File og velja Keyra nýtt verkefni.
2. Gerð ríkisstjóratíð og hakið "Búðu til þetta verkefni með stjórnunarréttindum” then click OK.
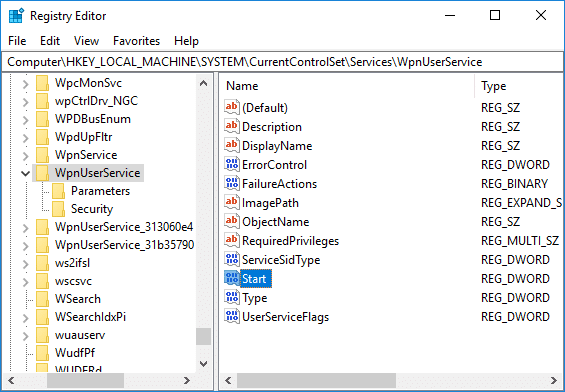
3. Now navigate to the following registry key in the Registry Editor:
ComputerHKEY_LOCAL_MACHINESYSTEMCurrentControlSetServicesWpnUserService
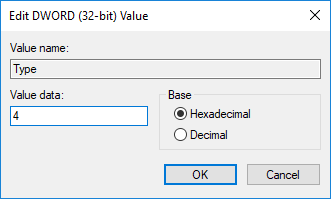
4. Vertu viss um að velja WpnUserService then in the right window double-click on the Byrjaðu DWORD.
5. Change its value to 4 then click Lagi.
6. Endurræstu tölvuna þína til að vista breytingar.
Aðferð 8: Uppfæra eða endurstilla Windows 10
Athugaðu: If you can’t access your PC, restart your PC a few times until you start Sjálfvirk viðgerð. Farðu síðan að Úrræðaleit > Endurstilla þessa tölvu > Fjarlægðu allt.
1. Ýttu á Windows takkann + I til að opna Stillingar og smelltu síðan á Uppfærslu- og öryggistákn.
![]()
2. Veldu í vinstri valmyndinni Bati.
3. Undir Endurstilla þessa tölvu, smelltu á „Byrjaðu"Hnappinn.

4. Veldu valkostinn til að Halda skrám mínum.

5. For the next step, you might be asked to insert Windows 10 installation media, so ensure you have it ready.
6. Now, select your Windows version and click aðeins á drifinu þar sem Windows er uppsett > remove my files.

5. Smelltu á Endurstilla hnappinn.
6. Fylgdu leiðbeiningunum á skjánum til að ljúka endurstillingunni.
Mælt með:
Það er það sem þú hefur með góðum árangri Lagfærðu upphafsvalmyndina sem virkar ekki í Windows 10 en ef þú hefur enn einhverjar spurningar varðandi þessa kennslu skaltu ekki hika við að spyrja þær í athugasemdahlutanum.