How to Add a Picture Password in Windows 10

Windows 10 has a lot of security features which are very useful for all users. Still, today we are talking about a particular feature which makes it easier for users to authenticate themselves while logging into their PC. With the introduction of Windows 10, you could now use password, PIN or picture password to log in to your computer. You could also set all three of them and then from the sign-in screen, and you could switch between any of these options to authenticate yourself. The only problem with these sign-in options is that they don’t work in Safe Mode and you have to only use the traditional password to login to your computer in safe mode.
But in this tutorial, we would be talking specifically about Picture Passwords and how to set it up in Windows 10. With picture password, you don’t need to remember the long password instead you sign in by drawing different shapes or making the right gesture over an image to unlock your PC. So without wasting any time let’s see How to Add a Picture Password in Windows 10 con l'aiuto della guida sotto elencata.
How to Add a Picture Password in Windows 10
Assicurati di creare un punto di ripristino nel caso in cui qualcosa vada storto.
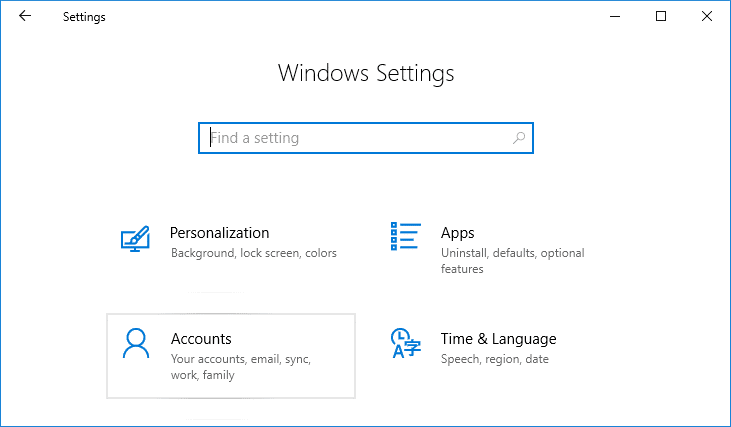
1. Premi il tasto Windows + I per aprire Impostazioni, quindi fai clic su Account.
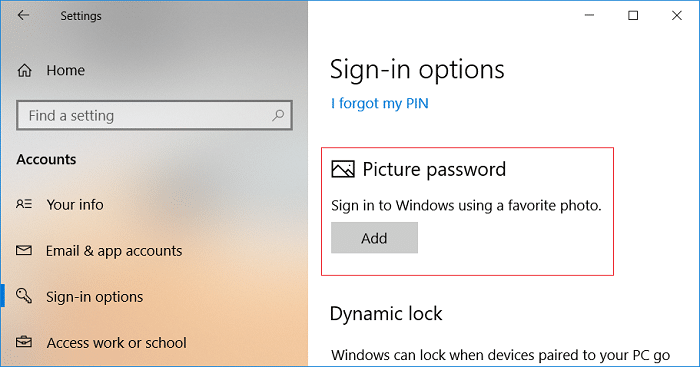
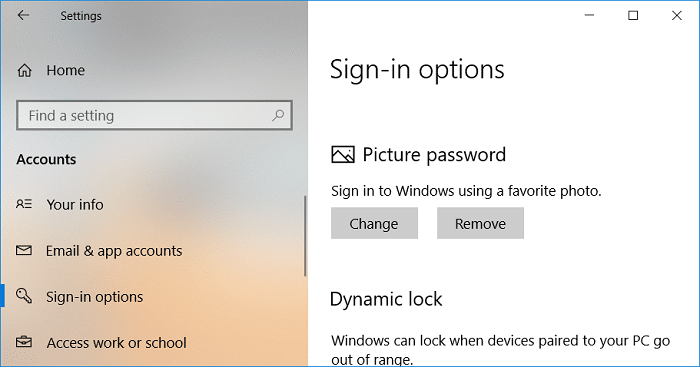
2. Dal menu a sinistra, seleziona Opzioni di accesso.
3. Ora nel riquadro della finestra di destra fare clic su "Aggiungi" sotto Picture Password.
Nota: A local account must have a password to be able to add a picture password. A Microsoft account will be password protected by default.
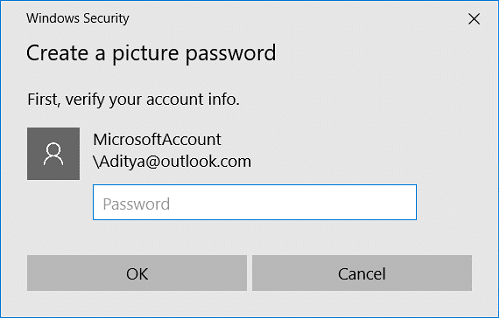
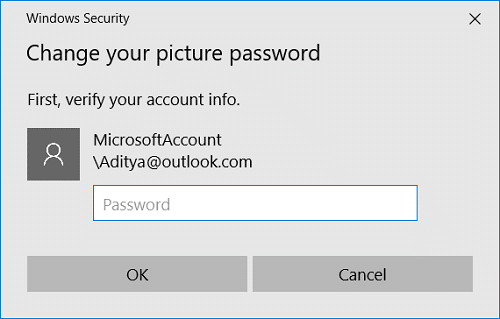
4. Windows ti chiederà di verificare la tua identità, so Enter your account password and click OK.
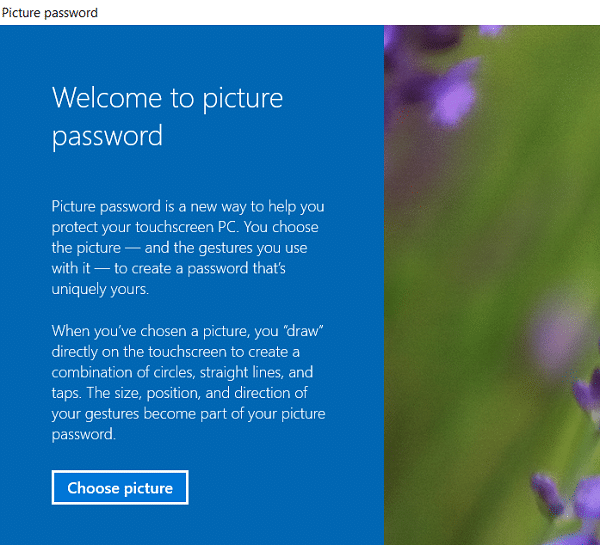
5. A new picture password window will open, clicca su "Scegli un'immagine".
6. Il prossimo, navigate to the picture’s location in Open dialog box then select the picture and click Apri.
7. Adjust the image by dragging it to position it the way you want then click “Usa questa immagine".
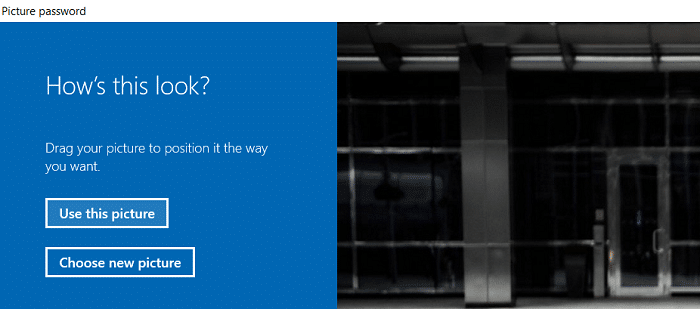
Nota: If you want to use a different picture, click on “Choose new picture” then repeat the steps from 5 to 7.
8. Ora devi farlo draw three gesture one by one on the picture. As you draw each gesture, you will see the numbers will move from 1 to 3.
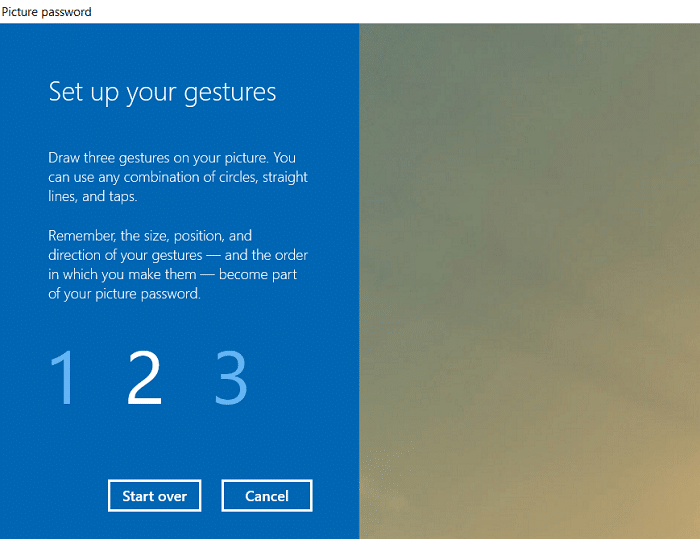
Nota: You can use any combination of circles, straight lines, and taps. You can click & drag to draw a circle or triangle or any shape you like.
9. Once you draw all the three gestures, you will be asked to draw them all again to confirm your password.
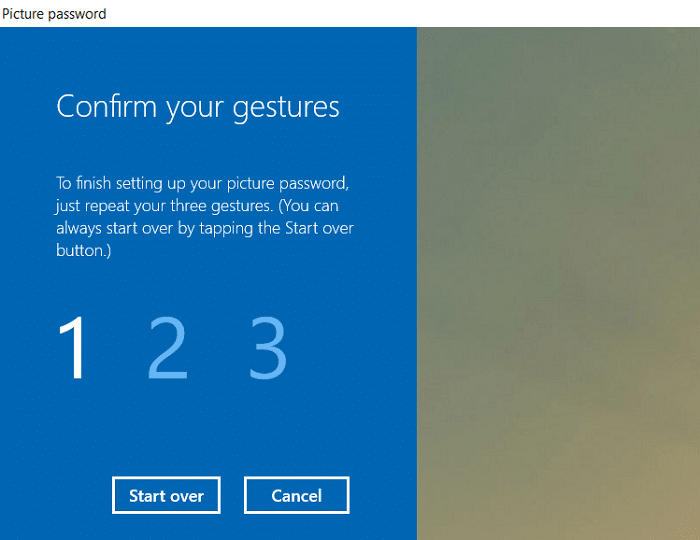
10. If you mess up your gestures, you could click on “Ricominciare” to start the process again. You would need to draw all the gestures from the beginning.
11. Infine, after adding all the gestures click Finish.
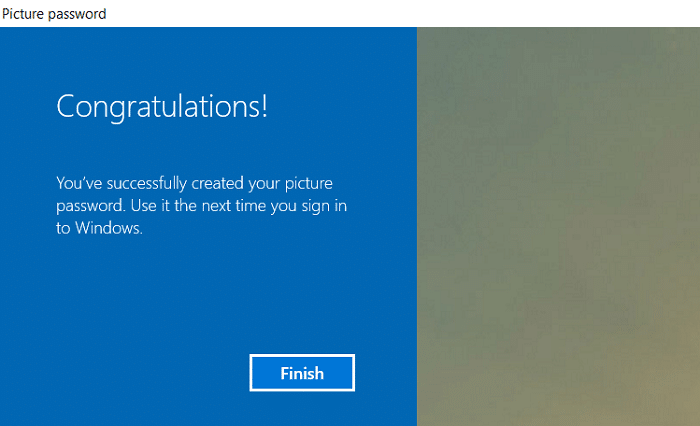
12. That’s it, your picture password has now been added as a sign-in option.
How to Change Picture Password in Windows 10
1. Premi il tasto Windows + I per aprire Impostazioni, quindi fai clic su Account.
2. Dal menu a sinistra, seleziona Opzioni di accesso.
3. Ora nel riquadro della finestra di destra fare clic su "Cambiamento di"pulsante sotto Picture Password.
4. Windows will ask you to verify your identity, so Inserisci la password del tuo account e fare clic su OK.
5. Adesso hai due opzioni, either you could change the gestures of your current picture, or you could use a new picture.
6. To use the current picture, click on “Usa questa immagine” and if you want to use a new image, click “Scegli una nuova immagine".
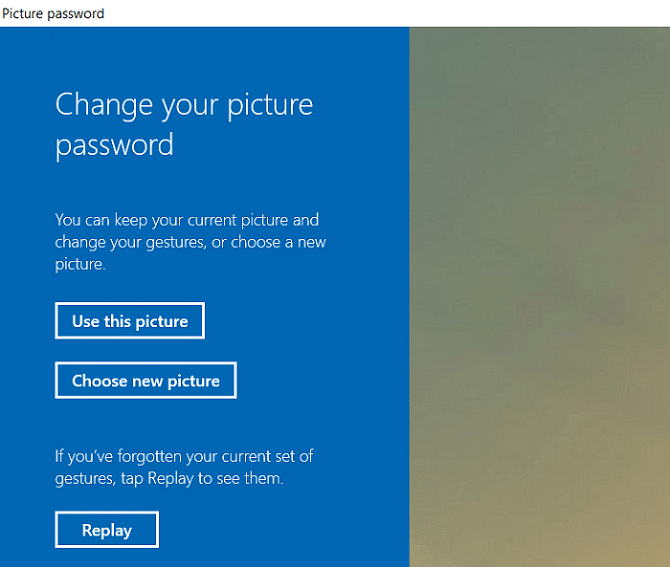
Nota: If you click “Use this picture” then skip the steps 7 and 8.
7. Navigate to and select the picture file you want to use then click Apri.
8. Adjust the image by dragging it to position it the way you want then click “Usa questa immagine".
9. Ora devi farlo draw three gesture one by one on the picture.
Nota: You can use any combination of circles, straight lines, and taps. You can click & drag to draw a circle or triangle or any shape you like.
10. Once you draw all the three gestures, you will be asked to draw them all again to confirm your password.
11. Finally, after adding all the gestures click Fine.
12. Riavvia il PC per salvare le modifiche.
How to Remove a Picture Password in Windows 10
1. Premi il tasto Windows + I per aprire Impostazioni, quindi fai clic su Account.
2. Dal menu a sinistra, seleziona Opzioni di accesso.
3. Ora nel riquadro della finestra di destra fare clic su "Rimuovere"pulsante sotto Picture Password.
4. That’s it, your picture password has now been removed as a sign-in option.
5. Chiudi tutto e riavvia il PC per salvare le modifiche.
Consigliato:
Questo è ciò che hai imparato con successo How to Add a Picture Password in Windows 10 ma se hai ancora domande riguardo a questo tutorial, sentiti libero di farle nella sezione commenti.