Of course, Google Play Services is very important as it handles a major part of your Android device’s functioning. Not many people know about it, but it פועל ברקע and makes sure that all your apps work properly and smoothly. It also coordinates authentication processes, all the privacy settings, and syncing contact numbers.
But what if your low-key best friend turns into a foe? Yes, that is right. Your Google Play Services app can act as a battery burner and suck up your Battery in a go. Google Play Services allows features such as Location, Wi-Fi network, mobile data to work in the background, and this certainly costs you Battery.
In order to combat that, we have listed down various methods to fix this issue, but before starting, let us learn about a few חוקי זהב about your Phone’s Battery life:
1. Switch off your Wi-Fi, Mobile Data, Bluetooth, Location, etc. if you are not using them.
2. Try to maintain your battery percentage between 32% עד 90%, or else it can affect the capacity.
3. Do not use a duplicate charger, cable, or adaptor to charge your phone. Only use the original one sold by the phone manufacturers.
Even after following these rules, your phone is creating an issue, then you should definitely check out the list we have jotted down below.
ראה גם:
8 דרכים לתקן TikTok ללא שגיאת חיבור לאינטרנט
Fix Google Chrome Disk Full Download Error
Acer Laptop Shutting Down without Warning (Even on Full Battery): Here’s the Fix!
10 Fixes for Google Maps Location Sharing Not Updating
תקן את מסך המוות הסגול בטלפון סמסונג
אז, מה אתם מחכים? בואו להתחיל!
How to Fix Google Play Services Battery Drain
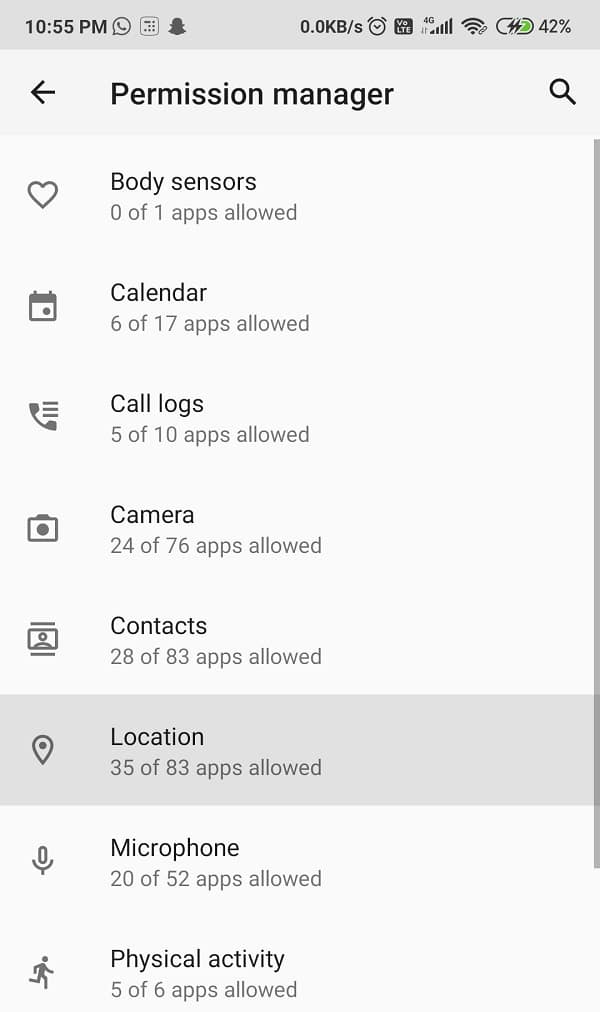
Detect Google Play Services’ Battery Draining
Detecting the sum of Battery that Google Play Services is draining out of your Android phone is very easy. Interestingly, you do not even need to download any third-party app for that. All you need to do is follow these basic steps:
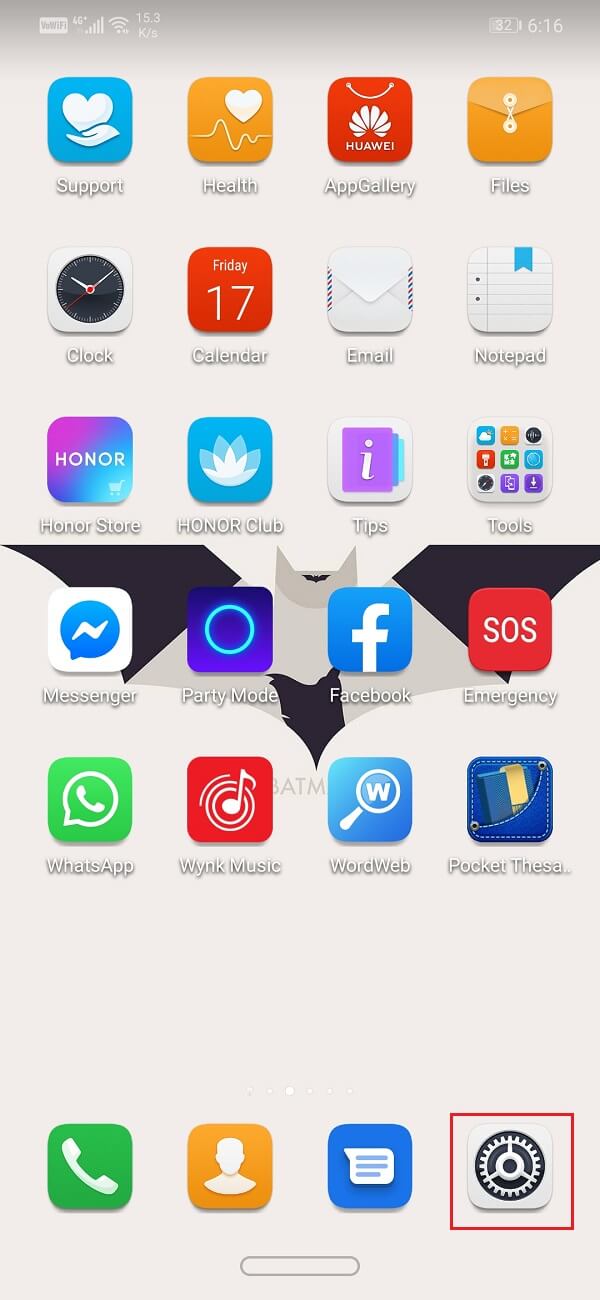
1. עבור ל הגדרות icon of the App Drawer and tap on it.
2. מצא אפליקציות והתראות ובחר אותו.
3. כעת, הקש על נהל יישומים לַחְצָן.
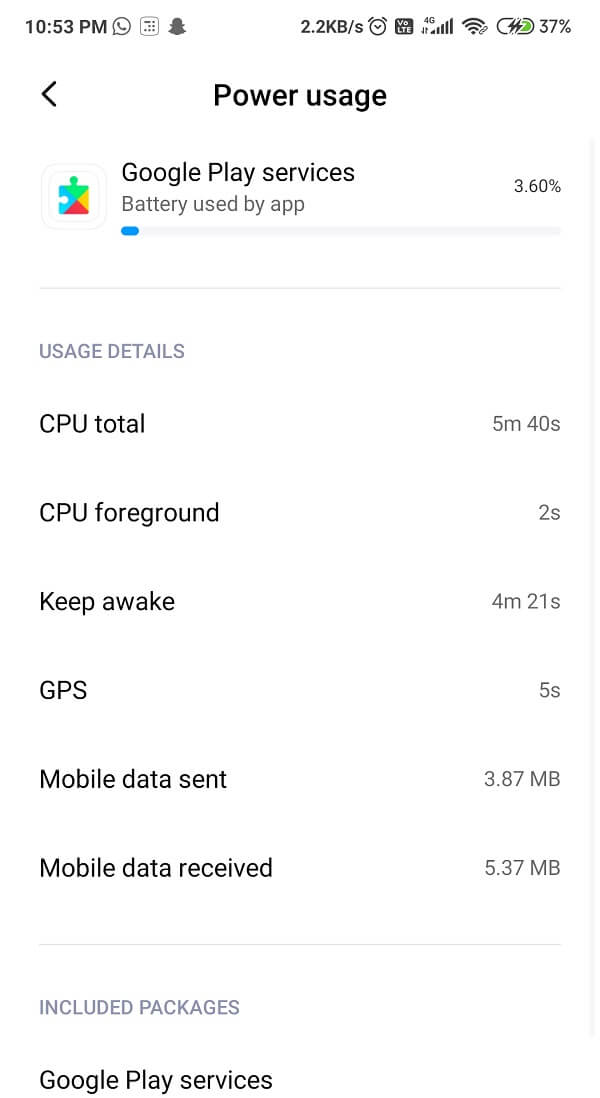
4. From the scroll-down list, find the “שירותי Google Play” option and then click on it.

5. Moving forward, click on the ‘מתקדם’ button then take a glance at what percentage is mentioned under the “סוֹלְלָה" סָעִיף.
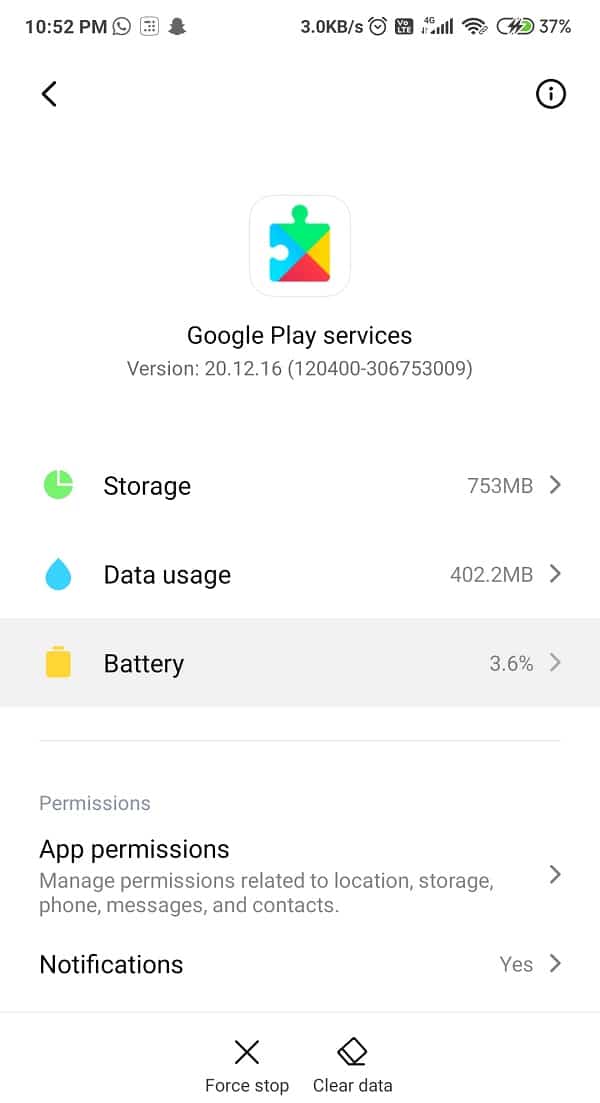
זה יהיה display the percentage of battery consumption of this particular App since the time the phone was last fully charged. In case, Google Play services are using a large amount of your Battery, say if it is going up to double digits, that can be a little problematic as it is considered to be too high. You will have to act on this issue, and for that, we are here to help with infinite tips and tricks.
Which is a major source of Battery Drainage?
Let me bring a major fact to the table. Google Play Services does not really drain your Android device’s Battery as such. It actually depends on the other apps and features that are constantly communicating with the Google Play Services, such as mobile data, Wi-Fi, Location tracking feature, etc. that run in the background and suck the Battery out of your device.
So once you are clear that it is שירותי Google Play that is affecting your Battery negatively, try and focus on finding out which apps are exactly the root cause of this critical problem.
For that, there are many apps, such as Greenify ו סטטיסטיקות סוללה טובות יותר, that are available on Google Play Store for free and can help you out in this situation. They will provide you with detailed insight into which apps and processes are the root cause of your Battery running out so fast. After seeing the results, you can accordingly remove those apps by uninstalling them.
גם לקרוא: 7 Best Battery Saver Apps for Android with Ratings
Google Play Services Draining Phone’s Battery? Here’s How to Fix it
עכשיו שאנחנו יודעים את cause of the battery drain is Google Play services its time to see how to fix the issue with the below-listed methods.
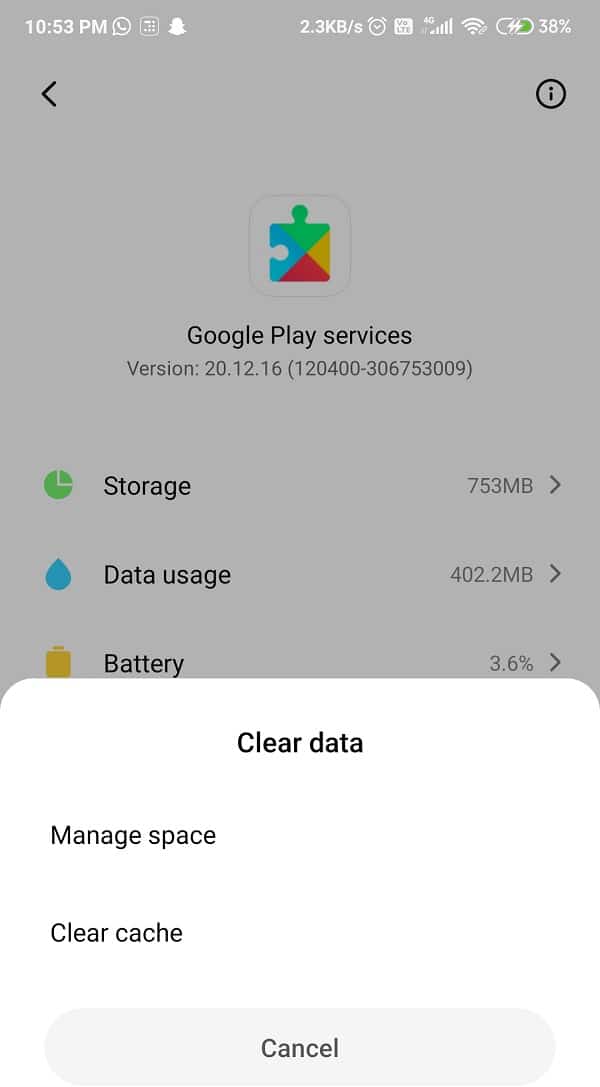
Method 1: Clear Cache of Google Play Services
The first and foremost method that you should practice is clearing the Cache and data history of Google Play Services. Cache basically helps to store data locally because of which the phone can speed up the loading time and cut data usage. It’s like, every time you access a page, the data gets downloaded automatically, which is kind of irrelevant and unnecessary. This older data can lump up, and it can also go astray, which can be a little annoying. To avoid such a situation, you should try clearing cache and data in order to save some battery.
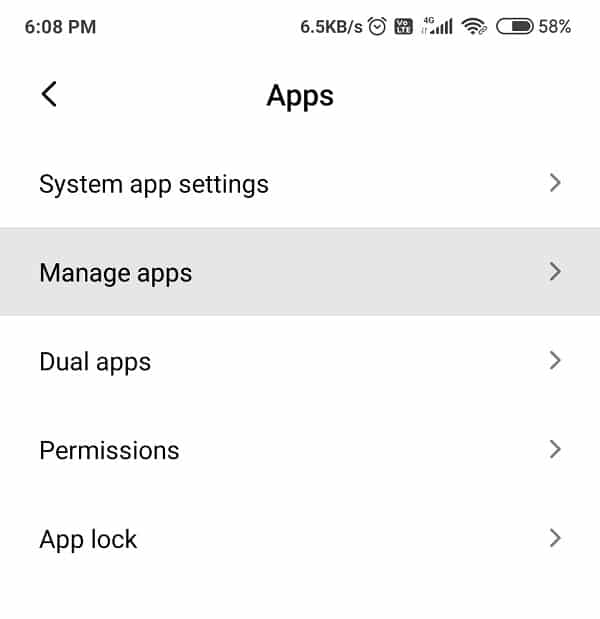
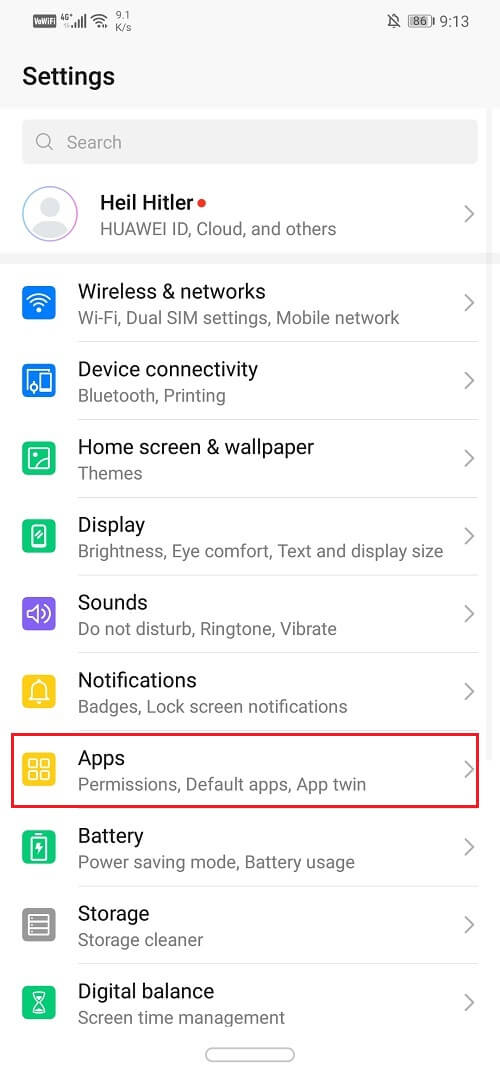
1. To wipe the Google Play Store cache and data memory, click on the הגדרות option and select the “אפליקציות והודעות"אופציה.
![]()
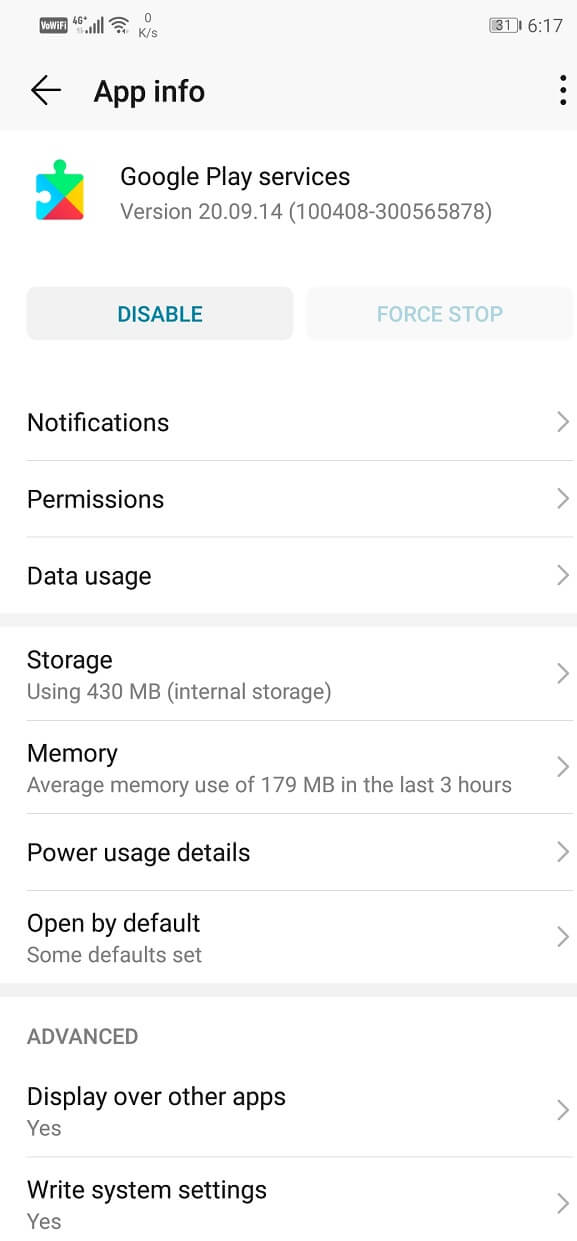
2. כעת לחץ על נהל יישומים ולחפש את Google Playשירותים option and tap on it. You will see a list of options, including a “מטמון” button, select it.
If this does not fix your battery drainage issues, try going for a more radical solution and clear the Google Play Services data memory instead. You will be required to log in to your Google account after you are done with it.
Steps to Delete Google Play Store Data:
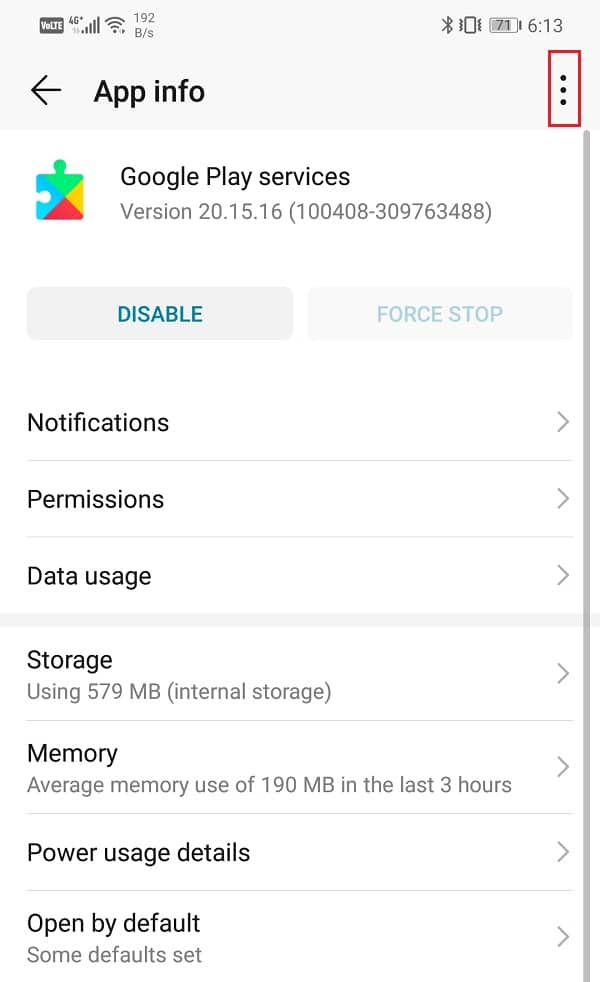
1. עבור ל הגדרות אוֹפְּצִיָהולחפש את Apps, like in the previous step.
2. כעת לחץ על ניהול אפליקציות, ומצא את שירותי Google Play app, select it. Finally, rather than pressing “נקה מטמון", לחץ על "נקה נתונים".
3. This step will clear the application and make your phone a little less heavy.
4. All you need to do is log in to your Google Account.
Method 2: Turn Off Auto Sync Feature
If by chance, you have more than one Google accounts linked with your Google Play Services app, that could be the reason behind your phone’s battery drain issue. As we know that Google Play Services has to track your location in order to look for new events in your current area, it is unknowingly running in the background constantly, without a break. So basically, that means even more memory is consumed.
But, of course, you can fix this. You simply just have to turn the Auto Sync feature for other accounts off, for example, your Gmail, Cloud Storage, Calendar, other third-party applications, which include Facebook, WhatsApp, Instagram, etc.
In order to turn off the auto-sync Mode, follow these steps:
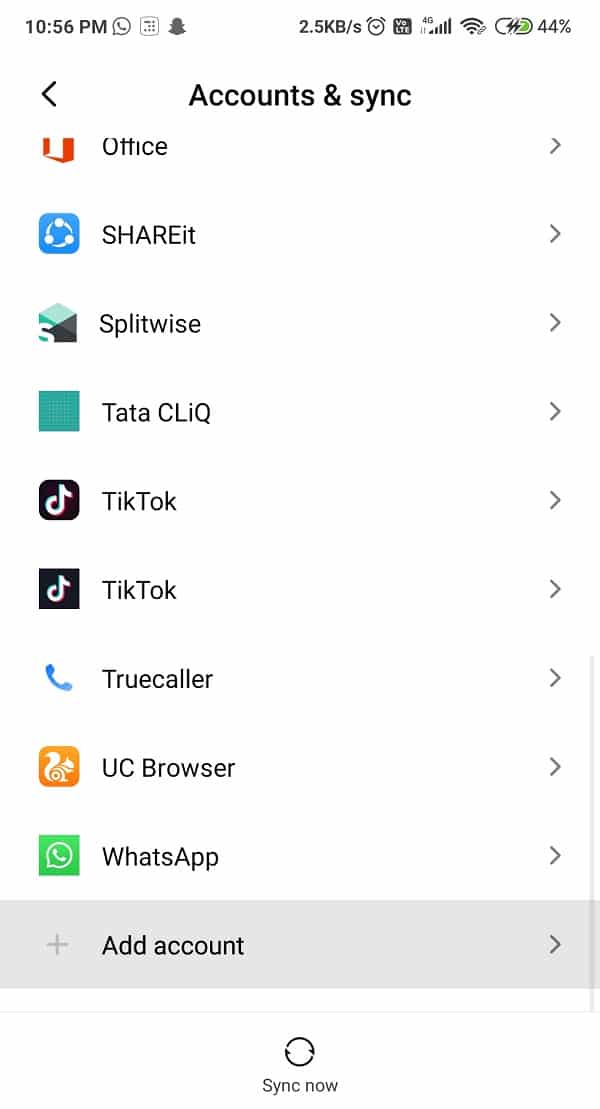
1. Tap on the ‘הגדרות’ icon and then scroll down until you find ‘Accounts and Sync’.
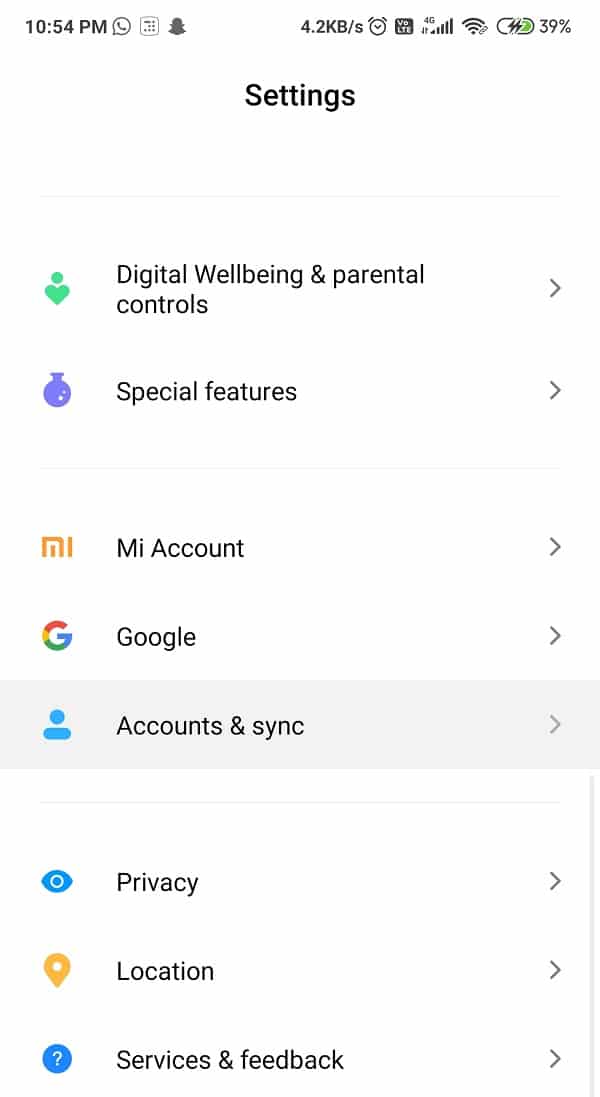
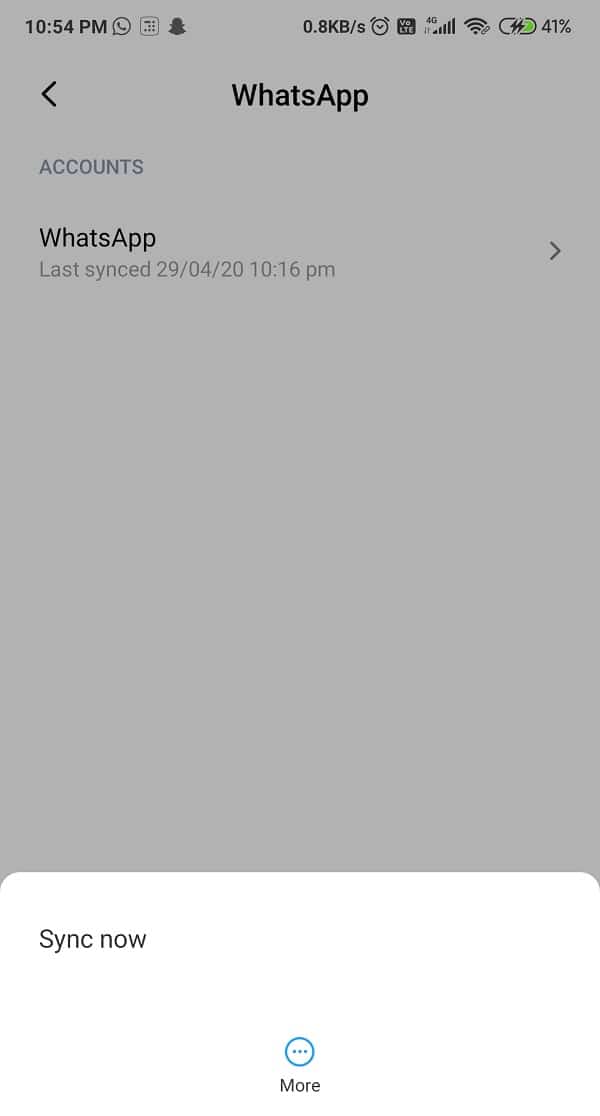
2. Then, simply click on each account and check whether the Sync is turned off or on.
3. Supposedly, the account says “Sync on”, then click on the “סנכרון חשבון” option and go to the app and control all the major syncing options for that specific App.
However, it is not a necessity. If auto-sync is really very crucial for a given app then you can leave it as it is and try turning off auto-sync for the apps, which are a little less important.
שיטה 3: תקן שגיאות סנכרון
Sync errors arise when Google Play Services try to sync data but does not necessarily succeed. Because of these errors, you might have to charge your Android Device. Check whether your contact numbers, calendar, and Gmail account have any major issues. If it is possible, remove any emojis or stickers next to your contact names as Google does not really dig that.
לנסות removing and re-adding your Google account a shot. Maybe this will fix the errors. Turn off your mobile data and disconnect Wi-Fi for a while, like for 2 or 3 minutes and then turn it back on.
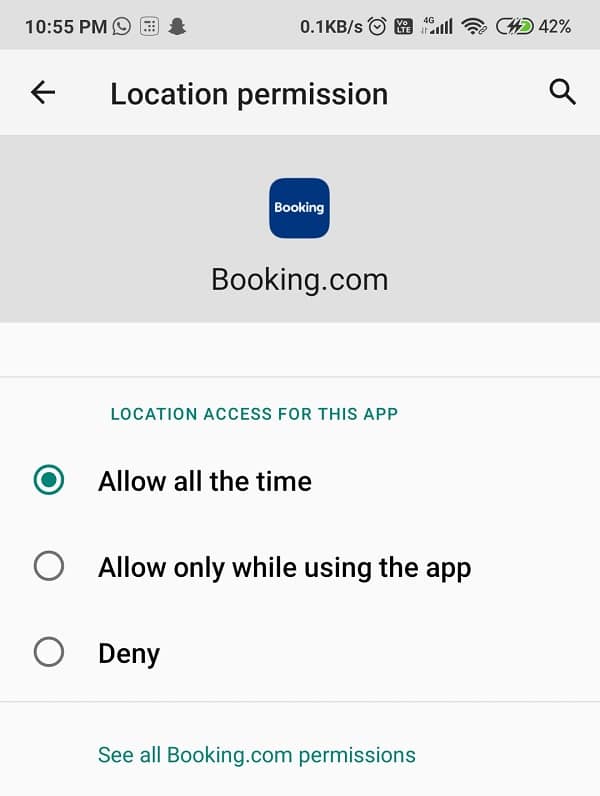
Method 4: Turn Off Location Services for certain apps
Many default and third-party apps require your Location in order to work. And the problem is that they ask for it through the Google Play Services, which later uses the GPS system to collect this data and information. In order to turn off Location for a particular app like Life360, follow these simple steps:
1. עבור ל הגדרות אפשרות והקש על Apps סָעִיף.
![]()
2. הקש על נהל יישומים button and then look for the App that is causing this trouble and select it.
3. כעת, בחר את הרשאות button and check whether the מקום syncing toggle is turned on.
4. אם כן, תכבה את זה immediately. This will help in the reduction of battery drainage.
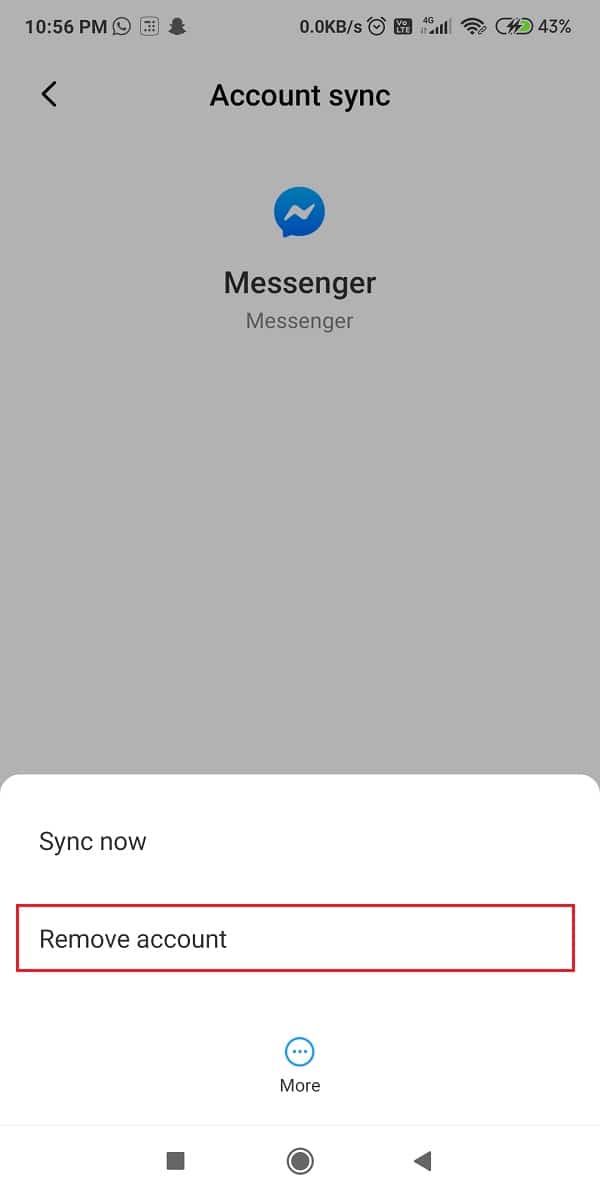
Method 5: Remove and re-add all your Account(s)
Removing the current Google and other application accounts and then adding them back again can also help you overcome this issue. Sometimes syncing and connectivity errors can cause such problems.
1. הקש על הגדרות option and then navigate the חשבונות וסנכרון כפתור. לחץ על זה.
2. כעת לחץ על Google. You will be able to see all the accounts you have linked with your Android device.
הערה: Make sure you remember the user ID or username and password for each of the accounts that you are planning to remove; otherwise, you won’t be able to log in again.
3. Tap on the account and then select the עוד כפתור קיים בתחתית המסך.
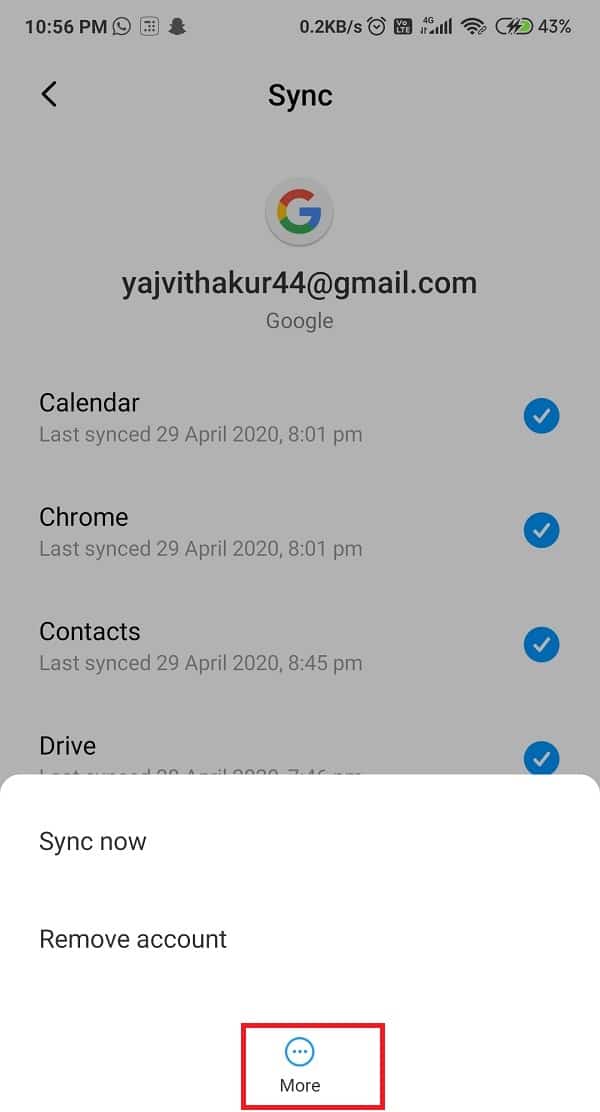
4. כעת, הקש על הסר חשבון. Repeat the process with the other accounts as well.
5. כדי להסיר את Application Accounts, לחץ על האפליקציה ofwhich you want to remove the account and then press on עוד לַחְצָן.
6. לבסוף, בחר the Remove Account כפתור, ואתה טוב ללכת.
7. ל add back these accounts, go back to the הגדרות ולחץ על חשבונות וסנכרון שוב.
8. Scroll down the list until you find the הוסף חשבון option. Tap on it and follow the further instructions.
השיטה 6: עדכן את שירותי Google Play
If you are not using an up to date version of the Google Play Services, this might be the reason behind your problem. Many such issues can be fixed by just updating the App as it fixes the problematic bugs. So, at last, updating the App might be your only option. To update your Google Play Services, follow these steps:
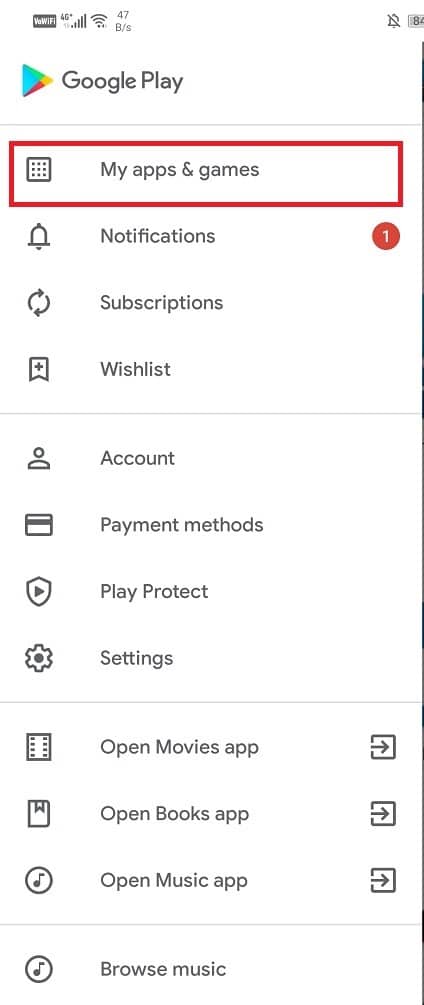
1. עבור ל בחנות Google Play ולחץ על שלוש שורות icon present at the top left corner of the screen.
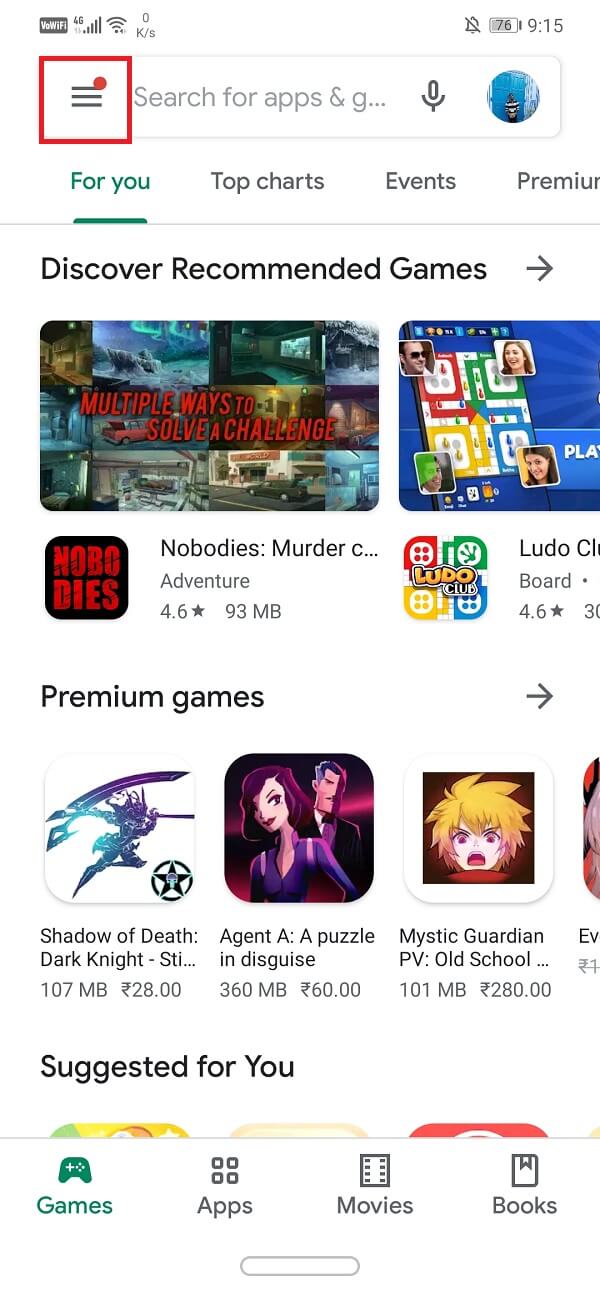
2. From that, select האפליקציות והמשחקים שלי. In the drop-down list, find the שירותי Google Play app and check whether it has any new updates. If yes, להורדה them and wait for Installation.
If you’re still unable to update Google Play services then it might best to update Google Play Services manually.
השיטה 7: Update Google Play Services Using Apk Mirror
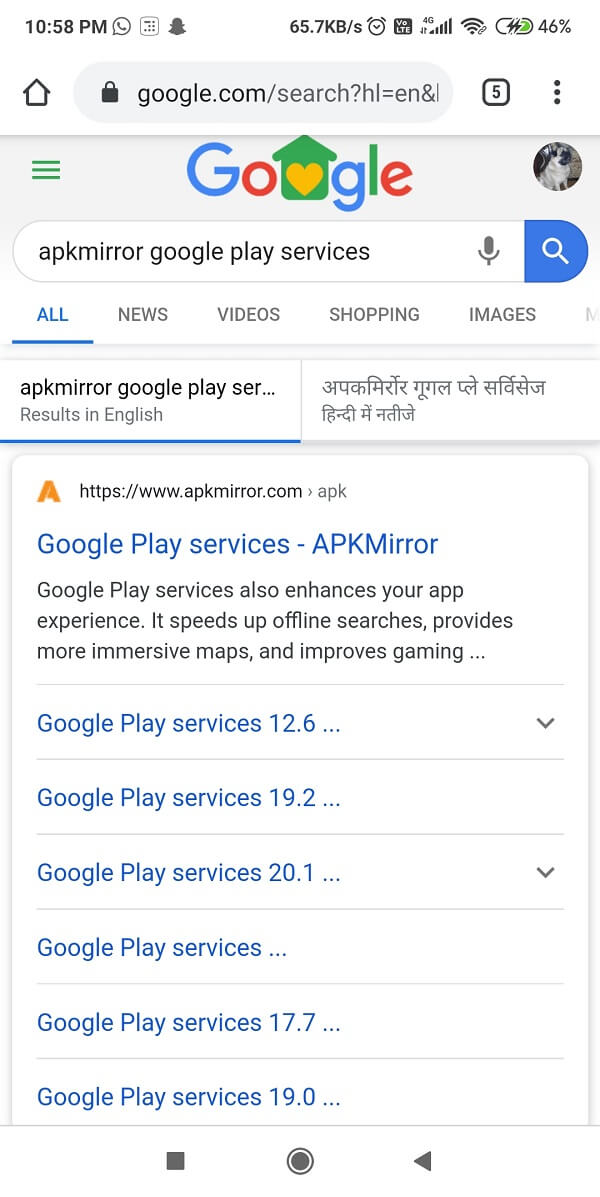
If the above method didn’t work then you can always update Google Play Services using third-party websites such as APK mirror. Although this method isn’t recommended because third-party websites might contain viruses or malware in the .apk file.
1. עבור אל שלך ברואר and log on to APKMirror.com.
2. In the search box, type ‘Google Play Service’ and wait for its latest version.
3. If yes, click on the להורדה button and wait until it is done.

3. After downloading is complete, להתקין the .apk file.
4. If you are a first time user, tap on the ‘Give Permission’ sign, pop up on the screen next.
Go as per instructions, and hopefully, you will be able to fix the Google Play Services Battery Drain issue.
השיטה 8: Try Uninstalling Google Play Services Updates
This might sound a little odd, but yes, you heard it right. Sometimes, what happens is that with a new update, you might invite a bug as well. This bug can create many major or minor issues, such as this one. So, try uninstalling Google Play Services’ updates, and maybe it will make you happier. Remember, removing updates may also take away some of the additional features and improvements that were added.
1. עבור ל Settings of your phone.
2. הקש על Apps option.
3. כעת בחר את שירותי Google Play מרשימת האפליקציות.
4. עכשיו הקש על ה- שלוש נקודות אנכיות on the top right-hand side of the screen.
5. לחץ על הסר את ההתקנה של עדכונים אוֹפְּצִיָה.
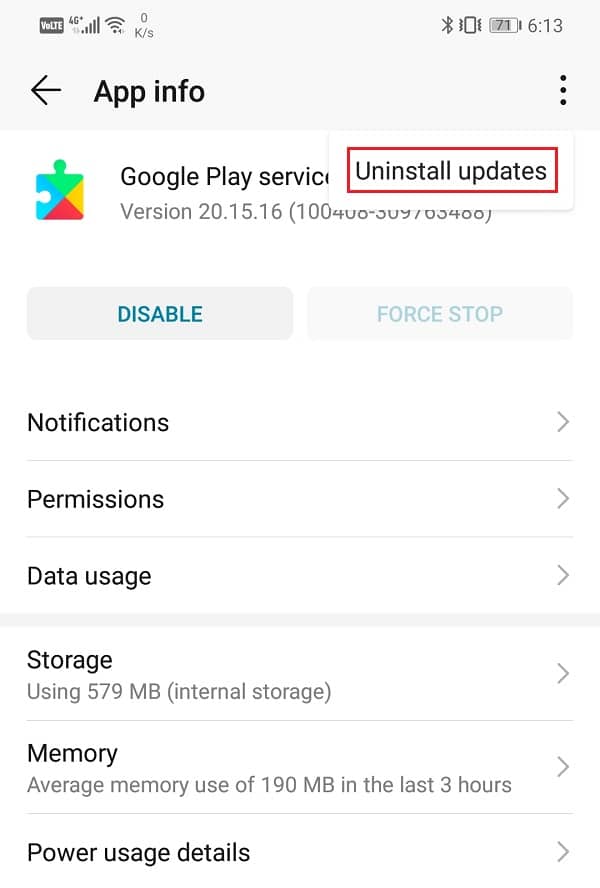
6. Reboot your phone, and once the device restarts, open Google Play Store, and this will trigger an automatic update for Google Play Services.
גם לקרוא: 3 Ways to Update Google Play Store [Force Update]
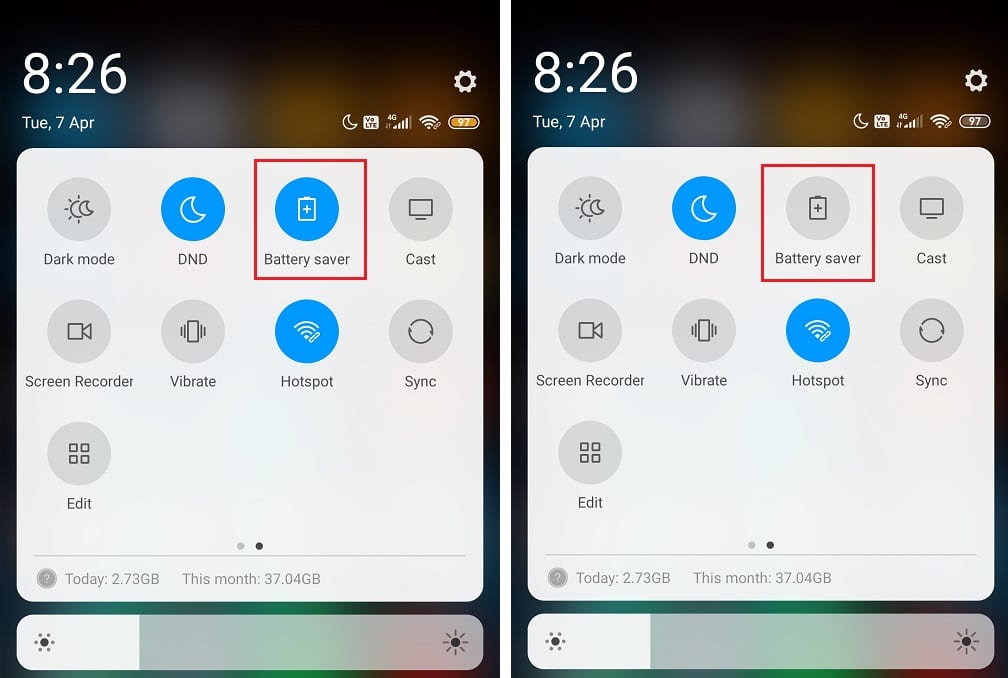
השיטה 9: Enable Battery Saver Mode
If your Android device’s battery is draining as fast as a river, you should definitely worry about it & check Battery health right away.. Google Play Services can trigger the Battery’s working ability and decrease its capacity. It can be quite frustrating as you cannot carry your chargers everywhere, every time. To optimize your Battery, you can switch ON the Battery Saver Mode, and it will make sure that your Battery survives long.
This feature will disable unnecessary phone’s performance, restricts background data, and also reduces the brightness in order to conserve energy. To switch on this exciting feature, follow these steps:
1. לך ל הגדרות ולנווט הבטריה אוֹפְּצִיָה.
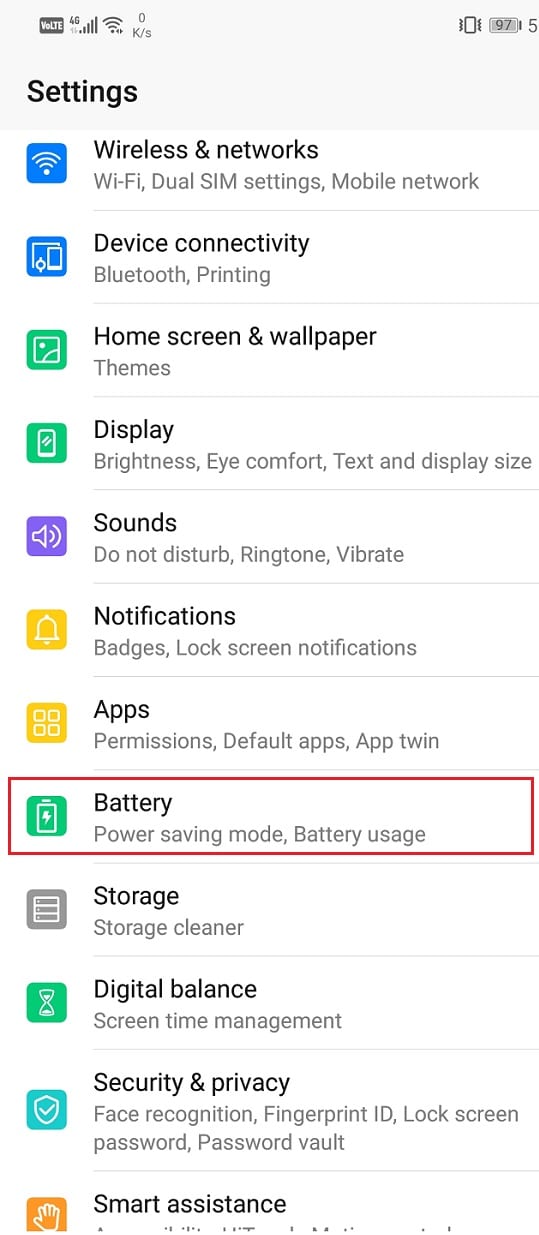
2. Now, locate the ‘Battery & Performance’ ולחץ עליו.
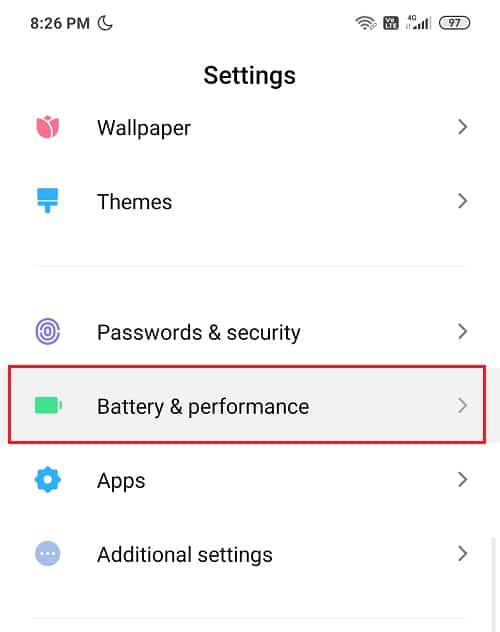
3. You will see an option saying ‘Battery Saver.’ Turn on the toggle next to Battery Saver.
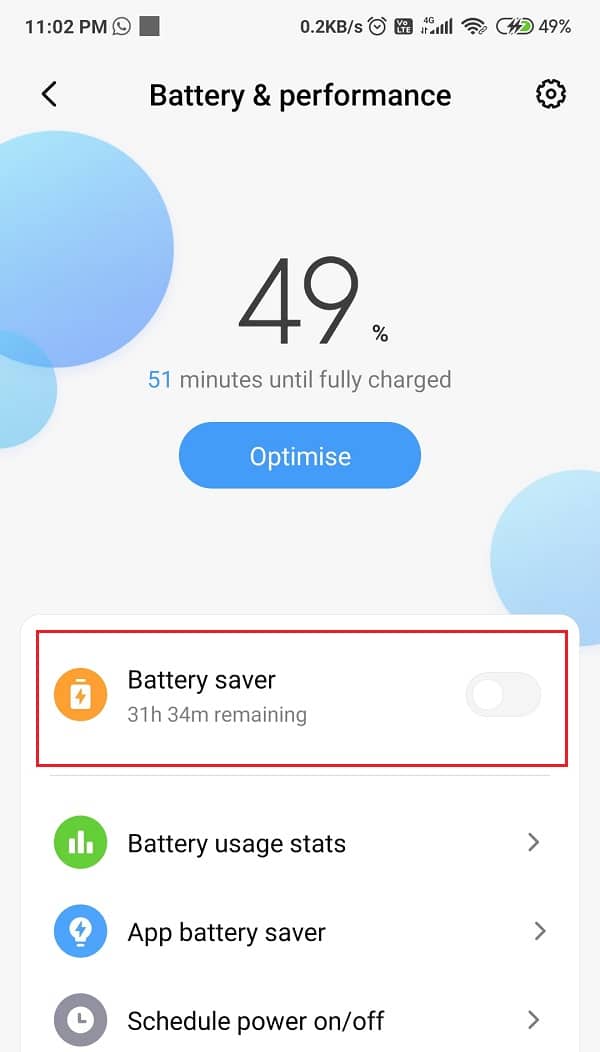
4. Or you can locate the מצב חיסכון בחשמל icon in your Quick Access Bar and turn it ח.
Method 10: Change Google Play Services Access to Mobile Data & WiFi
Google Play Services often tends to sync in the background. If in case, you have set your Wi-Fi network on תמיד ביום, it is a possibility that Google Play Services might be misusing it. In order to put it on Never or On Only during charging, follow these steps thoroughly:
1. עבור ל הגדרות אפשרות ומצא את חיבורי סמל.
2. הקש Wi-Fi ולאחר מכן בחר מתקדם.
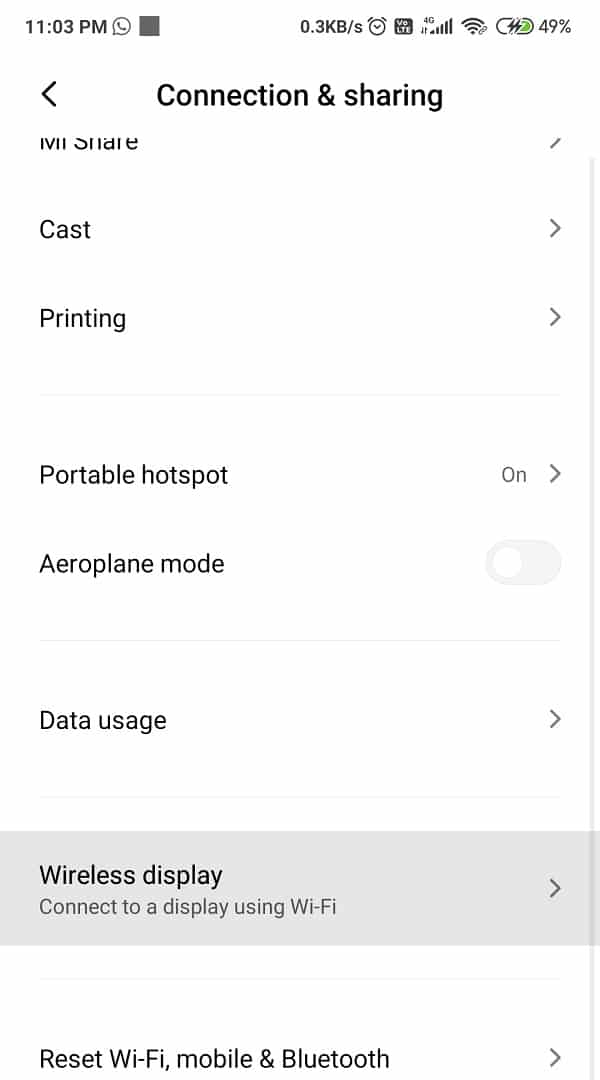
3. כעת לחץ על View More, and amongst the three options, choose אף פעם or Only during charging.
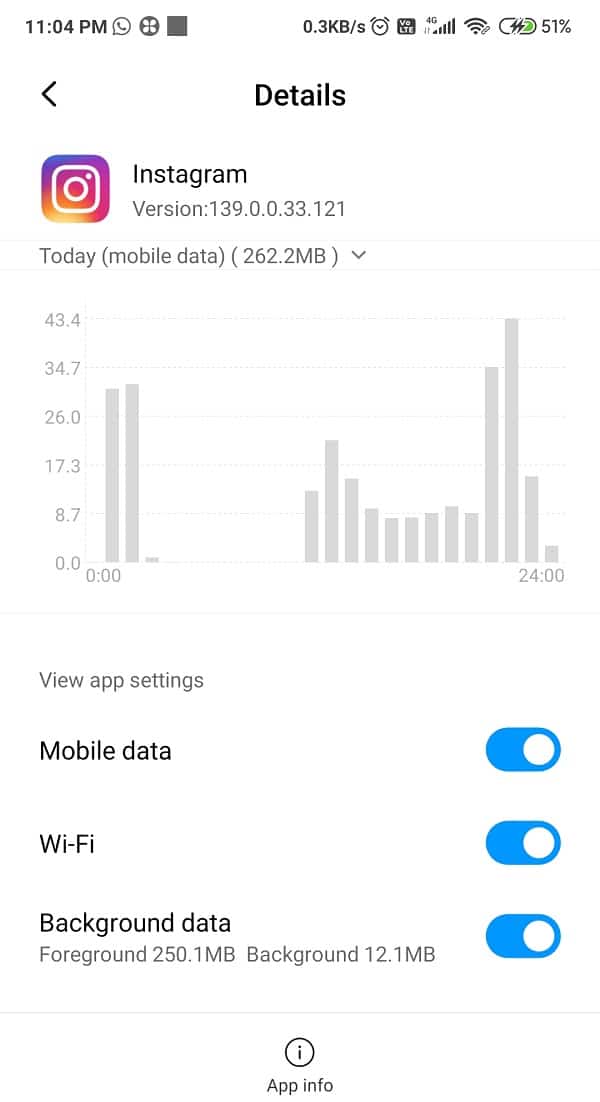
השיטה 11: Turn Off Background Data Usage
Turning off the background data is a perfect move. You can save not only the phone’s Battery but also secure some Mobile Data. You should really give this trick a try. It is worth it. Here are steps to turn off background Data Usage:
1. As always, go to the הגדרות אפשרות ומצא את Connections tab.
2. Now, look for the שימוש בנתונים ואז לחץ על Mobile Data Usage.
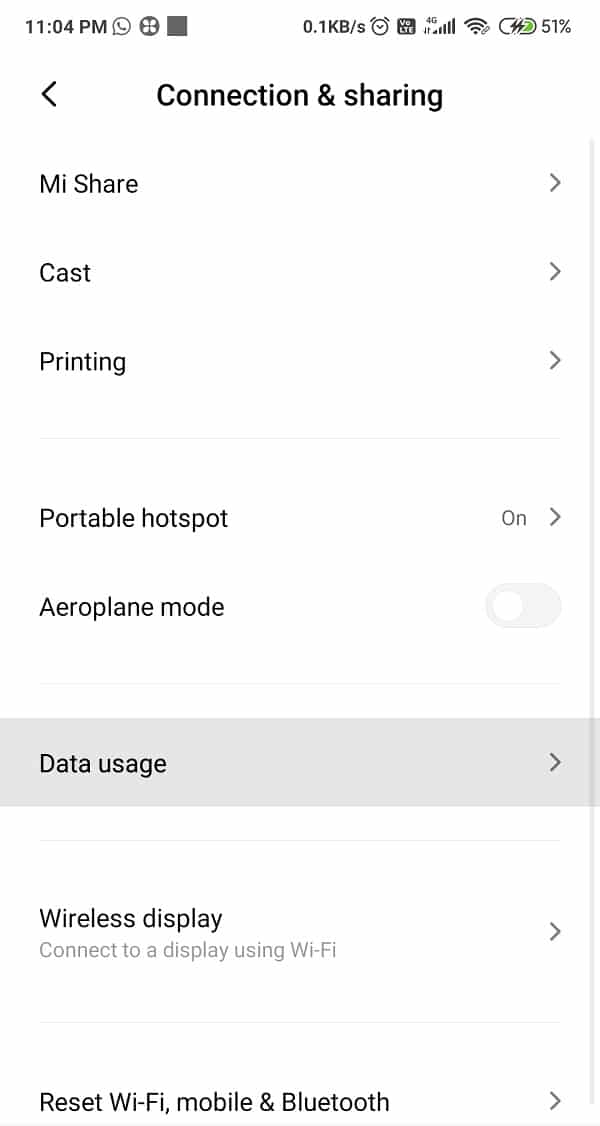
3. From the list, find שירותי Google Play ובחר אותו.לכבות the option saying אפשר שימוש בנתוני רקע.
גם לקרוא: How to Kill Android Apps Running in the Background
השיטה 12: הסר התקנה של אפליקציות לא רצויות
We are aware that except for Android One devices and Pixels, all the other devices come with certain bloatware applications. You are lucky that you can disable them as they tend to consume a large amount of memory and Battery as well. In some phones, you can also uninstall the bloatware applications as they are not of any use.
Such Apps can affect your Battery’s capacity adversely and can also overload your device, making it slow. So, keep in mind to get rid of them from time to time.
1. לחץ על הגדרות אפשרות ובחר Apps ו התראות.
![]()
2. לחץ על ניהול אפליקציות and find the Apps you want to uninstall from the scroll-down list.

3. Select the particular app and tap on the לחצן הסר התקנה.
שיטה 13: עדכן את מערכת ההפעלה של אנדרואיד
It is true that keeping your device up to date plays a major role in fixing any issues or bugs. Your device manufacturers come up with new updates from time to time. These updates help in improving the performance of your device as they introduce new features, fix any previous bugs, and betters the overall user experience. These updates keep Android Devices safe from any vulnerability.
1. נווט ל הגדרות ולאחר מכן הקש על על טלפון אוֹפְּצִיָה.
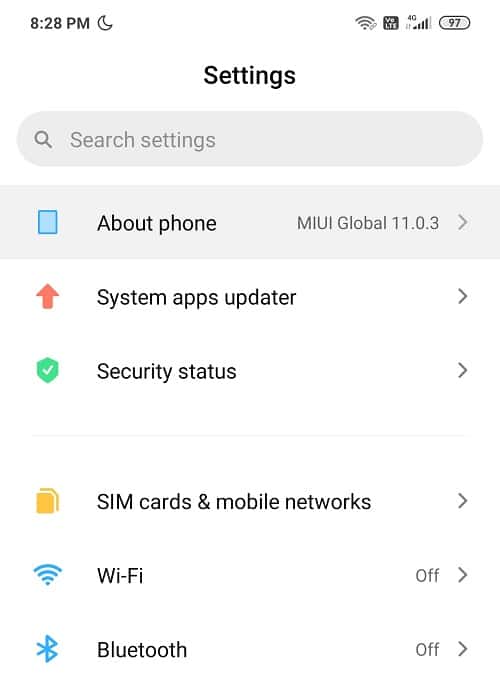
2. הקש עדכון מערכת under About phone.
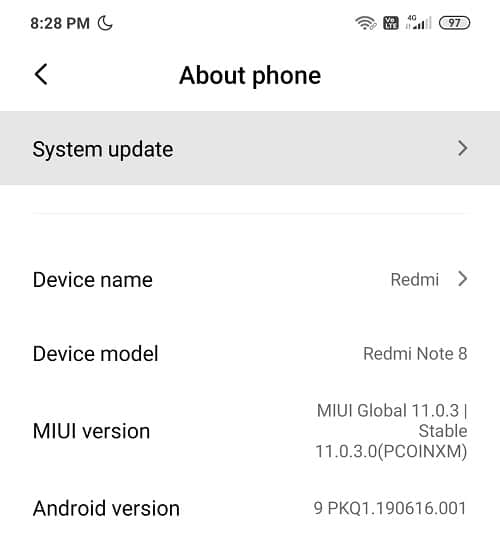
3. הקש בדוק עדכונים.
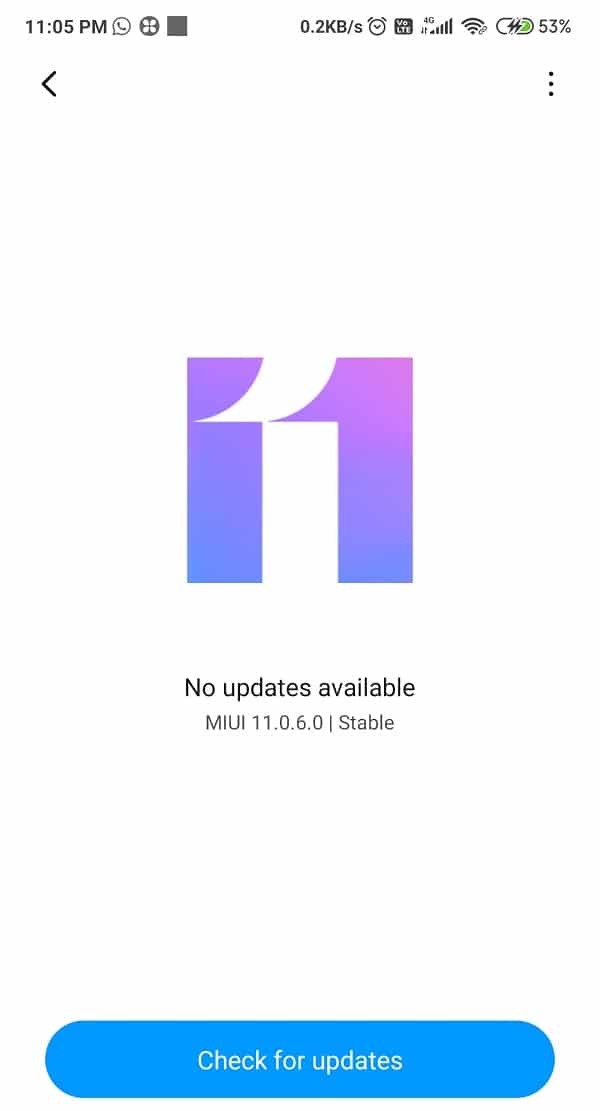
4. הורדה it and wait for its Installation.
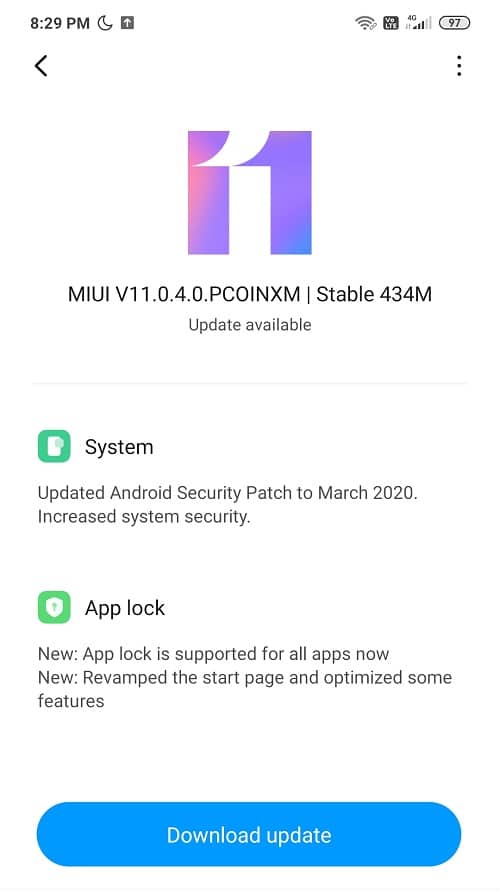
5. Wait for the installation to complete and restart your device.
השיטה 14: סגור אפליקציות רקע
While using our Android Devices, multiple apps run in the background, which causes your phone to slow down and lose Battery faster. This could be the reason behind your phone acting up and misbehaving.
We recommended closing or ‘להכריח להפסיק’ these Apps, which are running in the background to combat this issue. To close the Apps running in the background, follow these steps:
1. נווט ב הגדרות ואז לחץ על אפליקציות והתראות.
2. חפש את האפליקציה you want to force stop in the scroll-down list.
3. Once you find it, בחר אותו ולאחר מכן הקש על 'Force Stop’.
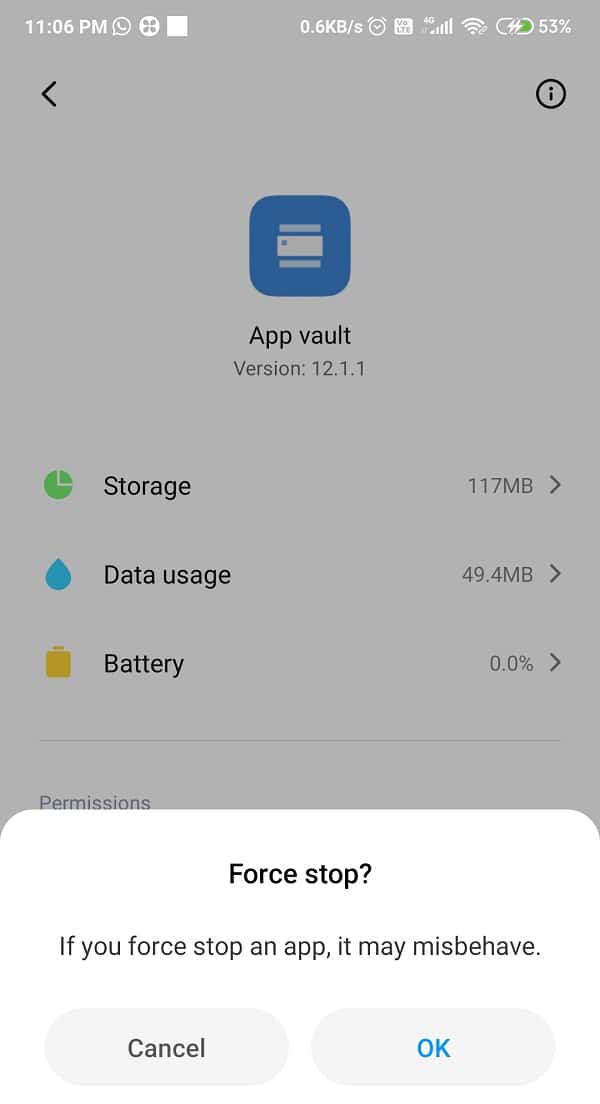
4. לבסוף, הפעל מחדש your device and see if you’re able to fix the Google Play Services Battery Drain issue.
השיטה 15: Uninstall Any Battery Optimizers
It is better for your device if you אל תתקין a Third Party Battery Optimizer to save its battery life. These third-party apps do not improve the performance of the device, rather make them worse. Such apps only clear the cache & data history from your device and dismiss the background’s Apps.
So, it is better to use your default Battery Saver rather than investing in an outsider because installing such Apps can be considered as an unnecessary load, which can affect your phone’s battery life negatively.
השיטה 16: Reboot Your Device To Safe Mode
Rebooting your device to Safe Mode can be a great tip. Moreover, this process is quite simple and easy. Safe Mode will troubleshoot any software issues in your Android device, which can be either caused by a third-party app or any external software download, which can interrupt our device’s normal functioning. Steps to activate Safe Mode are as follows:
1. לחץ לחיצה ארוכה על ה- לחצן הפעלה of your Android.
2. Now, press and hold the כבה option for a few seconds.
3. You will see a window pop up, asking you whether you want to הפעל מחדש למצב בטוח, לחץ על אישור.
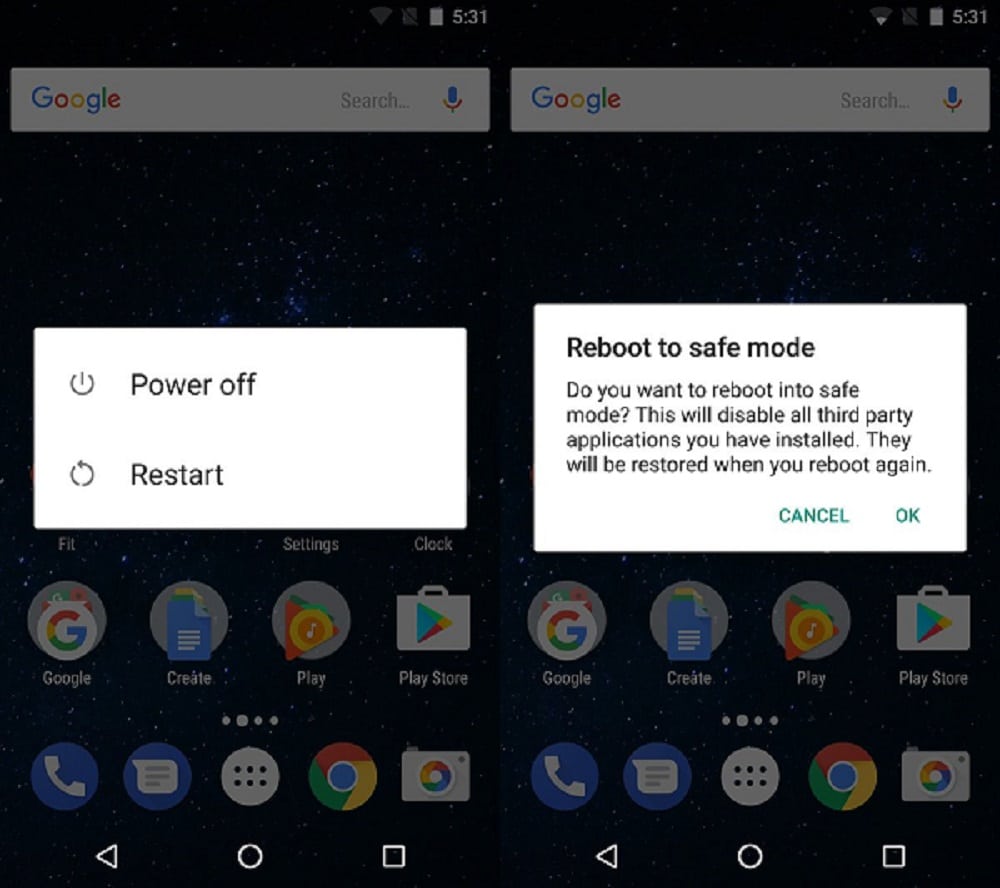
4. Your phone will now boot to the מצב בטוח.
5. You will also see the words ‘Safe Mode’ written on your home screen at the extreme bottom left corner.
6. See if you’re able to resolve the Google Play Services Battery Drain issue in Safe Mode.
7. Once finished troubleshooting, you need to turn off Safe Mode, in order to boot your phone normally.
מומלץ:
Unhealthy battery life could a person’s worst nightmare. Google Play Services might be the reason behind this, and to figure that out, we have listed these hacks for you. Hopefully, you were able to fix the Google Play Services Battery Drain issue once and for all. Let us know which method worked for you in the comment section.

")