Synchronize Windows 10 Clock with an Internet Time Server

Synchronize Windows 10 Clock with an Internet Time Server: If you have set the Clock in Windows 10 to automatically set time then you may be aware that the current time is synchronized with an Internet Time Server in order to update time. This means that the clock on your PC’s Taskbar or Windows Settings is updated at regular intervals to match the time on the time server which ensures that your clock has accurate time. You need to be connected to the internet for time to automatically synchronize with an Internet time server without which the time won’t be updated.
Now Windows 10 uses the Network Time Protocol (NTP) to connect with the Internet time servers in order to synchronize Windows Clock. If the time in Windows Clock is not accurate then you could face network issues, corrupted files, and incorrect timestamps in documents & important files. With Windows 10 you could easily change the time servers or can even add a custom time server when necessary.
So now you know it’s important for your Windows to display the correct time in order to ensure proper functioning of your PC. Without which certain applications and Windows services will start experiencing issues. So without wasting any time let’s see How to Synchronize Windows 10 Clock with an Internet Time Server with the help of the below-listed tutorial.
How to Synchronize Windows 10 Clock with an Internet Time Server
הקפד ליצור נקודת שחזור למקרה שמשהו ישתבש.
Method 1: Synchronize Windows 10 Clock with an Internet Time Server in Internet Time Settings
1. סוג לִשְׁלוֹט in Windows 10 Search then click on לוח בקרה מתוצאת החיפוש.

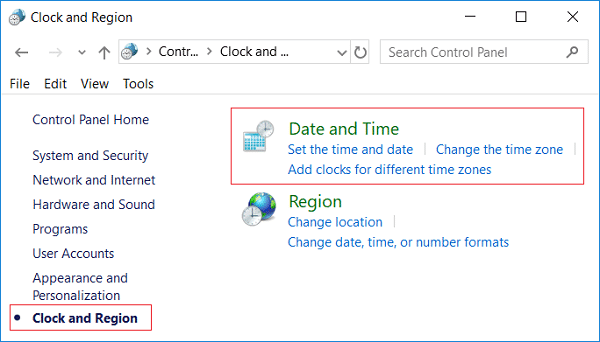
2. כעת לחץ על "שעון, שפה ואזור" ואז לחץ על "תאריך ושעה
3.Under Date and Time window click “שנה תאריך ושעה
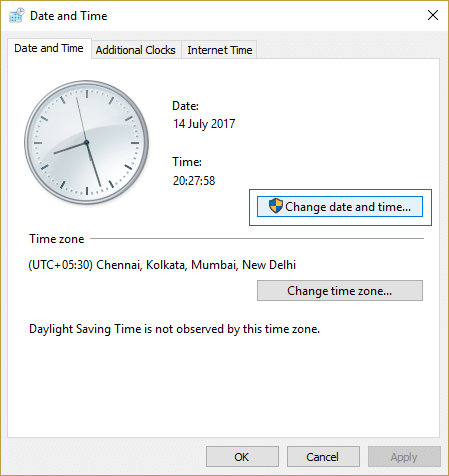
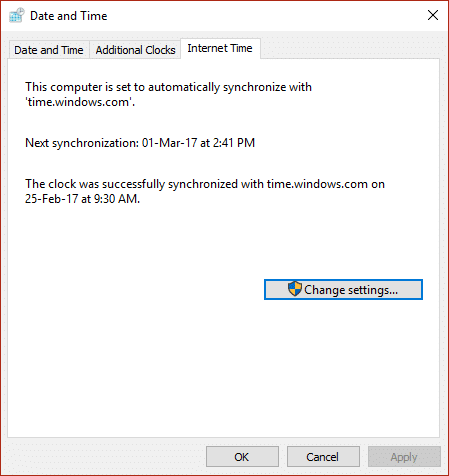
4.Switch to Internet Time then click on “שינוי הגדרות
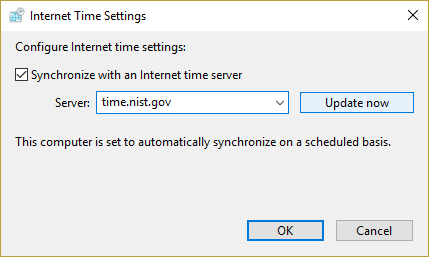
5. הקפד לסמן את "סנכרון עם שרת זמן אינטרנט” box, then select a time server from the Server drop-down and click Update Now.
6.Click Ok then click Apply followed by OK again.
7.If the time is not updated then choose a different Internet time server and again click Update now.

8. הפעל מחדש את המחשב כדי לשמור שינויים.
Method 2: Synchronize Windows 10 Clock with an Internet Time Server in Command Prompt
1. הקש על מקש Windows + X ואז בחר שורת הפקודה (מנהל).

2. הקלד את הפקודה הבאה לתוך cmd והקש Enter:
w32tm / סינכרון מחדש
net time /domain
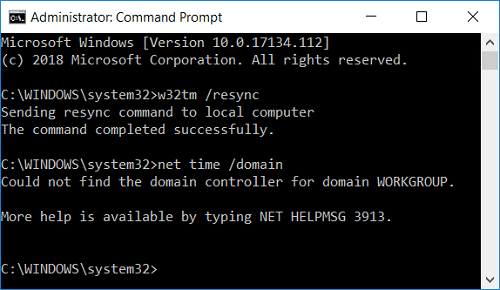
3. אם אתה מקבל א The service has not been started. (0x80070426) errorאז אתה צריך start Windows Time service.
4.Type the following command to start Windows Time service then again try to synchronize Windows Clock:
netstart w32time
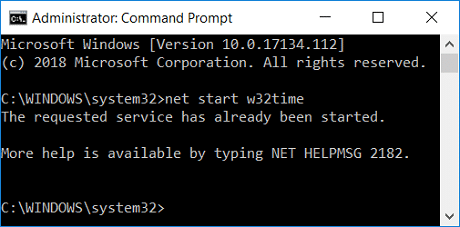
5.Close Command Prompt and restart your PC.
Method 3: Change the Internet Time Synchronization Update Interval
1. הקש על מקש Windows + R ואז הקלד regedit ולחץ על Enter כדי לפתוח את עורך הרישום.

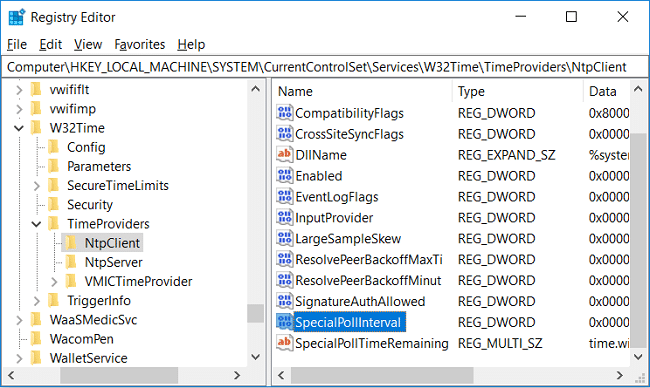
2. נווט אל מפתח הרישום הבא:
ComputerHKEY_LOCAL_MACHINESYSTEMCurrentControlSetServicesW32TimeTimeProvidersNtpClient
3. בחר NtpcClient then in right window pane double-click on SpecialPollInterval לשנות את ערכו.
4. כעת בחר Decimal from the Base then in the Value date change the value to 86400.
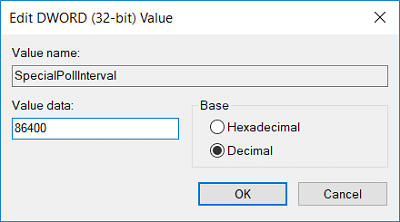
הערה: 86400 seconds (60 seconds X 60 minutes X 24 hours X 1 day) which means that the time will be updated every day. The default time is every 604800 seconds (7 days). Just make sure not use the time interval less than 14400 seconds (4 hours) as your computer’s IP will get banned from the time server.
5.Click Ok then close Registry Editor.
6. הפעל מחדש את המחשב כדי לשמור שינויים.
Method 4: Add a new Internet time server on Windows 10
1.Type control in Windows 10 Search then click on לוח בקרה מתוצאת החיפוש.
2. כעת לחץ על "שעון, שפה ואזור" ואז לחץ על "תאריך ושעה
3.Under Date and Time window click “שנה תאריך ושעה
4. עבור אל זמן אינטרנט לאחר מכן לחץ על "שינוי הגדרות
5. סמן את "סנכרון עם שרת זמן אינטרנט” box then under Server type the address of the time server and click עדכן כעת.
הערה: עיין כאן for a list of the Simple Network Time Protocol (SNTP) time servers that are available on the Internet.
6.Click Ok then click Apply followed by OK again.
7. הפעל מחדש את המחשב כדי לשמור שינויים.
Method 5: Add a new Internet time server on Windows 10 using Registry
1. הקש על מקש Windows + R ואז הקלד regedit ולחץ על Enter כדי לפתוח עורך הרישום.
2. נווט אל מפתח הרישום הבא:
HKEY_LOCAL_MACHINESOFTWAREMicrosoftWindowsCurrentVersionDateTimeServers
3. לחץ לחיצה ימנית על שרתים ולאחר מכן בחר חדש > ערך מחרוזת.
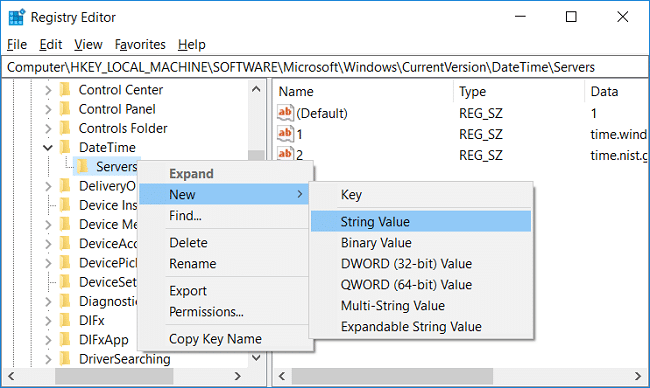
4.Type a number according to the position of the new server, for example, if there are already 2 entries then you have to name this new string as 3.
5.Now double-click on this newly created String Value to change its value.
6.הבא, type the address of the time server then click OK. For example, if you want to use Google Public NTP server then enter time.google.com.
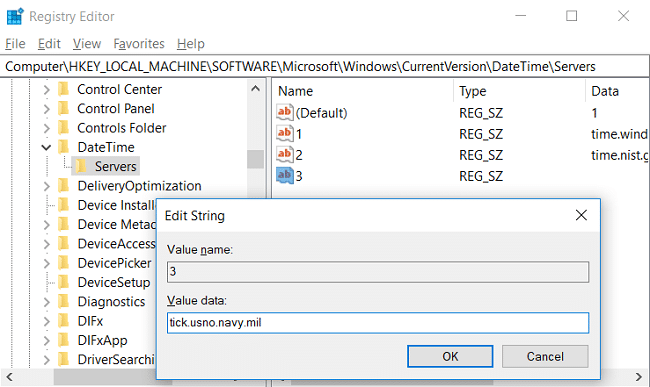
הערה: עיין כאן for a list of the Simple Network Time Protocol (SNTP) time servers that are available on the Internet.
7. הפעל מחדש את המחשב כדי לשמור שינויים.
If you’re still facing in synchronizing Windows 10 Clock then fix them using the below-listed steps:
הערה: This will remove all your custom servers from Registry.
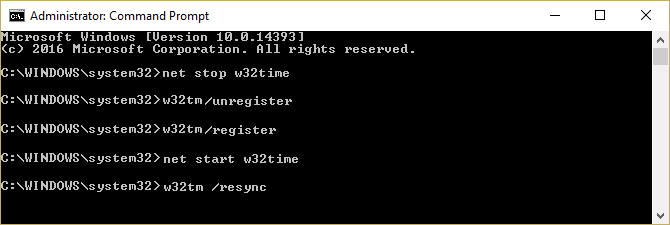
1. הקש על מקש Windows + X ואז בחר שורת פקודה (מנהל).

2. הקלד את הפקודה הבאה לתוך cmd והקש Enter:
netstop w32time
w32tm /ביטול רישום
w32tm /register
netstart w32time
w32tm /resync /nowait
3. הפעל מחדש את המחשב כדי לשמור שינויים.
מומלץ:
זהו זה שלמדת בהצלחה How to Synchronize Windows 10 Clock with an Internet Time Server but if you still have any queries regarding this tutorial then feel free to ask them in the comment’s section.