This is the age of streaming. With cheap and fast internet available almost everywhere, there is hardly any need to exhaust our storage space with media files. Songs, videos, movies can be live-streamed anytime, anywhere. Apps like Spotify especially with its Wrapped Playlist, YouTube Music, Wynk, etc., can be easily used to play any song at any time.
However, there are still many people who have an extensive collection of songs and albums preserved safely on their local storage like a computer or hard disk. It is not easy to let go of a meticulously created hand-picked library of favorite tunes. Back in the day, downloading and saving songs on your computer via iTunes was pretty standard. Over the years, iTunes started getting obsolete. The only people using it are mostly the ones who are afraid of losing their collection in the process of upgrading.
If you are one of them and would like to transfer your music from iTunes to your Android phone then this is the article for you. Going forward, we will be discussing various ways in which you can sync your iTunes music library on Android so that you do not lose any songs from your precious collection.
5 Ways To Transfer Music From iTunes To Android
Method 1: Transfer iTunes Music to Android Phone using Apple Music
If you are a new Android user and have recently migrated from iOS, then you probably would like to wait a little longer before bidding a final farewell to the Apple ecosystem. In this case, Apple Music is the most convenient solution for you. The app is available on the Playストア for free, and it can easily sync iTunes music library on Android.
Additionally, with Apple officially shifting its focus from iTunes to Apple Music, this is the best time for you to make the switch. To transfer music, you must be signed in to the same Apple ID on iTunes (on your PC) and the Apple Music app (on your phone). Also, you need to have a subscription to Apple Music. If all these conditions are met, then you can follow the steps given below to start transferring the songs right away.
関連項目:
Google Playストアエラー9を修正する963つの方法
Facebookメッセンジャーでメディア読み込みエラーを修正する10の方法
Android での Netflix エラー 5.7 を修正する
Spotify にログインできないエラーを修正する 10 の方法
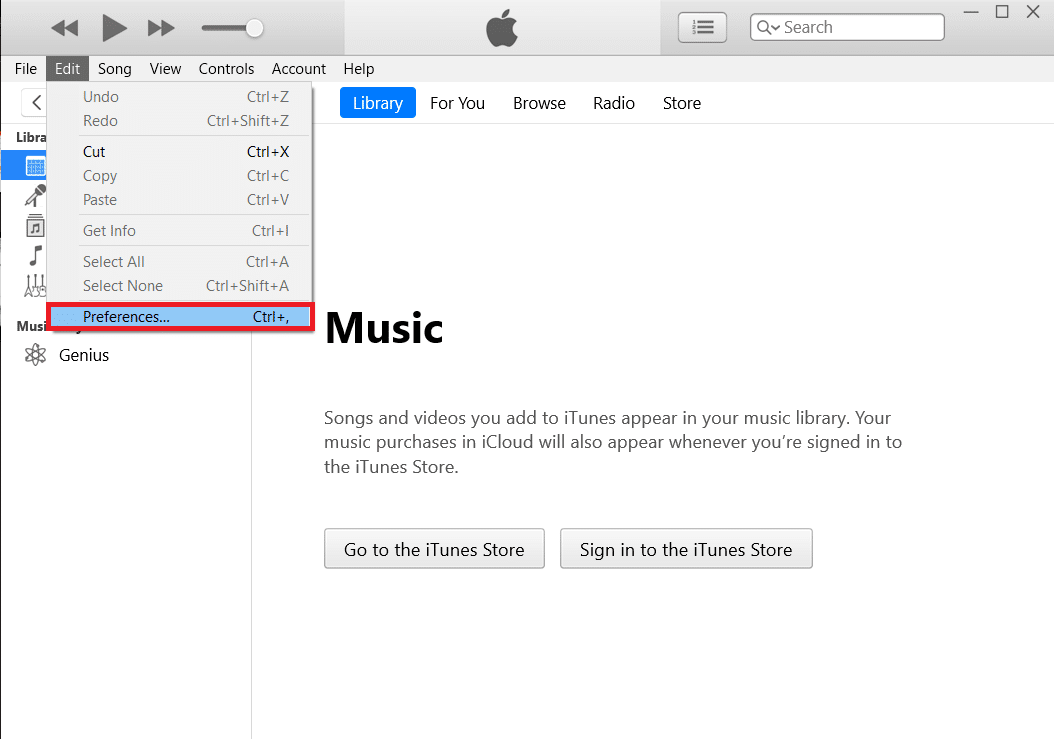
1.まず開く iTunes on your PC and then click on the 編集 オプションを選択します。
2. 今すぐ選択 環境設定 ドロップダウンリストから選択します。
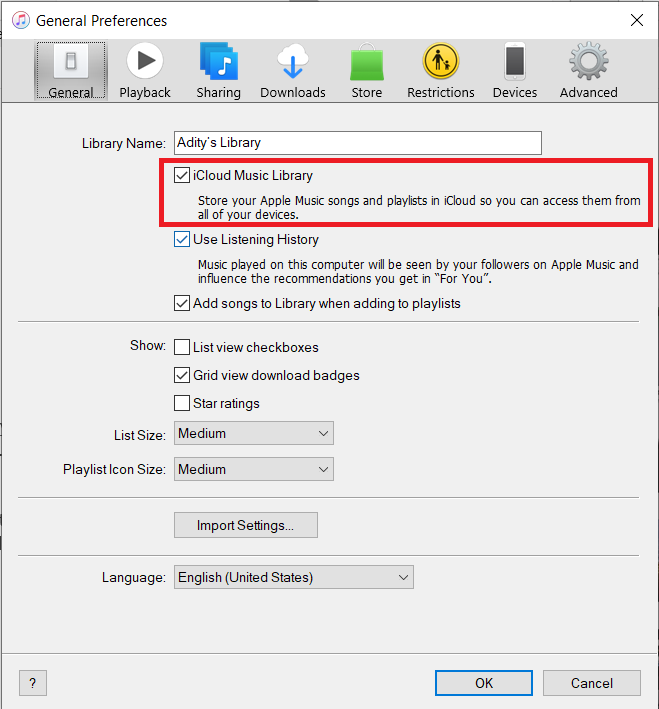
3. After that, go to the tab and then make sure that the checkbox next to the iCloud音楽ライブラリ 有効になっています。
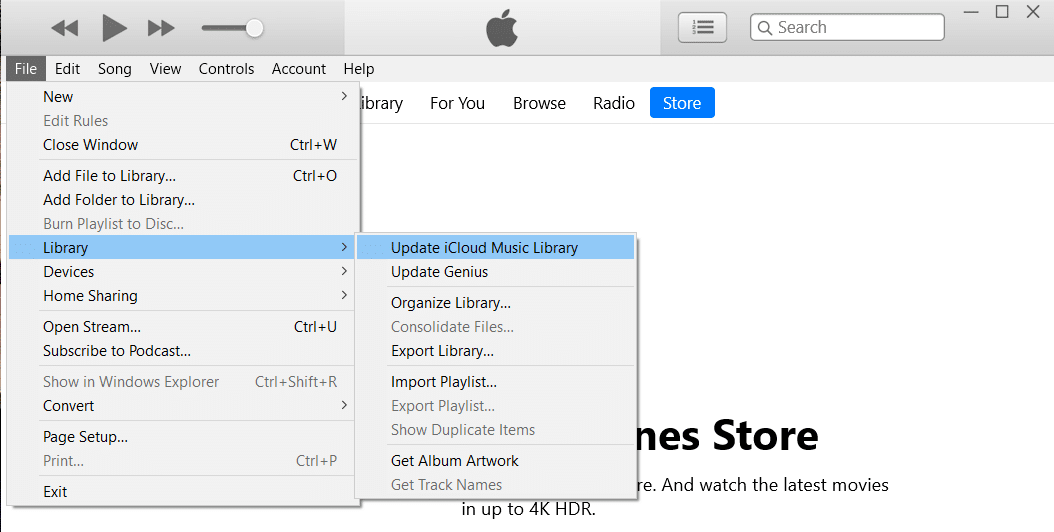
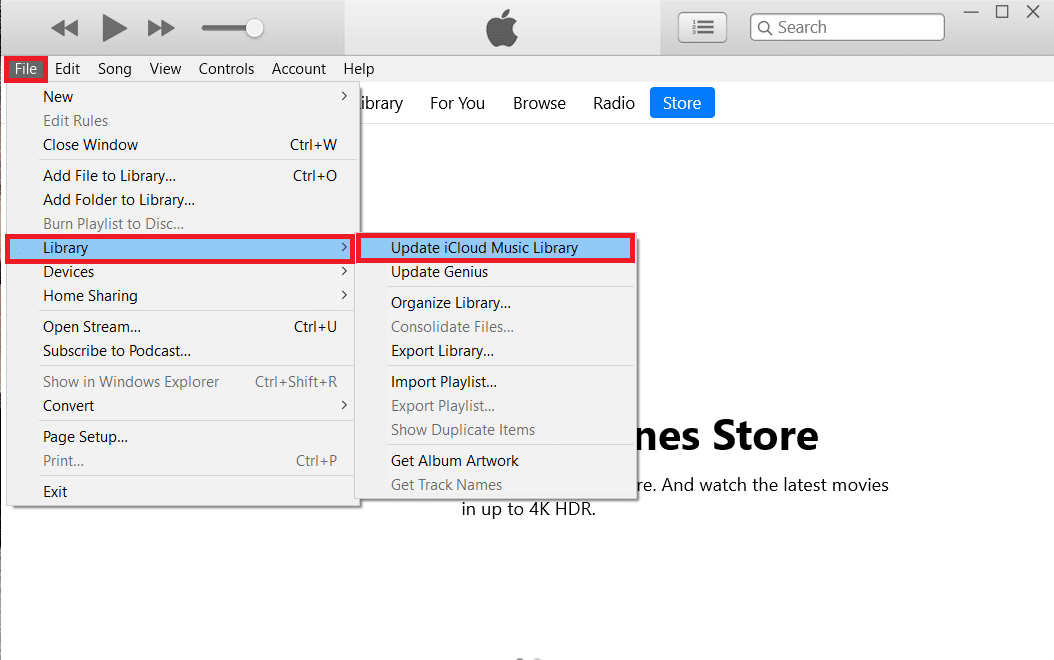
4. Now come back to the home page and click on the File オプションを選択します。
5. From the drop-down menu, select 図書館 、次にをクリックしてください iCloudミュージックライブラリを更新する オプションを選択します。
6. iTunes will now start uploading songs to the cloud. This might take some time if you have a lot of songs.
7. Wait for a couple of hours and then open the アップルミュージックアプリ あなたのAndroid携帯電話で。
8。 あなたをタップする 図書館 option at the bottom, and you will find all your songs from iTunes here. You can play any song to check whether or not it is working correctly.
また読む: 連絡先を新しい Android スマートフォンにすばやく転送する 5 つの方法
Method 2: Manually Transfer Songs from your Computer to Android Phone via USB
The above-discussed methods involve downloading additional apps and getting paid subscriptions for them. If you want to avoid all that hassle and opt for a more simple and basic solution, then the good old USB cable is here to the rescue.
You can simply connect your phone to your computer via a USB cable and then use Windows Explorer to copy files from the hard disk to the phone’s memory card. The only drawback to this system is that the phone has to be connected to the PC at all times while the files are being transferred. You won’t have the mobility as in the case of transfer via the Cloud. If that’s fine by you then follow the steps given below.
1. 最初に行う必要があるのは、 connect your phone to the computer via a USB cable.
2.今開いています Windowsエクスプローラ に移動します iTunesフォルダー あなたのコンピュータ上で。
3。 ここに、 you will find all the albums and songs that you have downloaded via iTunes.
4. After that, proceed to copy all the folders containing your songs.

5.次に、 ストレージドライブお使いの携帯電話の & 新しいフォルダーを作成する for your iTunes music and paste all the files there.
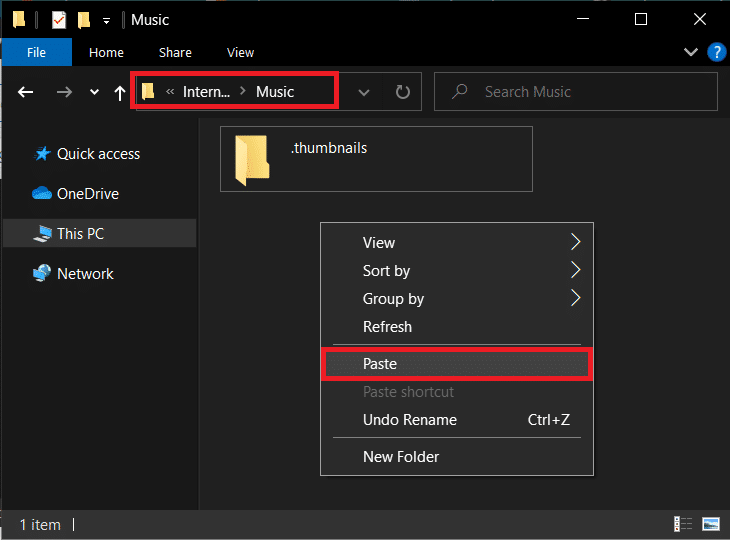
6. Once the transfer is completed, you can open the default music player app on your Android device, and you will find your entire iTunes library there.
また読む: 古い WhatsApp チャットを新しい携帯電話に転送する方法
Method 3: Transfer your Music with the help of doubleTwist Sync
The best part about Android is that you will always find plenty of third-party apps to perform any task if you don’t want to use the built-in or official apps. One such fine third-party app solution is doubleTwist Sync. It is a wonderful alternative to apps like Google Play Music or Apple Music. Since it is compatible with both Android and Windows, it can act as a bridge to transfer your iTunes library from your computer to your phone.
What the app basically does is ensures that there is a sync between iTunes and your Android device. Unlike other apps and software, it is a two-way bridge, meaning any new song downloaded on iTunes will sync on your Android device and vice versa. The app is essentially free if you are okay with transferring files via USB. In case you want the added convenience of cloud transfer over Wi-Fi, then you need to pay for the AirSync service. Given below is a step-wise guide to using the double Twist Sync app.
1. まず、 connect your Android device to your computer. You can either do so with the help of a USB cable or use the AirSync app.
2 その後、 launch the doubleTwist program あなたのコンピュータ上で。
3. It will automatically detect your phone and show how much available storage space you have.
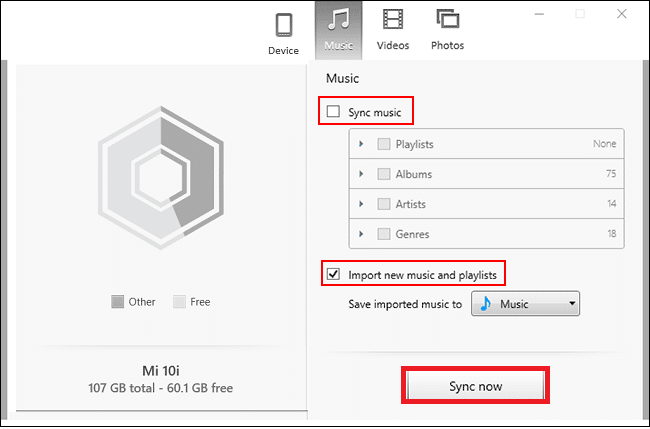
4. 次に、 音楽を聴く際のスピーカーとして タブには何も表示されないことに注意してください。 横のチェックボックスをクリックします 音楽を同期する そして確認する select all the subcategories like Albums, Playlists, Artists, etc.
5. As mentioned earlier, doubleTwist Sync can act as a two-way bridge and so you can choose to sync the music files on your Android to iTunes. To do so, simply チェックボックスを有効にするnext to Import new music and playlists.
6. Once everything is set up, simply click on the 今すぐ同期する button and your files will start getting transferred to your Android from iTunes.
7. You can play these songs on your phone using any music player app that you like.
Method 4: Sync your iTunes Music Library on Android using iSyncr
Another cool third-party app that helps you to sync iTunes music library on Android is the iSyncr app. It is available for free on the Play Store, and you can download its PC client from its ウェブサイト. The transfer takes place via a USB cable. This means that once both the apps are installed, you simply need to connect your phone to the computer and launch the programs on the respective devices.
The PC client will automatically detect the Android device and will ask you to ファイルの種類を選択してください that you would like to sync on your Android. Now, you need to click on the checkbox next to iTunes 、次にをクリックしてください 同期
Your music files will now get transferred from iTunes to your phone, and you will be able to play them using any music player app. iSyncr also allows you to sync your music library wirelessly over Wi-Fi if both the devices are connected to the same network.
Method 5: Sync your iTunes Library with Google Play Music (Discontinued)
Google Play Music is the default, built-in music player app on Android. It has cloud compatibility, which makes it easier to sync with iTunes. All that you need to do is upload your songs to the cloud, and Google Play Music will sync your entire library on your Android device. Google Play Music is a revolutionary way to download, stream, and listen to music that is compatible with iTunes. It is a perfect bridge between your iTunes and Android.
In addition to that, Google Play Music is accessible both on a computer and a smartphone. It also offers cloud storage for 50,000 songs, and thus you can rest assured that storage isn’t going to be a problem. All you need to effectively transfer your music is an additional app called Googleミュージックマネージャ (also known as Google Play Music for Chrome), which you will have to install on your computer. Needless to say, you also need to have the Googleの音楽を再生 app installed on your Android phone. Once the two apps are in place, follow the steps given below to learn how to transfer your music.
1. The first thing that you need to do is run the Googleミュージックマネージャ コンピューター上のプログラム。
2。 今 Google アカウントにログインします. Make sure that you are logged in to the same account on your phone.
3. This is to ensure that the two devices are connected and ready for sync.
4. Now, look for the option to Upload songs to Google Play Music それをタップします。
5. After that select iTunes as the location from where you would like to upload the music.
6。 あなたをタップする アップロードを開始 button, and it will begin to upload songs to the cloud.
7. You can open the Google Play Music app on your phone and go to the Library, and you will notice that your songs have started to appear.
8. Depending on the size of your iTunes library, this may take some time. You can continue with your work meanwhile and let Google Play Music carry on with its job in the background.
推奨:
この記事がお役に立てば幸いです。 transfer music from iTunes to your Android phone. We understand that your music collection isn’t something that you would like to lose. For all those people who have spent years creating their music library and special playlists on iTunes, this article is the perfect guide to help them carry forward their legacy onto a new device. Also, with apps like iTunes and even Google Play Music on the decline, we would recommend you to try new-age apps like YouTube Music, Apple Music, and Spotify. This way, you would be able to experience the best of both worlds.

