- in ウィンドウズ by
Enable Enhanced Anti-Spoofing for Windows Hello Face Authentication

Enable Enhanced Anti-Spoofing for Windows Hello Face Authentication: Windows 10 PC allows you to sign-in using fingerprint, face recognition, or iris scan using Windows Hello. Now Windows hello is a biometrics-based technology which enables users to authenticate their identity in order to access their devices, apps, networks etc using any one of the above methods. Now face detection in Windows 10 works well, but it can’t differentiate between a photo of your face inside your mobile or the actual user face.
The potential threat because of this issue is that someone with your photo could unlock your device by using their mobile. To overcome this difficulty, the anti-spoofing technology comes into actions and once you have enabled the anti-spoofing for Windows Hello Face Authentication, a photo of the authentic user cannot be used to login into the PC.
Once the enhanced anti-spoofing is enabled, Windows will require all users on the device to use anti-spoofing for facial features. This policy is not enabled by default and users have to manually enable anti-spoofing feature. Anyway, without wasting any time let’s see How to Enable Enhanced Anti-Spoofing for Windows Hello Face Authentication with the help of the below-listed tutorial.
Enable Enhanced Anti-Spoofing for Windows Hello Face Authentication
何か問題が発生した場合に備えて、必ず復元ポイントを作成してください。
Method 1: Disable or Enable Enhanced Anti-Spoofing for Windows Hello Face Authentication in Group Policy Editor
1.Windows キー + R を押してから、次のように入力します。 gpedit.mscを Enterキーを押して開きます グループ ポリシー エディター。

2.次の場所に移動します。
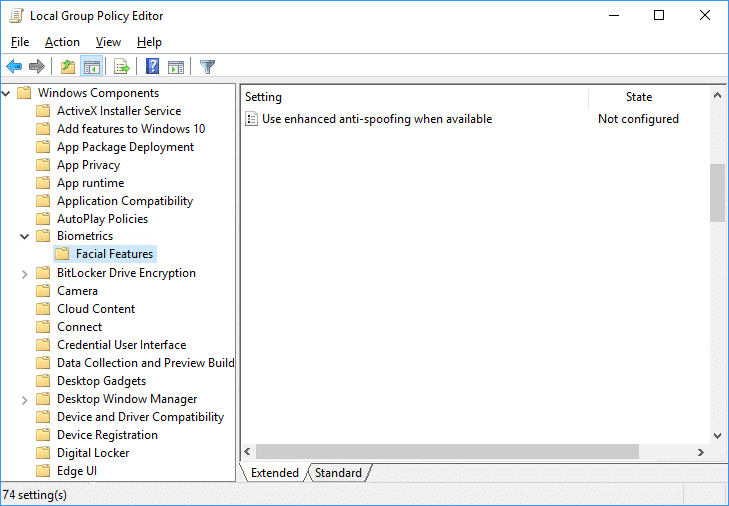
Computer ConfigurationAdministrative TemplatesWindows ComponentsBiometricsFacial Features
3.Select 顔の特徴 then in right window pane double-click on the “Configure enhanced anti-spoofing"政策。
4.Now change the settings of the Configure enhanced anti-spoofing policy according to:
To Enable Enhanced Anti-Spoofing for Windows Hello Face Authentication: Select Not Configured or Disabled
To Disable Enhanced Anti-Spoofing for Windows Hello Face Authentication: Select Enabled

5.Click Apply followed by OK then close Group Policy Editor.
6. PC を再起動して変更を保存します。
Method 2: Disable or Enable Enhanced Anti-Spoofing for Windows Hello Face Authentication in Registry Editor
1.Windows キー + R を押してから、次のように入力します。 regeditを Enterキーを押して開きます レジストリエディタ。

2.次のレジストリ キーに移動します。
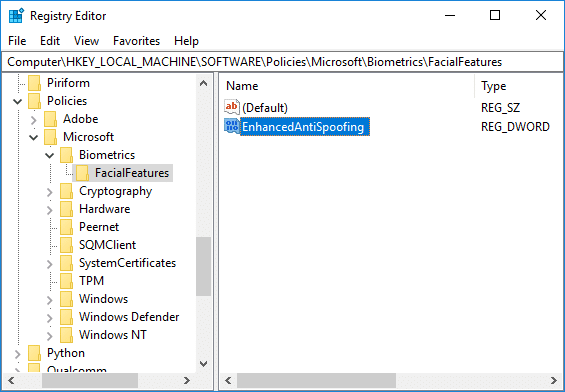
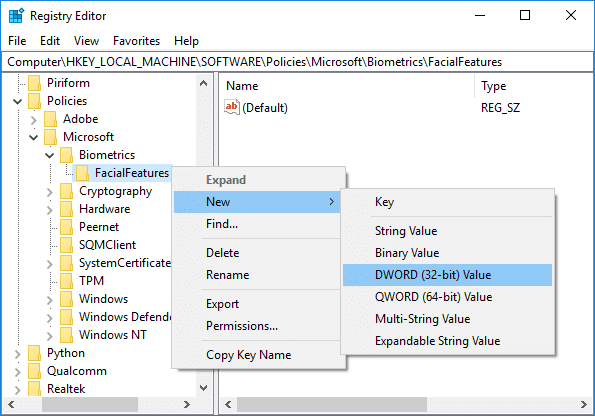
HKEY_LOCAL_MACHINESOFTWAREPoliciesMicrosoftBiometricsFacialFeatures
3.右クリック FacialFeatures 次に選択する 新規>DWORD(32ビット)値。
4.新しく作成したこの DWORD に次の名前を付けます。 EnhancedAntiSpoofing Enterキーを押します。

5.Double-click on EnhancedAntiSpoofing DWORD and change it’s value to:
Enable Enhanced Anti-Spoofing: 1
Disable Enhanced Anti-Spoofing: 0
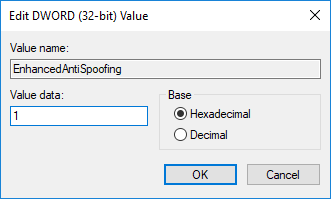
6.Once you have typed the correct value simply click OK.
7.Close registry editor and reboot your PC to save changes.
推奨:
それはあなたがうまく学んだことです How to Enable Enhanced Anti-Spoofing for Windows Hello Face Authentication in Windows 10 ただし、この投稿に関してまだご質問がある場合は、コメント欄でお気軽にお問い合わせください。