WmiPrvSE is the acronym for Windows Management Instrumentation Provider Service. Windows Management Instrumentation (WMI) is a component of the Microsoft Windows operating system that provides management information and control in an enterprise environment. Many people believe it’s a virus as sometimes WmiPrvSE.exe causes high CPU usage, but it’s not a virus or malware instead WmiPrvSE.exe is manufactured by Microsoft itself.
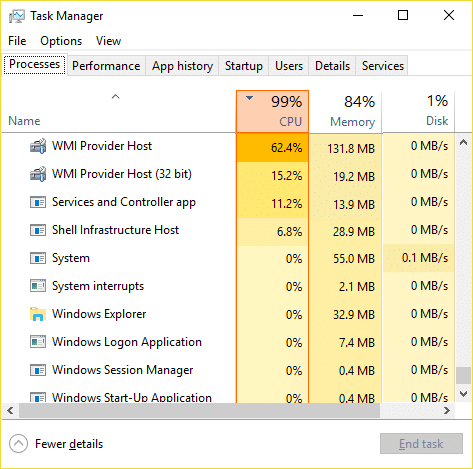
The main problem is that the Windows freezes or stuck when WmiPrvSE.exe is taking many system resources, and all the other apps or programs are left with a little or no resources at all. This will cause your PC to become sluggish, and you won’t be able to use it all, at last, you will have to reboot your PC. Even after a reboot, sometimes this issue will not be resolved, and you will again face the same problem. So without wasting any time let’s see how to actually Fix High CPU Usage by WmiPrvSE.exe with the below-listed troubleshooting guide.
Fix High CPU Usage by WmiPrvSE.exe
何か問題が発生した場合に備えて、必ず復元ポイントを作成してください。
Method 1: Restart Windows Management Instrumentation Service
1. Windows キー + R を押して、次のように入力します。 services.mscと Enterキーを押します。

2。 検索 Windows Management Instrumentation Service in the list then right-click on it and select 再起動。
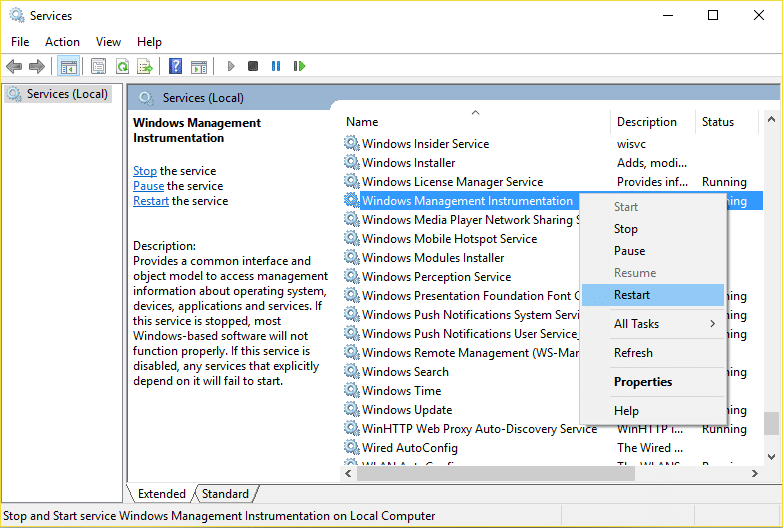
3. This will restart all the service associated with WMI services and Fix High CPU Usage by WmiPrvSE.exe.
Method 2: Restart Other Services associated with WMI
1. Press Windows Key + X then select コマンドプロンプト(管理者)

2. Type the following into cmd and hit Enter after each one:
ネットストップiphlpsvc
ネットストップwscsvc
ネット停止のWinMgmt
net start winmgmt
ネットスタートwscsvc
ネットスタートiphlpsvc
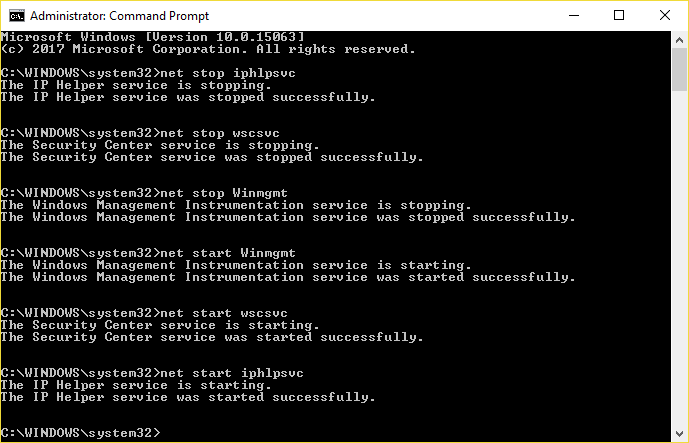
3. PC を再起動して変更を保存します。
方法 3: CCleaner と Malwarebytes を実行する
1。 ダウンロードとインストール CCleanerは & Malwarebytes.
2. マルウェアバイトを実行する and let it scan your system for harmful files. If malware is found, it will automatically remove them.

3. Now run CCleaner and select カスタムクリーン.
4. Under Custom Clean, select the 「ウィンドウ」タブ then make sure to checkmark defaults and click 解析.

5. Once Analyze is complete, make sure you’re certain to remove the files to be deleted.

6.最後に、 ランクリーナー button and let CCleaner run its course.
7. To further clean your system, select the Registry tab, and ensure the following are checked:

8。 クリックしてください 問題をスキャンする button and allow CCleaner to scan, then click on the 選択された問題を修正

9. When CCleaner asks “レジストリへの変更をバックアップしますか? はいを選択.
10. Once your backup has completed, click on the 選択したすべての問題を修正する
11. Restart your PC to save changes.
Method 4: Run System Maintenance Troubleshooter
1. Windows キー + X を押して、 コントロールパネル。

2. Search Troubleshoot and click on トラブルシューティング。

3. Next, click on view all in the left pane.
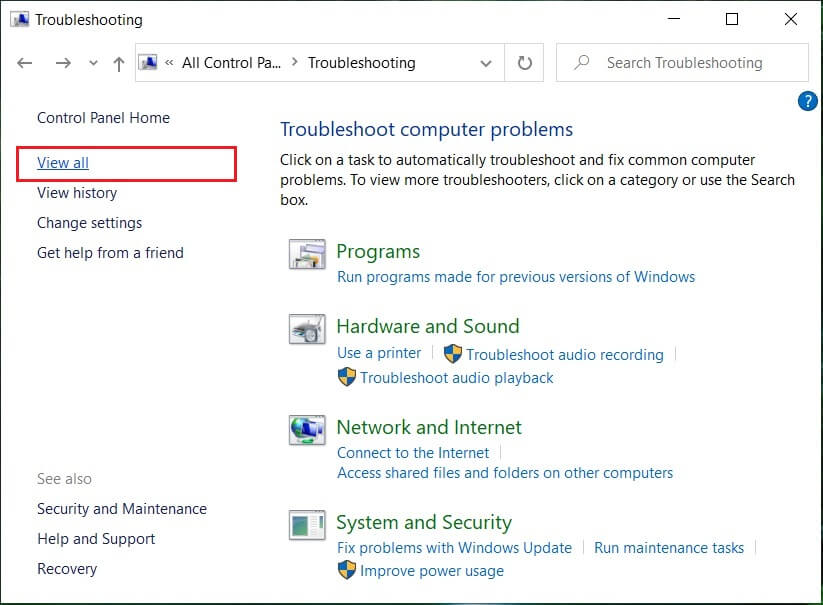
4. Click and run the Troubleshooter for System Maintenance.

5. The Troubleshooter may be able to Fix High CPU Usage by WmiPrvSE.exe.
Method 5: Locate the process manually using Event Viewer
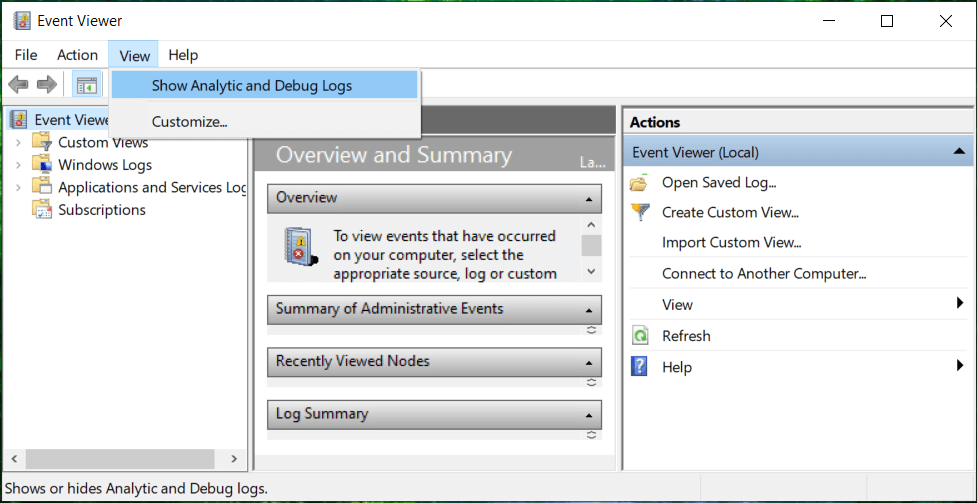
1. Windows キー + R を押して、次のように入力します。 EVENTVWR.MSC Enterキーを押して開きます イベントビューアー。

2. From the top menu, click on 詳しく見る 次に選択します Show Analytic and Debug Logs option.
3. Now, from the left pane navigate to the following by double-clicking on each of them:
Applications and Services Logs > Microsoft > Windows > WMI-Activity
4. Once you are under WMI-アクティビティ folder (make sure you have expanded it by double-clicking on it) select Operationally.
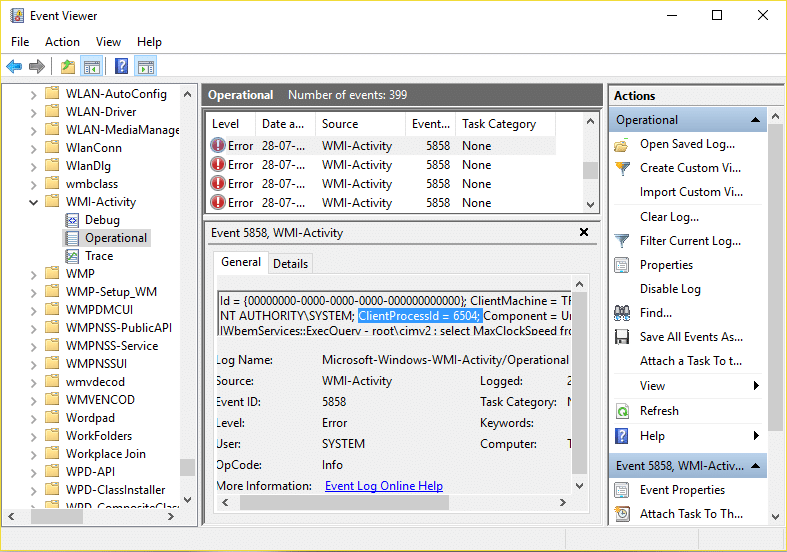
5. In the right window pane select エラー under Operational and General tab look for the ClientProcessId for that particular service.
6. Now we have the Process Id of the particular service causing High CPU usage, we need to disable this particular service この問題を修正します。
7。 押す CTRL + SHIFT + ESC together to open Task Manager.

8.に切り替え Service tab 探して Process Id which you noted above.
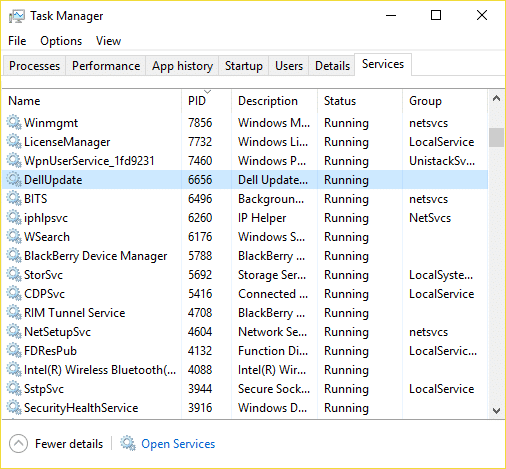
9. The service with the corresponding Process ID is the culprit, so once you find it go to Control Panel > Uninstall a Program.
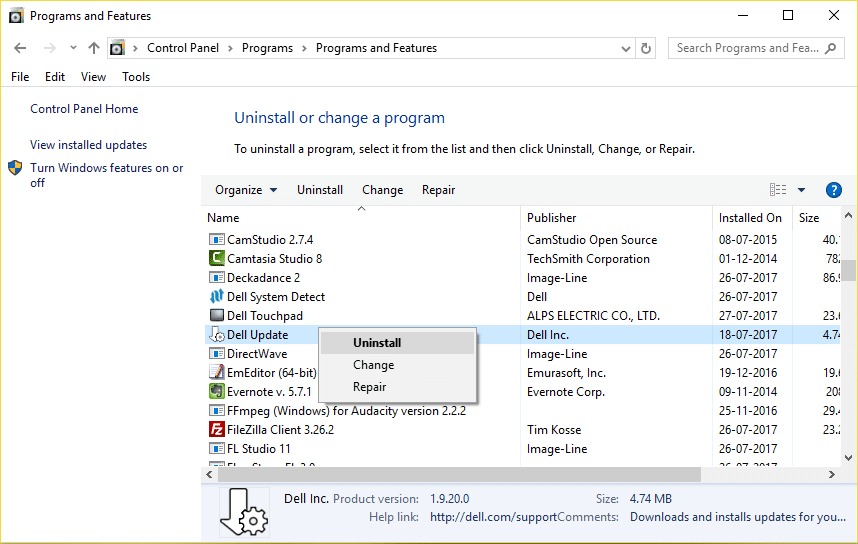
10. Uninstall the particular program or service associated with above Process ID then reboot your PC.
推奨:
これで成功です Fix High CPU Usage by WmiPrvSE.exe ただし、この投稿に関してまだ質問がある場合は、コメントのセクションで遠慮なく質問してください。

