გამოასწორეთ Microsoft Teams ვიდეო ზარი არ მუშაობს

If your camera is not working with Teams, don’t worry! This is a common issue faced by most users who handle meetings and conferences. Despite the fact that Microsoft გუნდები is one of the best video conferencing and chatting applications, it is not perfect at times. Suddenly, you may detect Microsoft Teams video call not working issue, so you will be struck with paused video or black screen only. This problem may be associated with an in-built camera or an external web camera. Also, if you cannot start the camera, incompatible app settings may contribute to Teams video not working problem. We bring to you a perfect guide that will teach you how to fix Microsoft Teams video call not working issue. So, continue reading the article.
How to Fix Microsoft Teams Video Call Not Working
Before you get into the troubleshooting section, you must learn the reasons that cause this issue. And so, you can easily resolve the same appropriately.
- Corrupt/incompatible camera drivers.
- Additional camera devices are configured to your Windows 10 PC.
- Camera permission is not granted on your computer.
- A third-party antivirus program or Firewall is interfering with the Teams software.
- Some other applications in your device are using your inbuilt camera.
- VPN/Proxy interference.
- მოძველებული ოპერაციული სისტემა.
Now, move ahead to the next section to resolve this issue. Analyze the reason to implement selective troubleshooting methods to attain quick results.
We have compiled a list of methods that will help you fix this problem in this section. The methods are arranged from basic to advanced steps to attain easier and faster results. Follow them in the same order to attain perfect results.
ძირითადი პრობლემების მოგვარება
Before trying the advanced troubleshooting methods, here are some simple hacks that will resolve all temporary glitches associated with Microsoft Teams application.
1. Replug Webcam
- If you are using an external web camera, the first thing you have to do is to unplug the web camera from the USB port, გადატვირთეთ your computer, and ხელახლა შეაერთეთ it again after some time.
- If you are using an inbuilt camera, ensure it is out of hardware glitches and failure.
2. Remove Other Hardware Devices
- Some other hardware devices plugged into your PC may interfere with the inbuilt camera or webcam. Temporarily, disable all other devices and check if this helps you.
- If you do not face this issue after disconnecting all other hardware devices, then plug them one by one to sort out the culprit.
- Always buy genuine peripherals from official or reliable stores for your Windows 10 computer.
3. დახურეთ ფონის პროგრამები
მეთოდი 1: გაუშვით აპარატურის და მოწყობილობების პრობლემების აღმოფხვრა
Windows 10 computers come with inbuilt troubleshooter tools to fix any problems associated with all of their components. The functionality of your camera can be affected by numerous factors. So, we recommend troubleshooting hardware and devices as instructed below.
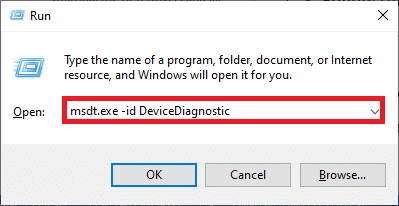
1. დაჭერა Windows + R გასაღებები ერთად გაუშვით გასაშვებად დიალოგური ფანჯარა.
2. ტიპი msdt.exe –id DeviceDiagnostic და მოხვდა შეიყვანეთ.
3. შემდეგ, დააჭირეთ ღილაკს შემდეგი.

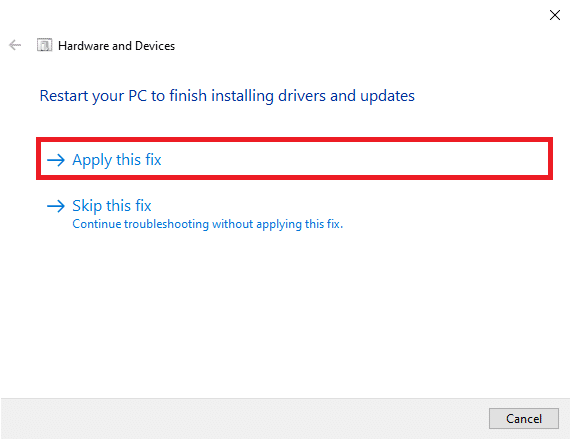
4A. If there is an issue and your device is not set up with the latest drivers, you will receive the following prompt. Select გამოიყენეთ ეს შეკეთება and follow the on-screen instructions. Then, გადატვირთვა თქვენი მოწყობილობა.
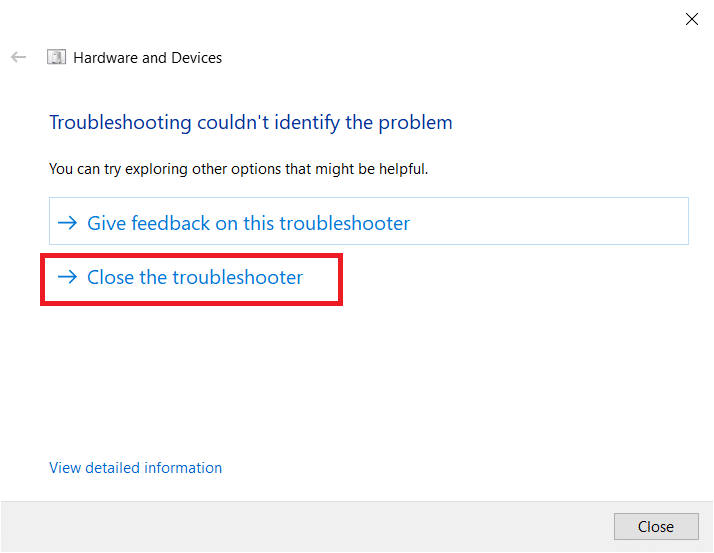
4B. If there is no issue with the drivers, click Დახურე პრობლემის მაჩვენებელი შემდეგ ეკრანზე.
Method 2: Choose the Right Camera in Teams
Teams must access your camera, and for that, you have to choose the correct camera. If Teams faces any issue while accessing the camera, you will face so many conflicts. For the Desktop version of Teams, follow the below-mentioned steps to choose the right camera in your Windows 10 PC.
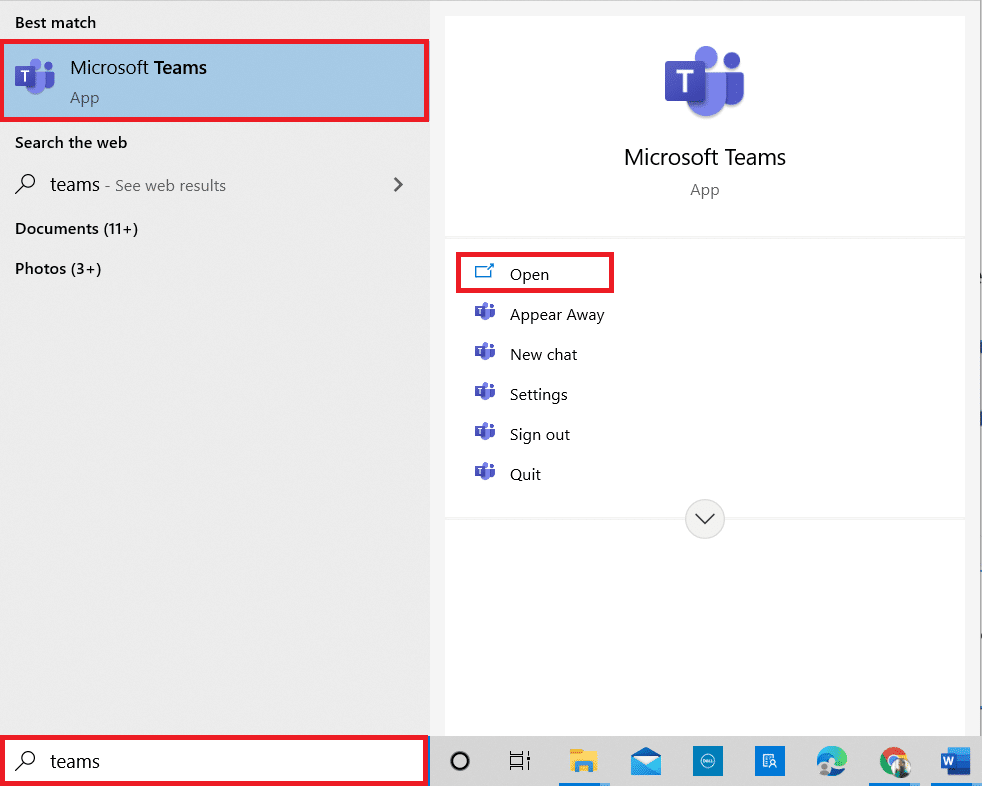
1. დააჭირეთ Windows გასაღები. ტიპი Microsoft გუნდები და გაუშვით.
2. დაწკაპეთ სამ წერტილიანი ხატი შენი გვერდით მომხმარებლის ფოტო გუნდებში.
![]()
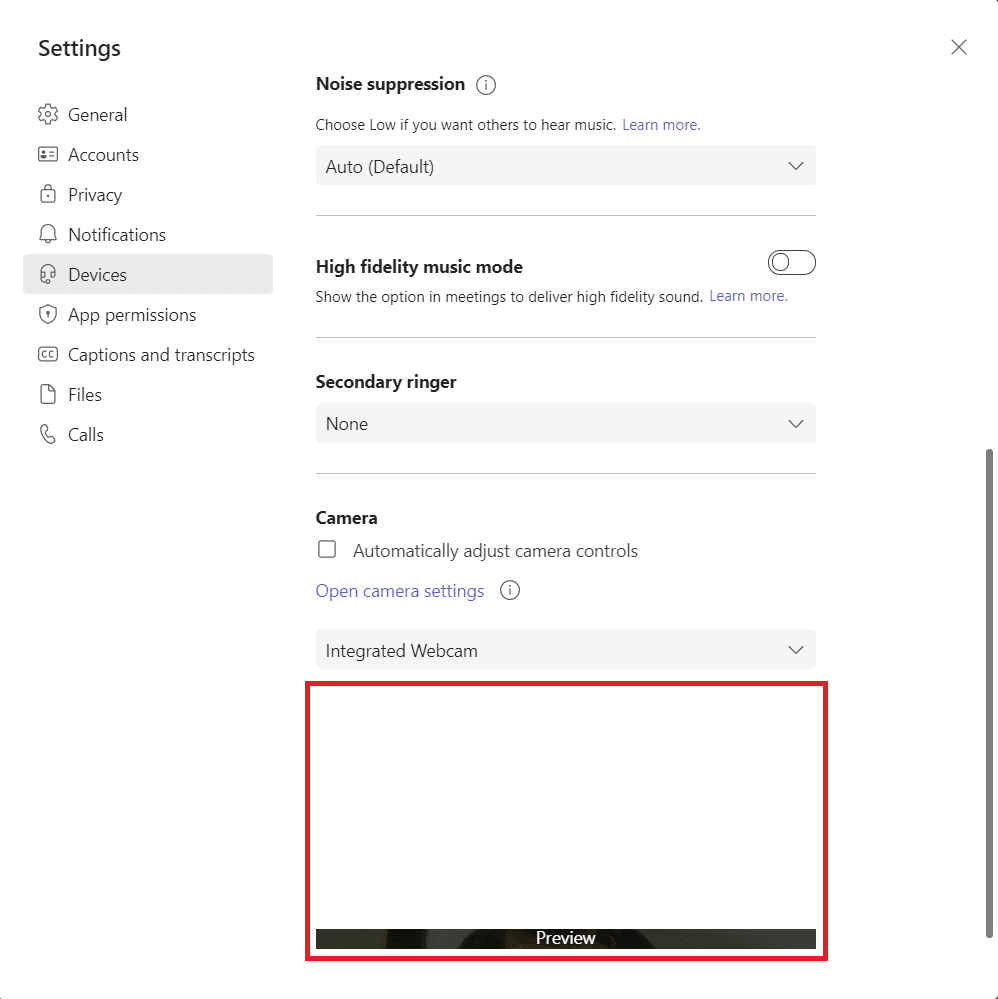
3. გადახვიდეთ მოწყობილობები tab in the left pane and scroll down the right screen.
4. ახლა, ში კამერა menu, expand the drop-down menu.
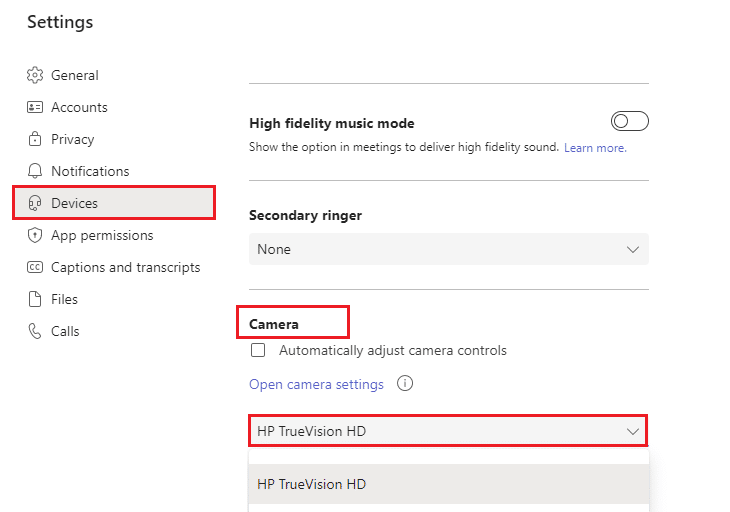
5. შემდეგ აირჩიეთ კამერა you want to use and make sure you save the changes. Check if you have fixed the Microsoft Teams video call not working issue by confirming the video in the preview space.
ასევე წაიკითხე: როგორ შევცვალოთ Microsoft Teams Profile Avatar
Method 3: Clear Microsoft Teams Cache
Teams collect temporary memory in the form of a cache to process the tasks easily within the app. If this temporary memory is over bulged or corrupt in your Windows 10 PC, then it might interfere with its main functions like camera, voice, noise, and a lot more. To solve the Teams video not working issue, consider clearing the cache as instructed below.
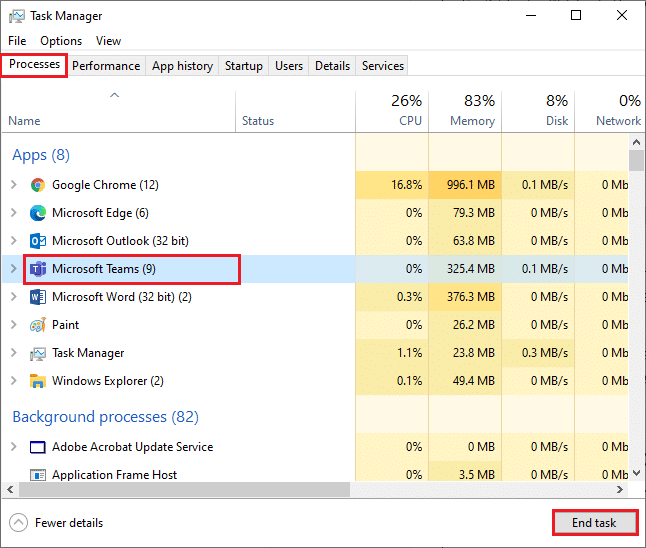
1. გასვლა გუნდები და გაშვება პროცესების მენეჯერი (Task Manager) დაჭერით Ctrl + Shift + Esc კლავიშები ერთდროულად.
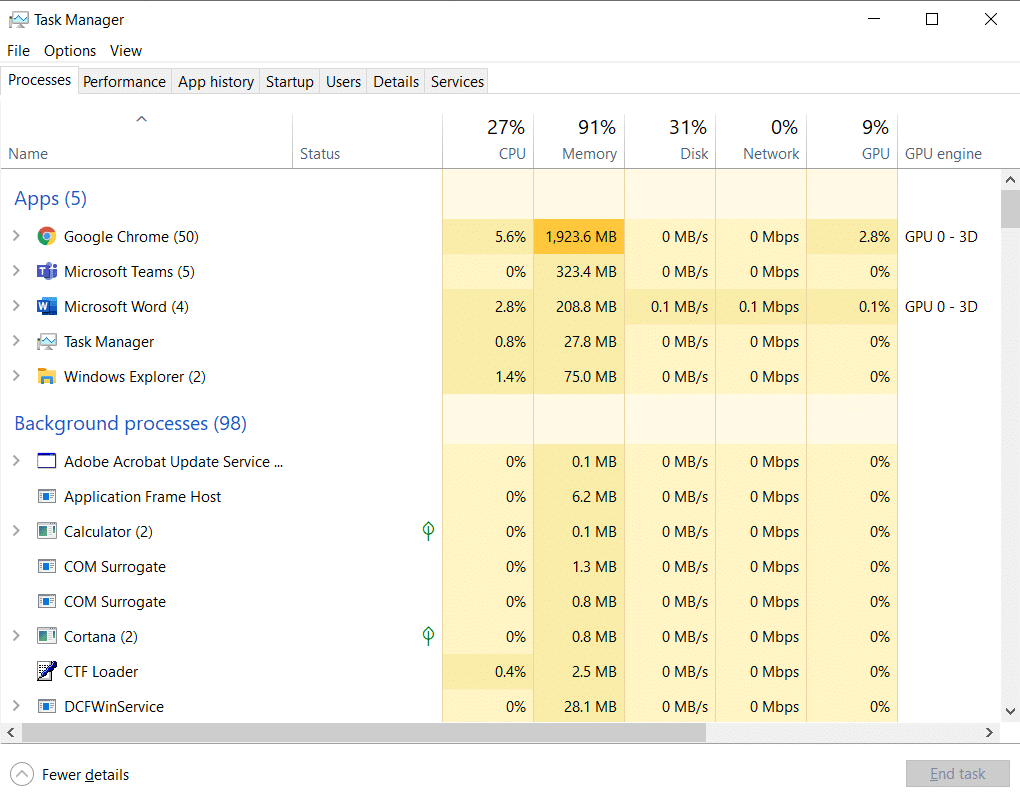
2. In პროცესები tab, აირჩიეთ Microsoft გუნდები programs that are running in the background and select დასრულებული სამუშაო.
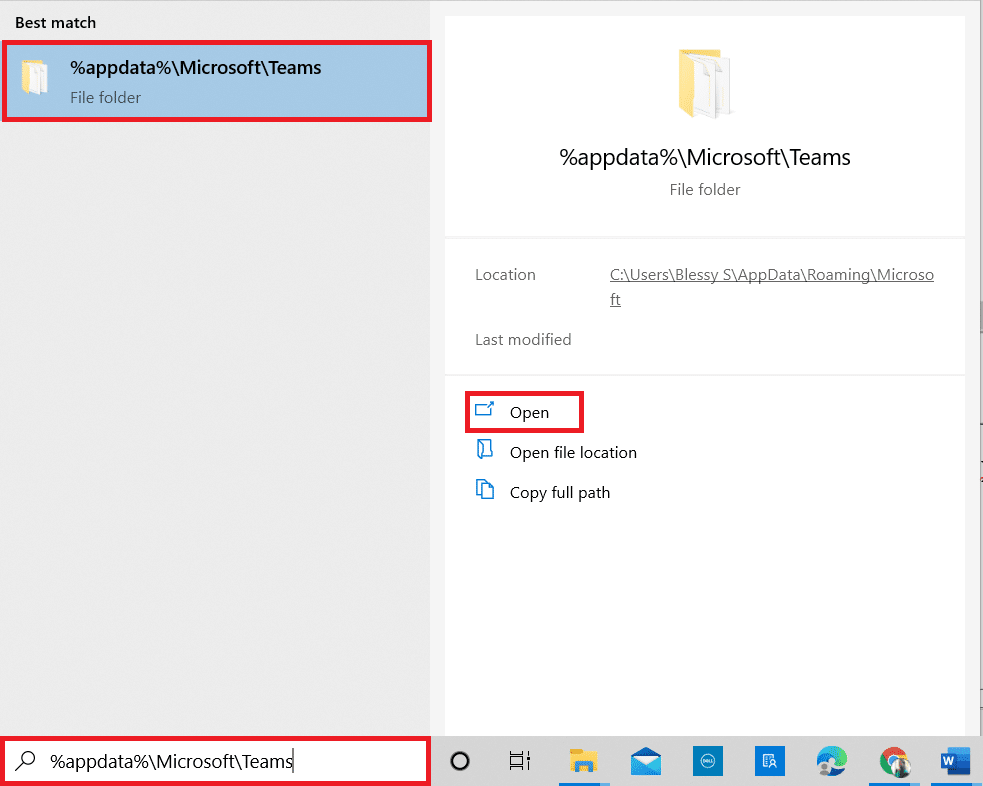
3. შემდეგ, დააჭირეთ Windows გასაღები და ტიპის % appdata% MicrosoftTeams საძიებო ბარაკში.
4. დაწკაპეთ ღიაა როგორც ნაჩვენებია.
5. ახლა, აირჩიეთ all the files and folders within the folder and select the წაშლა ვარიანტი.
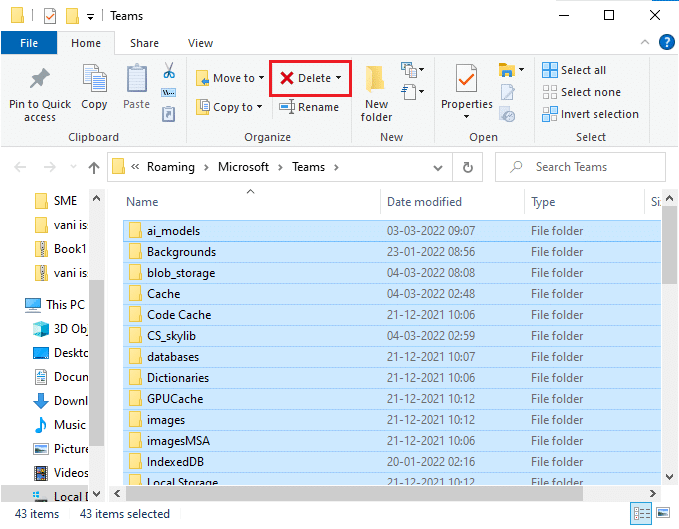
6. გადატვირთეთ თქვენი Windows 10 კომპიუტერი.
Method 4: Disable Other Additional Devices
If you are using an external webcam or two or more cameras, your default camera might interfere with them. To fix the problem, disable all other additional devices as instructed below.
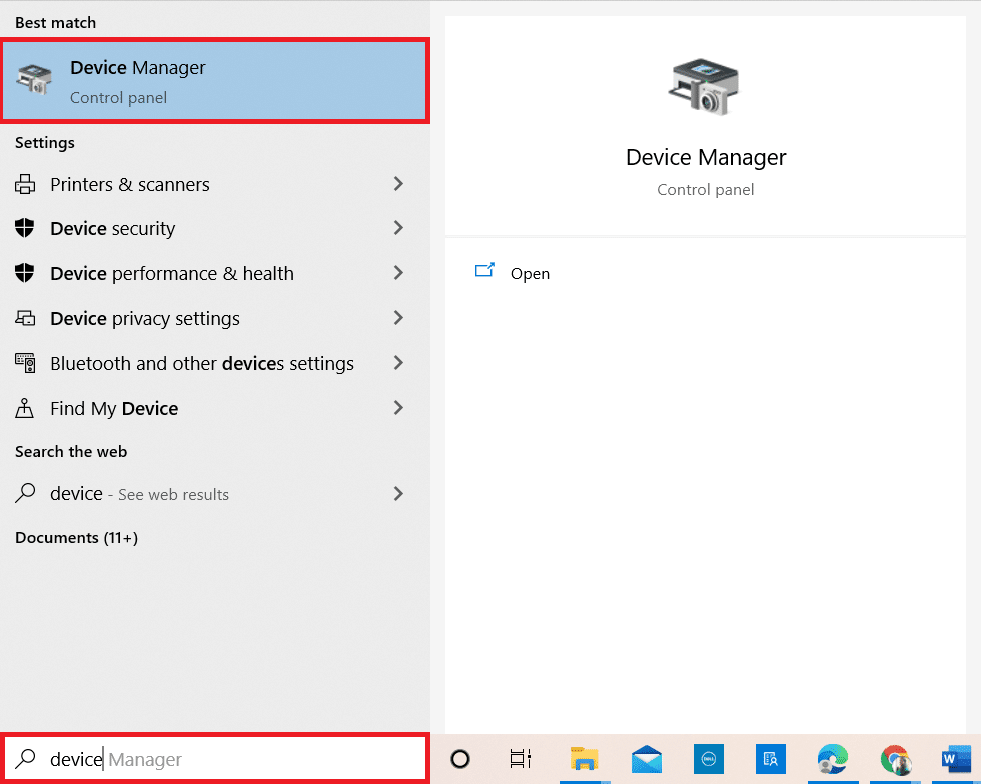
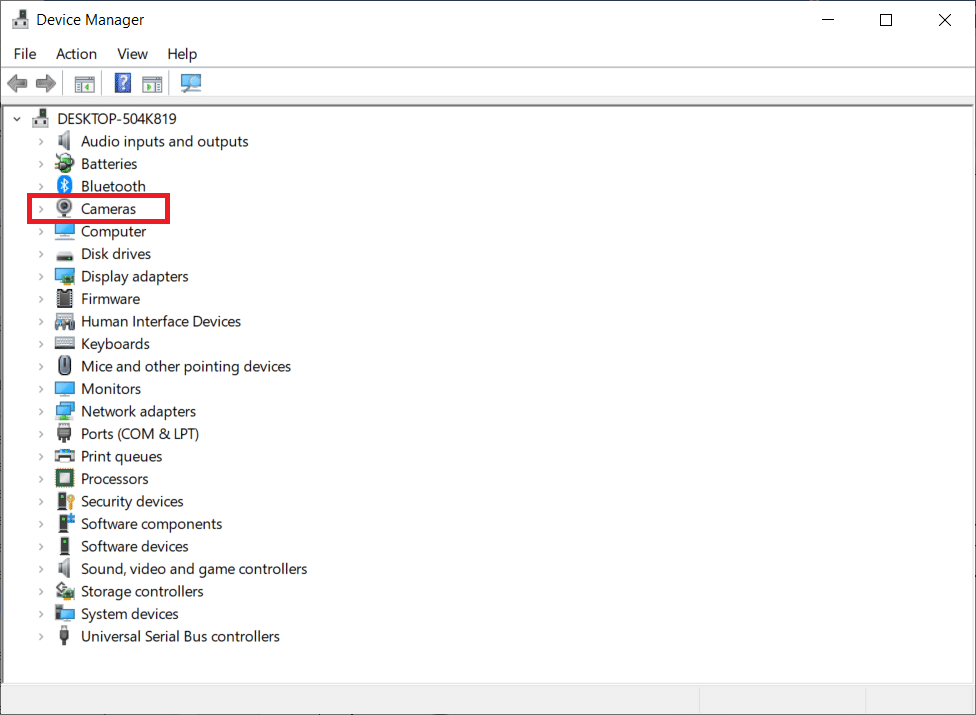
1. ტიპი Device Manager იმ Windows 10 საძიებო მენიუ და გახსენით იგი.
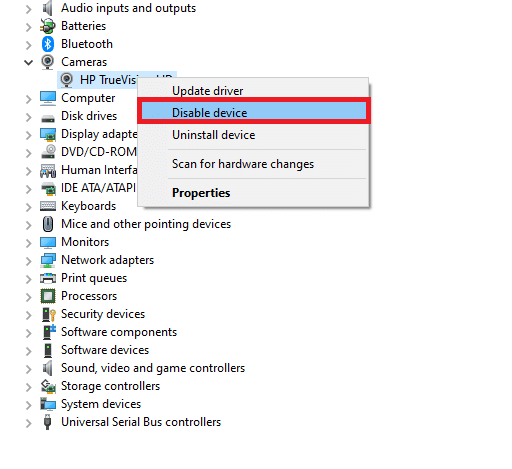
2. ახლა ორჯერ დააწკაპუნეთ კამერები მისი გაფართოება.

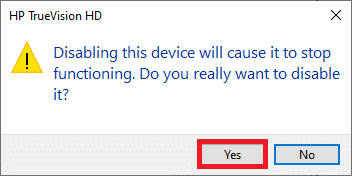
3. შემდეგ დააწკაპუნეთ მაუსის მარჯვენა ღილაკით camera device (HP TrueVision HD, for example) and select the მოწყობილობის გამორთვა ვარიანტი, როგორც ნაჩვენებია.
შენიშვნა: Ensure you select a camera that you are not currently using in Teams.
4. დაადასტურეთ მოთხოვნა დაწკაპუნებით დიახ.
5. Follow these steps for all other additional devices and check if you have resolved Teams video call not working issue.
შენიშვნა: Make sure you re-enable the default camera adapter again after fixing the issue.
ასევე წაიკითხე: როგორ ჩართოთ ან გამორთოთ Microsoft Teams Push to Talk
Method 5: Allow Camera Permissions for Browsers
If you are using the browsing version of Teams, check if you have appropriate permissions for camera access. If not, you cannot access the camera for any browser-related applications, or you will be prompted for the same. Here are a few instructions to allow camera permissions for browsers. Google Chrome is taken as an example.
1. პრესა Windows გასაღები. ტიპი Google Chrome და გაუშვით.

2. დაწკაპეთ სამ წერტილიანი ხატი და აირჩიეთ პარამეტრები ვარიანტი.
![]()
3. ახლა, აირჩიეთ უსაფრთხოება და დაცვა in the left pane and choose საიტის პარამეტრები from the main page.
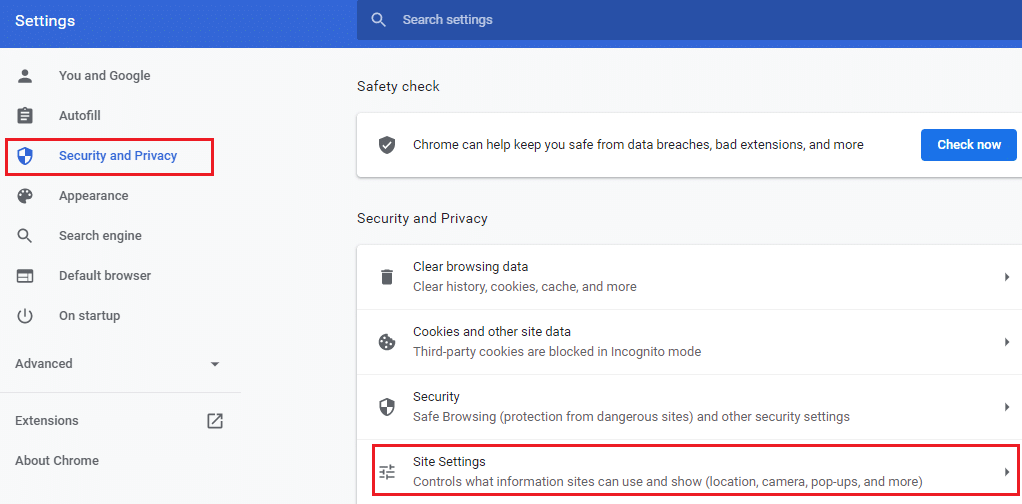
4. Scroll down the main screen and select the კამერა ვარიანტი ქვეშ ნებართვები მენიუ, როგორც ნაჩვენებია.
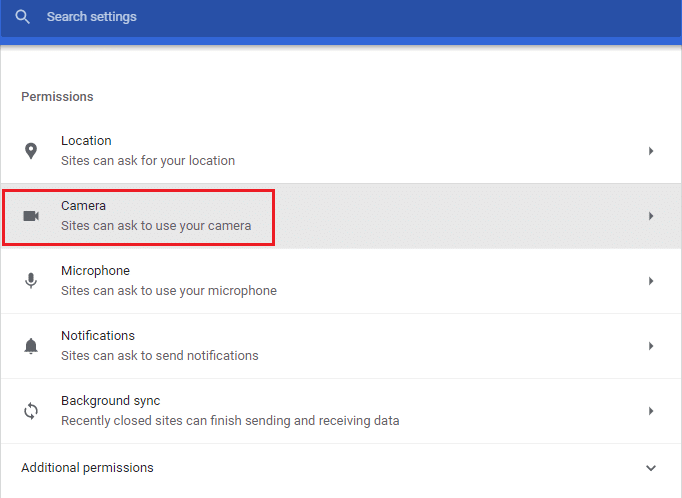
5. აქ აირჩიეთ საიტებს შეუძლიათ მოითხოვონ თქვენი კამერის გამოყენება option and make sure გუნდები is not added in Not allowed to use your camera სია.
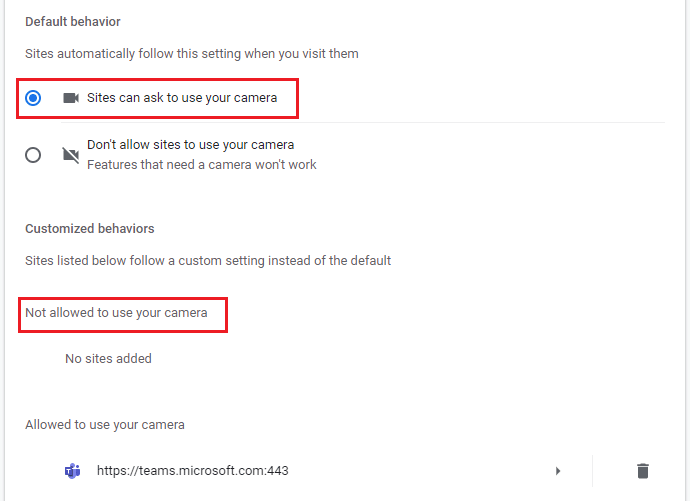
6. Relaunch your ბრაუზერი and check if you have fixed the Teams video not working issue.
მეთოდი 6: Windows-ის განახლება
If you are using an outdated version of Windows 10 PC, then you may face common hardware problems in it, especially for cameras. Fortunately, you can update your Operating System with these simple steps.
1. პრესა Windows + I კლავიშები ერთად გასახსნელად პარამეტრები თქვენს კომპიუტერში.
2. ახლა, აირჩიეთ განახლება და უსაფრთხოება.
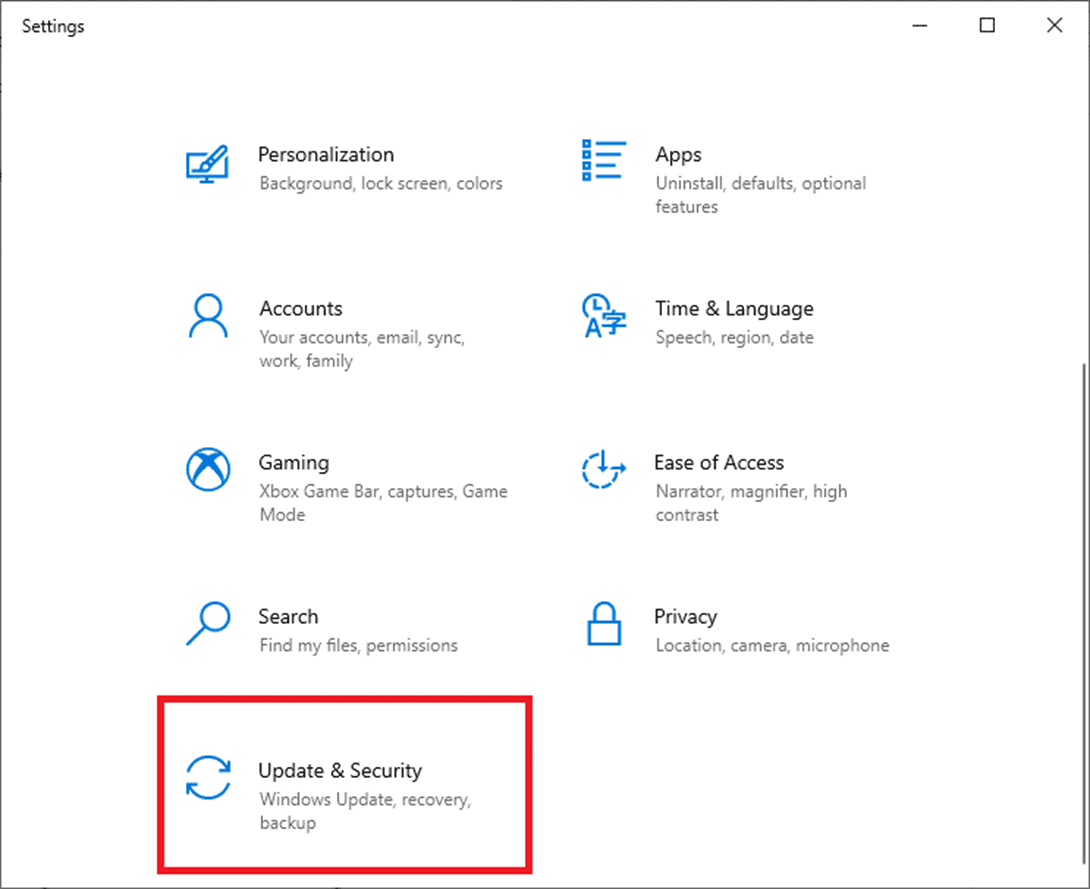
3. აირჩიეთ შეამოწმოთ განახლებები მარჯვენა პანელიდან.
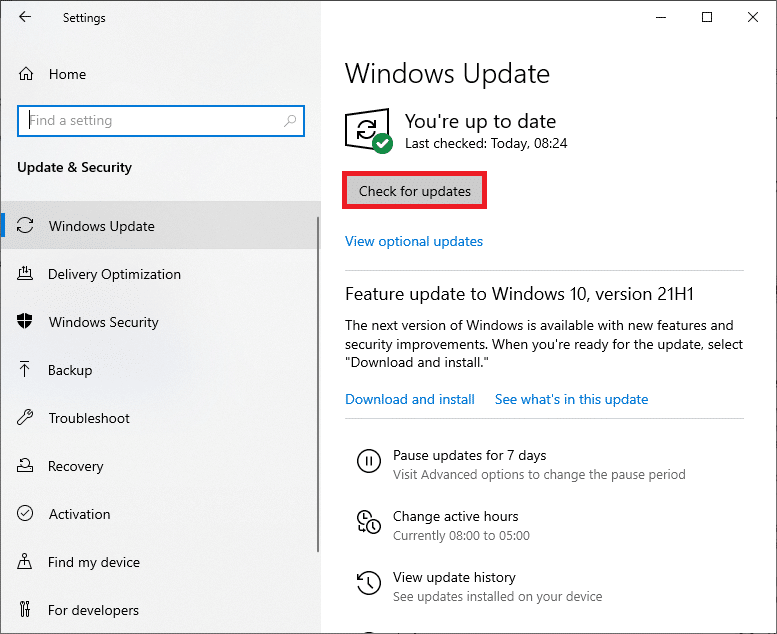
4A. If your system is outdated, click ახლა დააინსტალირეთ რომ ჩამოტვირთოთ და დააინსტალიროთ უახლესი ვერსია.
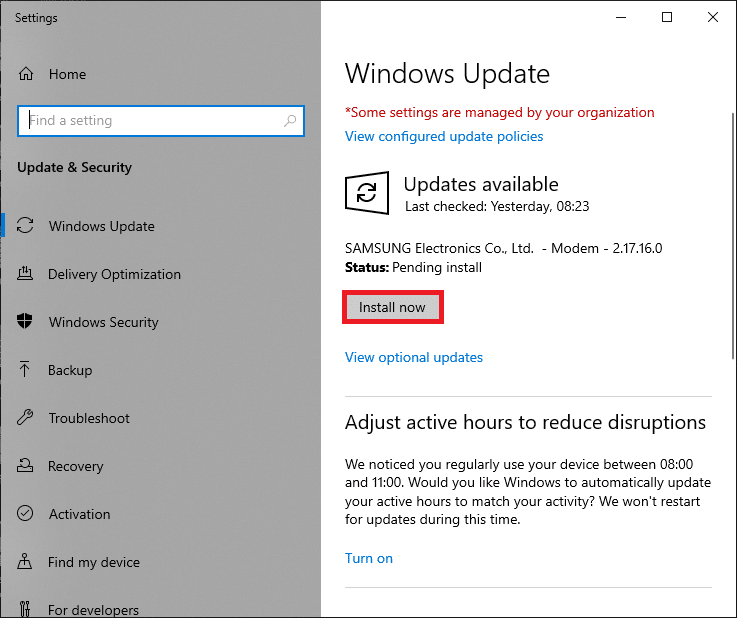
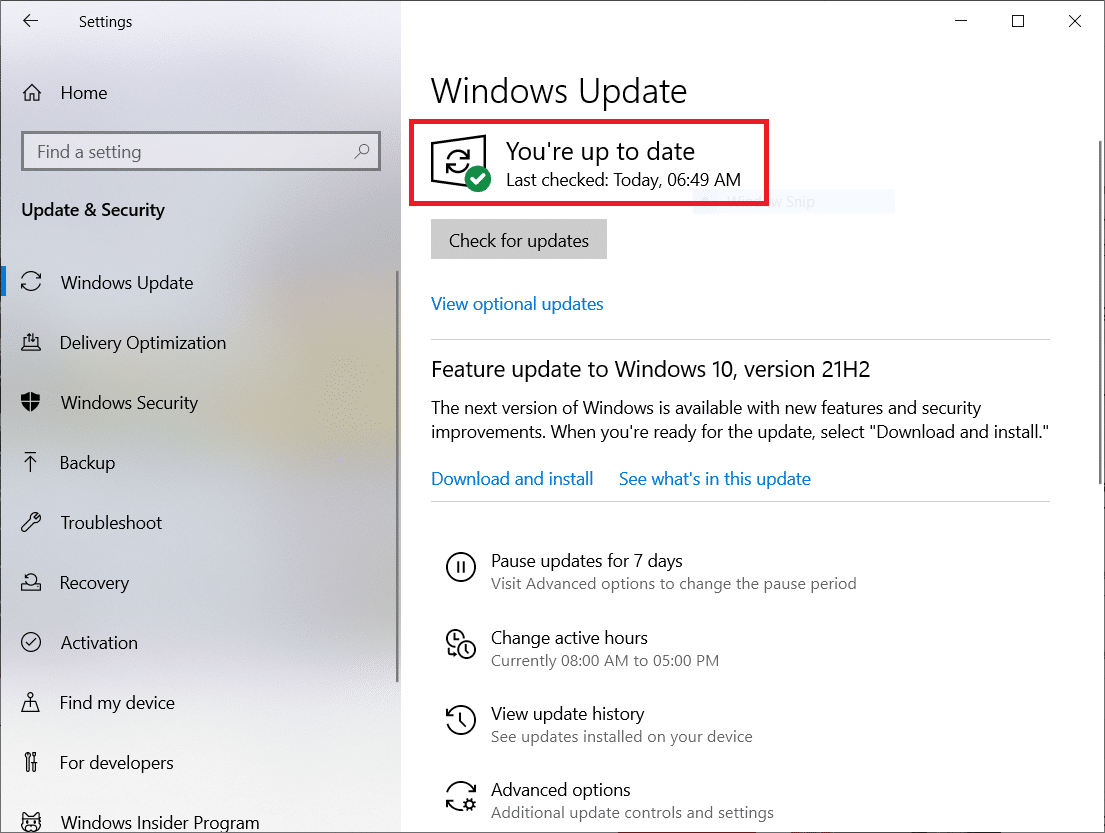
4B. თუ თქვენი სისტემა უკვე განახლებულია, მაშინ ის გამოჩნდება განახლებული ხარ გაგზავნა.
ასევე წაიკითხე: სად ინახება Microsoft Teams ჩანაწერები?
მეთოდი 7: Firewall-ის გამორთვა (არ არის რეკომენდებული)
If the security suite of Windows Defender Firewall is blocking the camera access of Microsoft Teams, here are a few options to deal with the issue.
ვარიანტი I: თეთრი სიის გუნდები Firewall-ში
1. დააჭირეთ Windows გასაღები და ტიპის Windows დამცველის Firewall. Open the best results.
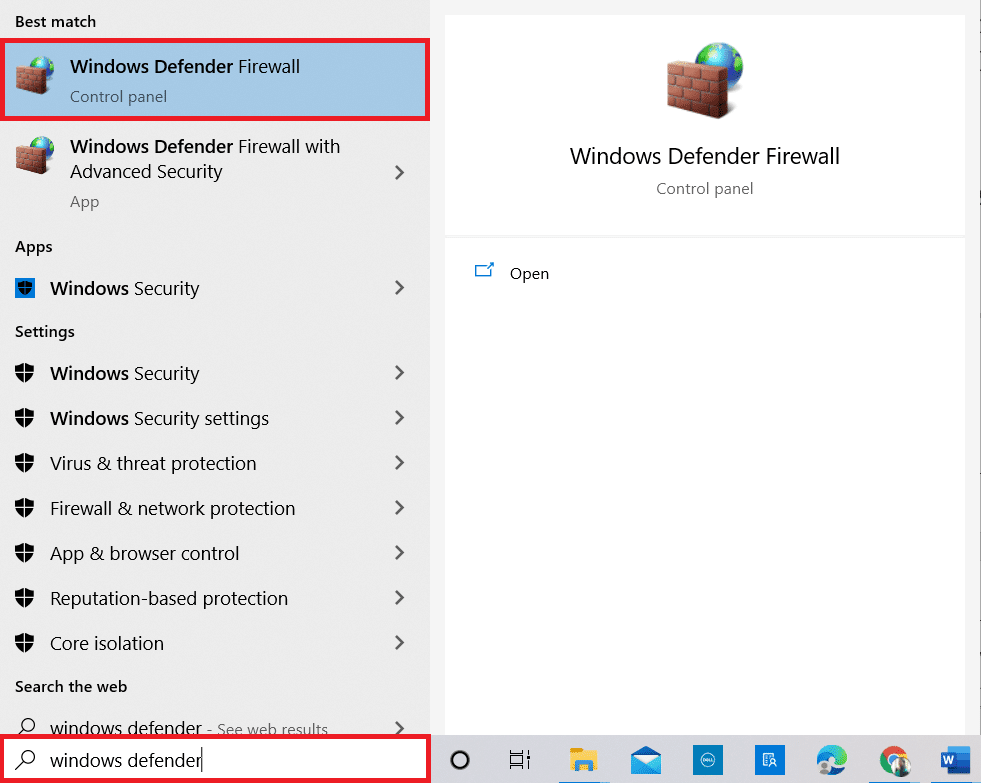
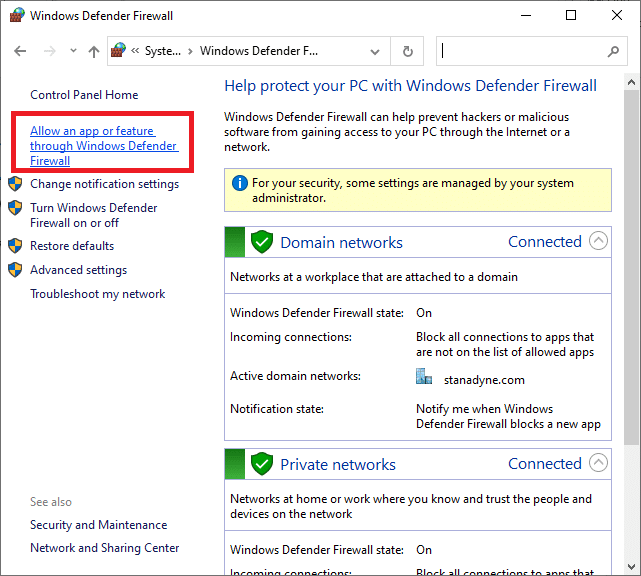
2. ამომხტარ ფანჯარაში დააწკაპუნეთ ნება დართეთ აპს ან ფუნქციას Windows Defender Firewall– ის საშუალებით.
3. შემდეგ დააწკაპუნეთ პარამეტრების შეცვლა. საბოლოოდ, შეამოწმეთ Microsoft გუნდები დაუშვას Firewall-ის მეშვეობით.
შენიშვნა: თქვენ შეგიძლიათ გამოიყენოთ სხვა აპის დაშვება… to browse your program if your desired application or program does not exist in the list.
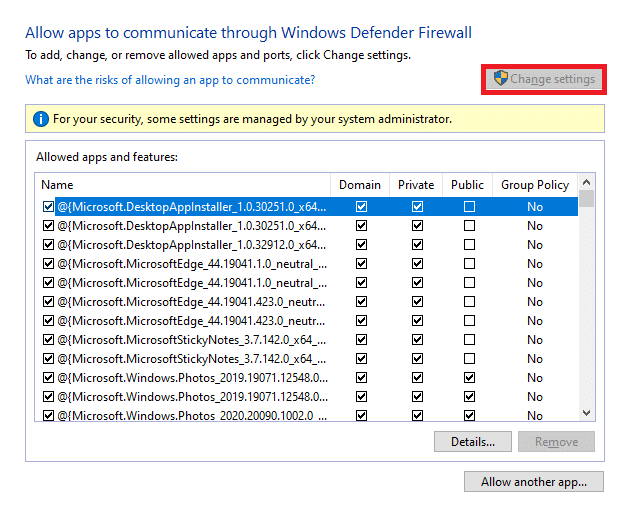
4. დაბოლოს, დააჭირეთ OK ცვლილებების შენახვა.
ვარიანტი II: Firewall-ის დროებით გამორთვა
შენიშვნა: If you disable the Firewall, it makes your computer more vulnerable to malware or virus attacks. Hence, if you choose to do so, make sure to enable it soon after fixing the issue.
1. პრესა Windows გასაღები. ტიპი პანელი და გახსენით იგი.
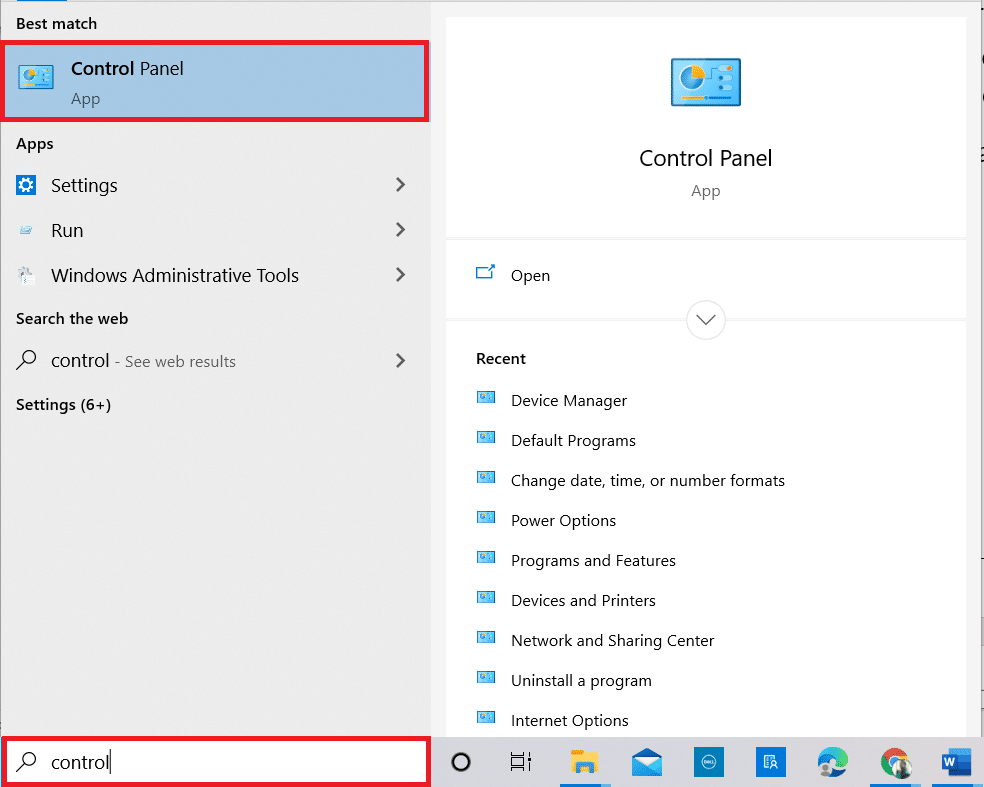
2. უცნობია ნახვა as კატეგორია და აირჩიეთ სისტემა და უსაფრთხოება.
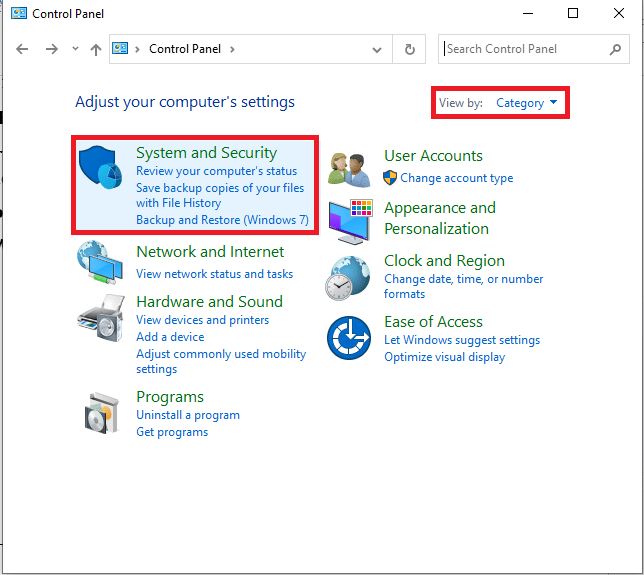
3. ახლა, დააჭირეთ ღილაკს Windows Defender Firewall, როგორც აქ ნაჩვენებია.
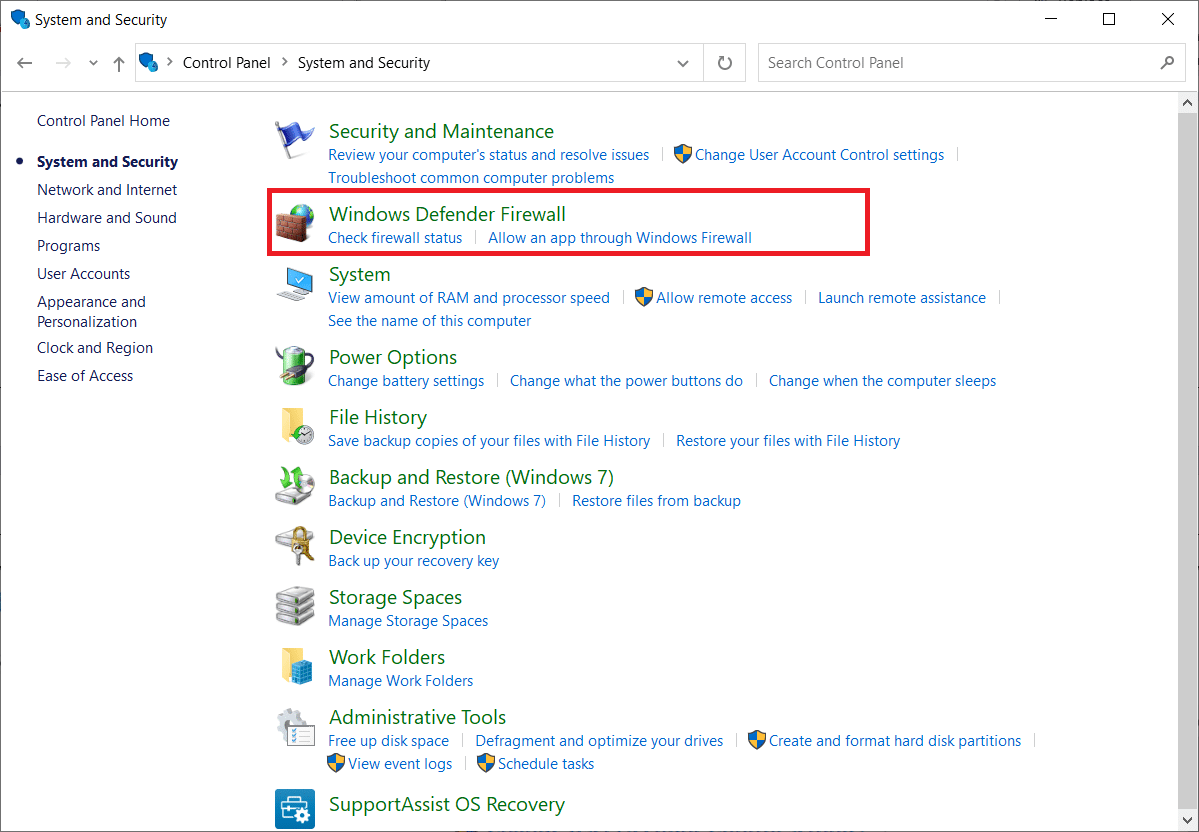
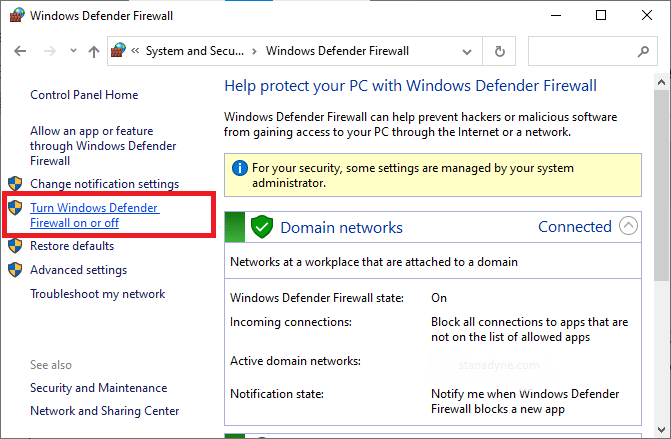
4. აირჩიეთ ჩართეთ Windows Defender Firewall on ან off ვარიანტი მარცხენა მენიუდან.
5. ახლა, მონიშნეთ ველი გვერდით გამორთეთ Windows Defender Firewall (არ გირჩევთ) პარამეტრი, სადაც არ უნდა იყოს ამ ეკრანზე.
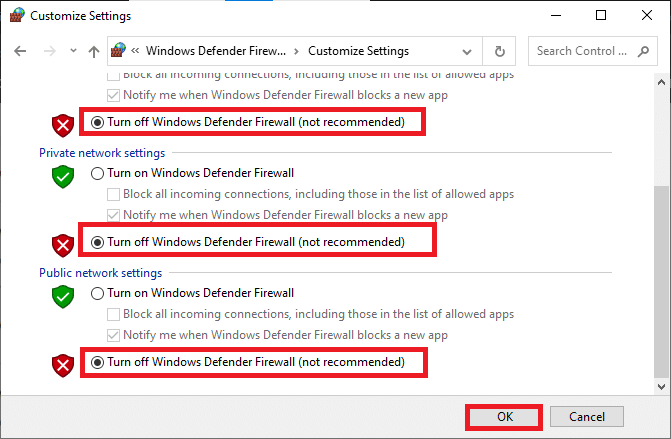
6. click OK მდე გადატვირთეთ თქვენი კომპიუტერი.
მეთოდი 8: გამორთეთ VPN
Virtual Private Networks are used to prevent data stealing from a private network, and it is used as a gateway between the client and the server. Sometimes, using VPN servers might cause issues in online video conferencing applications. We recommend you disable the VPN client as instructed below.
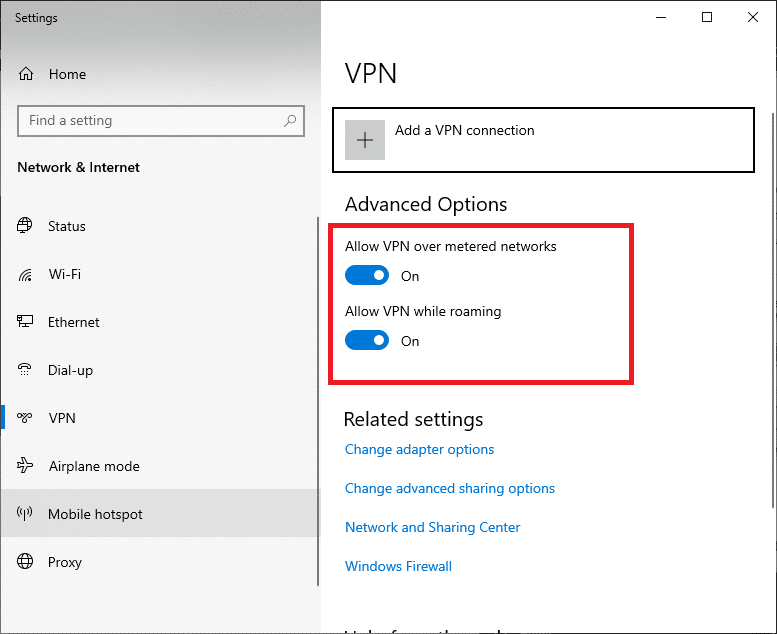
1. დააჭირეთ Windows გასაღები და ტიპის VPN პარამეტრები საძიებო ბარაკში.
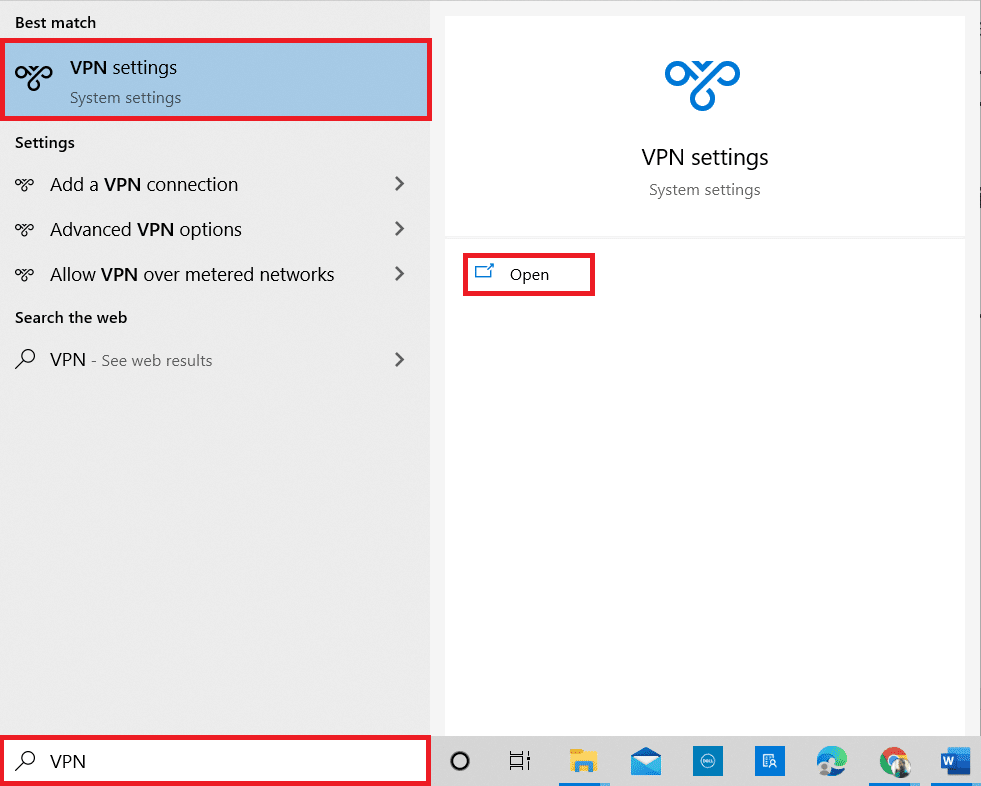
2. In პარამეტრები window, disconnect the active VPN მომსახურება.
3. გამორთეთ VPN პარამეტრები ქვეშ დამატებითი პარამეტრები.
ასევე წაიკითხე: შეასწორეთ Microsoft Teams Keeps Restart
Method 9: Reinstall Camera Drivers
The old and incompatible camera drivers you use will often lead to Microsoft Teams video call not working issue. To remain on the safer side, always ensure you use an updated version of drivers. Here are a few instructions to reinstall camera drivers.
1. დაიწყეთ Device Manager using the steps mentioned above and expand the კამერები მასზე ორჯერ დაწკაპუნებით.
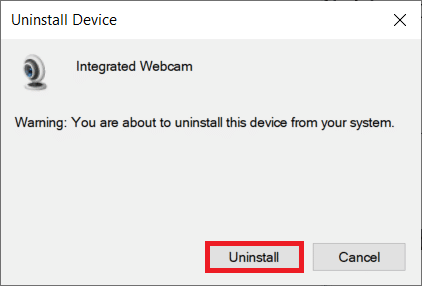
2. ახლა დააწკაპუნეთ მაუსის მარჯვენა ღილაკით მძღოლი და აირჩიეთ მოწყობილობის წაშლა.
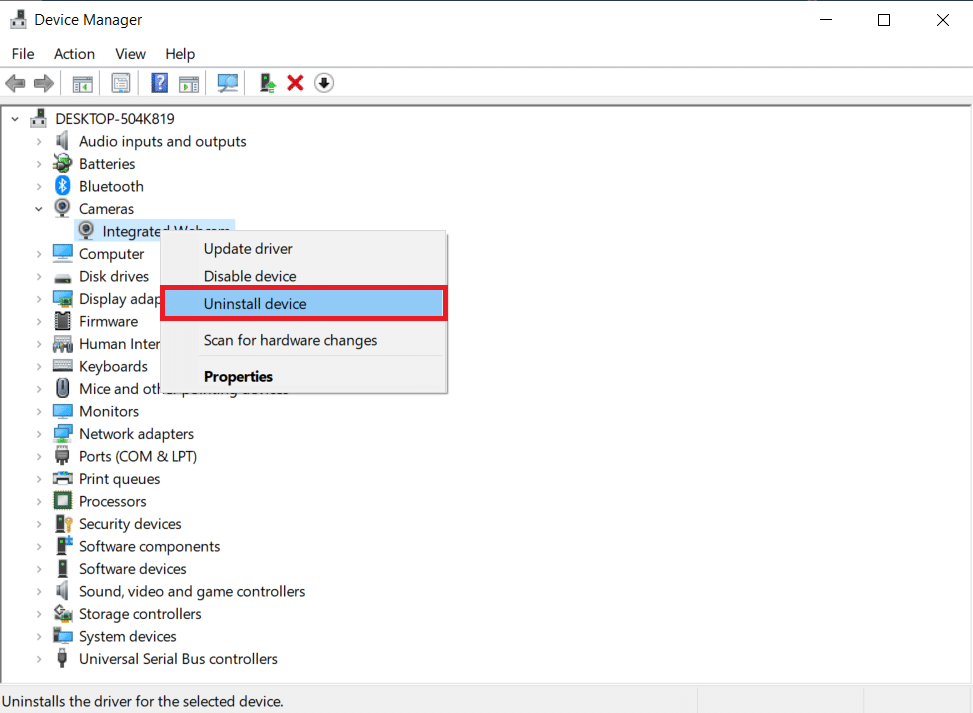
3. click Uninstall მოთხოვნაში.
4. Now, visit the manufacturer’s website (e.g. Lenovo).
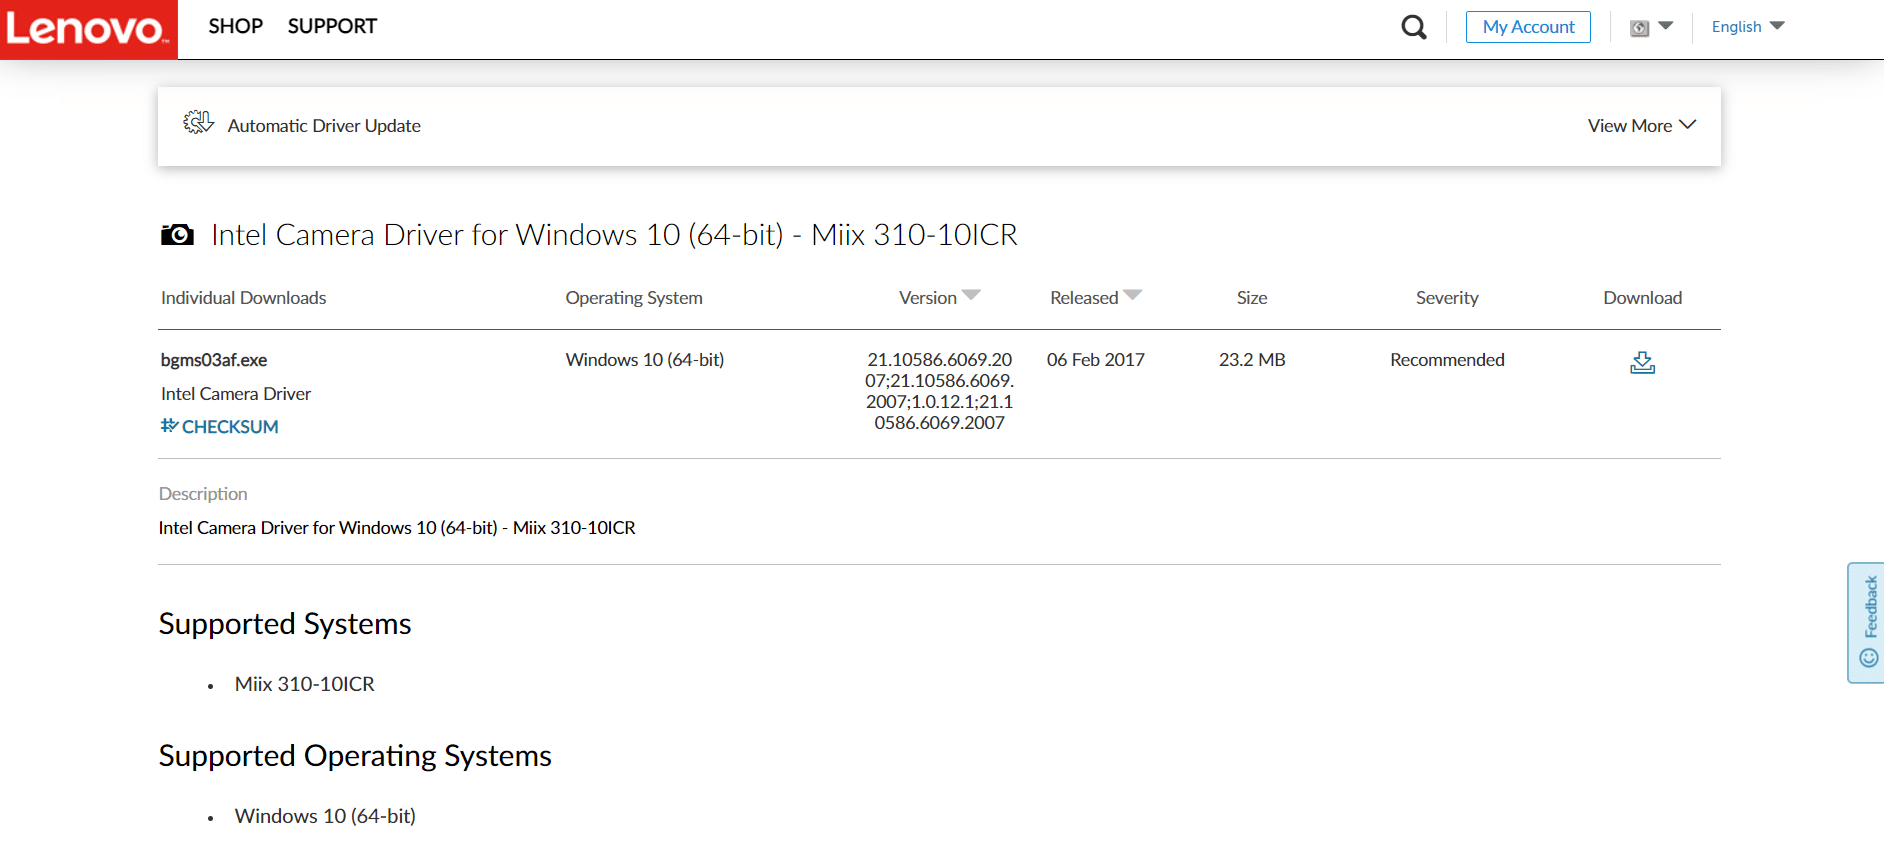
5. მოვძებნით მდე ಡೌನ್ಲೋಡ್ ಮಾಡಿ თქვენს კომპიუტერში Windows-ის ვერსიის შესაბამისი დრაივერები.
6. ჩამოტვირთვის შემდეგ, ორჯერ დააწკაპუნეთ მასზე გადმოწერილი ფაილი და მიჰყევით ეკრანზე მითითებებს მის დასაყენებლად.
Method 10: Use Browser Version of Teams
If you have not attained any fix for this Microsoft Teams video call not working issue in the desktop version of Teams, then you can try a browser of Teams. This is an alternative to the issue and makes sure you have enabled access to media services enabled in your Windows 10 PC.
- If you are using the browsing version of Teams, check if you have appropriate permissions for camera access as done in მეთოდი 5.
- If not, you cannot access the camera for any browser-related applications, or you will be prompted for the same.
ასევე წაიკითხე: როგორ დავაყენოთ Microsoft-ის გუნდის სტატუსი, როგორც ყოველთვის ხელმისაწვდომი
Method 11: Contact Microsoft Teams Technical Support
Still, if you cannot access Teams in both desktop and web versions of Teams, then take the last chance to submit a query on the official Microsoft support page.
1. წასვლა Microsoft-ის მხარდაჭერის გვერდი.
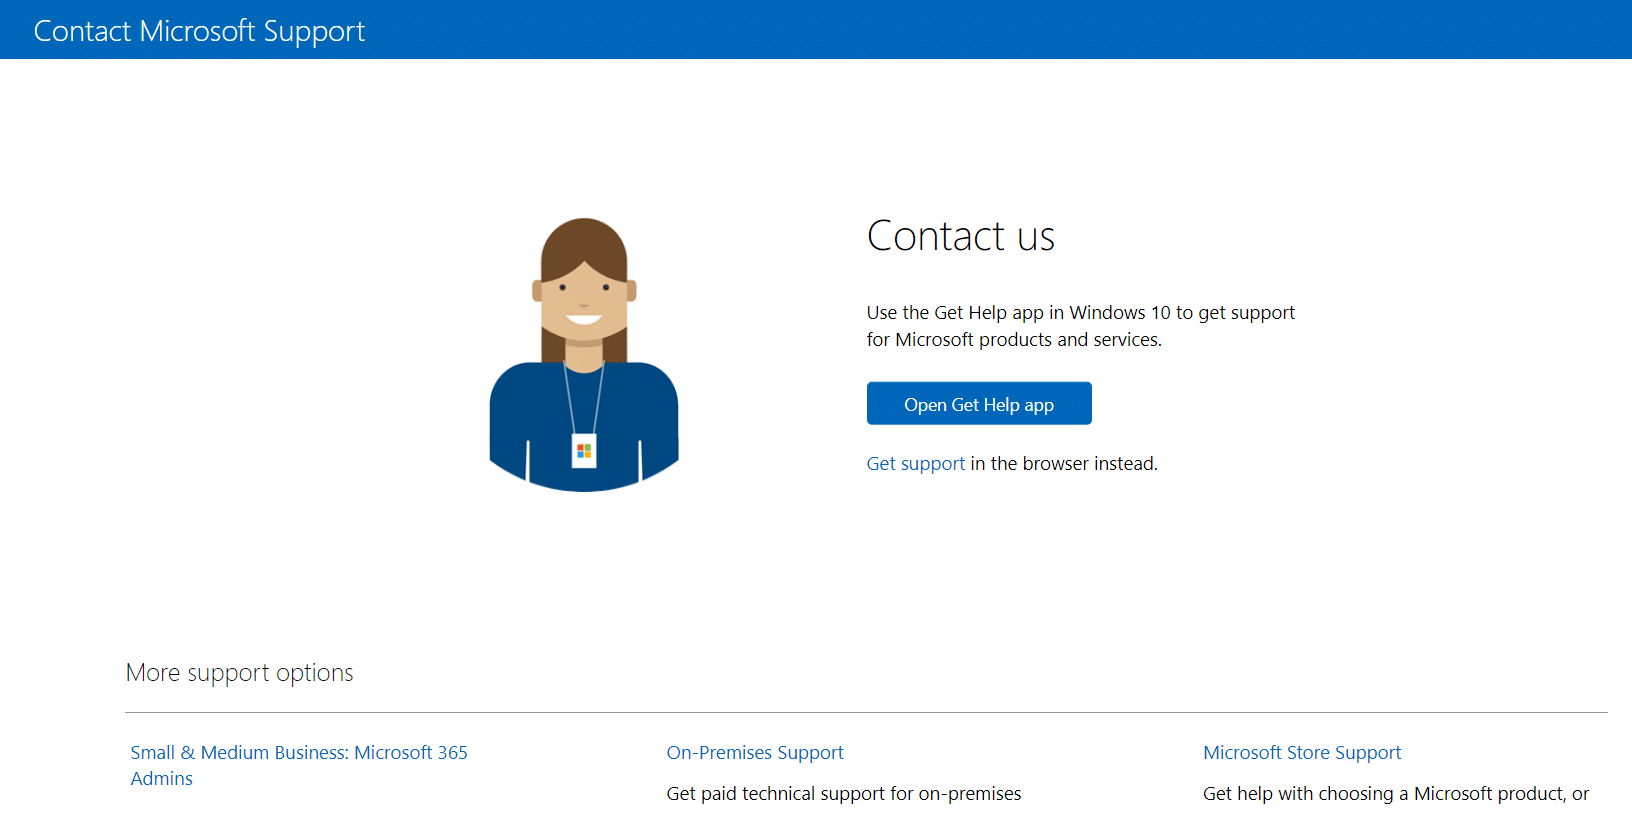
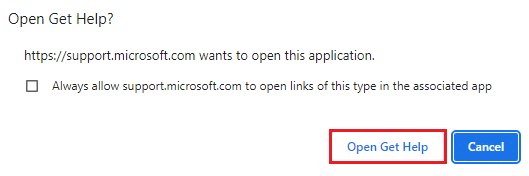
2A. You can use the მიიღეთ დახმარების აპლიკაცია in your Windows 10 system to submit your query. For this, click on the Open Get Help app button and confirm the prompt by clicking on the გახსენით დახმარების მიღება ღილაკს.
2B. Also, you could use the ბრაუზერის ვერსია to submit your problem. To do so, click on the მხარდაჭერა ლინკები.

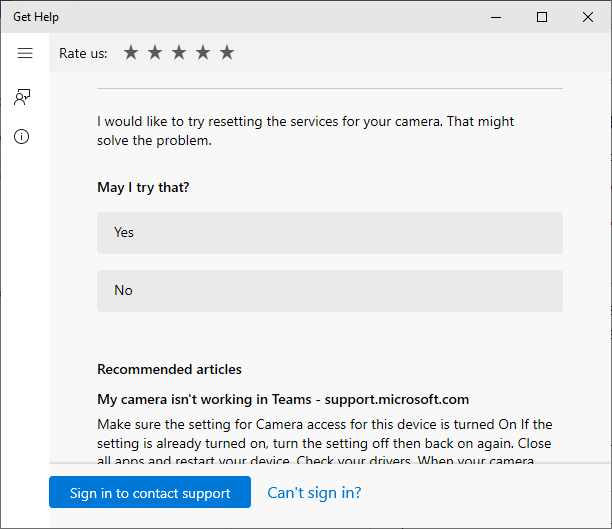
3. ახლა ჩაწერეთ your problem იმ Tell us your problem so we can get you the right help and support მინდორი და მოხვდა შეიყვანეთ.
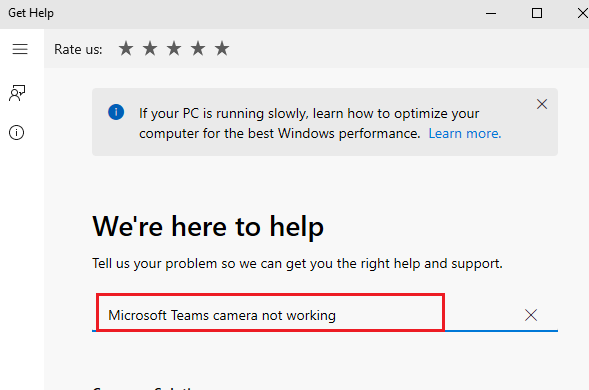
4. Then, answer the questions according to your convenience, and finally, you would have resolved the Microsoft Teams video call not working issue.
რეკომენდებული:
ვიმედოვნებთ, რომ ეს სახელმძღვანელო სასარგებლო იყო და თქვენ შეძლებთ გამოსწორებას Microsoft Teams video call not working. Feel free to reach out to us with your queries and suggestions. Keep visiting our page for more cool tips & tricks, and leave your comments below. Let us know what you want to learn next.