Adobe Premiere Pro is video editing software that carries out necessary tasks for producing high-definition and good-quality video. The software is a non-linear editing system that perfectly fits professionals and amateurs. This award-winning software is great at what it does, including importing videos, audio, and graphics, adding effects, exporting videos in various formats, and arranging all the elements together to fit a visual timeline. It can thus be used for almost all the common editing tasks, although there is a catch with the software while exporting videos: Premiere Pro error code 3. This error code has been encountered by many users when they try to export their video or content after editing it. If you have also faced the same issue and are looking for fixes, you have come to the right place. We have a perfect guide for resolving error code 3 in Premiere Pro, and along the way will also familiarize you with the reasons behind the error. So, let us get started with our doc right away to fix error code 3 error compiling movie.
How to Fix Premiere Pro Error Code 3 in Windows 10
Error code 3 in Adobe Premiere Pro is encountered on a system when the settings required for Premiere Pro are not set up properly. The error code is usually seen when a video is rendered in H264 format, leaving all the editing down the drain and leaving videos compiled incompletely. It can also be an error compiling movie, export error, or error completing render on Windows 10/11.
What Causes Error Code 3?
Some reasons for the above-said issue are listed below:
- მოძველებული გრაფიკის დრაივერები
- Outdated Premiere Pro software
- Duplicate file with the same title and format
- Insufficient space in the hard disk
- Invalid output drive
- Low or medium GPU usage
- Corrupt projection load
Now that you know the causes that usually result in error code 3 when you export a video on Premiere Pro, it is time to look at some of the best troubleshooting methods that are perfect workarounds for the above-given causes.
Method 1: Rename File
The basic method to fix error code 3 is to rename the file you are trying to render. Many error codes are usually related to file names that have special characters. Also, a special character can stop your file from compiling as the system cannot read it. Therefore, you must დარწმუნდით, რომ თქვენი file name has a regular alphabet and no special characters.
Also, renaming the file is great in resolving the issue of duplicate files. If there already is a file ერთად similar name, format, and title on your system, it can become a roadblock in the export of your current file. So, make sure you change the name by adding a letter or word.
Method 2: Restart Adobe Premiere Pro
Another method that is simple yet effective is restarting the program. It is quite useful in cases where a minor glitch or a bug is causing issues with the video rendering.
შენიშვნა: Save the edited file before closing it to avoid losing the changes made.
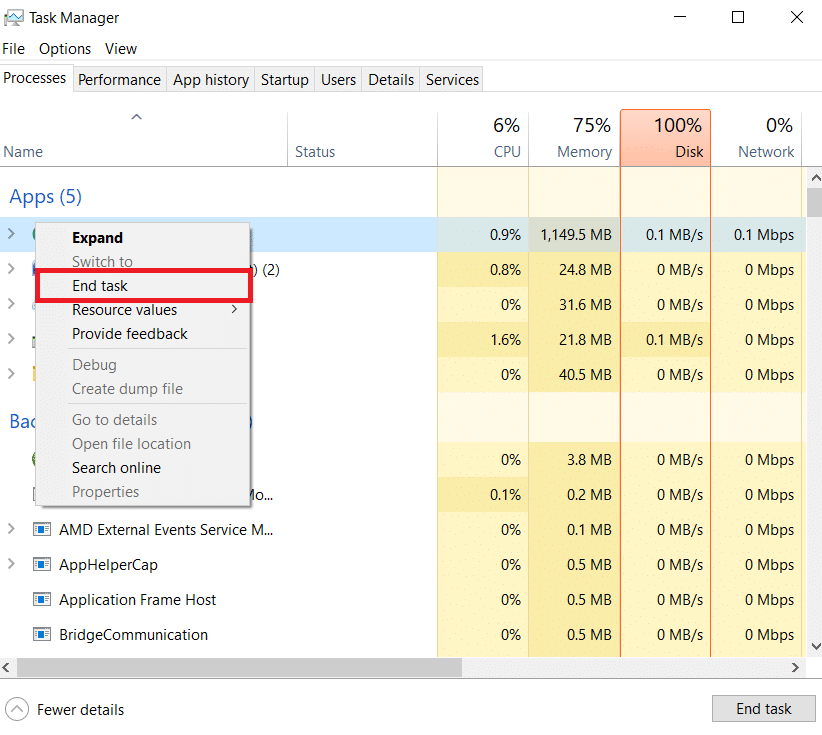
1. დააჭირეთ Ctrl + Shift + Esc კლავიშები ერთად გასახსნელად პროცესების მენეჯერი (Task Manager) .
2. Locate the Adobe Premiere Pro process and right-click on it.
3. აირჩიეთ ბოლო დავალება option to close the app.
4. ახლა, ხელახლა დაწყება აპლიკაცია and check if you can now export the video without the error code.
ასევე წაიკითხე: How to Disable Adobe AcroTray.exe at Startup
Method 3: Remove Effects
თუ გამოგიყენებიათ excessive effects in your video and added სპეციალური თვისებები like smart rendering or GPU rendering, they are liable to cause Premiere Pro error code 3. Hence, you must remove excessive effects and special features to ensure you get your rendered video without an error. You can also try removing the clips between the video as they can be incompatible. So, make sure you don’t add unnecessary effects to your video.
Method 4: Check Export Crash Location
You can also resolve Premiere Pro error code 3 while exporting the video if you know exactly where the crash led to the error. This can be done by framing the video back a few frames or a few frames forward with the help of the menu present at the bottom of the screen. You can export the small segment first to check if the issue still persists. If not, you cannot export the rest of the file too. Move on to the next method.
Method 5: Change Location of Project File
The following method to consider if you are still facing issues with error code 3 is to change the project file’s location. Also, for many users changing the location of the exported video along with the project file has been extremely helpful. So, let us look at the methods that can help you with the same:
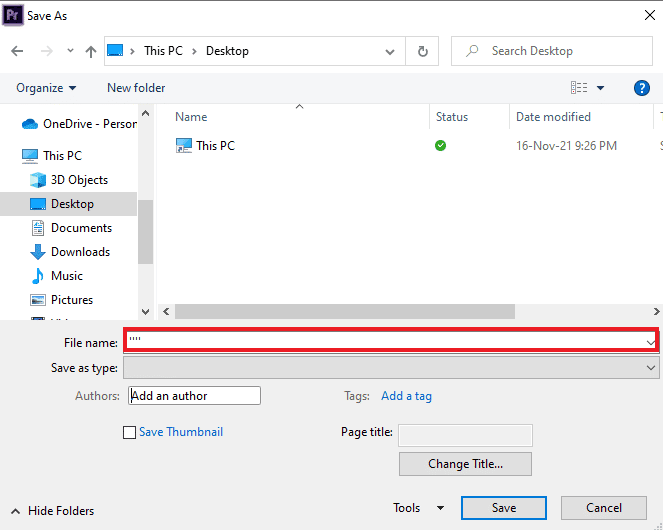
1. Once your project is ready, select the ფაილი option from the upper left corner and click on შენახვა როგორც.
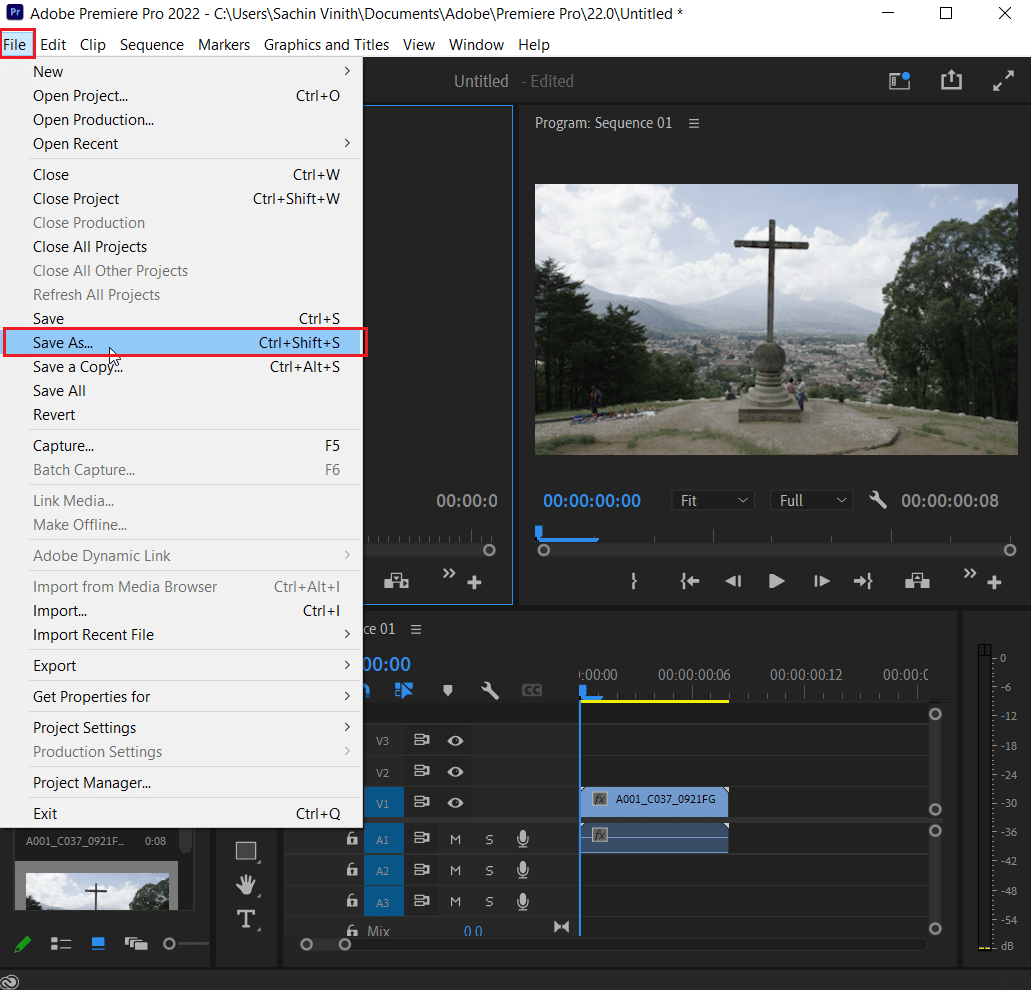
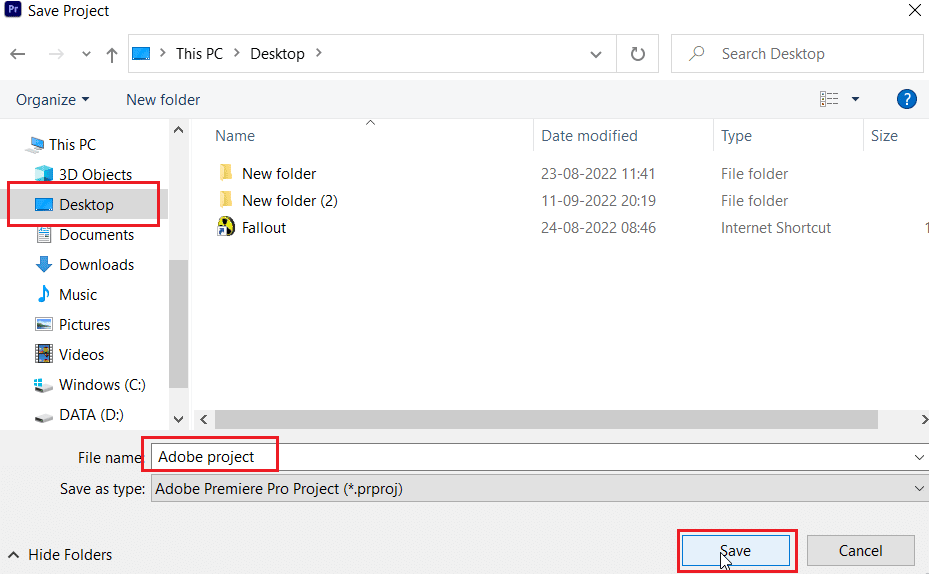
2. Then, set the file’s location to the Desktop or someplace else and click on გადარჩენა.
3. ახლა, გახსენით ექსპორტის პარამეტრები, აირჩიეთ გამოყვანის tab და დააჭირეთ ექსპორტი.
After the steps are performed, check if the action you were trying to process earlier can now be conducted without error code 3.
ასევე წაიკითხე: How Do I Fix Accelerated Renderer Error
Method 6: Update Premiere Pro
If you are still struggling to fix error code 3 error compiling movie, then you can try updating the application itself. If the whole issue is caused due to a bug, it can easily be resolved by installing the new version of Premiere Pro. To do it manually, you first need to uninstall the application from your system and install its latest version from the official website. You can easily follow the steps below for the same:
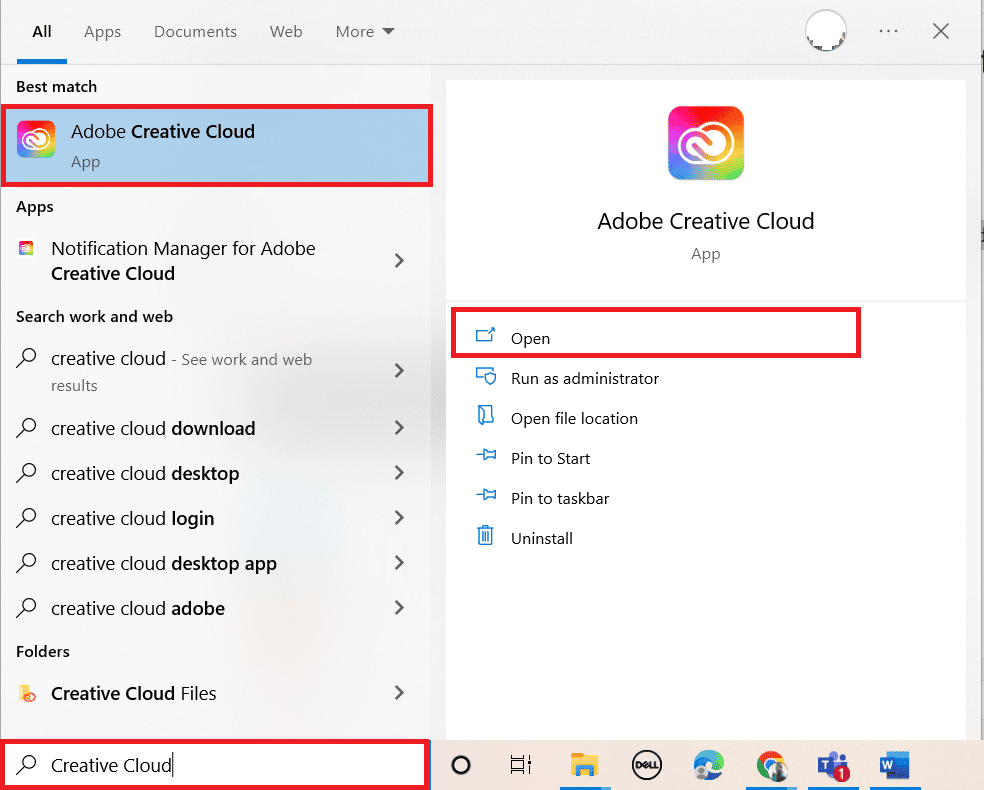
1. დააჭირეთ Windows გასაღები. ტიპი შემოქმედებითი Cloud და დააჭირეთ ღიაა.
2. დაწკაპეთ სამი ჰორიზონტალური ხაზი ზედა მარცხენა კუთხეში.
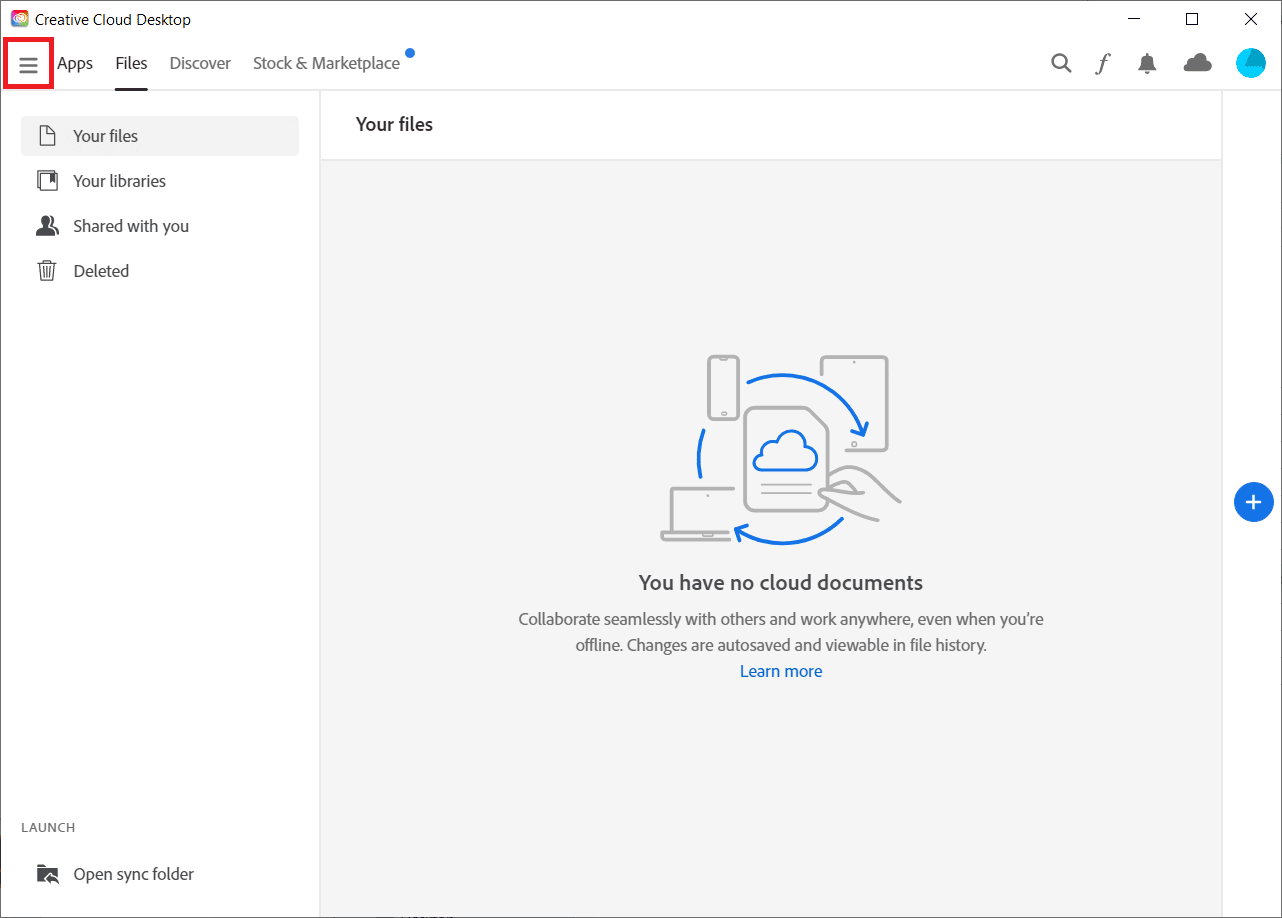
3. აირჩიეთ დახმარება > შეამოწმეთ განახლებები.
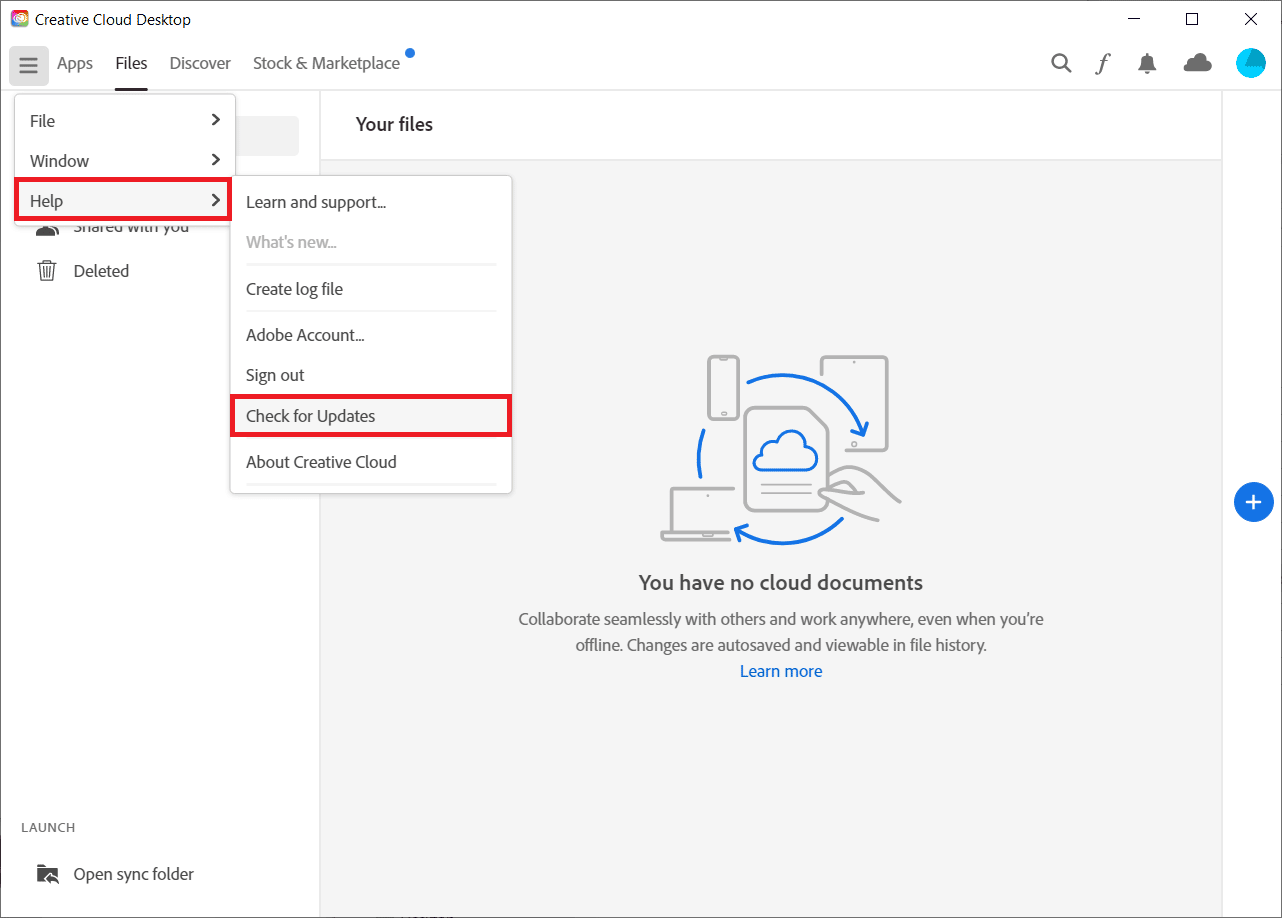
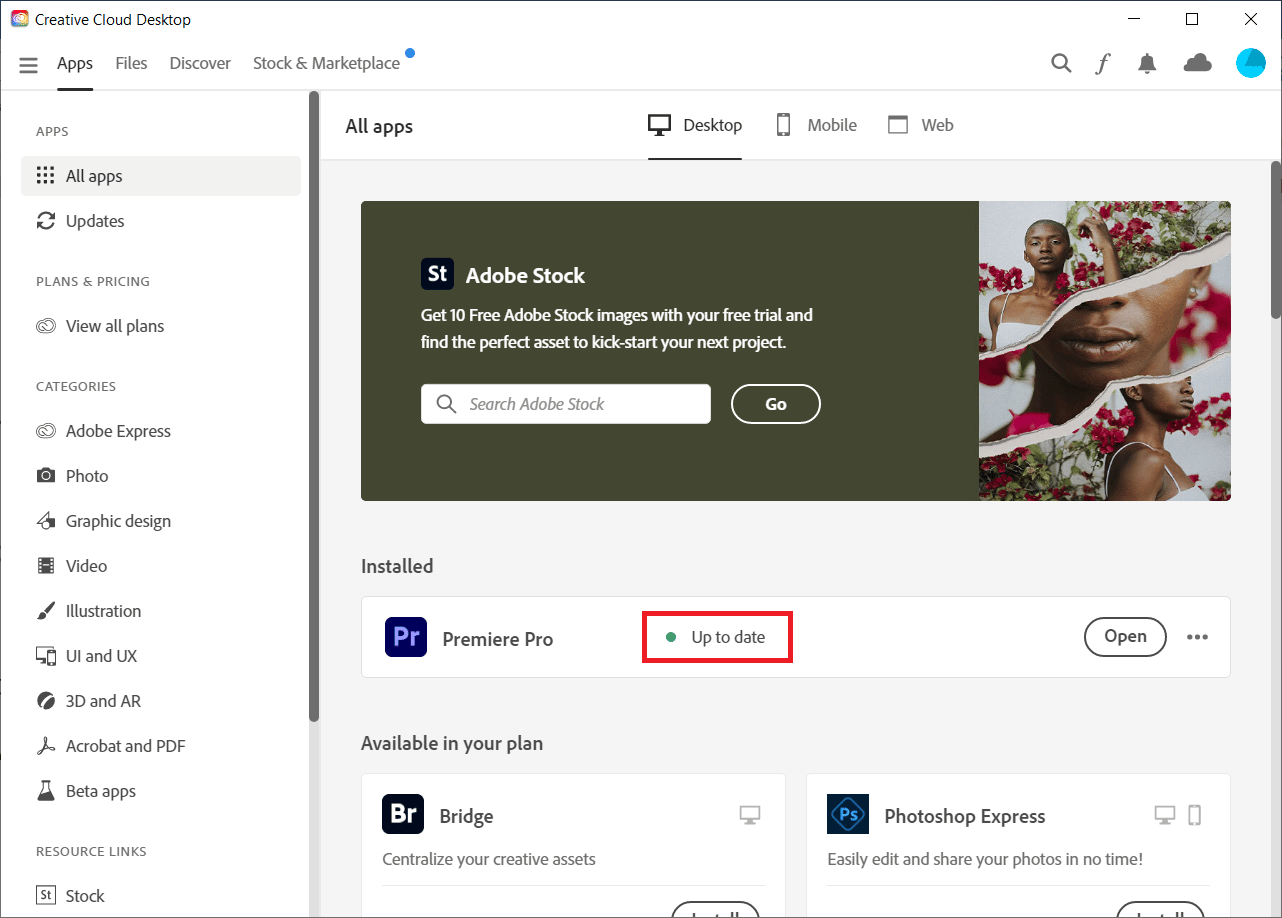
4A. If an update is available, click on განახლება next to Premiere Pro.
4B. If the software is up-to-date, it will display დღემდე შემდეგი პრემიერა პრო.
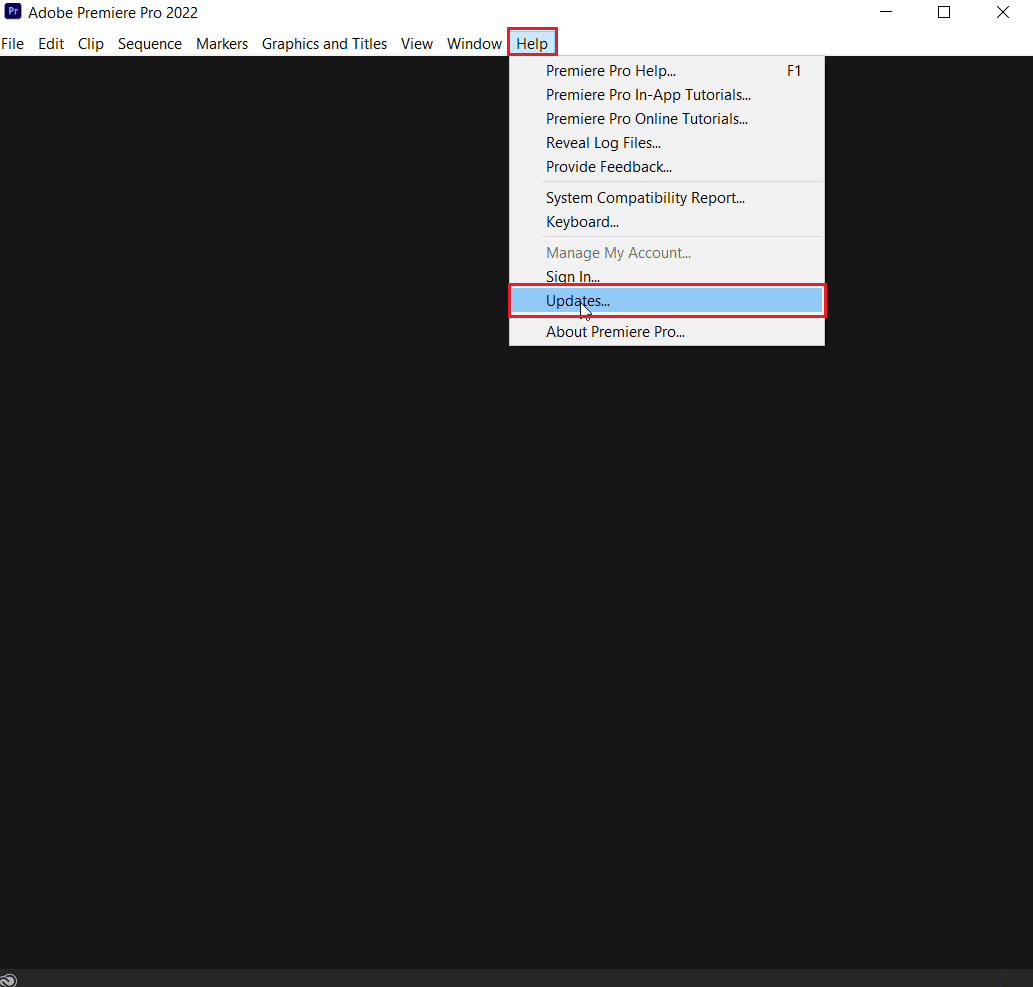
შენიშვნა: Alternatively you can directly update the app by navigating to Help > Updates… მენიუში Adobe Premiere Pro app.
ასევე წაიკითხე: Fix Adobe Software You Are Using Is Not Genuine Error
Method 7: Create New Project
You can also try creating a new project for the same file, as it is a convenient and helpful fix. Follow the steps instructed below for details:
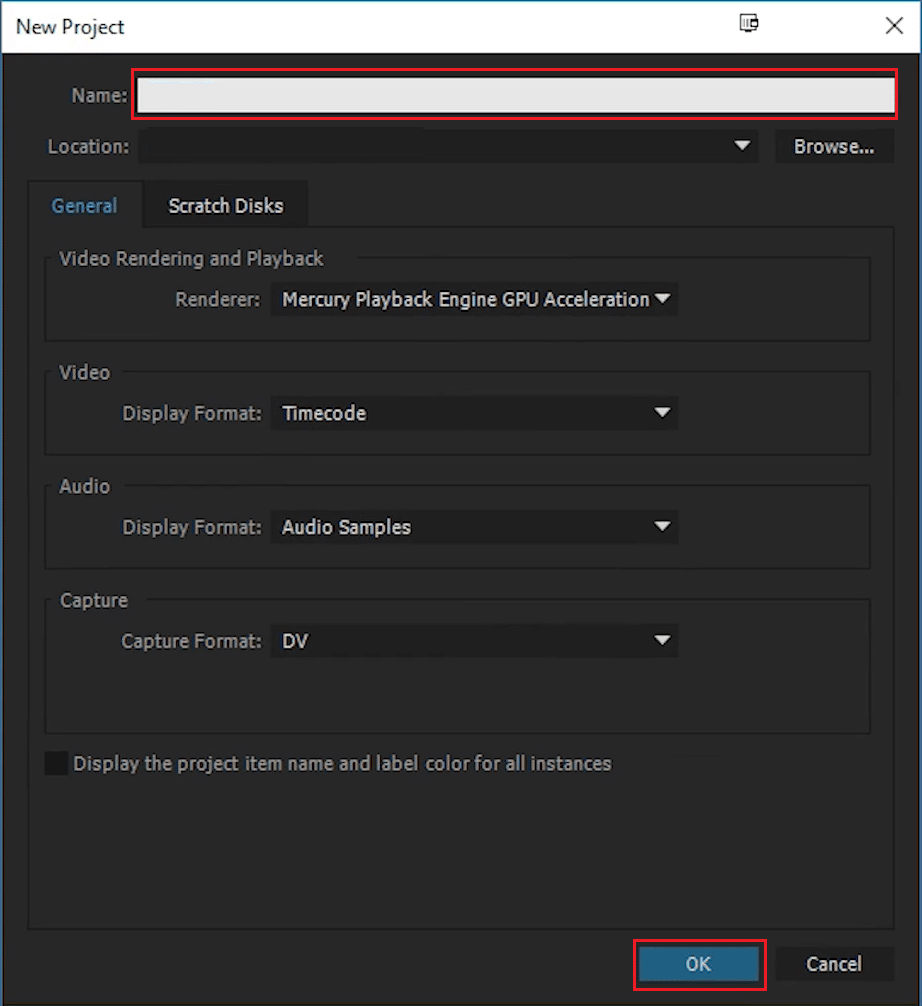
1. ღია Adobe Premiere Pro და წასვლა ფაილი და აირჩიეთ New > Project… ვარიანტი.
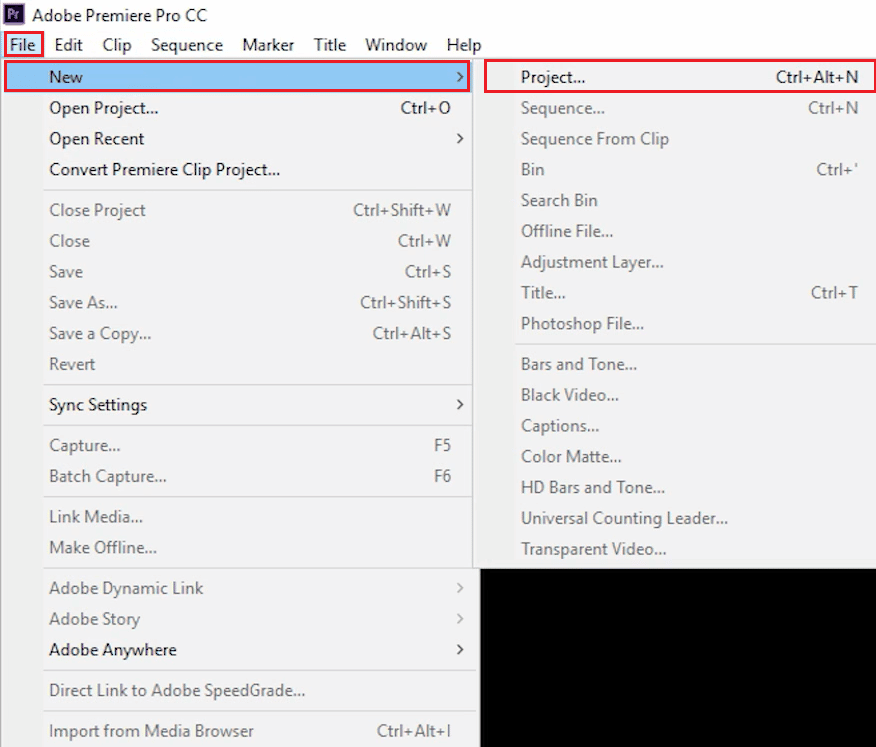
2. დაასახელეთ პროექტი და დააჭირეთ OK.
3. Once the new project is created, იმპორტი the previous project to the new one with გადათრევა ფუნქცია.
After you are done with importing, check if you are facing the same error code on rendering or exporting the video.
Method 8: Change Encoding Preferences
For users who have been struggling with a video export in Premiere Pro, disabling hardware encoding preferences has been of great help in resolving Premiere Pro error code 3. You can do the same using the steps instructed below:
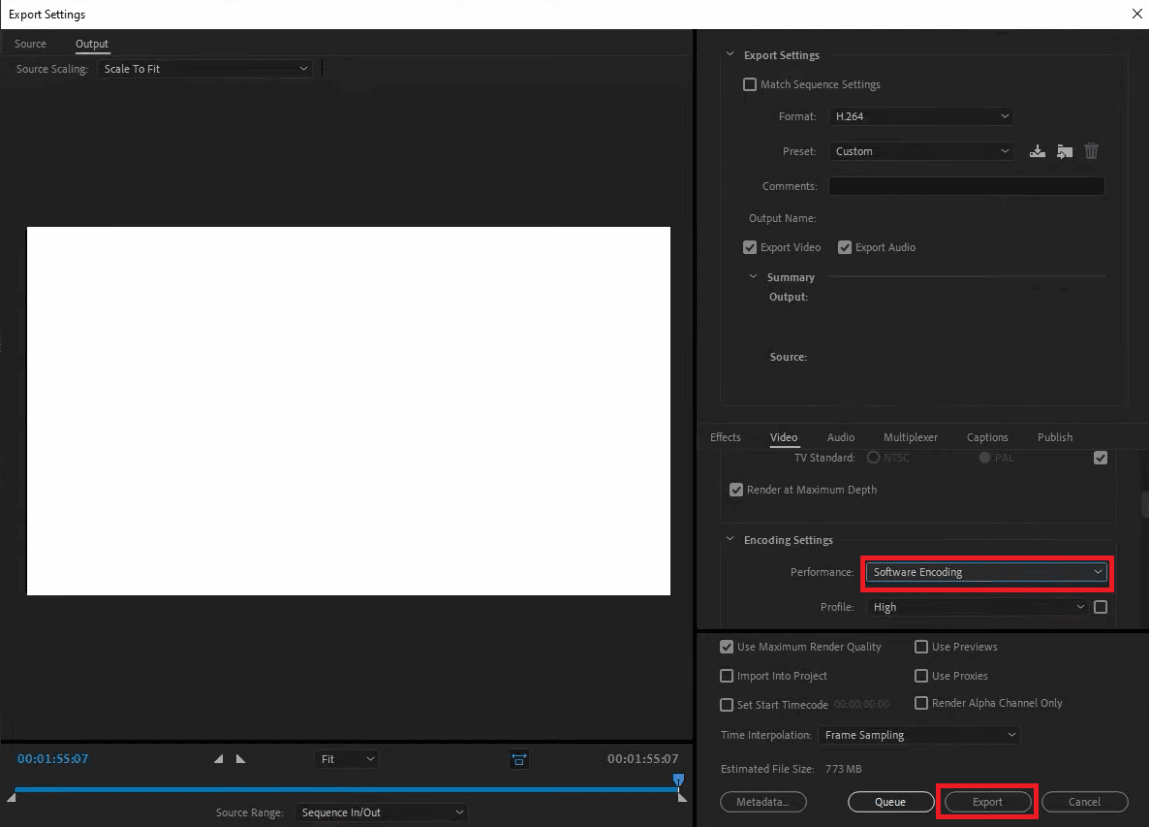
1. In ექსპორტის პარამეტრები wizard, scroll down the ვიდეო სექცია.
2. არჩევა Software Encoding ქვეშ შესრულებით: იმ კოდირების პარამეტრები სექცია.
3. შემდეგ, დააჭირეთ ღილაკს ექსპორტი ღილაკს.
ასევე წაიკითხე: Top 21 Best Alternatives to Adobe InDesign
Method 9: Change Video Renderer
If you encounter Premiere Pro error code 3 while rendering the video, you can resolve the issue by changing the video renderer. It is an effective fix to try out if none of the methods have helped you out till now.
შენიშვნა: Mercury Playback Engine Software can cause stability issues in some PC configurations.
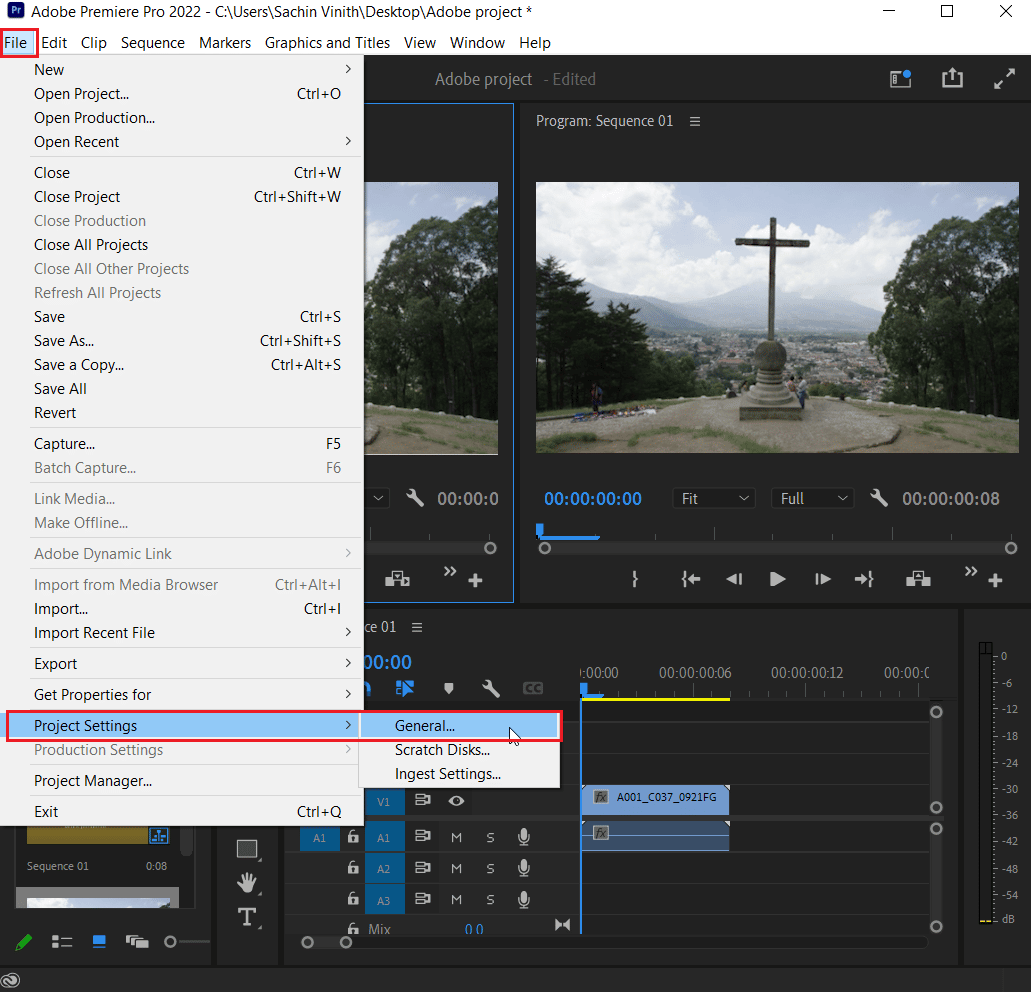
1. გახსნა ვიდეო in Premiere Pro that is causing the error and click on ფაილი ზედა მარცხენა კუთხეში.
2. არჩევა პროექტის პარამეტრები და დააჭირეთ ზოგადი.
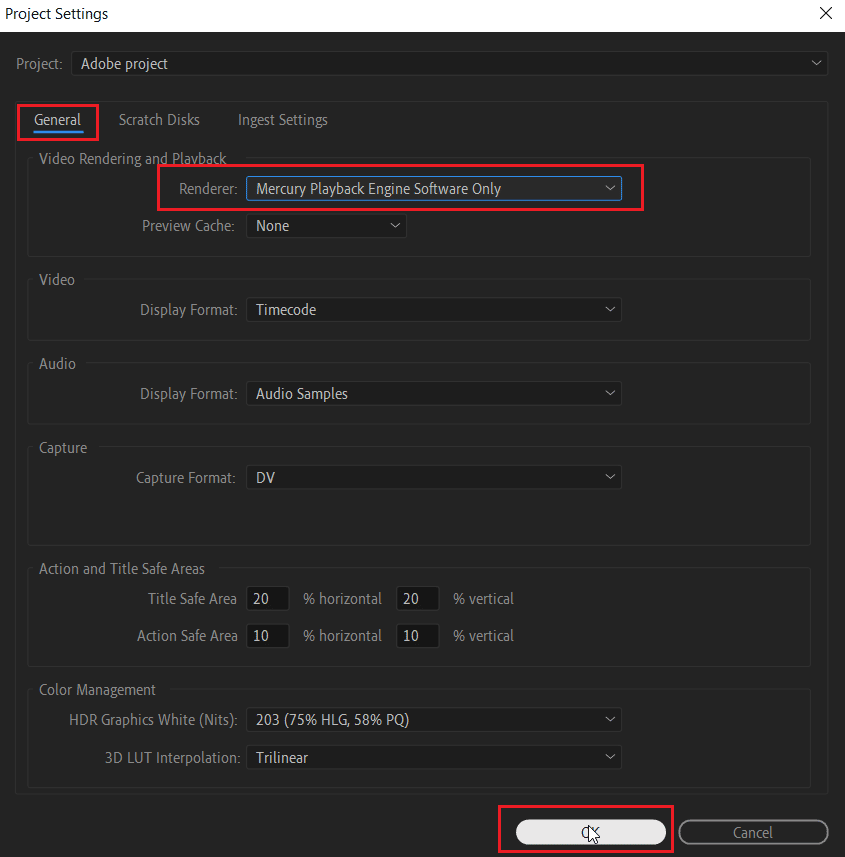
3. შემდეგი, გადადით Video Rendering and Playback განყოფილება და დააჭირეთ ღილაკს გამწევი to open the drop-down menu.
4. შემდეგ, აირჩიეთ Mercury Playback Engine Software Only ვარიანტი და დააჭირეთ OK.
5. Re-render the video and check if the issue has been resolved.
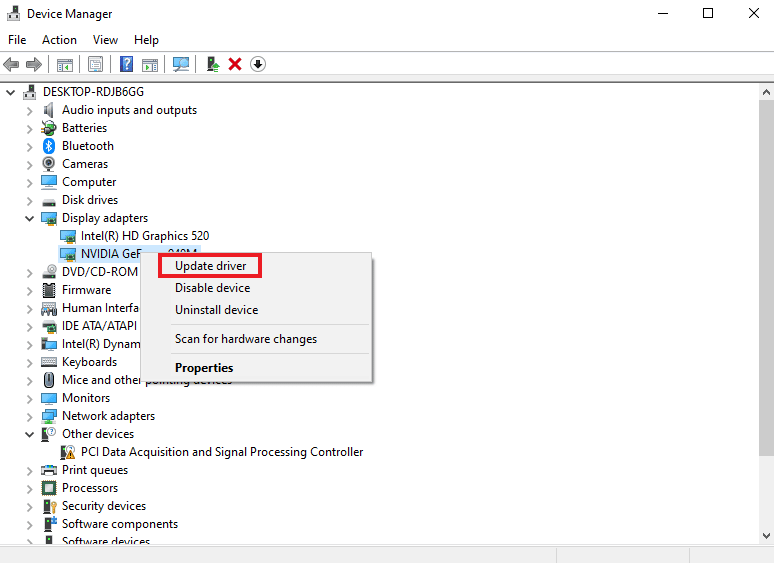
მეთოდი 10: გრაფიკის დრაივერის განახლება
It is also possible that your system’s graphics driver is an underlying cause behind error code 3 in Premiere Pro. If this is the case, then it is important to update them. Even though drivers of your system get new updates every time, you install a new update for Windows. If their update gets skipped for some reason, you can do it manually using our guide on 4 Ways to Update Graphics Drivers in Windows 10. In general, it is always recommended to keep your system’s graphics driver up to date to maintain stability, security, and optimized performance of the system tasks.
ასევე წაიკითხე: Fix NVIDIA Driver Not Compatible with this Version of Windows
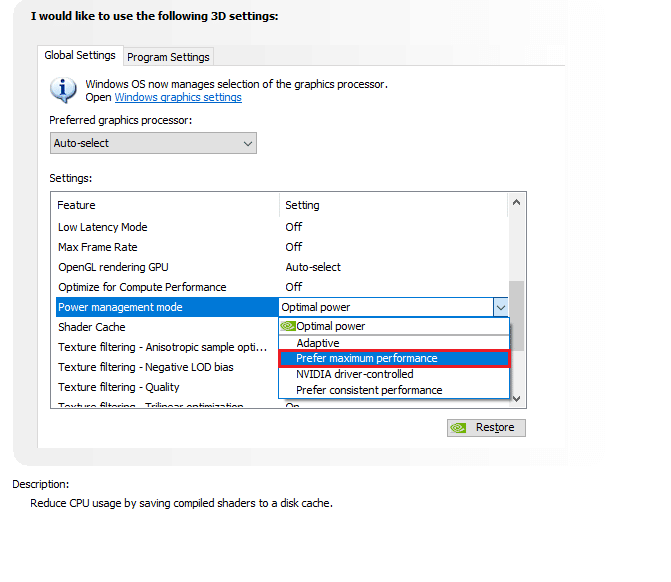
Method 11: Set Power Management Mode to Maximum
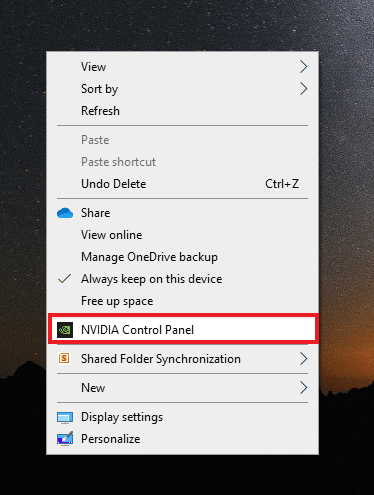
For users with NVIDIA Control Panel or AMD Radeon Software, setting power management mode to the maximum in GPU can be extremely helpful in fixing error code 3 in Premiere Pro. So, if you are an NVIDIA user, follow the steps given below:
1. დააწკაპუნეთ მარჯვენა ღილაკით თქვენს Desktop და დააჭირეთ NVIDIA პანელი.
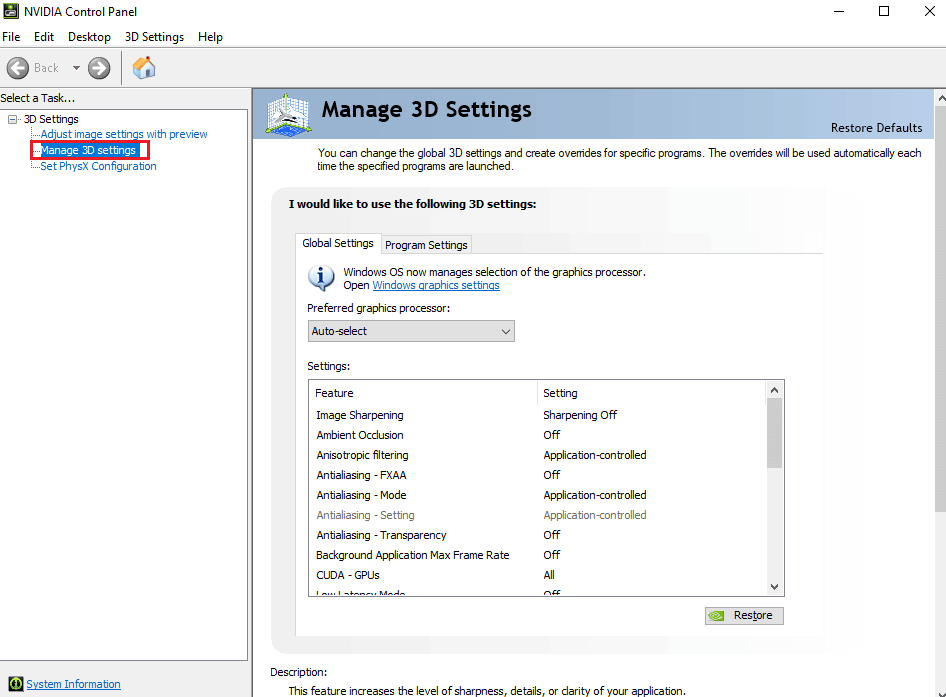
2. აირჩიეთ მართეთ 3D პარამეტრები ვარიანტი მარცხენა მხარეს პანელიდან.
3. განთავსება ენერგიის მართვის რეჟიმი ქვეშ პარამეტრები and expand its menu.
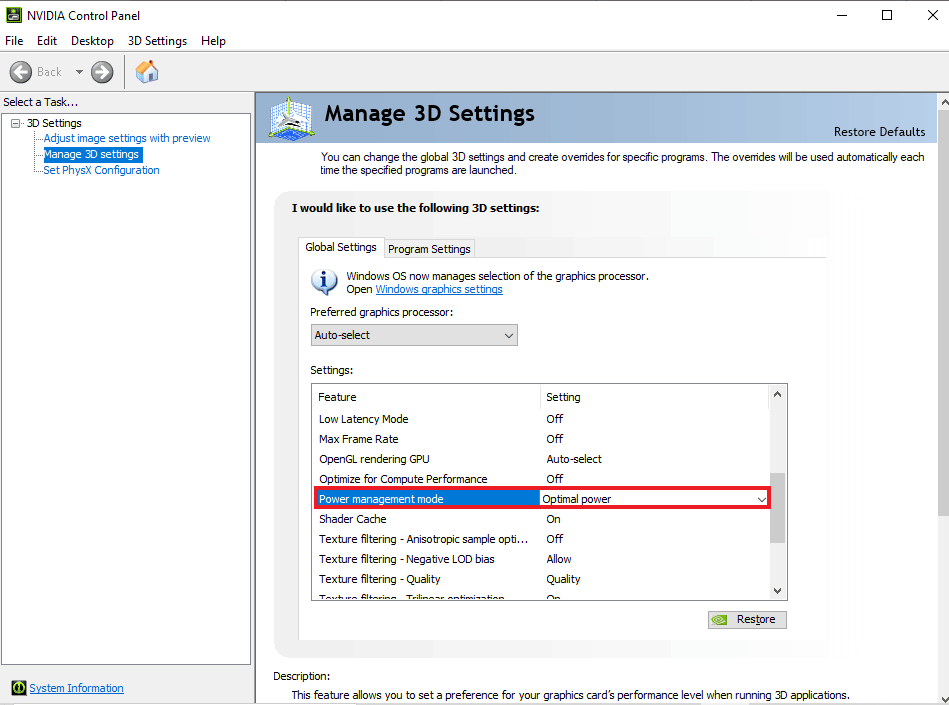
4. ახლა, აირჩიეთ უპირატესობა მიანიჭეთ მაქსიმალურ შესრულებას საწყისი ჩამოსაშლელი მენიუდან.
რეკომენდებული:
Adobe Premiere Pro is the ultimate program for editing videos professionally. The application’s features and content make it one of the ultimate editing programs. However, issues like Premiere Pro error code 3 can be spoilers for editors who spend hours adding effects and end up getting an error code while exporting their work. We hope that our guide could help people in need looking for a solution to tackle this problem. Let us know how our doc could be of help to you. For queries or suggestions, you can contact us by leaving your comments below.

