როგორ ჩართოთ Android-ის ყოველთვის ჩართული ჩვენება

Always On Display Android
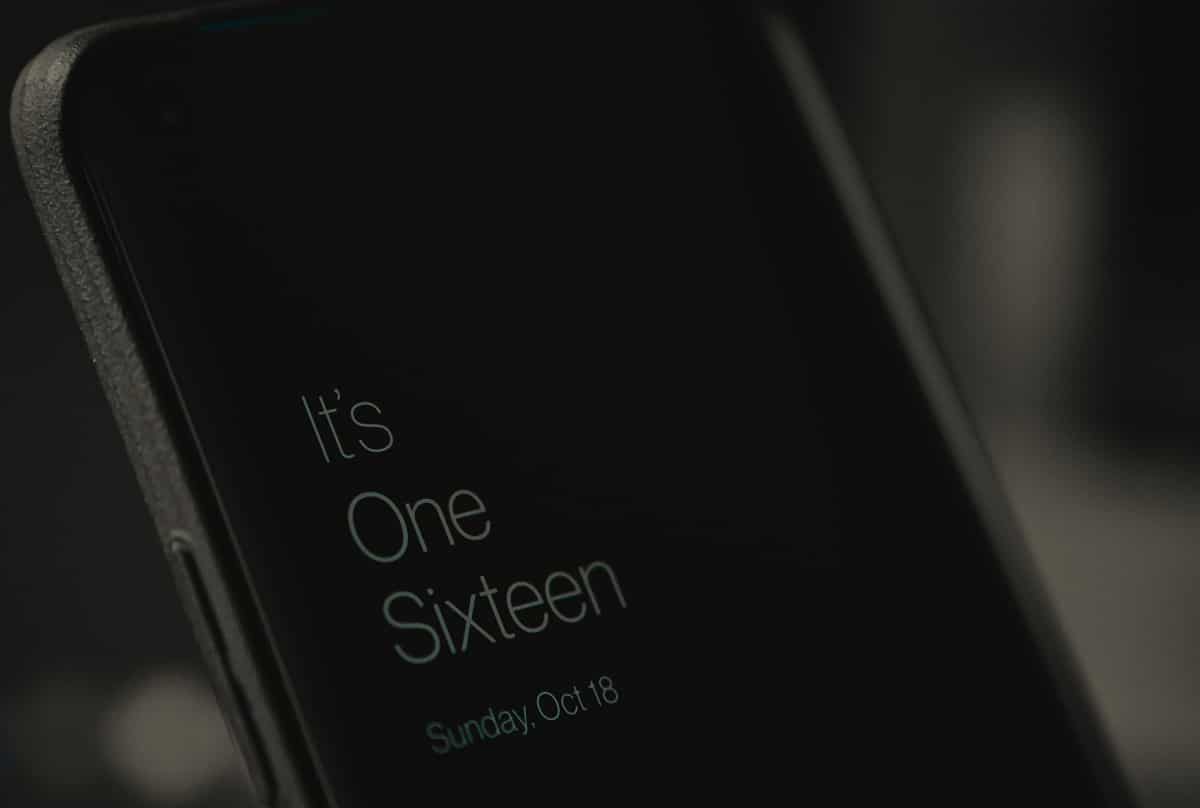
Android devices keep coming with new features that we never thought were needed until they were released. Continuing this tradition, Android introduced the ყოველთვის ჩართული feature. Although, it was initially released for Samsung devices but has now made its way to most Android smartphones. This feature allows you to keep your screen on at all times to view time and other important notifications. The Always On Screen has a black background and is really dim thus, minimizes battery consumption. Read our short guide and learn how to enable Always on display Android.
როგორ ჩართოთ Android-ის ყოველთვის ჩართული ჩვენება
Just like most users, you must also feel that the Always On feature and is a convenient and handy feature. Therefore, follow the methods explained in this article to Enable Always on Display on Android devices.
Method 1: Use in-built Always On Display feature
While the feature is not available on all Android devices, you should be able to enable the Always on display feature on your device with Android version 8 or higher. Simply, follow these steps:
იხილეთ ასევე:
როგორ გამოვასწოროთ Twitter-ის შეტყობინებები, რომლებიც არ მუშაობს (Android-ზე და iOS-ზე)
როგორ გამოვასწოროთ ხმოვანი ფოსტა, რომელიც არ მუშაობს Android-ზე
როგორ გამოვასწოროთ Android Auto არ მუშაობს
როგორ წაშალოთ წინასწარ დაინსტალირებული აპები Android-ზე (მარტივი გზა)
როგორ აღვადგინოთ Google Chrome Android-ზე
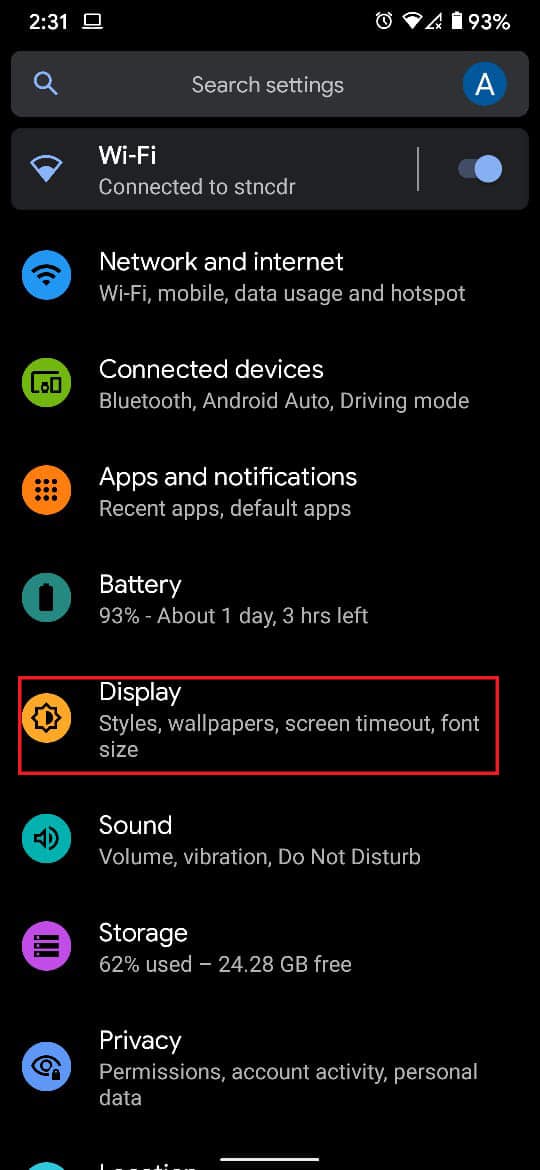
1. გახსენით მოწყობილობა პარამეტრები და შეეხეთ ჩვენება ვარიანტი, როგორც ნაჩვენებია.
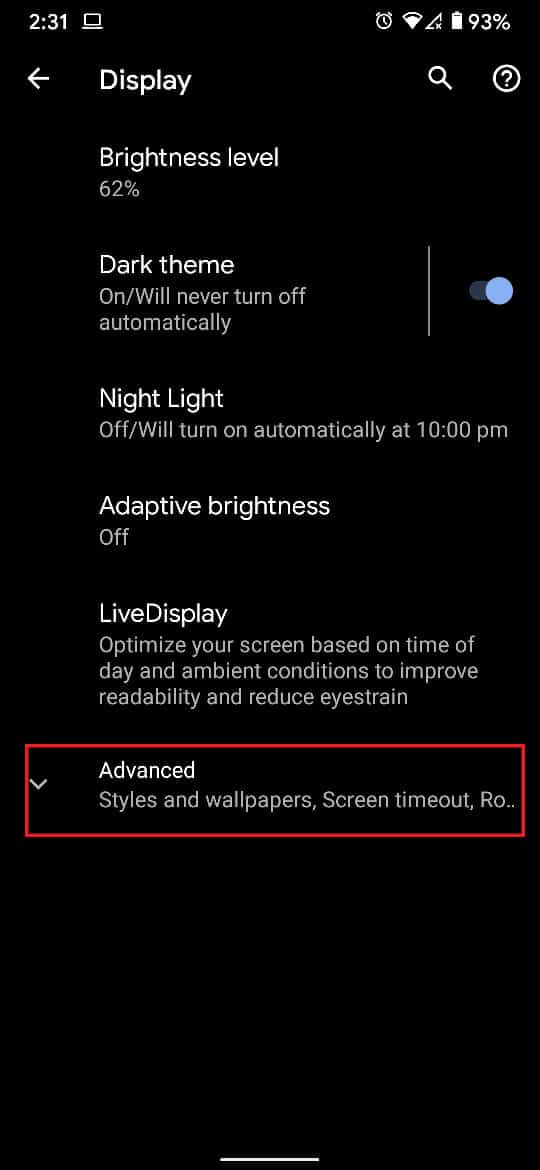
3. შეეხეთ მოწინავე to view all display settings.
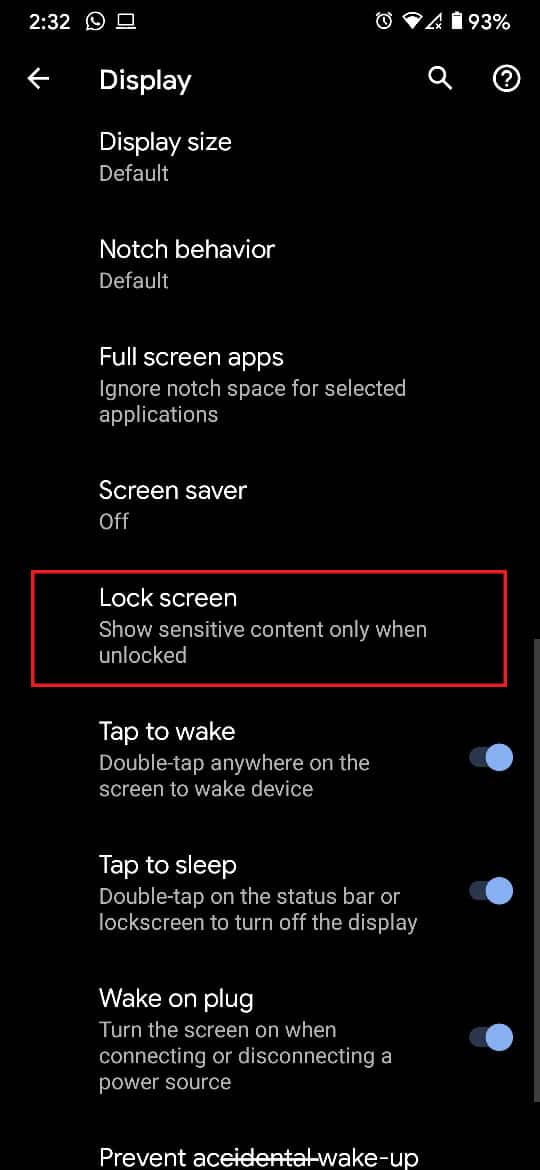
4. Scroll down and tap the option titled ეკრანის დაბლოკვა, როგორც ხაზგასმულია ქვემოთ.
5. In როდის უნდა აჩვენო განყოფილება, შეეხეთ დამატებითი პარამეტრები.
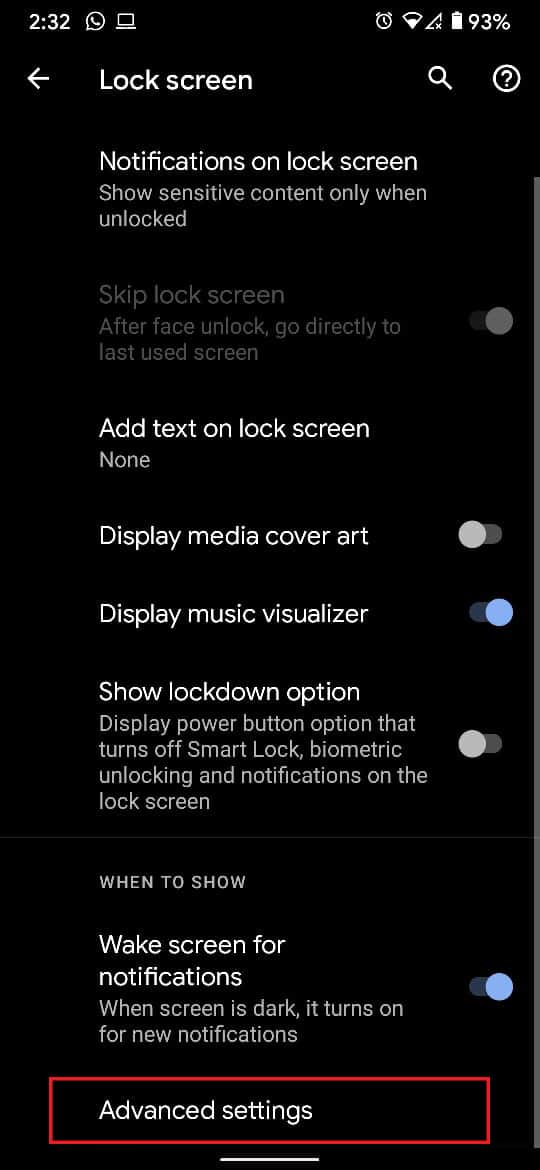
6. Turn the toggle ON for the გარემოს ჩვენება ფუნქცია.
შენიშვნა: On other Android devices like Samsung and LG, the ambient display feature is visible as Always on display.
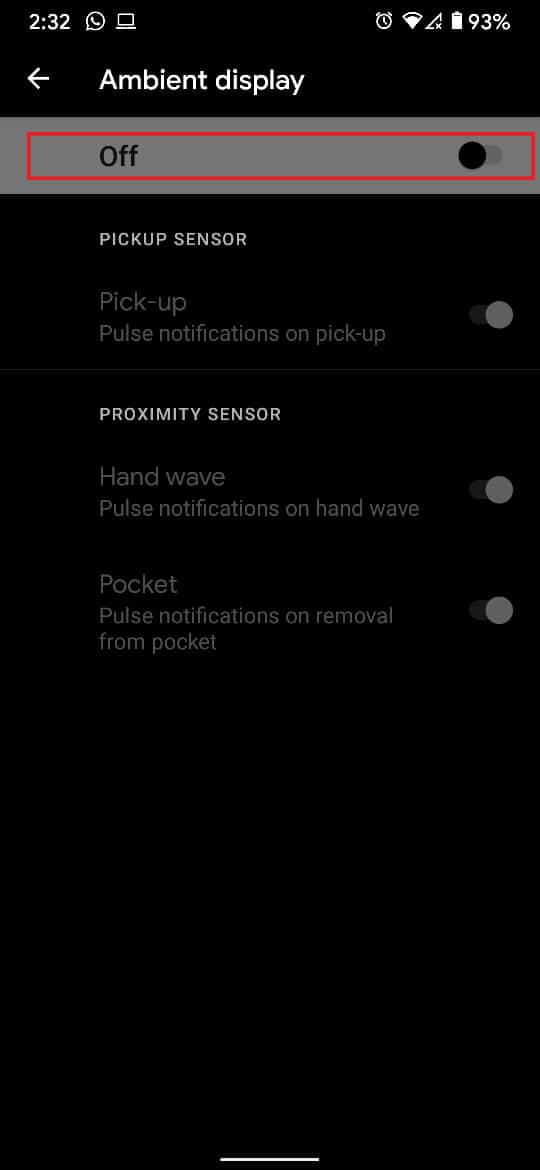
If you are unable to view the Always-on feature, then enable all the toggle switches on the გარემოს ჩვენება screen. Next, flip the phone around a few times to enable Always on display.
ასევე წაიკითხე: How To Disable Google Assistant On Lock Screen
Method 2: Use third-party Always On Display App
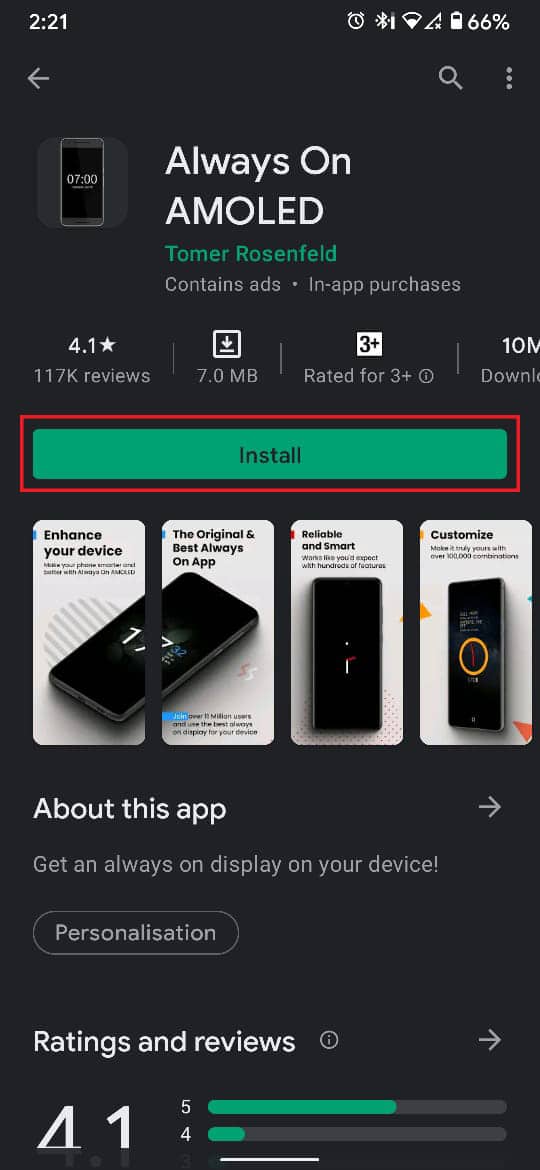
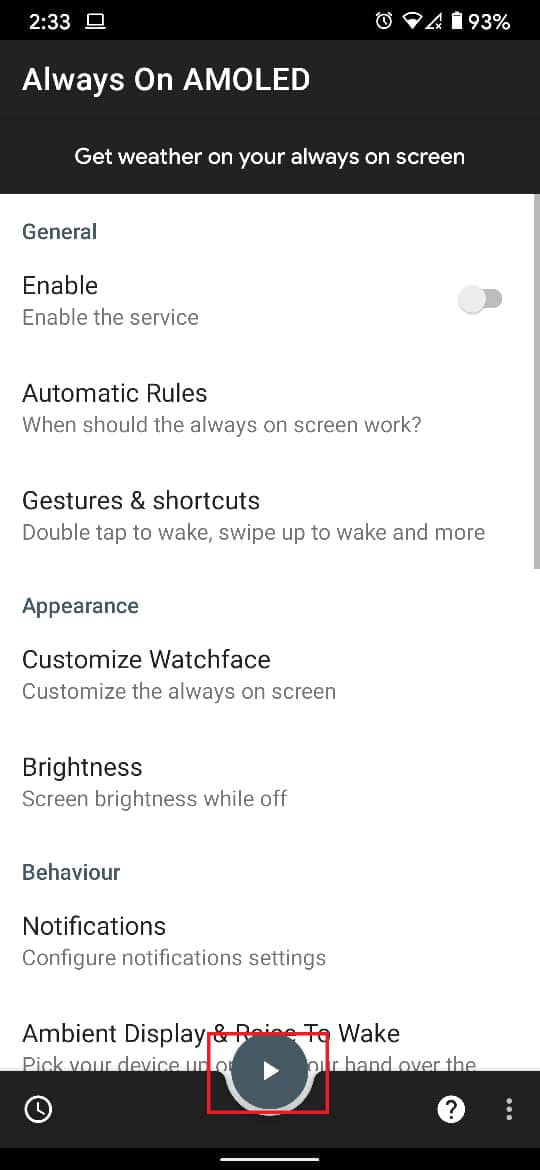
The inbuilt Always On feature on Android although effective, is not really customizable. Moreover, the feature is not available on many Android devices. Thus, users have no choice but to opt for third-party applications. ყოველთვის AMOLED– ზე app, however, is more than just an Always On Display application. It offers several customization options for Always on display while the AMOLED display helps save a ton of battery life. Here’s how to enable Always On Display Android using this app:
1. გახსენით Google თამაში მაღაზია და ჩამოტვირთვა ყოველთვის AMOLED.
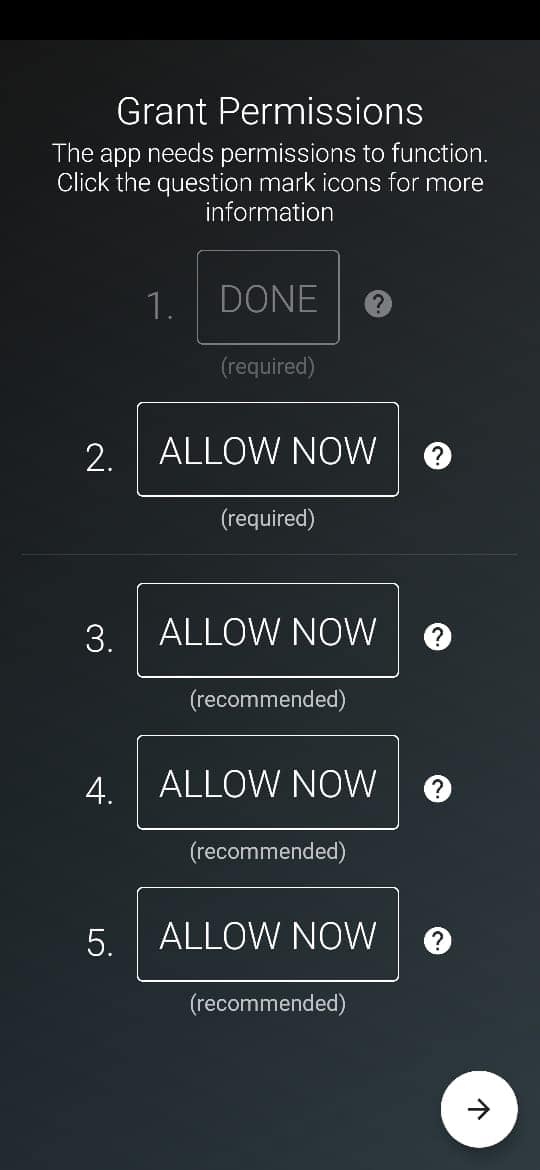
2. დაწკაპეთ ღიაა to run Always on Display APK file.
3. ნებართვების გაცემა that are required for the app to function at optimal capacity.
4. Next, adjust the options to alter the brightness, the style of the clock, the duration of the ambient display, the parameters for activation, etc. to customize your Always on Display Android screen.
5. ახლა, შეეხეთ დაკვრის ღილაკი displayed at the bottom of the screen to preview the ambient display.
რეკომენდებული:
We hope you were able to understand how to enable Always on display Android as well as utilize the Always On Display app. Let us know which method worked for you. Have any queries or suggestions? Drop them in the comment section below.