- in Windows 10 by Admin
F8 Not Working In Windows 10? 5 Things To Try

If you’ve upgraded to Windows 10 from older versions like Windows XP, Vista and Windows 7, you may have noticed that the F8 function key you pressed during startup to enter Safe Mode no longer works.
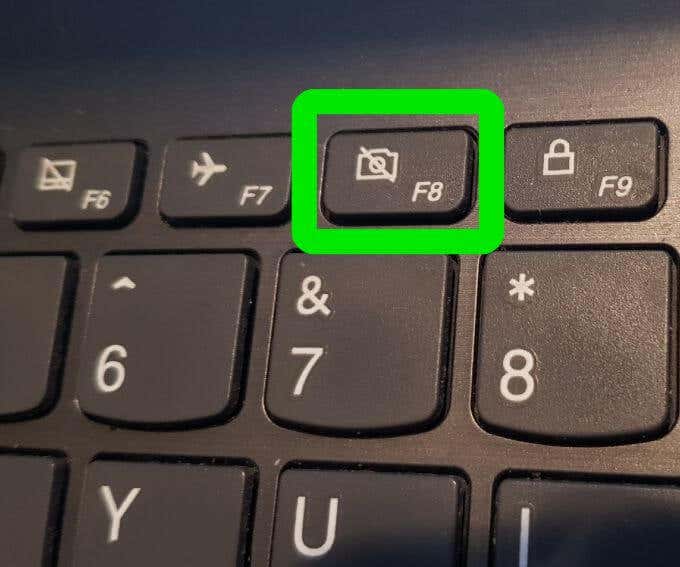
The F8 key is still available on your keyboard, but it works with other key combinations to perform certain functions, especially when your touchpad or mouse isn’t working and you need to пернелер тіркесімдерін қолданыңыз Орнына.
In this guide, we’re going to show you what to do when you find F8 not working in Windows 10, but first, let’s look at why this happens.
Why Is F8 Not Working In Windows 10?
Қауіпсіз режим is a native Windows feature in all versions of the operating system, which is used to troubleshoot various problems such as driver installation issues, problems booting into Windows, and malware or virus-related issues among others.
The F8 boot menu was removed in order to improve system boot time. This is because Windows 10 boots much faster than previous versions, so you won’t have enough time to press the F8 key and enter Safe Mode during startup. Plus, it can’t recognize the key press during the boot process, which prevents access to the boot options screen from where you can select the Safe Mode option.
Instead, Microsoft provided a new Advanced Boot Options menu feature that lets you access troubleshooting options such as Safe Mode and others.
You can still access the Safe Mode feature by pressing the F8 key, but you have to re-enable it manually using a few simple steps, and there are other methods that can also get you into Safe Mode, but they’re not as straightforward.
Fix F8 Not Working In Windows 10
1. Manually Re-enable F8 Key
- түрі CMD іздеу жолағында және басыңыз Әкімші ретінде іске қосыңыз.
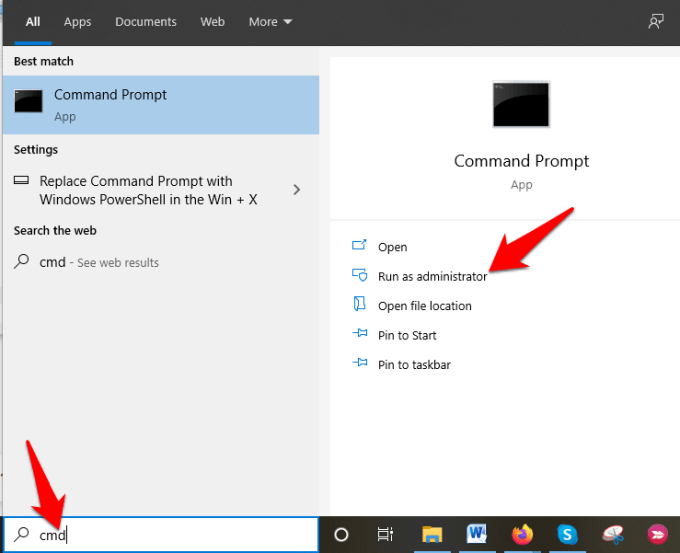
- Type this command in the Command Prompt: bcdedit / set {әдепкі} bootmenupolicy мұра және баспасөз кіру..

Ескерту: BCD or Boot Configuration Data Edit command is a native tool in Windows that controls how the operating system starts. It also helps you easily re-activate the F8 boot menu.
- Компьютеріңізді қайта іске қосыңыз, and press the F8 key repeatedly on the keyboard while it starts up and you’ll see the Advanced Boot Options menu, from where you can select Safe Mode, Safe Mode with Networkingнемесе Командалық шақыру арқылы қауіпсіз режим.
To disable the F8 key again, open the elevated Command Prompt and type this command: bcdedit / set {әдепкі} bootmenupolicy стандарты
2. Enter Safe Mode From Start Menu
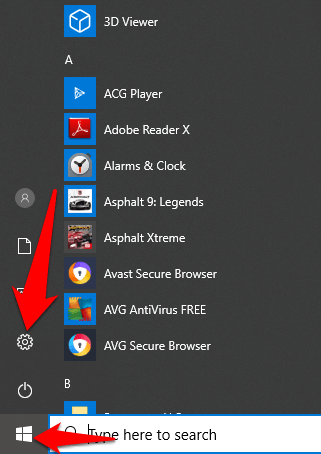
- басыңыз бастау тармағын таңдаңыз және Параметрлер.
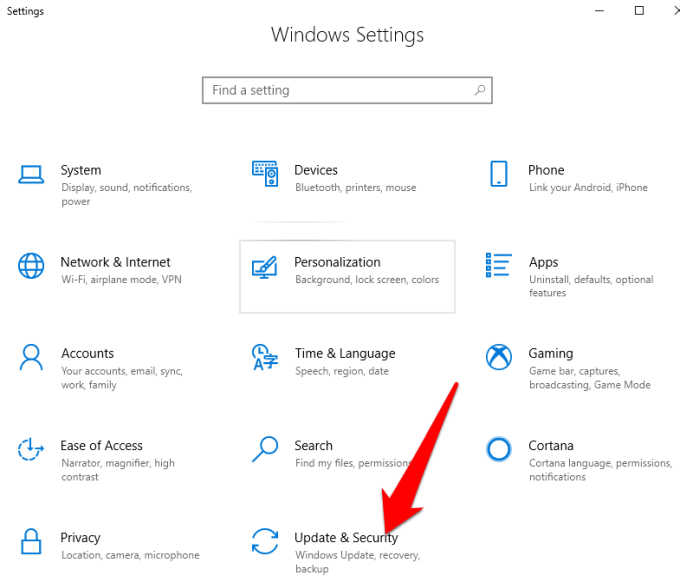
- Бұдан әрі нұқыңыз Жаңарту және қауіпсіздік Параметрлер мәзірінде.
- Сол жақ тақтада нұқыңыз қалпына келтіру сосын нұқыңыз Қазір қайта іске қосыңыз.

- Windows will restart automatically and display the Опцияны таңдаңыз screen. Click Ақауларды жою.


- Бұдан әрі нұқыңыз Іске қосу параметрлері.

- A screen will appear showing different startup options.
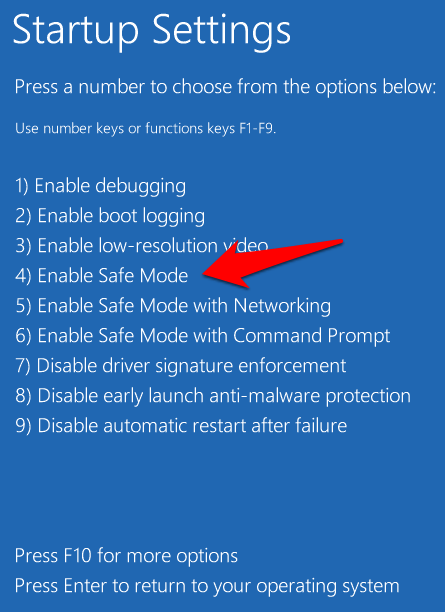
- On your keyboard, press the F4 key or number 4 key to enter Қауіпсіз режим, or the corresponding key to enter Қауіпсіз режим желі арқылы or with Command Prompt не істегіңіз келетініне байланысты.
Ескерту: You can also click бастау, батырмасын басыңыз күш button, and hold down the ауысым key when you click Қайтадан қосу. This automatically restarts Windows and brings up the Опцияны таңдаңыз screen, after which you can continue with the steps to access Safe Mode.
3. Start Safe Mode By System Configuration
System Configuration also known as msconfig, is a system utility used when troubleshooting the Windows startup process. It can disable or re-enable device drivers and programs that run during the boot process to figure out why the problem you’re experiencing occurred. It saves time compared to other methods that require you to repeat several steps just to enter Safe Mode.
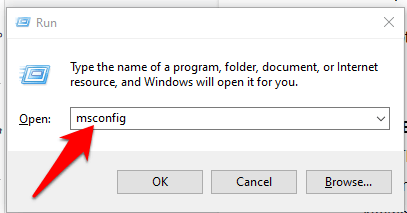
- Баспасөз The Windows logo key+R ашу үшін жүгіру диалогтық терезе және теріңіз msconfig. Содан кейін түймесін басыңыз кіру немесе басыңыз OK.
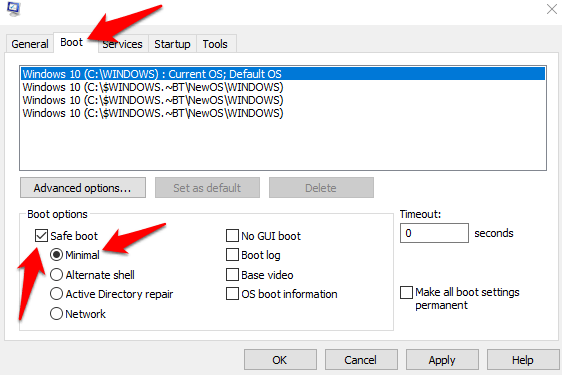
- басыңыз Жүктеу and mark the checkbox next to Қауіпсіз жүктеу. Таңдаңыз Ең төменгі және нұқыңыз OK. There are other options available such as Alternate Shell (Safe Mode with Command Prompt), Active Directory Repair, және Network (Safe Mode with Networking support), so you can pick the one you need.
- басыңыз Қолдану> OK for the changes to take effect and Windows will restart in Safe Mode.
To exit Safe Mode from System Configuration, open the Boot options window again, uncheck the box next to Safe Boot, және OK түймесін басыңыз. басыңыз Қайтадан қосу to apply the changes, and restart your computer normally.
4. Enter Safe Mode When Windows Can’t Boot Normally
Safe Mode loads with a minimum set of programs and drivers. If Windows can’t start normally, you won’t have a problem entering Safe Mode, because you can restart the PC twice and go to the Automatic Repair screen from where you can enter Safe Mode.
- Make sure your PC is off and then press and hold down the күш button until the computer goes off. Repeat this about two or three times (to trigger the boot recovery mechanism) until the Автоматты жөндеуді дайындау экран пайда болады.
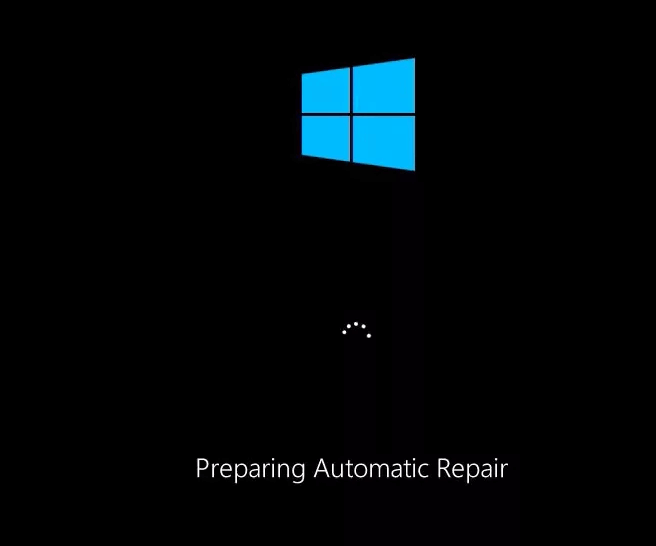
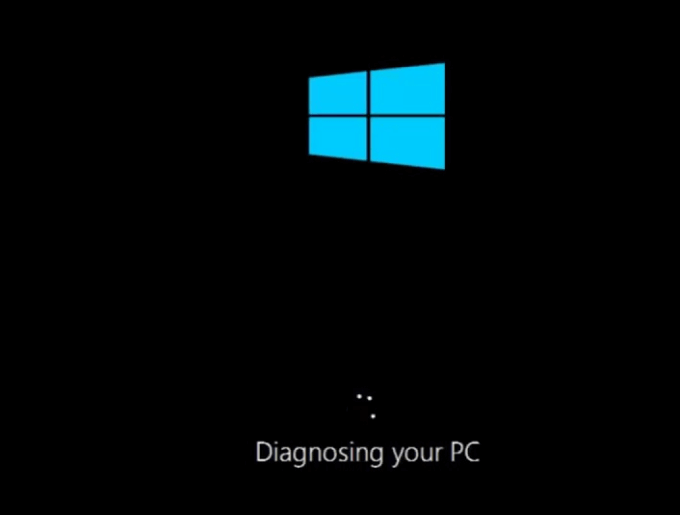
- If you see the Preparing Automatic Repair screen when you power on the computer the first time, skip to the next step, and the Diagnosing Your PC screen will appear. This will be followed by the Attempting repairs хабар.
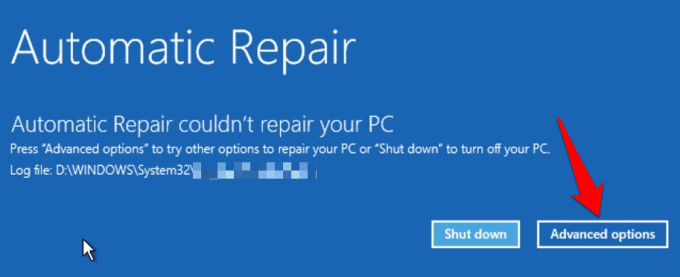
- Windows will show the Автоматты жөндеу компьютеріңізді жөндей алмады message and give you the Жабу және Кеңейтілген опциялар ішінде Іске қосуды жөндеу screen. Click Кеңейтілген опциялар.
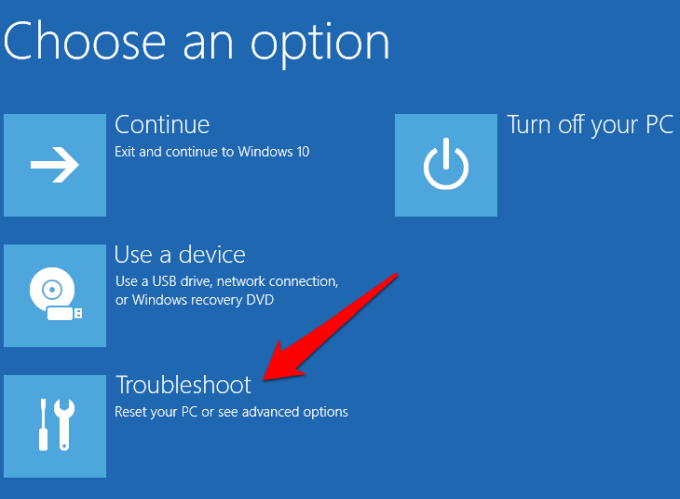
- басыңыз Ақауларды жою ішінде опцияны таңдаңыз экран.
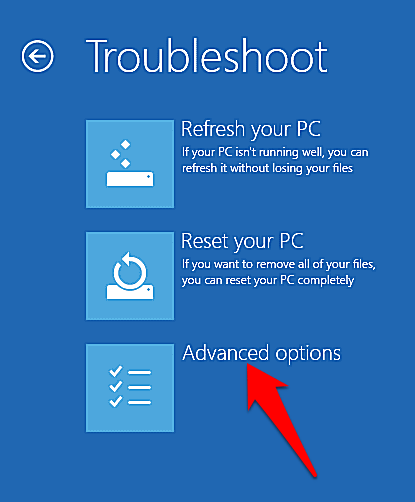
- Бұдан әрі нұқыңыз Advanced Options.

- Your PC will restart and show different startup options on the next screen.

- Press the F4 key or number 4 key on your keyboard to enter Қауіпсіз режим. You can also press the corresponding key to enter Командалық шақыру арқылы қауіпсіз режим or Networking көмегімен не істегіңіз келетініне байланысты.
Ескерту: If you have a Windows 10 bootable USB drive or setup disc, you can use that to start your PC in Safe Mode if Windows can’t load. Boot the PC using the bootable drive or setup disc, select Компьютеріңізді жөндеу and you’ll get to the Choose an option screen from where you can take the steps above to enter Safe Mode.
5. Start In Safe Mode When You Can’t Login to Desktop
This is another method you can use if you find Windows 10 Safe Mode not working. If you can access your login screen (welcome or sign-in screen) but can’t access or login to Desktop, use these steps to restart your computer in Safe Mode.
- Басыңыз күш at the bottom right side of the Windows 10 Login screen.
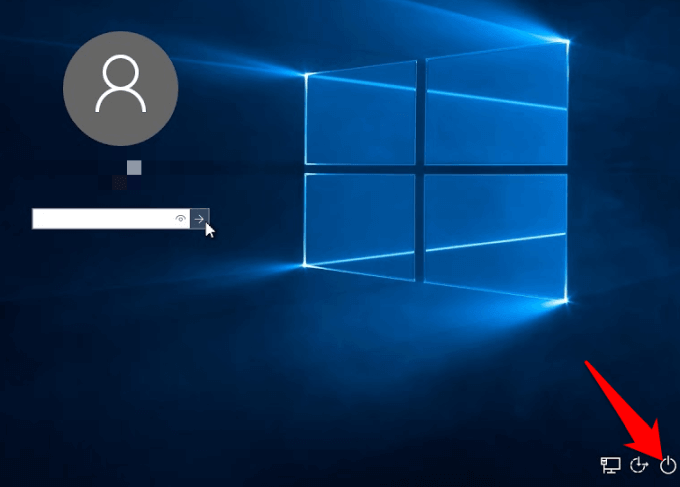
- Түймесін басып, ұстап тұрыңыз ауысым пернетақтадағы пернесін басып, таңдаңыз Қайтадан қосу. You’ll see the Өтінемін күте тұрыңыз screen appear briefly, and the Опцияны таңдаңыз screen. Click Ақауларды жою.

- Ішінде Advanced Options экранын нұқыңыз Іске қосу параметрлері.
- In the Startup Settings screen, press the key(s) corresponding to the Қауіпсіз режим option you want to use.

More Ways To Boot To Safe Mode
We hope you found this guide useful in helping you boot into Safe Mode when you find F8 not working in Windows 10. If you know of other methods you can use to access Safe Mode, you’re welcome to share them with us.