Fix Can’t adjust screen brightness in Windows 10

Fix Can’t adjust screen brightness in Windows 10: If you have recently upgraded to Windows 10 then you may be facing this annoying issue where you can’t adjust the screen brightness, in short, screen brightness settings stopped working. If you try to adjust the brightness using Windows Settings apps, you won’t be able to change anything, as dragging the brightness level up or down will do nothing. Now if you try to adjust brightness using the brightness keys on the keyword then it would display the brightness level going up and down, but nothing would actually happen.
Why I am unable to adjust screen brightness on Windows 10?
If you have enabled automatic battery management then if the battery starts to become low the brightness will be automatically changed to dim settings. And you won’t be able to adjust the brightness again until you will change the battery management settings or charge your laptop. But the issue can be a number of different things for example corrupted drivers, incorrect battery configuration, ATI bugЖәне т.б.
This is quite a common issue which a lot of Windows 10 users are facing right now. This issue can also be caused because of the corrupt or incompatible display driver and thankfully this issue can be easily resolved. So without wasting any more time let’s see how to actually fix can’t adjust screen brightness in Windows 10 with the help of below-listed steps.
Fix Can’t Adjust Screen Brightness in Windows 10
Бірдеңе дұрыс болмаса, қалпына келтіру нүктесін жасауды ұмытпаңыз.
1-әдіс: Дисплей адаптерінің драйверлерін жаңартыңыз
1. Windows пернесі + R пернелерін басып, теріңіз devmgmt.msc және ашу үшін Enter пернесін басыңыз Құрылғы менеджері.

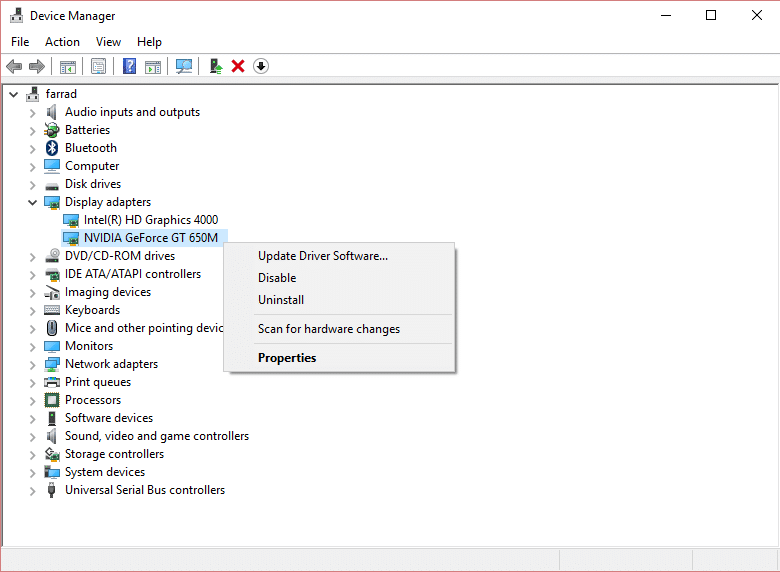
2. Кеңейту Адаптерлерді көрсету and then right-click on the integrated graphics card and select Драйверді жаңарту.
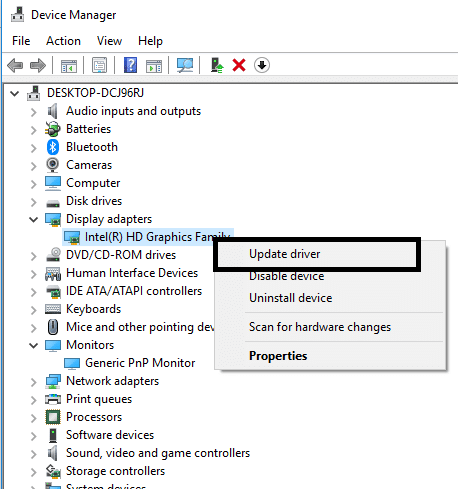
Ескерту: The integrated graphics card would be something like Intel HD графикасы 4000.
3. Содан кейін түймесін басыңыз Жаңартылған драйвер бағдарламалық жасақтамасы үшін автоматты түрде іздеу and let it install the driver automatically.
Ескерту: Make sure you have a good internet connection in order for Windows to automatically download the latest drivers.

4. Reboot your PC and see if the issue is resolved or not.
5. If not then again select Драйверді жаңарту and this time click on Драйвер бағдарламалық жасақтамасы үшін компьютерімді шолыңыз.
6. Бұдан әрі нұқыңыз Компьютерімде қол жетімді драйверлер тізімінен таңдауға рұқсат етіңіз төменгі жағында.

7. Қазір бақылау белгісі «Үйлесімді жабдықты көрсетіңіз” then from the list select Microsoft негізгі дисплей адаптері және нұқыңыз Келесі.
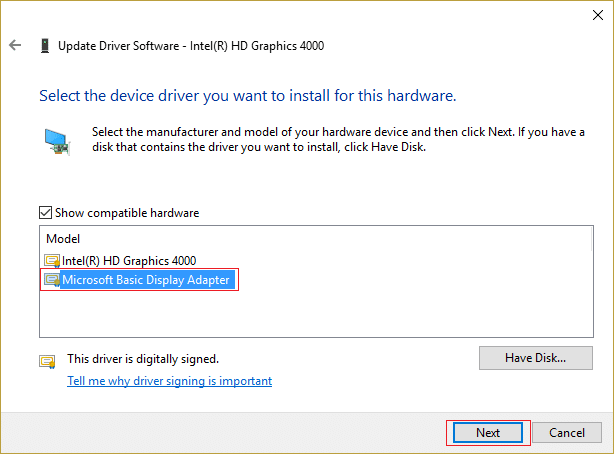
8. Let it install the basic Microsoft display driver and reboot your PC to save changes.
Method 2: Adjust the brightness from Graphics Settings
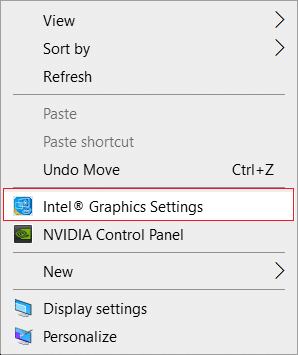
1. Right-click in an empty area on the desktop then select Intel Graphics параметрлері.
2. Енді басыңыз көрсету from the Intel HD Graphics Control Panel.
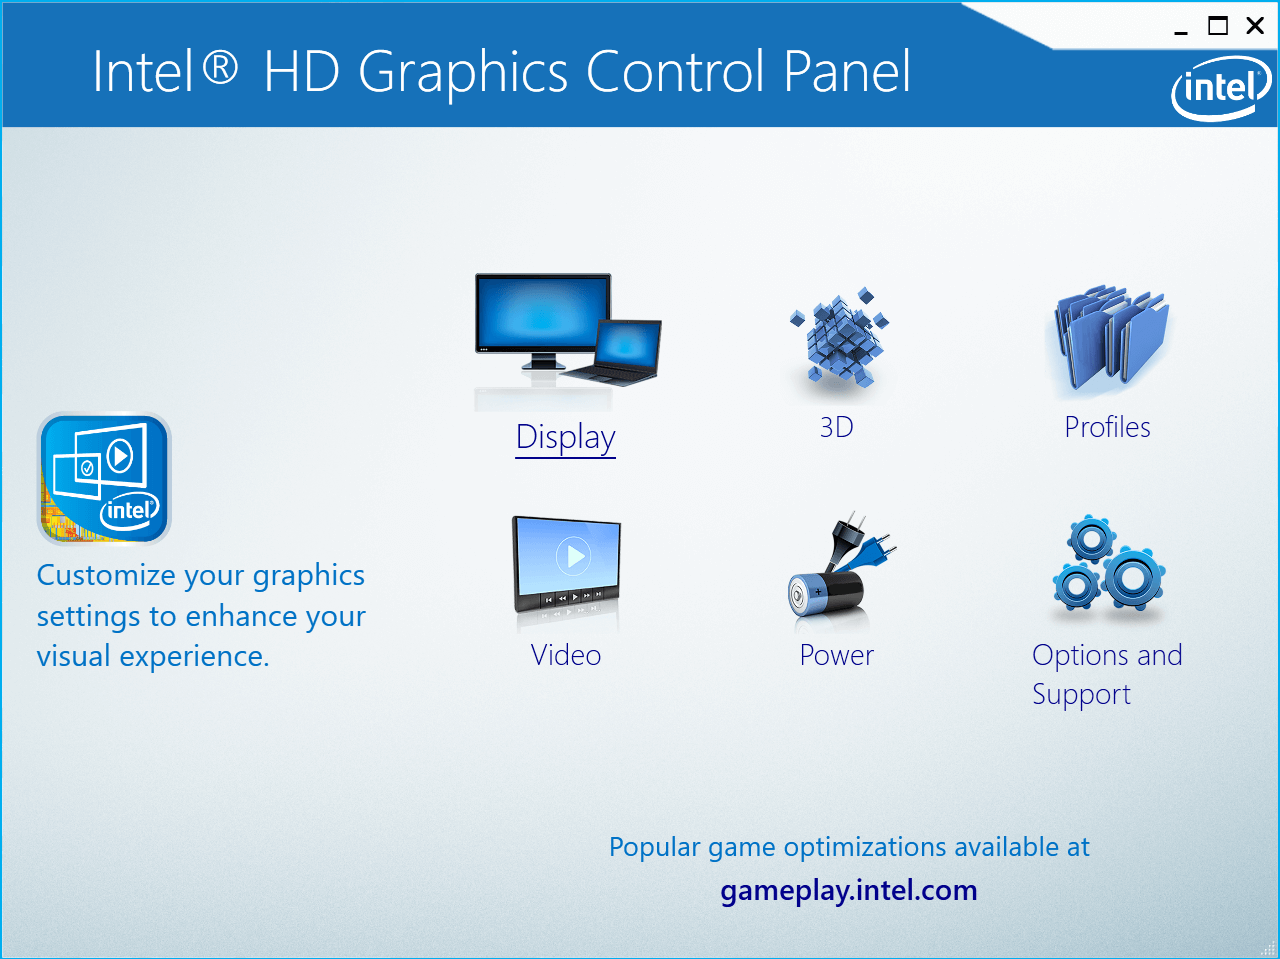
3. Сол жақтағы мәзірден таңдаңыз Color Settings.
4. Adjust the Brightness slider according to your liking and once done, click Қолданыңыз.

3 әдісі: Adjust screen brightness using Power Options
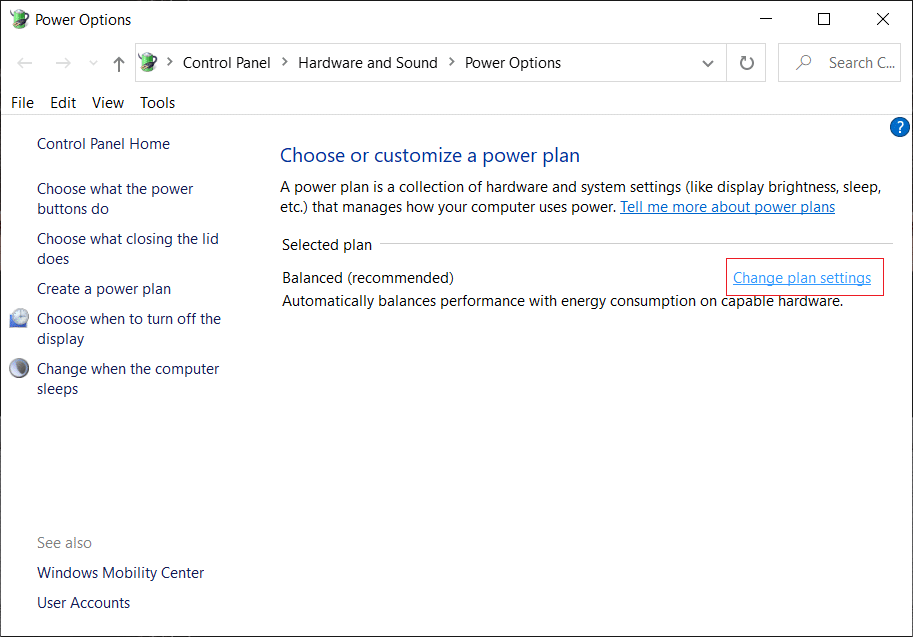
1. тінтуірдің оң жағын басыңыз Қуат белгішесі тапсырмалар тақтасында таңдап алыңыз Қуат параметрлері.
![]()
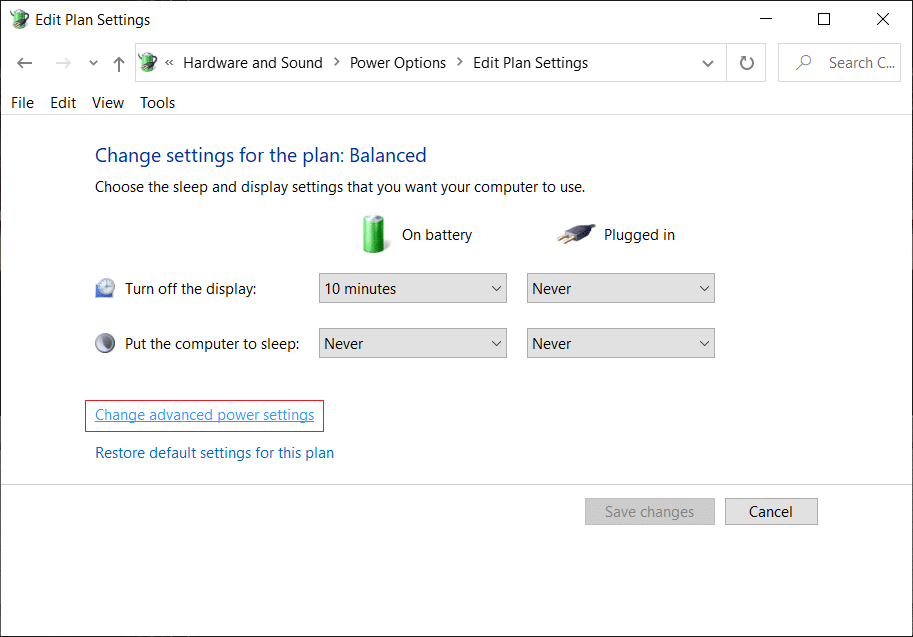
2. Енді басыңыз Жоспар параметрлерін өзгерту next to currently active power plan.
3. басыңыз Кеңейтілген қуат параметрлерін өзгерту түбінде.
4. From the Advanced settings window, find and expand Дисплей.
5. Now locate and click each of the following to expand their respective settings:
Дисплей жарықтығы
Dimmed display brightness
Адаптивті жарықтығын қосыңыз
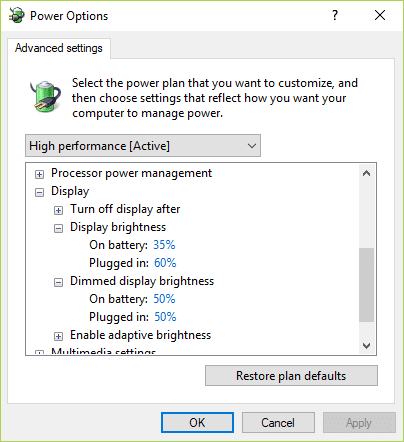
5. Change each of these to the settings you wish, but make sure “Адаптивті жарықтығын қосыңыз»Болып табылады өшірілген.
6. Аяқтағаннан кейін "Қолдану" түймесін, содан кейін "Жарайды" түймесін басыңыз.
7. Өзгерістерді сақтау үшін компьютерді қайта жүктеңіз.
4-әдіс: Жалпы PnP мониторын қосыңыз
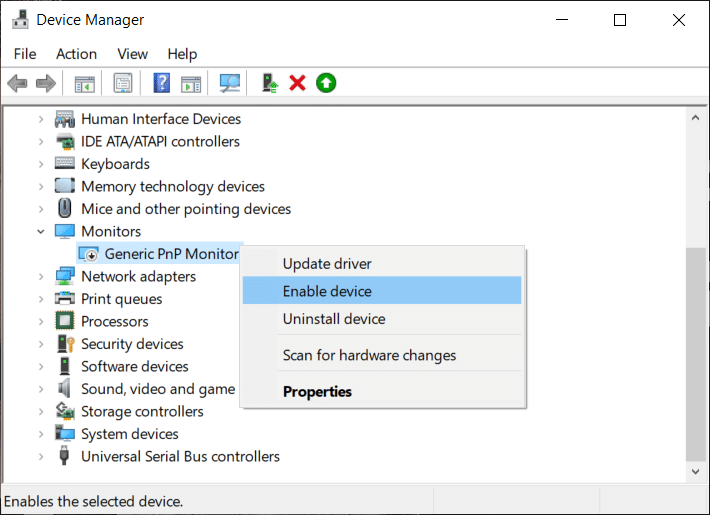
1. Windows пернесі + R пернелерін басып, теріңіз devmgmt.msc Құрылғы менеджерін ашу үшін Enter пернесін басыңыз.
2. Кеңейту Мониторлар одан кейін тінтуірдің оң жағын басыңыз Жалпы PnP мониторы тармағын таңдаңыз және Қосу.
3. Өзгерістерді сақтау және мүмкіндігіңіз бар-жоғын білу үшін компьютерді қайта жүктеңіз fix can’t adjust screen brightness in Windows 10 issue.
5-әдіс: Generic PnP Monitor драйверін жаңартыңыз
1. Windows пернесі + R пернелерін басып, теріңіз devmgmt.msc Enter енгізіңіз.
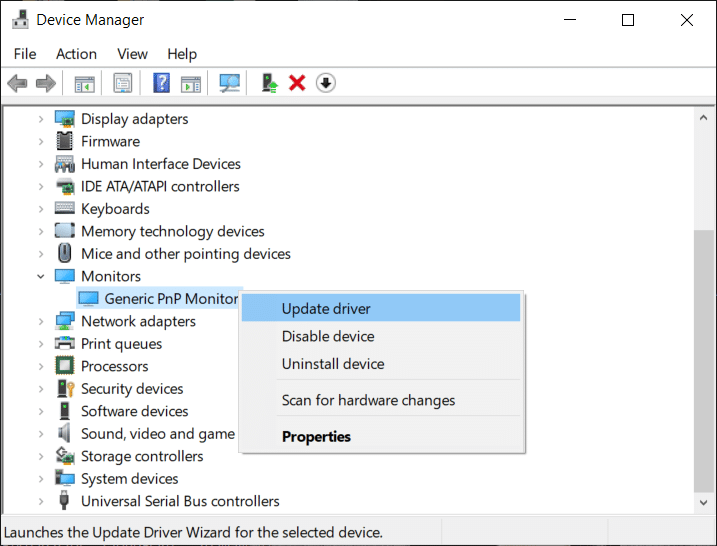
2. Кеңейту Мониторлар одан кейін тінтуірдің оң жағын басыңыз Жалпы PnP мониторы тармағын таңдаңыз және Драйверді жаңарту.
3. Таңдаңыз Драйвер бағдарламалық жасақтамасы үшін компьютерімді шолыңыз.

4. Бұдан әрі нұқыңыз Компьютерімде қол жетімді драйверлер тізімінен таңдауға рұқсат етіңіз төменгі жағында.
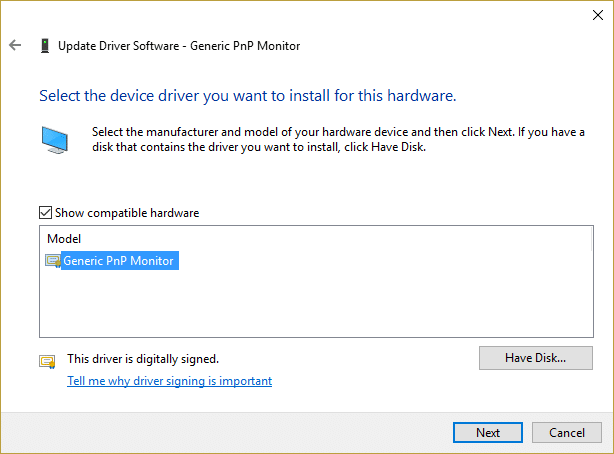
5. Енді таңдаңыз Жалпы PnP мониторы Келесі түймесін басыңыз.
6. Өзгерістерді сақтау және мүмкіндігіңіз бар-жоғын білу үшін компьютерді қайта жүктеңіз fix unable to adjust screen brightness on Windows 10 issue.
6-әдіс: графикалық карта драйверін жаңарту
If the Nvidia Graphics drivers are corrupted, outdated or incompatible then you won’t be able to adjust screen brightness in Windows 10. When you update Windows or install a third-party app then it can corrupt the video drivers of your system. In order to resolve this issue, you need to update your graphics card drivers in order to fix the underlying cause. If you face any such issues then you can easily update graphics card drivers with the help of this guide.
1. Windows пернесі + R пернелерін басып, теріңіз devmgmt.msc Enter енгізіңіз.
2. Now from Device Manager menu click Көру> Жасырын құрылғыларды көрсету.

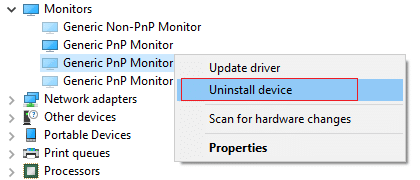
3. Right-click on each of the hidden devices listed under Мониторлар тармағын таңдаңыз және Uninstall Құрылғы.
4. Өзгерістерді сақтау және мүмкіндігіңіз бар-жоғын білу үшін компьютерді қайта жүктеңіз adjust screen brightness in Windows 10.
8-әдіс: Тіркеуді түзету
Ескерту: This method is only for users who have ATI graphics card and have Catalyst installed.
1. Windows пернесі + R пернелерін басып, теріңіз regedit және тізілім өңдегішін ашу үшін Enter пернесін басыңыз.

2. Navigate to the following Registry key:
HKEY_LOCAL_MACHINE SYSTEM ControlSet001 ControlClass {4d36e968-e325-11ce-bfc1-08002be10318} 0000
3. Now double-click on the following Registry keys and set their value to 0 then click OK:
MD_EnableBrightnesslf2
KMD_EnableBrightnessInterface2
4. Next, navigate to the following key:
HKEY_LOCAL_MACHINE SYSTEM CurrentControlSet Control Class {4d36e968-e325-11ce-bfc1-08002be10318} 0001
5. Again double-click on MD_EnableBrightnesslf2 and KMD_EnableBrightnessInterface2 then set their value’s to 0.
6. Close everything and restart your PC to save changes.
Сізге ұсынылады:
Жоғарыдағы қадамдар пайдалы болды деп үміттенемін және сіз жасай алдыңыз fix Can’t Adjust Screen Brightness in Windows 10 but if you still have any questions regarding this post feel free to ask them in the comment section.