If your laptop touchpad is not working then it will be impossible to use your laptop without a touchpad. Although, you can use an external USB mouse but that will be only a temporary fix. But don’t worry in this guide we will talk about various ways via which you can fix the broken touchpad issue.

How about working on your laptop without a touchpad? It is impossible unless you have connected an external mouse to your PC. What about those situations when you do not have an external mouse? Therefore, it is always recommended to keep your 노트북 터치패드 working. The main problem seems to be the driver conflict as the Window may have replaced the previous version of drivers with the updated version. In short, some drivers may have become incompatible with this version of Window and hence creating the issue where Touchpad is not working. In this guide, we will help you to understand various methods through which you can fix laptop touchpad not working issue.
8 Ways to Fix Laptop Touchpad Not Working
혹시라도 문제가 생길 경우를 대비해 복원 지점을 만들어 두시기 바랍니다.
While the laptop touchpad is not working you might want to navigate in Windows with the help of keyboard shortcuts, so these are a few shortcuts keys which will make it easier to navigate:
1.Use Windows Key to access Start Menu.
2. 사용 Windows 키 + X to open Command Prompt, Control Panel, Device Manager, etc.
3.Use Arrow keys to browse around and select different options.
4. 사용 탭 to navigate different items in the application and 엔터 버튼 to select the particular app or open the desired program.
5. 사용 Alt + Tab to select between different open windows.
You can also use an external USB mouse if your trackpad is not working until the issue is sorted and then you can again switch back to using the trackpad.
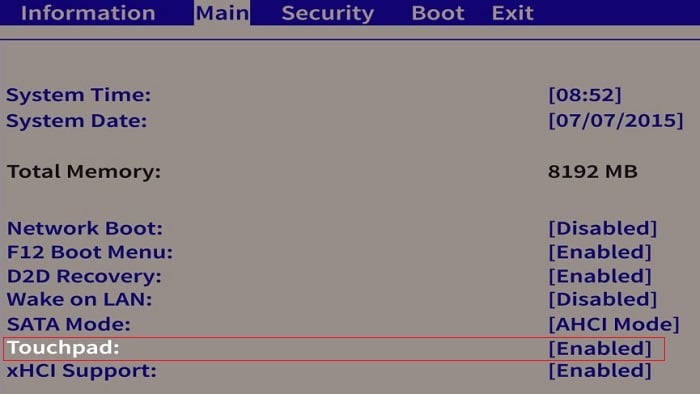
방법 1 – Enable Touchpad in BIOS 설정
It could be possible that the touchpad is disabled from the BIOS settings of your system. In order to fix this issue, you need to enable touchpad from BIOS.
For that purpose, you need to open your BIOS settings on your systems. Restart your systems and while it is rebooting, you need to keep pressing the F2 or F8 or Del button. Depending on the laptop manufacturer’s settings, accessing the BIOS setting could be different.
In your BIOS setting, you just need to navigate to the Advnaced section where you will find Touchpad or Internal Pointing Device or a similar setting where you need to check whether touchpad is enabled or not. If it is disabled, you need to change it to the 사용 mode and save the BIOS settings and Exit.
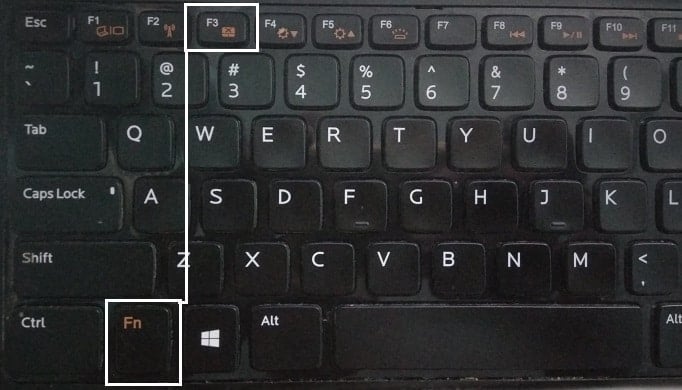
방법 2 - Enable Touchpad using the Function Keys
It is possible that the laptop touchpad might be disabled from the physical keys present on your keyboard. This can happen to anybody and you could have disabled the touchpad by mistake, so it’s always a good idea to verify that this is not the case here. Different laptops have different combinations to enable or disable the touchpad using the Keyboard shortcuts, for example, in my Dell laptop the combination is Fn + F3, in Lenovo it’s Fn + F8 etc. Locate the ‘Fn’ key on your PC and select the function key (F1-F12) that is associated with the touchpad.
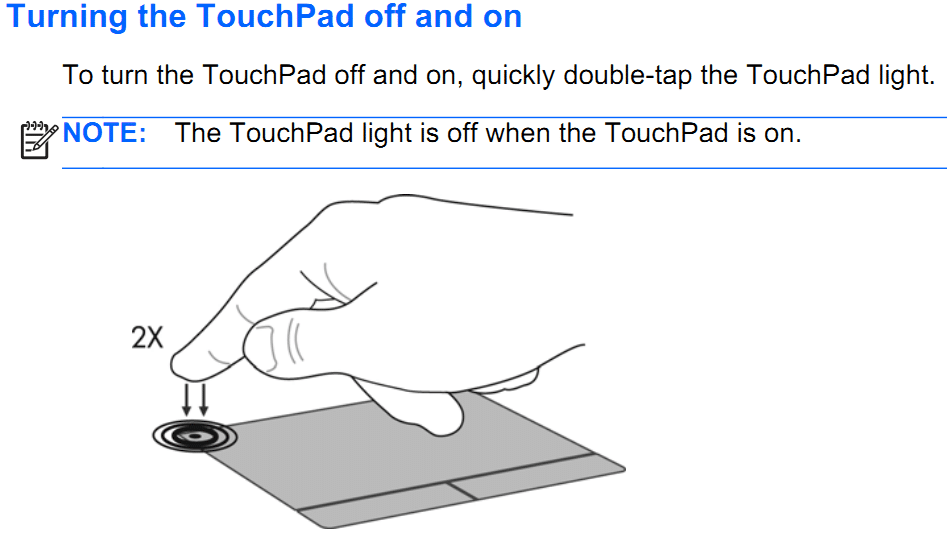
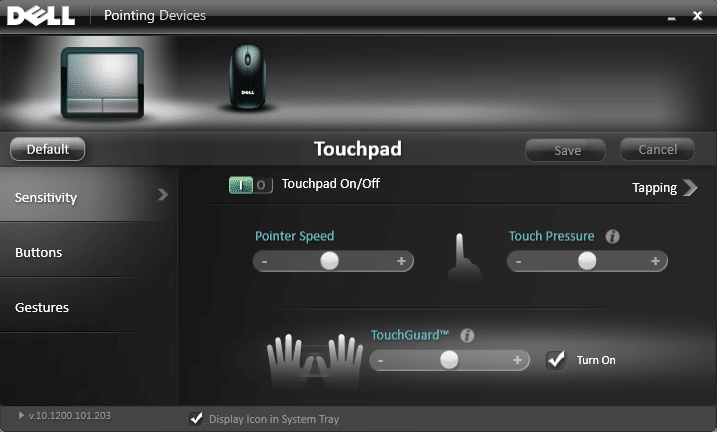
If the above doesn’t fix the issue then you need to double-tap on the TouchPad on/off indicator like shown in the below image to turn off the Touchpad light and enable the Touchpad.
방법 3 – Enable Touchpad in Mouse Properties
1. Windows 키 + I를 눌러 설정을 열고 다음을 선택하세요. 장치.
2.Select 마우스 및 터치 패드 from the left-hand menu and then click on 추가 마우스 옵션 하단에 링크.
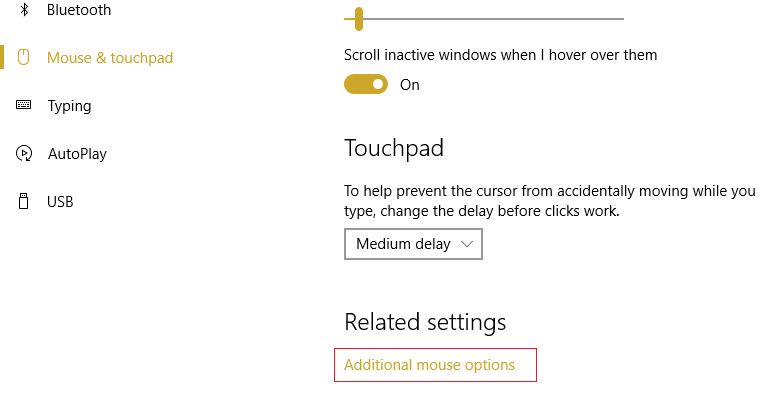
3.Now switch to the last tab in the 마우스 속성 window and the name of this tab depends on the manufacturer such as Device Settings, Synaptics, or ELAN, etc.

4.다음, 장치 선택 그런 다음 사용 버튼을 클릭합니다.
5. PC를 재부팅하여 변경 사항을 저장합니다.
An alternate way to Enable Touchpad
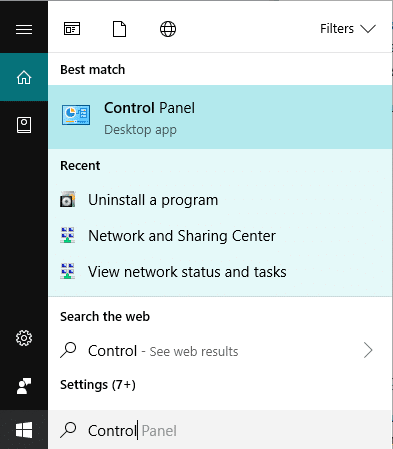
1.Type 제어 in the Start Menu Search bar then click on 제어 패널 검색 결과에서.
2.Click 하드웨어 및 소리 다음을 클릭하십시오 마우스 옵션 or Dell Touchpad.
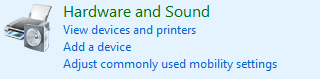
3.Make sure Touchpad On/Off toggle is set to ON and click save changes.
이것은해야한다 resolve the Laptop Touchpad not working issue but if you’re still experiencing the touchpad issues then continue with the next method.
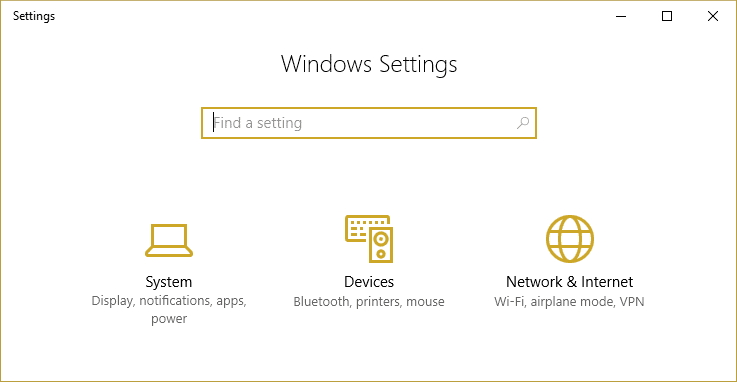
방법 4 - Enable Touchpad from Settings
1. Windows 키 + I를 누른 다음 선택합니다. 장치.
2.From the left-hand menu select Touchpad.
3.Then make sure to turn on the toggle under Touchpad.
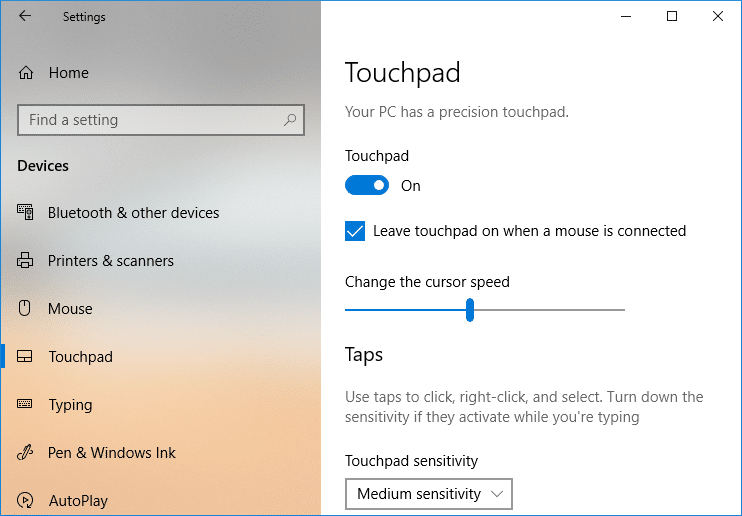
4. PC를 재부팅하여 변경 사항을 저장합니다.
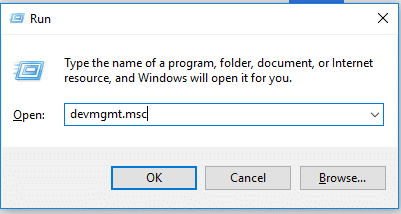
Method 5 – Update or Roll Back Touchpad Drivers
Some users have reported that because of the outdated or incompatible touchpad driver their Laptop touchpad was not working. And, once they updated or roll back touchpad drivers the issue was resolved and they were able to use their touchpad again.
1. Windows 키 + R을 누른 다음 입력 devmgmt.msc를 Enter 키를 눌러 장치 관리자를 엽니다.
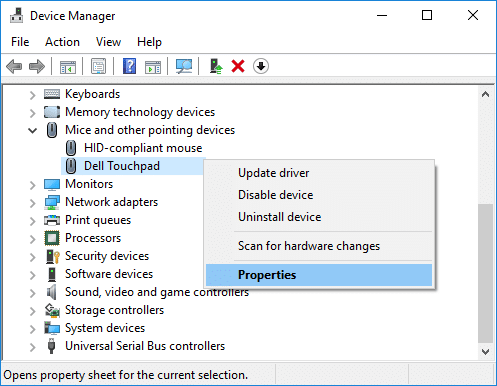
2.확장 마우스 및 기타 포인팅 장치.
3. 마우스 오른쪽 버튼을 클릭하세요. 터치 패드 device and select 속성.
4.Switch to the Driver tab and click on the 드라이버 업데이트 버튼을 클릭합니다.
참고 : You need to make sure that the Disable button is active.
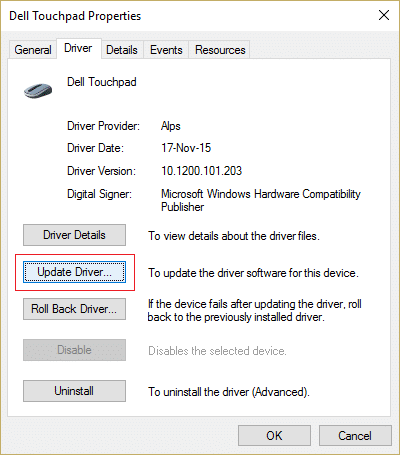
5.Now choose ‘업데이트 된 드라이버 소프트웨어 자동 검색’. Make sure you’re connected to the Internet for this feature to work properly.
6. 모든 것을 닫고 PC를 재부팅하여 변경 사항을 저장하십시오.
7.If you’re still facing the same issue then instead of Update Driver, you need to click on the 드라이버 롤백 버튼을 클릭합니다.

8.Once the process is complete, restart your PC to apply changes.
Update Touchpad drivers from Laptop manufacturer website
If none of the above works then as a last resort to fix the corrupted or outdated drivers you need to download & install the latest Touchpad drivers from your laptop manufacturer’s website. Sometimes updating Windows can also help, so make sure your Windows is up to date and there are no pending updates.
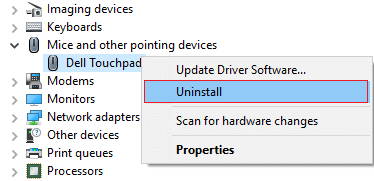
방법 6 – Remove Other Mouse Drivers
The laptop touchpad not working may arise if you have plugged in multiple mice into your laptop. What happens here is when you plug in these mice into your laptop than their drivers also get installed on your system and these drivers are not automatically removed. So these other mouse drivers might be interfering with your touchpad, so you need to remove them one by one:
1. Windows 키 + R을 누른 다음 입력 devmgmt.msc를 Enter 키를 눌러 장치 관리자를 엽니다.
2.In the Device Manager window, expand 마우스 및 기타 포인팅 장치.
3.Right-click on your other mouse devices (other than touchpad) and select 제거.
4.If it asks for confirmation then 예를 선택합니다.
5. PC를 재부팅하여 변경 사항을 저장합니다.
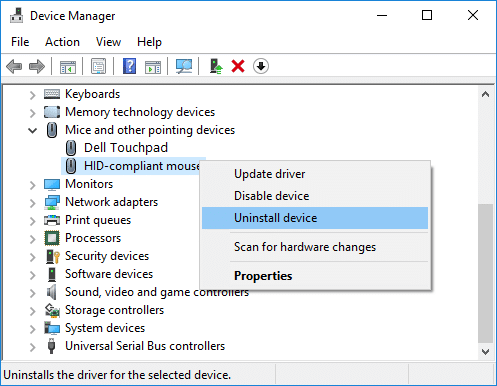
방법 7 – Reinstall Touchpad Drivers
1. Windows 키 + R을 누른 다음 입력 devmgmt.msc를 Enter 키를 눌러 장치 관리자를 엽니다.
2.In the Device Manager window, expand 마우스 및 기타 포인팅 장치.
3.Right-click on the Laptop Touchpad device and click on 제거.
5. 확인 메시지가 나타나면 선택하세요. 예.
6. PC를 재부팅하여 변경 사항을 저장합니다.
7.Once the system restarts, Windows will automatically install the default drivers for your Touchpad.
방법 8 – Perform Clean-Boot
Sometimes 3rd party software can conflict with the touchpad and therefore, you may experience Touchpad not working issue. In order to Fix resolve the broken Touchpad issue, PC에서 클린 부팅을 수행하고 문제를 단계별로 진단해야 합니다.

권장 사항 :
If you still face a problem with the touchpad, you need to take your laptop to a service center where they will make a thorough diagnosis of your touchpad. It could be the physical damage of your touchpad which needs repair of the damage. Therefore, you need not take any risk rather you need to contact the technician. The above-mentioned methods, however, will help you to resolve your software related problems causing the touchpad not working issue.

