Automatically disable Touchpad when Mouse is connected

If you use a traditional mouse over Touchpad, you could automatically disable touchpad when you plug in the USB Mouse. This can be easily done via Mouse Properties in Control Panel where you have a label called “Leave touchpad on when a mouse is connected”, so you need to uncheck this option and you’re good to go. If you have Windows 8.1 with the latest update, you could easily configure this option right from PC settings.
This option makes it easier for users to navigate and you don’t need to worry about accidental touch or click over touchpad when using a USB Mouse. So without wasting any time let’s see How to Automatically disable Touchpad when Mouse is Connected in Windows 10 with the help of the below-listed guide.
Automatically disable Touchpad when Mouse is connected
혹시라도 문제가 생길 경우를 대비해 복원 지점을 만들어 두시기 바랍니다.
Method 1: Disable Touchpad when Mouse is connected via Settings
1. Windows 키 + I를 눌러 엽니다. 설정 다음을 클릭하십시오 장치.

2. 왼쪽 메뉴에서 터치 패드.
3. Under Touchpad 선택을 취소하다 "마우스가 연결된 경우 터치패드를 켜두세요.".
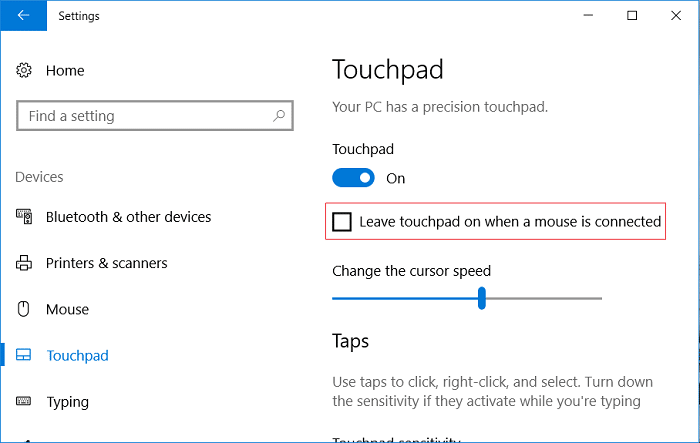
4. PC를 재부팅하여 변경 사항을 저장합니다.
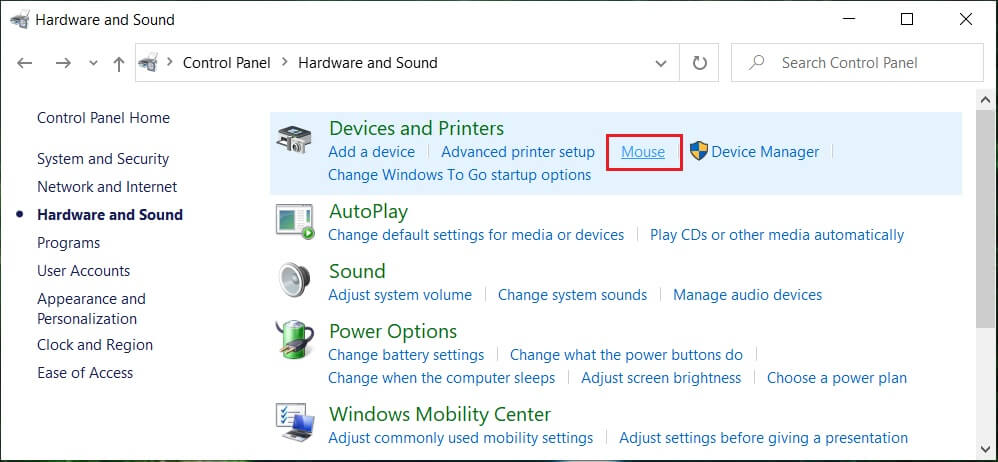
Method 2: Disable Touchpad when Mouse is connected via Mouse Properties
1. Windows 키 + Q를 눌러 검색을 불러오고 다음을 입력합니다. 제어, 그리고 클릭 제어 패널 검색 결과에서.

2. 다음을 클릭하십시오. 하드웨어와 사운드.

3. Under Devices and Printers click on 쥐.
4.로 전환 ELAN or Device Settings 그런 다음 탭 선택을 취소하다 "Disable internal pointing device when the external USB pointing device is attached"옵션.
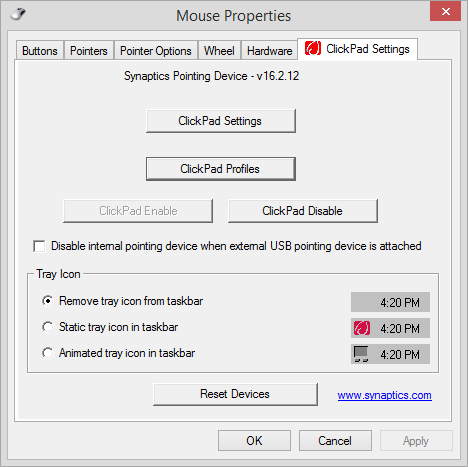
5. 적용을 클릭한 후 좋아요.
Method 3: Disable Dell Touchpad when Mouse is connected
1. Windows 키 + R을 누른 다음 입력 main.cpl을 Enter 키를 눌러 엽니 다. Mouse Properties.

2. Under Dell Touchpad tab, click on “Click to change Dell Touchpad settings".
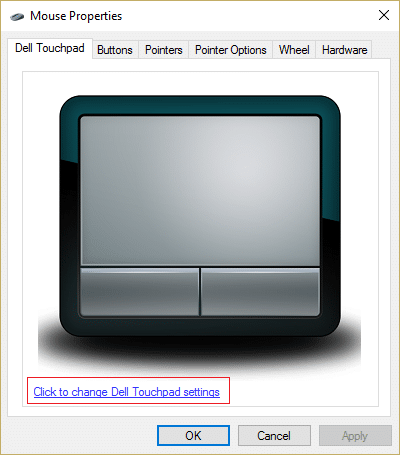
3. From Pointing Devices, select the Mouse picture from the top.
4. 체크표시 “Disable Touchpad when USB mouse is present".
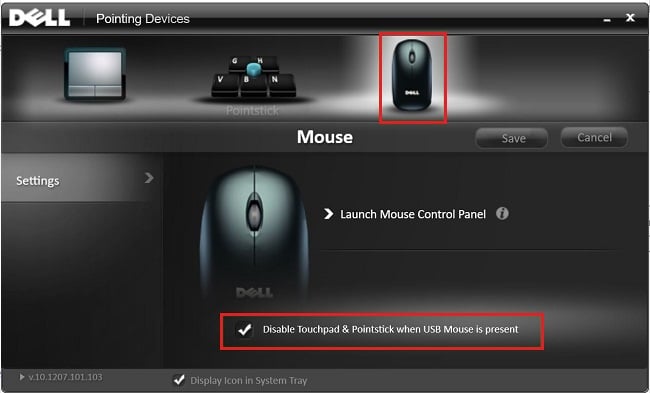
5. PC를 재부팅하여 변경 사항을 저장합니다.
Method 4: Disable Touchpad when Mouse is connected via Registry
1. Windows 키 + R을 누른 다음 입력 regedit를 Enter 키를 눌러 레지스트리 편집기를 엽니다.

2. 다음 레지스트리 키로 이동합니다.
HKEY_LOCAL_MACHINESOFTWARESynapticsSynTPEnh
3. 마우스 오른쪽 버튼으로 SynTPEnh 그 다음에 새로 만들기 > DWORD(32비트) 값.
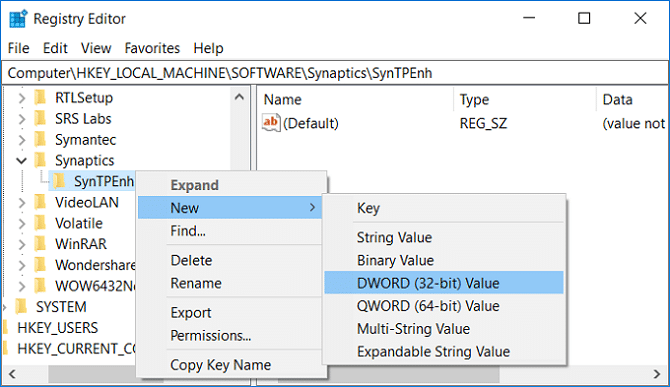
4. Name this DWORD as DisableIntPDFeature and then double click on it to change its value.
5. 다음을 확인하십시오 Hexadecimal is selected under Base then 값을 33으로 변경 확인을 클릭하십시오.
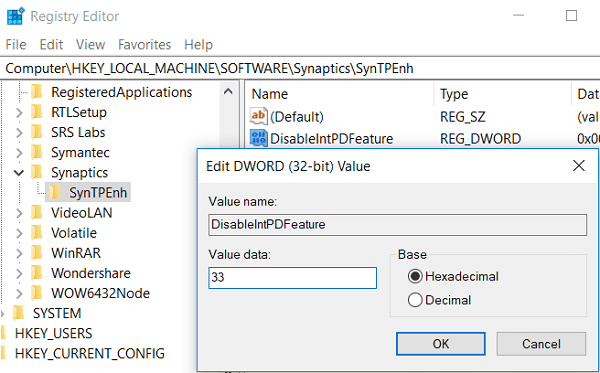
6. PC를 재부팅하여 변경 사항을 저장합니다.
Method 5: Disable Touchpad when Mouse is Connected in Windows 8.1
1. Press Windows Key + C key to open 설정 매력.
2. 선택 변경 PC 설정 than from the left-hand menu click on PC and Devices.
3. 그런 다음 마우스 및 터치 패드, then from the right window look for an option labelled as “마우스가 연결된 경우 터치패드를 켜두세요.".
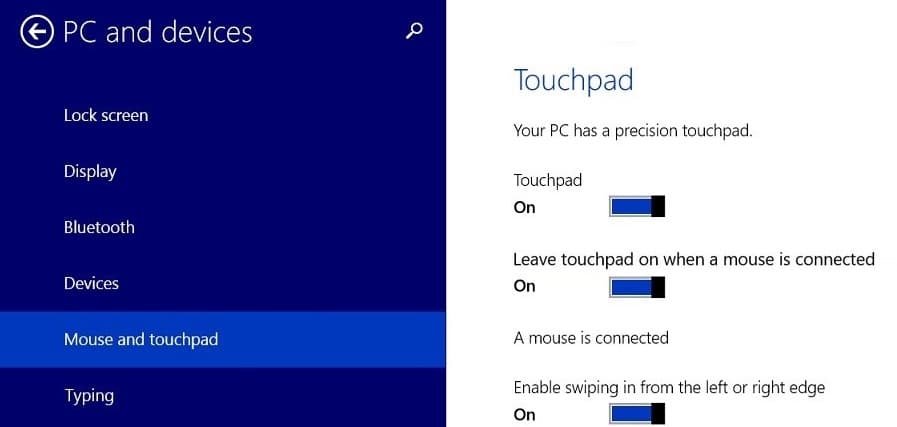
4. 반드시 disable or turn off the toggle for this option.
5. Reboot your PC to save changes, and this will automatically disable Touchpad when Mouse is connected.
권장 사항 :
그게 당신이 성공적으로 Disable Touchpad when Mouse is Connected in Windows 10 하지만 이 가이드에 관해 여전히 질문이 있는 경우 댓글 섹션에서 자유롭게 질문하세요.