Windows 10 has a serious bug since it’s inception which makes text blurred on users PC and the problem is faced system-wide by the user. So it doesn’t matter if you go to System Settings, Windows Explorer or Control Panel, all the text will be somewhat blurred because of the DPI Scaling Level for Displays feature in Windows 10. So today we are going to discuss How To Change DPI Scaling Level for Displays in Windows 10.
Windows 10에서 디스플레이의 DPI 배율 수준 변경
혹시라도 문제가 생길 경우를 대비해 복원 지점을 만들어 두시기 바랍니다.
Method 1: Change DPI Scaling Level for Displays Using Settings App
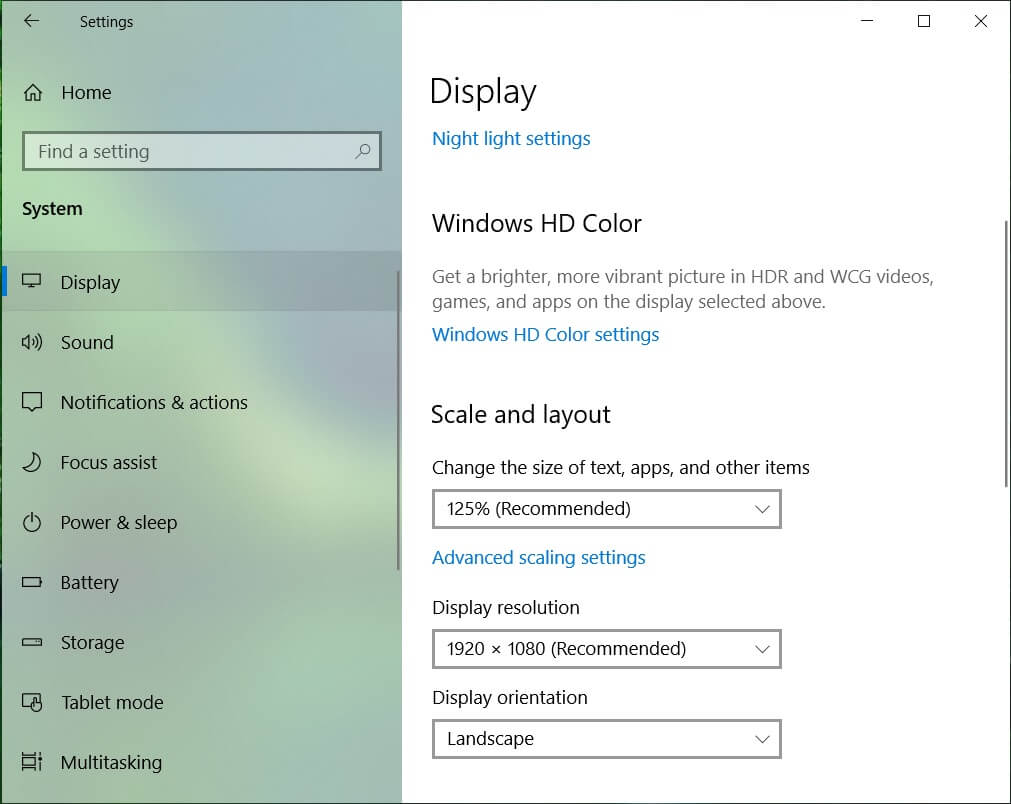
1. Press Windows Key + I to open Settings and then click on 시스템.

2. From the left-hand menu, make sure to select 디스플레이.
3. If you have more than one display, then select your display at the top.
4. 지금 아래 텍스트, 앱 및 기타 항목의 크기 변경,를 선택 DPI percentage 드롭 다운에서
5. Click on the Sign out now link to save changes.
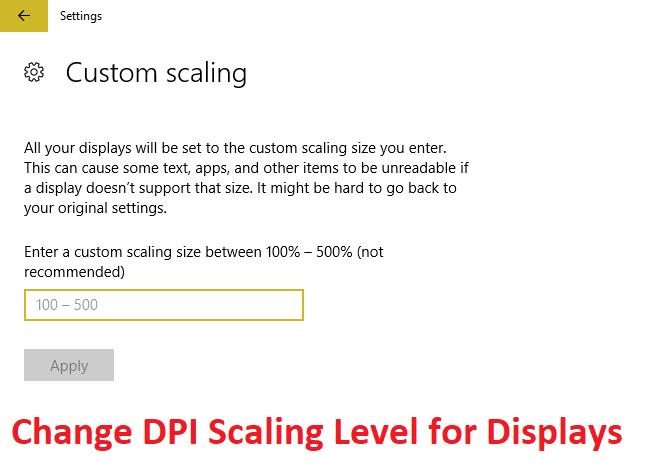
Method 2: Change Custom DPI Scaling Level for All Displays in Settings
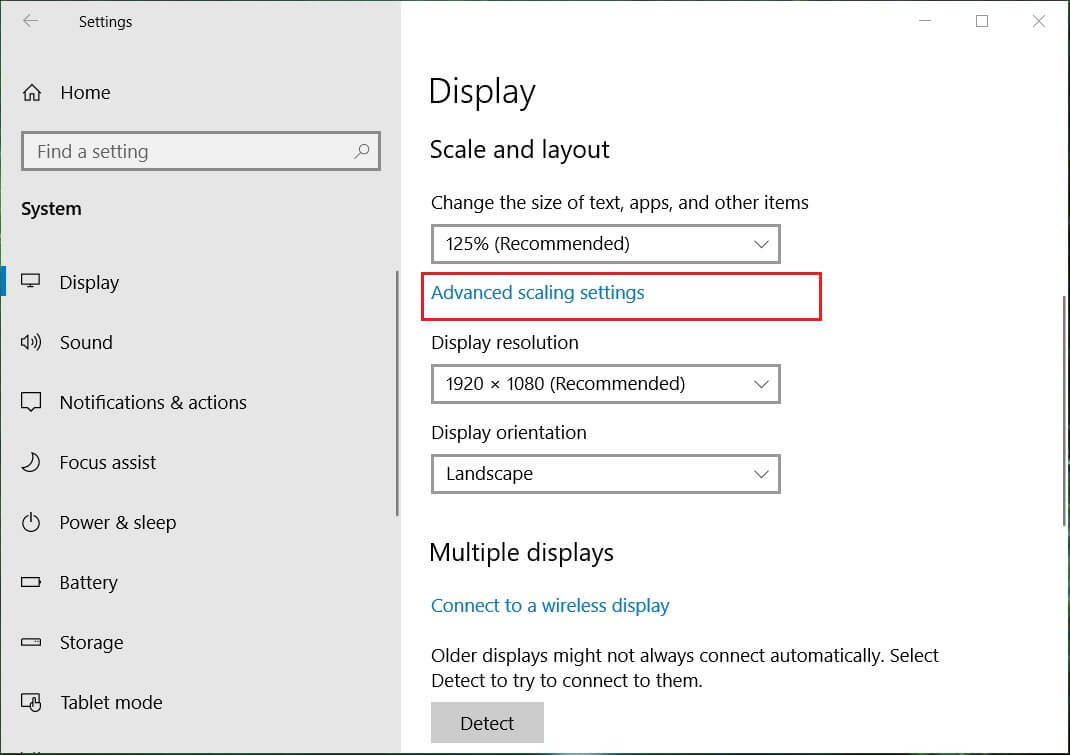
1. Press Windows Key + I to open Settings and then click on 시스템.
2. From the left-hand menu, make sure to select 디스플레이.
3. Now under Scale and layout click Custom scaling.
4. Enter a custom scaling size between 100의 % - 500의 % for all the displays and click on Apply.

5. Click on Sign out now to save changes.
Method 3: Change Custom DPI Scaling Level for All Displays in Registry Editor
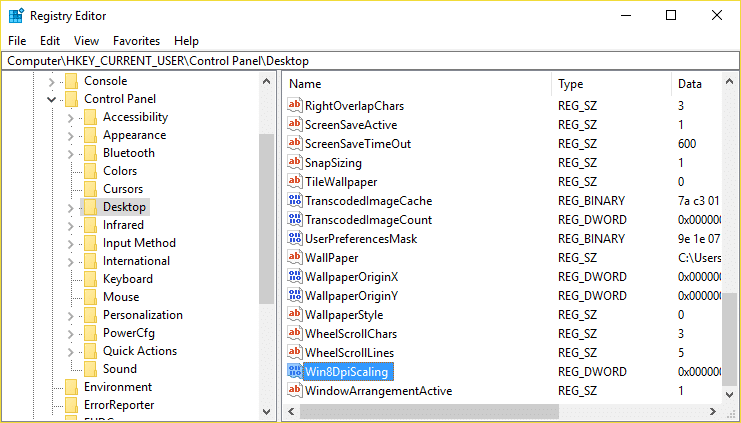
1. Windows 키 + R을 누른 다음 입력 regedit를 Enter를 누르십시오.

2. Navigate to the following Registry key:
HKEY_CURRENT_USERControl의 PanelDesktop
3. Make sure you have highlighted 데스크탑 in the left window pane and then in the right window pane double click on LogPixels DWORD.
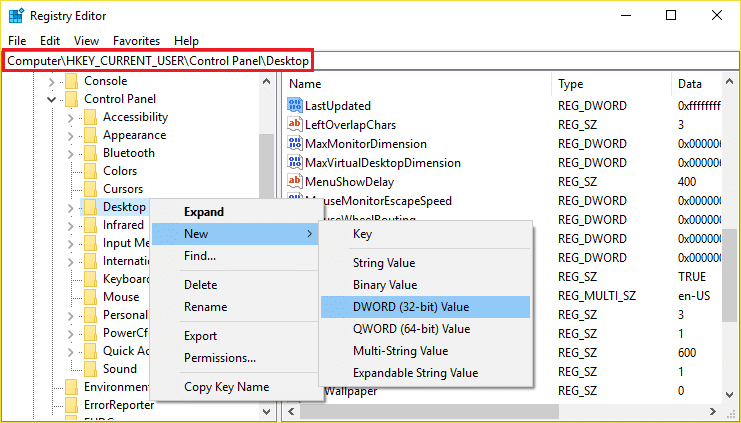
참고 : If the above DWORD doesn’t exist, you need to create one, right-click on Desktop and select New > DWORD (32-bit) value. Name this newly created DWORD as LogPixels.
4. 선택 소수 under Base then change its value to any of the following data and then click OK:
| DPI Scaling Level |
값 날짜 |
| Smaller 100% (default) | 96 |
| Medium 125% | 120 |
| Larger 150% | 144 |
| Extra Large 200% | 192 |
| Custom 250% | 240 |
| Custom 300% | 288 |
| Custom 400% | 384 |
| Custom 500% | 480 |
![]()
5. Again make sure Desktop is highlighted and in the right window pane double click on Win8DpiScaling.
참고 : If the above DWORD doesn’t exist, you need to create one, right-click on Desktop and select New > DWORD (32-bit) value. Name this DWORD as Win8DpiScaling.
6. Now change its value to 0 if you have chosen 96 from the above table for LogPixels DWORD but if you have chosen any other value from the table then set its 1 값.
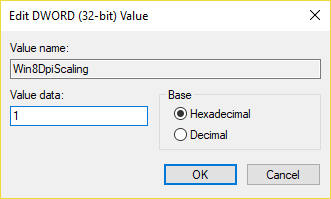
7. 확인을 클릭하고 레지스트리 편집기를 닫습니다.
8. PC를 재부팅하여 변경 사항을 저장합니다.
권장 사항 :
그것이 당신이 성공적으로 배운 것입니다. How To Change DPI Scaling Level for Displays in Windows 10 그러나 이 게시물과 관련하여 여전히 질문이 있는 경우 댓글 섹션에서 자유롭게 질문하세요.
")
