Enable Enhanced Anti-Spoofing for Windows Hello Face Authentication

Enable Enhanced Anti-Spoofing for Windows Hello Face Authentication: Windows 10 PC allows you to sign-in using fingerprint, face recognition, or iris scan using Windows Hello. Now Windows hello is a biometrics-based technology which enables users to authenticate their identity in order to access their devices, apps, networks etc using any one of the above methods. Now face detection in Windows 10 works well, but it can’t differentiate between a photo of your face inside your mobile or the actual user face.
The potential threat because of this issue is that someone with your photo could unlock your device by using their mobile. To overcome this difficulty, the anti-spoofing technology comes into actions and once you have enabled the anti-spoofing for Windows Hello Face Authentication, a photo of the authentic user cannot be used to login into the PC.
Once the enhanced anti-spoofing is enabled, Windows will require all users on the device to use anti-spoofing for facial features. This policy is not enabled by default and users have to manually enable anti-spoofing feature. Anyway, without wasting any time let’s see How to Enable Enhanced Anti-Spoofing for Windows Hello Face Authentication with the help of the below-listed tutorial.
Enable Enhanced Anti-Spoofing for Windows Hello Face Authentication
혹시라도 문제가 생길 경우를 대비해 복원 지점을 만들어 두시기 바랍니다.
Method 1: Disable or Enable Enhanced Anti-Spoofing for Windows Hello Face Authentication in Group Policy Editor
1. Windows 키 + R을 누른 다음 입력 gpedit.msc를 Enter 키를 눌러 엽니 다. 그룹 정책 편집기.

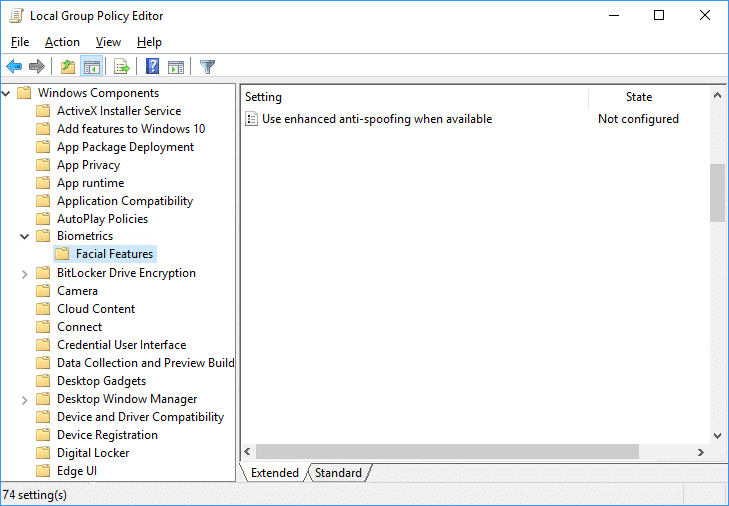
2.다음 위치로 이동합니다.
Computer ConfigurationAdministrative TemplatesWindows ComponentsBiometricsFacial Features
3.Select 얼굴 특징 then in right window pane double-click on the “향상된 스푸핑 방지 구성"정책.
4.Now change the settings of the Configure enhanced anti-spoofing policy according to:
To Enable Enhanced Anti-Spoofing for Windows Hello Face Authentication: Select Not Configured or Disabled
To Disable Enhanced Anti-Spoofing for Windows Hello Face Authentication: Select Enabled

5.Click Apply followed by OK then close Group Policy Editor.
6. PC를 재부팅하여 변경 사항을 저장합니다.
Method 2: Disable or Enable Enhanced Anti-Spoofing for Windows Hello Face Authentication in Registry Editor
1. Windows 키 + R을 누른 다음 입력 regedit를 Enter 키를 눌러 엽니 다. 레지스트리 편집기.

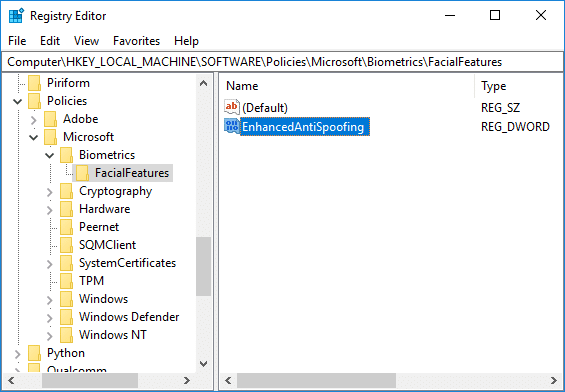
2. 다음 레지스트리 키로 이동합니다.
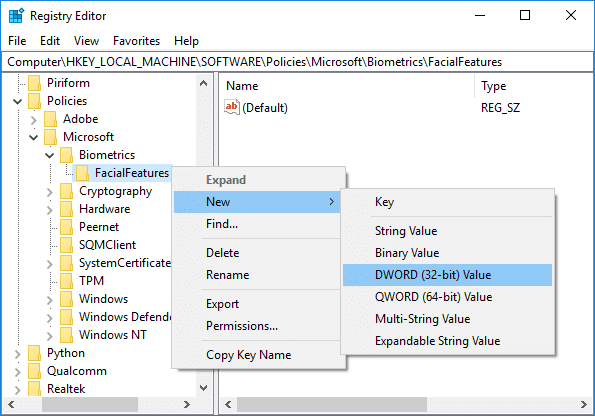
HKEY_LOCAL_MACHINESOFTWAREPoliciesMicrosoftBiometricsFacialFeatures
3.오른쪽 클릭 FacialFeatures 그 다음에 새로 만들기 > DWORD(32비트) 값.
4. 새로 생성된 DWORD의 이름을 다음과 같이 지정합니다. EnhancedAntiSpoofing Enter를 누르십시오.

5.Double-click on EnhancedAntiSpoofing DWORD and change it’s value to:
Enable Enhanced Anti-Spoofing: 1
Disable Enhanced Anti-Spoofing: 0
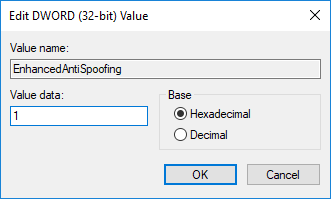
6.Once you have typed the correct value simply click OK.
7.Close registry editor and reboot your PC to save changes.
권장 사항 :
그것이 당신이 성공적으로 배운 것입니다. How to Enable Enhanced Anti-Spoofing for Windows Hello Face Authentication in Windows 10 그러나 이 게시물과 관련하여 여전히 질문이 있는 경우 댓글 섹션에서 자유롭게 질문하세요.