Windows 10에서 진단 데이터 뷰어 활성화 또는 비활성화

You may be aware that Windows collect diagnostic and usage data information and send it to Microsoft to improve the product & services associated with the overall Windows 10 experience. It also helps in patching bugs or security loopholes faster. Now starting with Windows 10 v1803, Microsoft has added a new Diagnostic Data Viewer tool that lets you review the diagnostic data your device is sending to Microsoft.

Diagnostic Data Viewer Tool is disabled by default, and to use it, and you need to enable Diagnostic Data Viewer. Enabling or Disabling this tool is very simple as it is integrated into the Settings App under Privacy. So without wasting any time, let’s see How to Enable or Disable Diagnostic Data Viewer in Windows 10 with the help of the below-listed tutorial.
Windows 10에서 진단 데이터 뷰어 활성화 또는 비활성화
혹시라도 문제가 생길 경우를 대비해 복원 지점을 만들어 두시기 바랍니다.
Method 1: Enable or Disable Diagnostic Data Viewer in Windows 10 Settings
1. Press Windows Key + I to open the 설정 app then click on the 개인 정보 보호 아이콘.
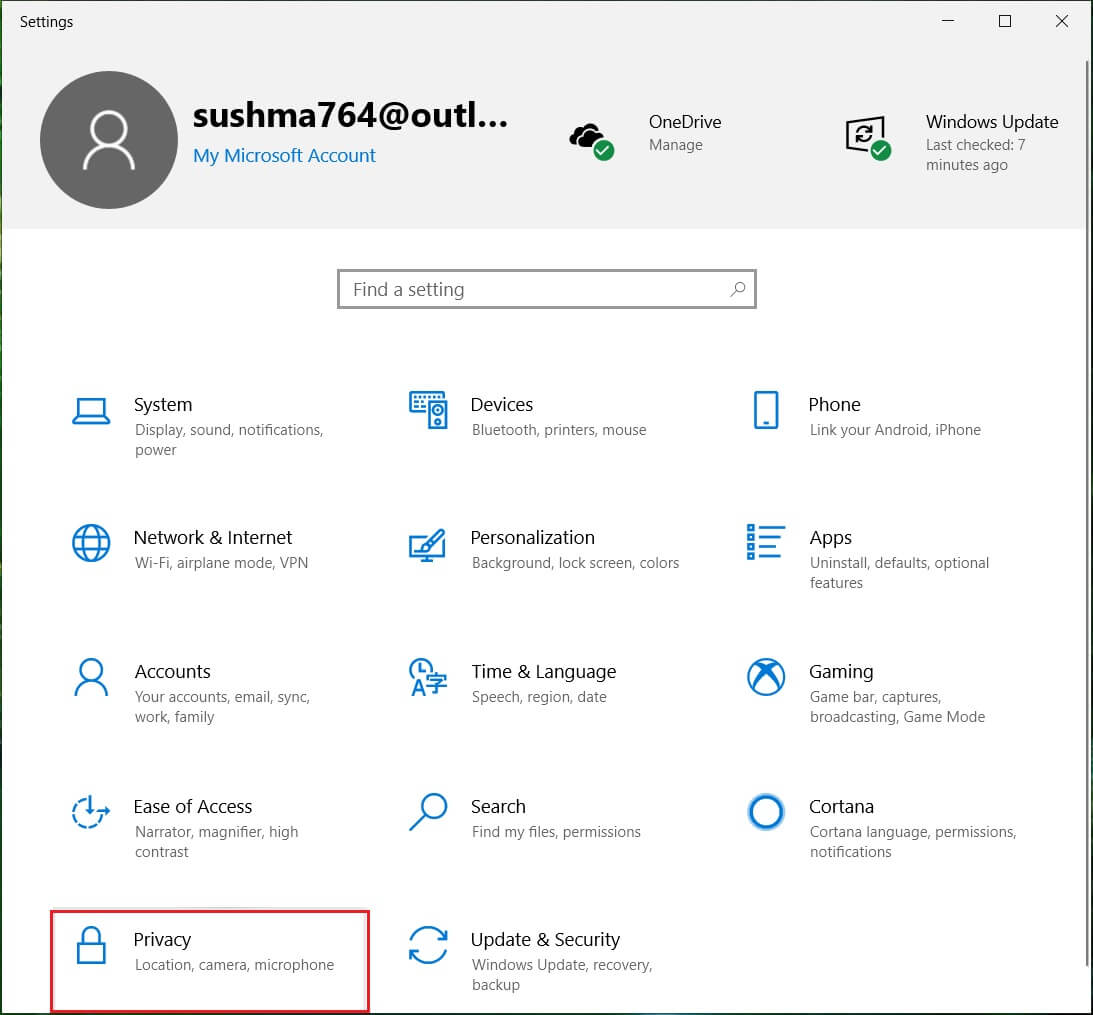
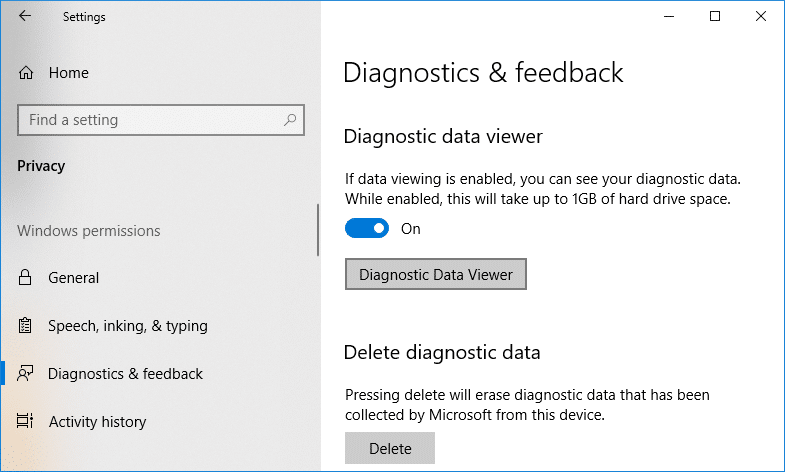
2. Now, from the left-hand side menu, click on 진단 및 피드백.
3. From the right window pane scroll down to Diagnostic Data Viewer section.
4. Under Diagnostic Data Viewer make sure to turn ON or enable the toggle.
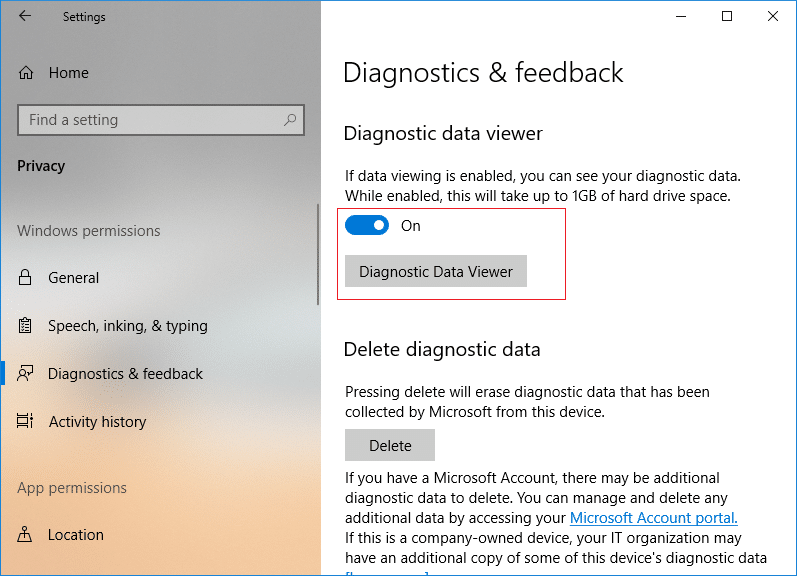
5. If you’re enabling the Diagnostic Data Viewer Tool, you need to click on Diagnostic Data Viewer button, which will then take you to the Microsoft Store to click on “돈을 받아가세요” to download and install Diagnostic Data Viewer app.

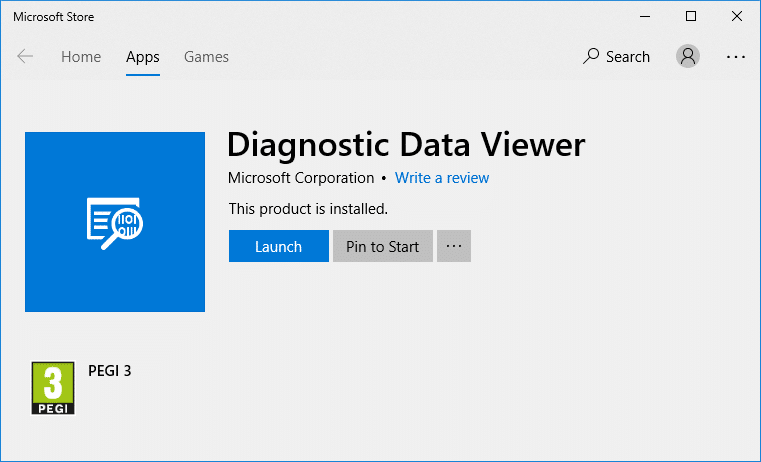
6. Once the app is installed, click on “실행” to open the Diagnostic Data Viewer app.
7. Close everything, and you can restart your PC.
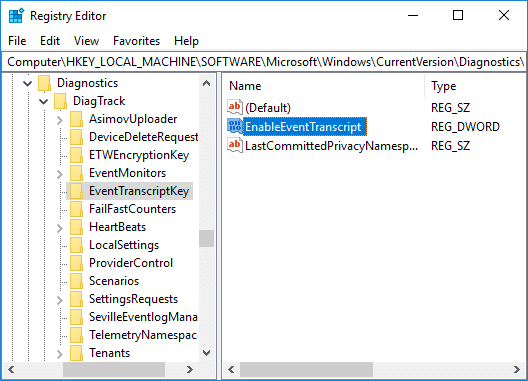
Method 2: Enable or Disable Diagnostic Data Viewer in Registry Editor
1. Windows 키 + R을 누른 다음 입력 regedit를 Enter 키를 눌러 레지스트리 편집기를 엽니다.

2. 다음 레지스트리 키로 이동합니다.
HKEY_LOCAL_MACHINESOFTWAREMicrosoftWindowsCurrentVersionDiagnosticsDiagTrackEventTranscriptKey
3. 이제 마우스 오른쪽 버튼을 클릭하세요. 이벤트 전사 키 그 다음에 새로 만들기 > DWORD(32비트) 값.
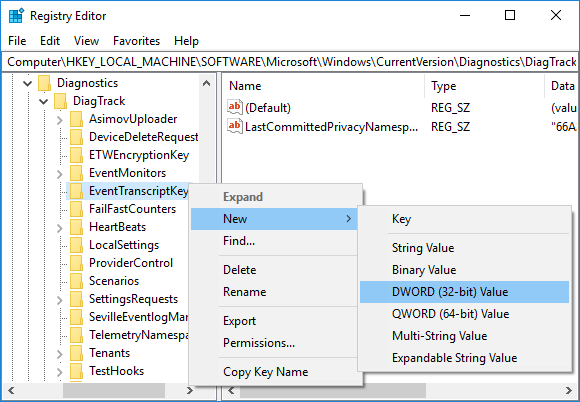
4. Name this newly created DWORD as 이벤트 스크립트 활성화 Enter를 누르십시오.
5. Double-click on EnableEventTranscript DWORD to change its value according to:
0 = Disable Diagnostic Data Viewer Tool
1 = Enable Diagnostic Data Viewer Tool
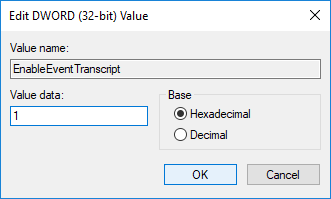
6.Once you changed the DWORD value, click OK and close registry editor.
7. Finally, Restart your PC to save changes.
또한 읽기 : Quest Diagnostics는 워크인을 지원합니까?
How to View your Diagnostics Events
1. Windows 키 + I를 눌러 엽니다. 설정 다음을 클릭하십시오 개인 정보 보호 아이콘.
2. 왼쪽 메뉴에서 진단 및 피드백 그때 가능 the toggle for Diagnostic Data Viewer and then click on Diagnostic Data Viewer button.
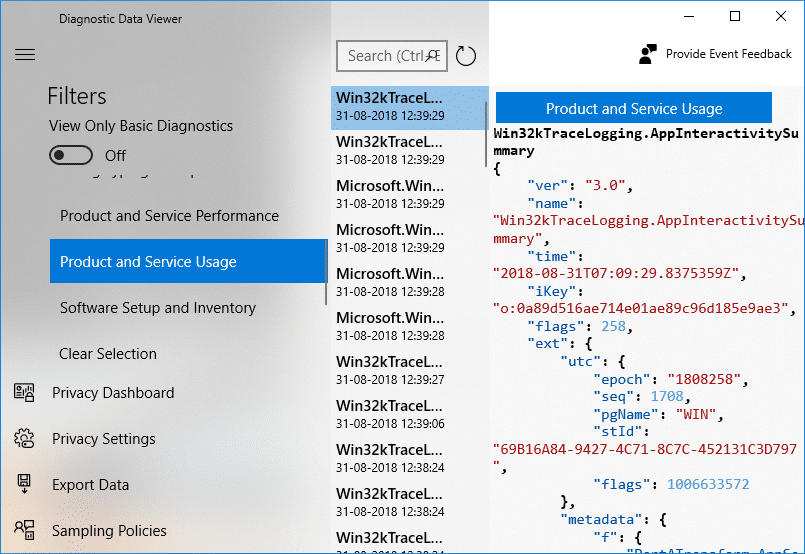
3. Once the app opens, from the left column, you can review your diagnostic events. Once you select a particular event than in the right window, you will see the detailed event view, showing you the exact data uploaded to Microsoft.
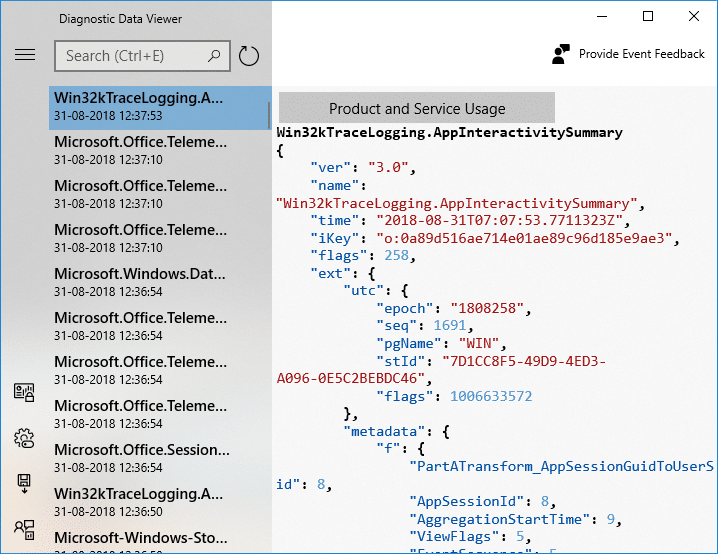
4. You can also search for a particular diagnostic event data using the search box at the top of the screen.
5. Now click on the three parallel lines (Menu button) which will open the detailed Menu from where you can select particular filters or categories, which define how Microsoft uses the events.
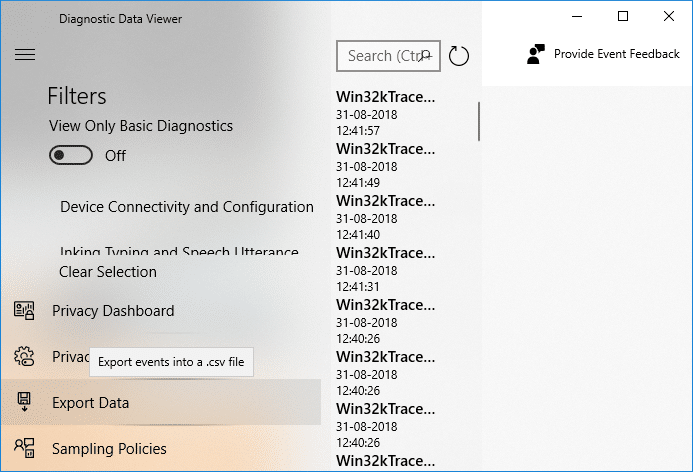
6. If you need to Export data from the Diagnostic Data Viewer app again click on the menu button, then select Export Data.
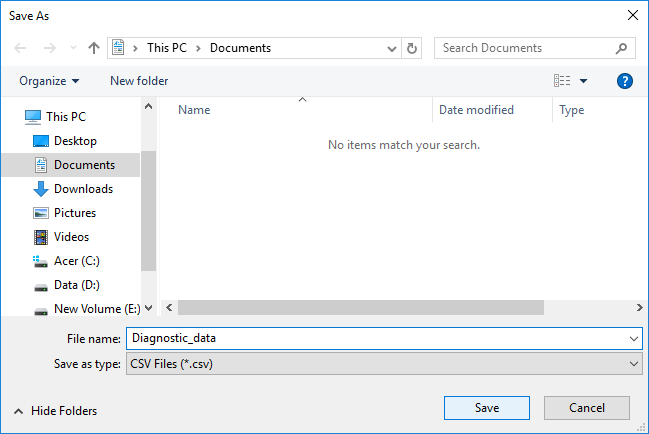
7. 다음 것, you need to specify a path where you want to save the file and give the file a name. To save the file, you need to click on the Save button.
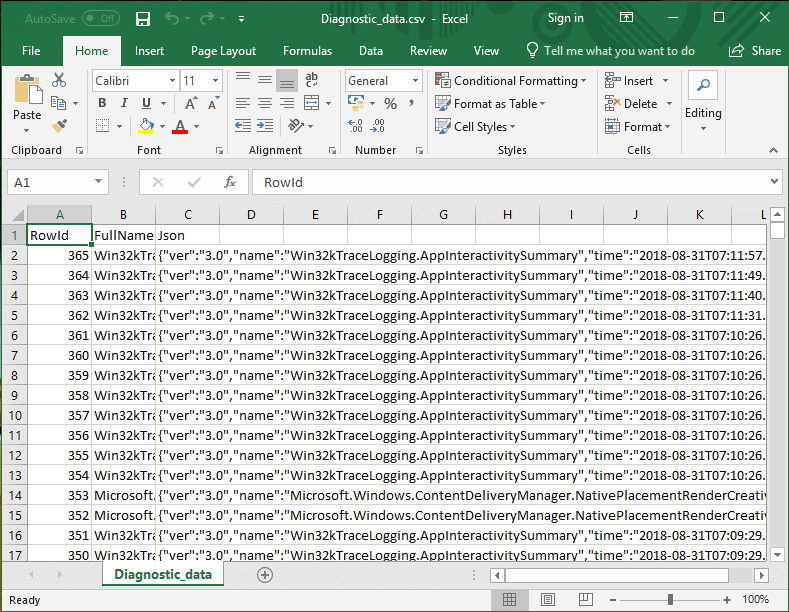
8. Once done, the diagnostic data will be exported to a CSV file to your specified location, which can then be used on any other device to analyze the data further.
권장 사항 :
그것이 당신이 성공적으로 배운 것입니다. How to Enable or Disable Diagnostic Data Viewer in Windows 10 그러나 이 튜토리얼과 관련하여 여전히 질문이 있는 경우 의견 섹션에서 자유롭게 질문하십시오.