Windows 10에서 재생 장치로 Skype 오류 수정

Skype is one of the most famous Video Calling services in the world; Skype was one of the first apps to provide video call services to users. Over the years Skype has raised in popularity, the application has also added new features to help provide a more interactive to better user experience. Skype sometimes can run into various errors; one of such errors is a Skype error with playback device on Windows 10; this error can cause audio errors with the Skype program. Skype playback error is a common error that Windows 10 users often have while using the application. In this guide, we will discuss reasons and methods for Skype error playback device.
How to Fix Skype Error with Playback Device on Windows 10
여러 가지 이유가 있을 수 있습니다. Skype: error with playback device on Windows 10; some of the common reasons for this error are listed below.
- Mostly this error is associated with Application bugs and errors
- System speaker errors can also cause the playback device error
- Improper speaker settings on your computer can also cause this error on your computer
- Outdated or corrupted audio drivers on your computer can also cause this error
The following guide will discuss methods to resolve Skype error with playback device on windows 10.
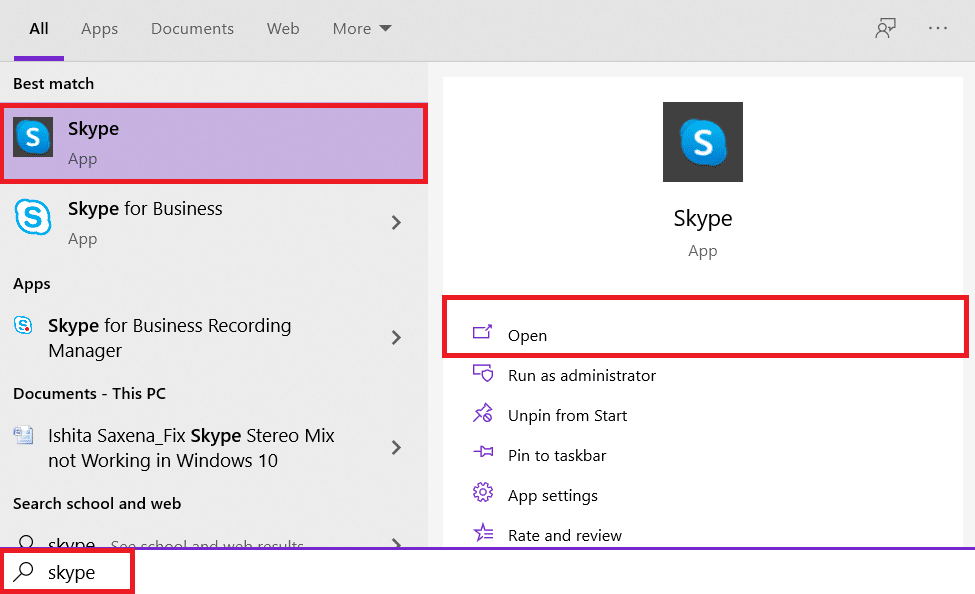
Method 1: Relaunch Skype
Generally Skype error with playback device on Windows 10 is associated with minor bugs and lags with the Skype app; you can easily resolve this error by closing and relaunching the Skype app. Many users found that closing and relaunching the app resolved the issue.
Method 2: Enable Speakers
It is also possible that Skype error with playback device on Windows 10 was caused by the system speakers, to resolve the issues with system Speakers, you can try to enable and disable the speakers.
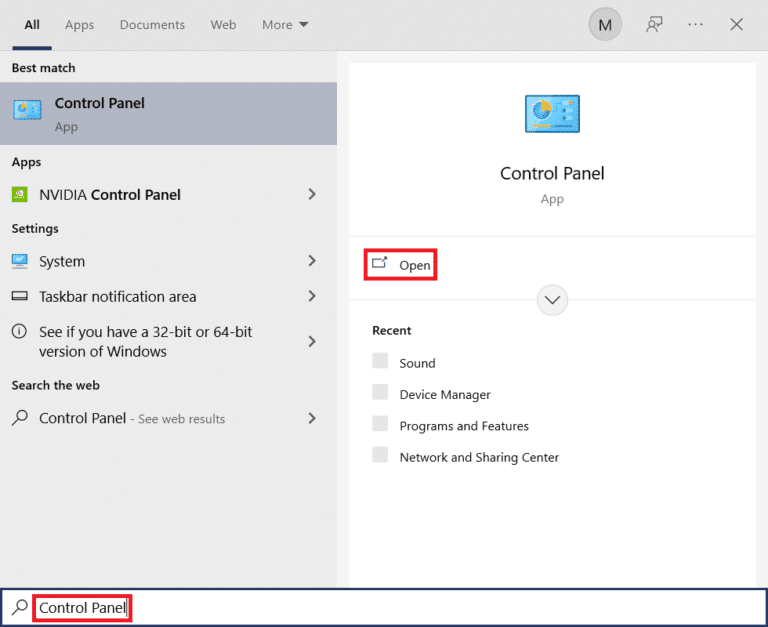
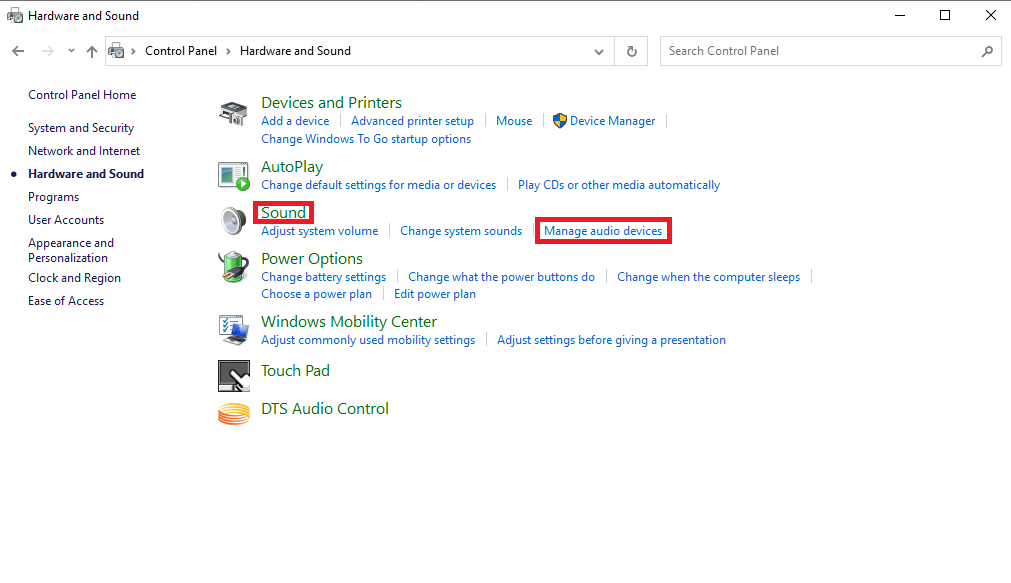
1. 누르세요 Windows 키입력 제어판, 다음을 클릭하십시오. 엽니다.
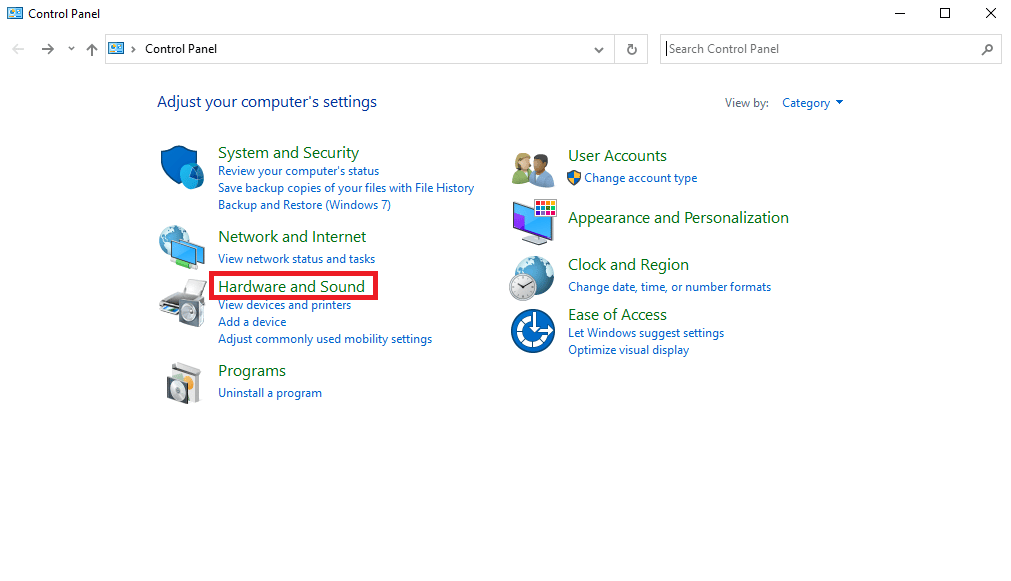
2. 세트 보기 기준 > 카테고리, 다음을 클릭하십시오. 하드웨어 및 소리 환경.
3. 아래에 소리 옵션을 클릭하세요. 오디오 장치 관리.
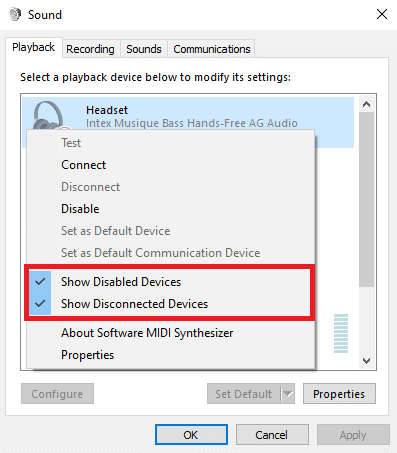
4. Right-click anywhere on the 소리 window and check the following options:
- 비활성화 된 장치 표시
- 연결 해제 된 장치 표시
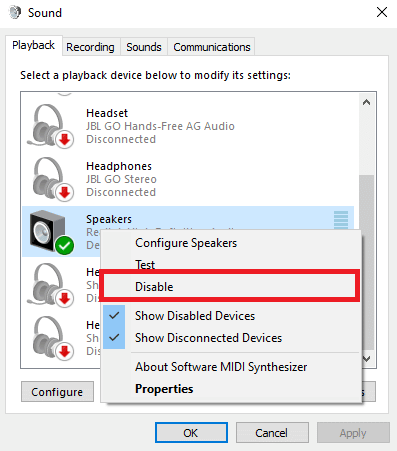
5. Now, Right-click on the 스피커 클릭 사용 안 함.
6. 이제 Speaker 다시 클릭하십시오. 사용.
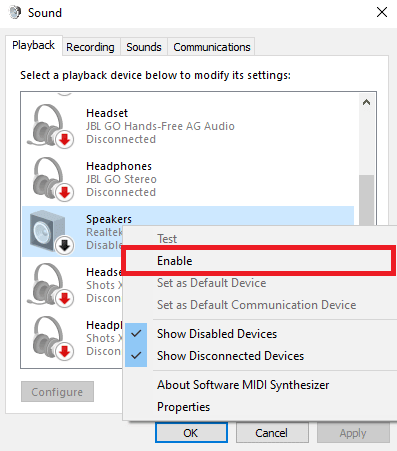
7. 을 클릭 신청 그리고 OK 을 클릭하여 변경 사항을 저장합니다.
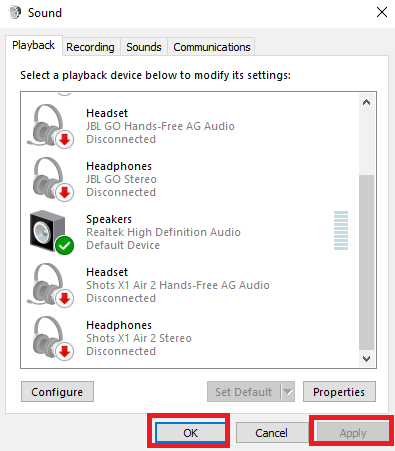
Enabling and disabling the speakers should often resolve Skype playback error, if not and you still have issues with Skype error playback device, move on to the next method.
또한 읽기 : Windows 10에서 Skype 스테레오 믹스가 작동하지 않는 문제 수정
Method 3: Run Playing Audio Troubleshooter
To resolve various Skype error playback device issues on your computer, such as Skype playback error you can try to run the Windows 10 in-built audio troubleshooter. Follow these steps to run audio troubleshooter.
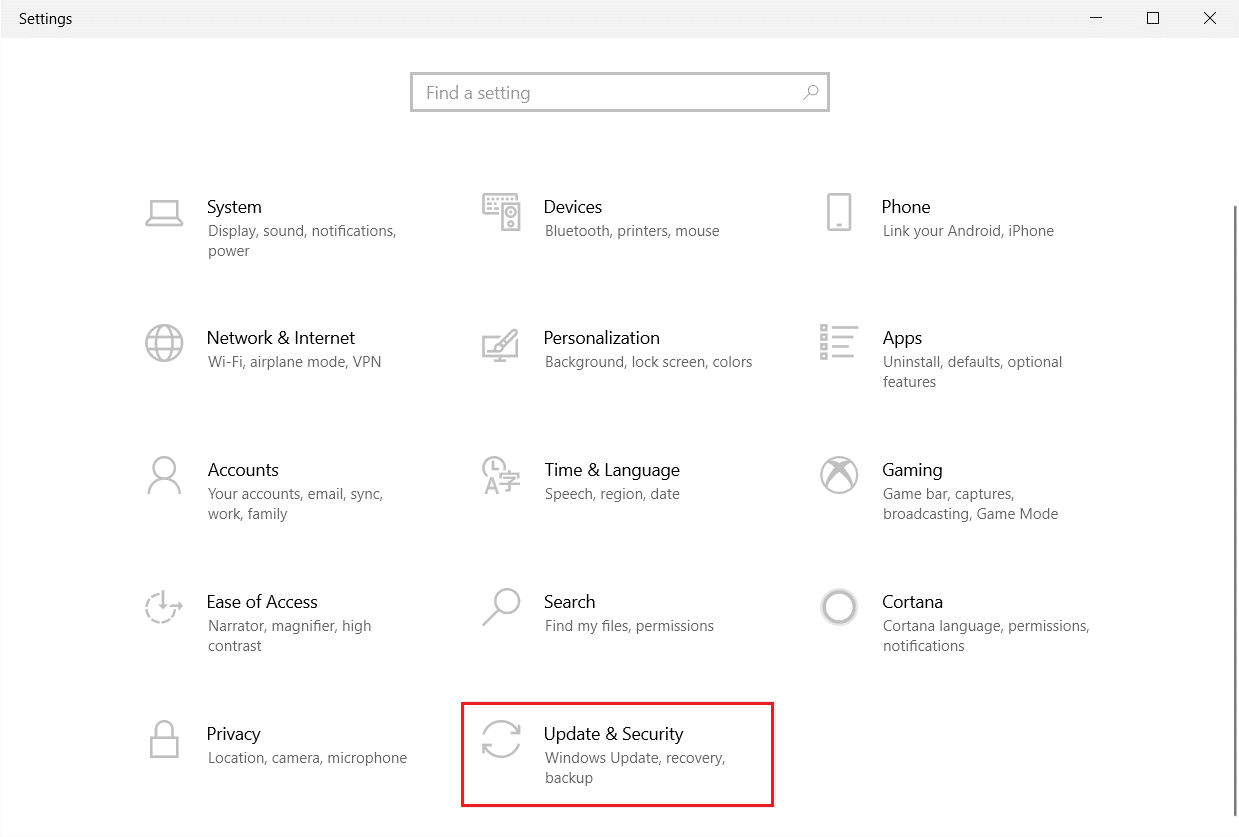
1. 프레스 Windows + I 키 동시에 출시 설정.
2. 클릭 업데이트 및 보안 타일, 그림과 같이.
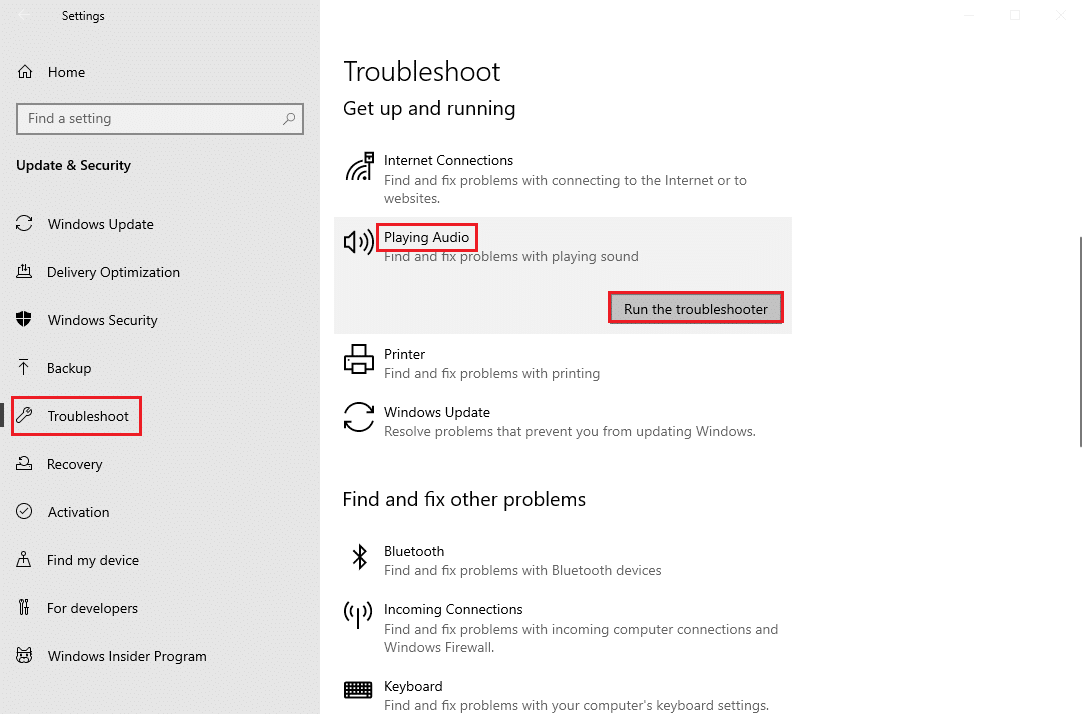
3. 이동 문제 해결 왼쪽 창의 메뉴.
4. 선택 오디오 재생 문제 해결 도구를 클릭하고 문제 해결사 실행 아래에 강조 표시된 버튼이 표시됩니다.
5. Wait for the troubleshooter to detect and fix the problem. Once the process is complete, click 이 픽스 적용 및 다시 시작 당신의 PC.
Method 4: Re-enable Audio Device
The issue can also be caused by your system audio devices, in this case, you can try to resolve the issue by temporarily disabling the audio device on your computer and enabling it again.
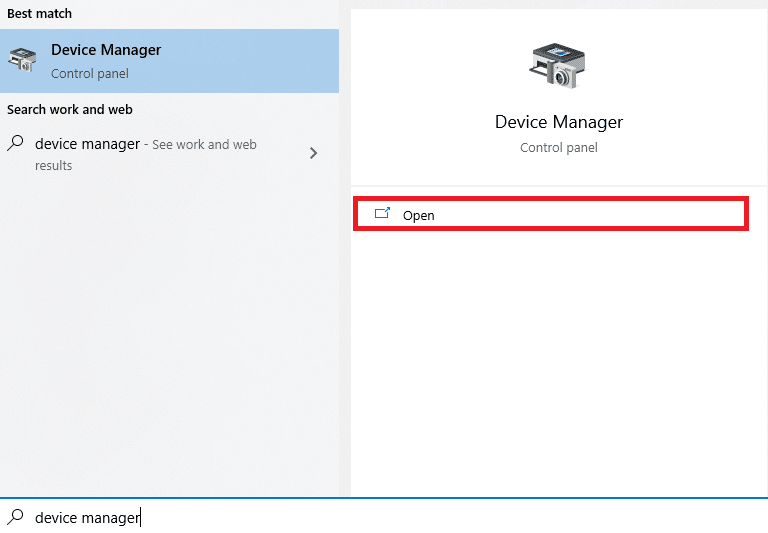
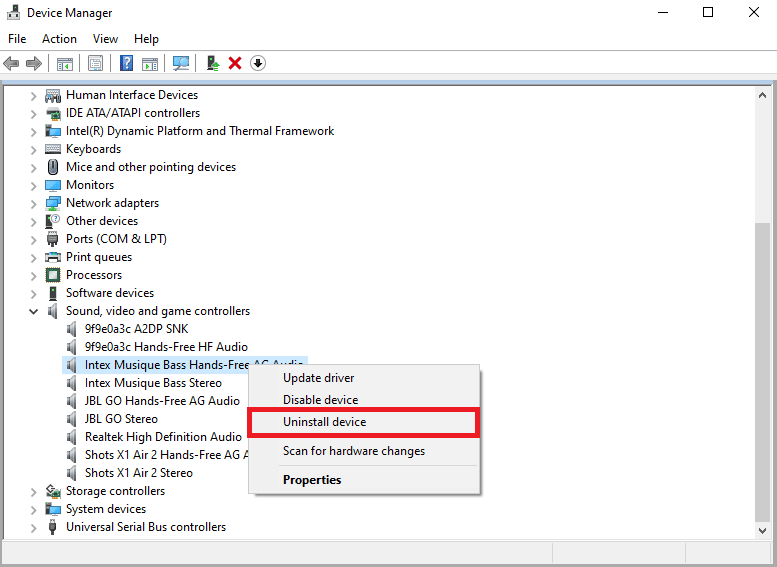
1. 히트 Windows 키입력 장치 관리자,를 클릭하십시오 엽니다.
2. Locate and expand the 사운드, 비디오 및 게임 컨트롤러.
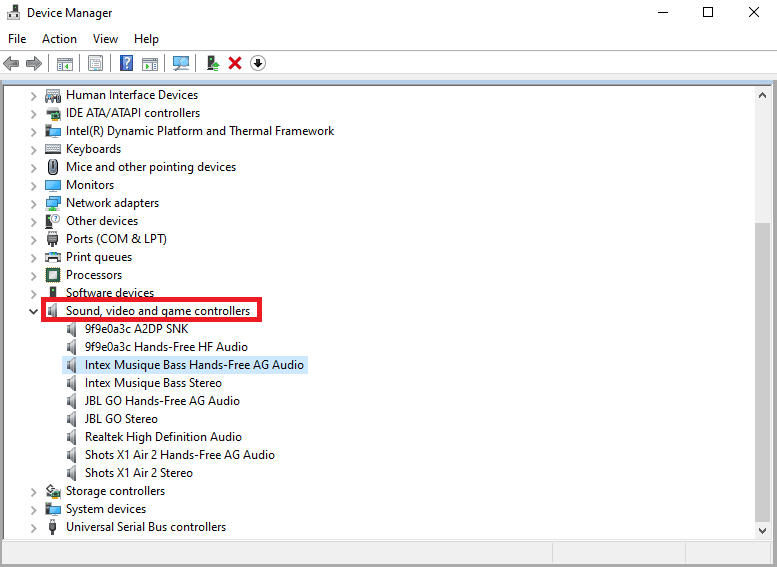
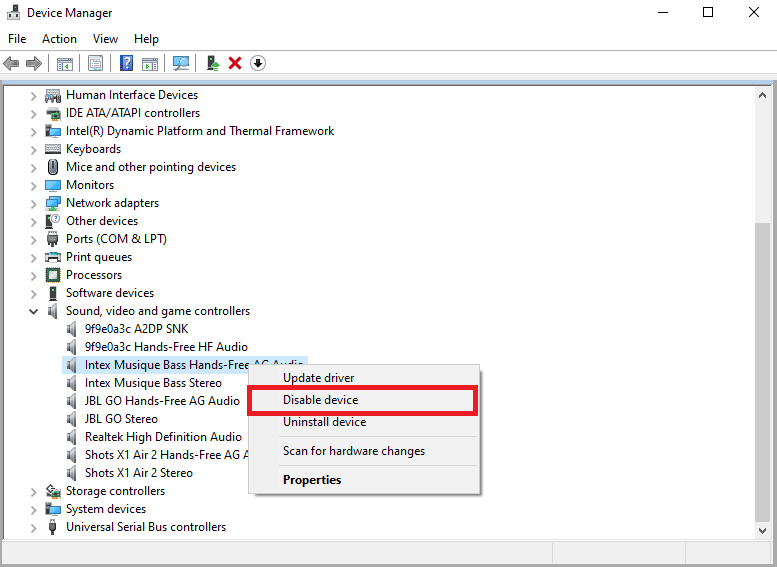
3. 그런 다음 마우스 오른쪽 버튼을 클릭합니다. 오디오 드라이버 다음을 클릭합니다 기기 사용 중지.
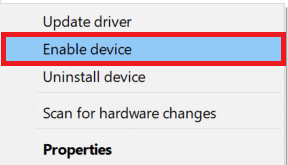
4. Again, right-click on the driver and select 기기 사용 설정 option after a few minutes.
또한 읽기 : Skype 채팅 텍스트 효과를 사용하는 방법
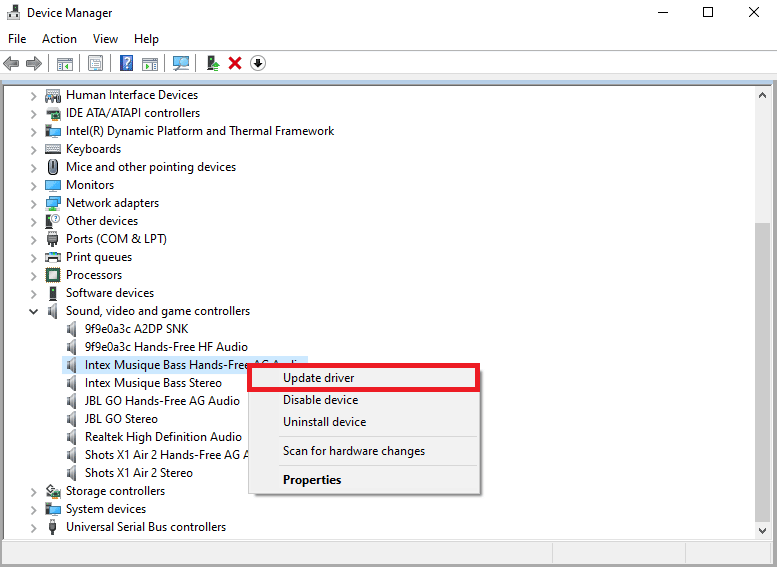
방법 5 : 오디오 드라이버 업데이트
Corrupted and outdated drivers are one of the main reasons for Skype error with playback device on Windows 10. To resolve the issues caused by audio drivers, you can try to update audio drivers read our guide on how to update device drivers on Windows 10.
방법 6 : 오디오 드라이버 재설치
If Skype error with playback device on Windows 10 with the computer audio device continues. You can try to delete it entirely. Many users found that deleting their audio device also effectively resolved the issue. Follow our guide to uninstall and reinstall drivers on Windows 10.
Method 7: Reset Skype Configuration Files
If the previous methods don’t resolve Skype error with playback device on Windows 10 issues, you can also try to reset the Skype configuration files to resolve most of the Skype issues
1. If you are running the Skype application 닫아.
2. 프레스 윈도우 + R 키 오픈을 위해 함께 달리기 대화 상자.
3. 유형 % AppData의 % 그리고 Enter 키 열 수 Appdata 폴더.
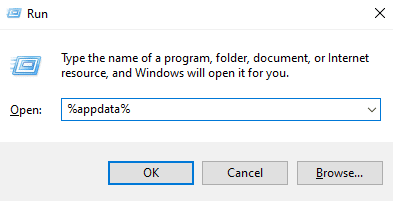
4. 해당 항목을 찾아 마우스 오른쪽 버튼으로 클릭하세요. Skype: 폴더에 있습니다.
5. 을 클릭 이름 바꾸기 and rename the folder as Skype.old.
6. 이제 다시 시작 스카이프 앱.
In most cases, this method was helpful to many users, if it doesn’t work, move on to the next method.
또한 읽기 : How to Send Skype Code with Proper Format
방법 8: Skype 앱 다시 설치
If none of the previous method work, and you continue to have Skype error playback device issues, try reinstalling the Skype app.
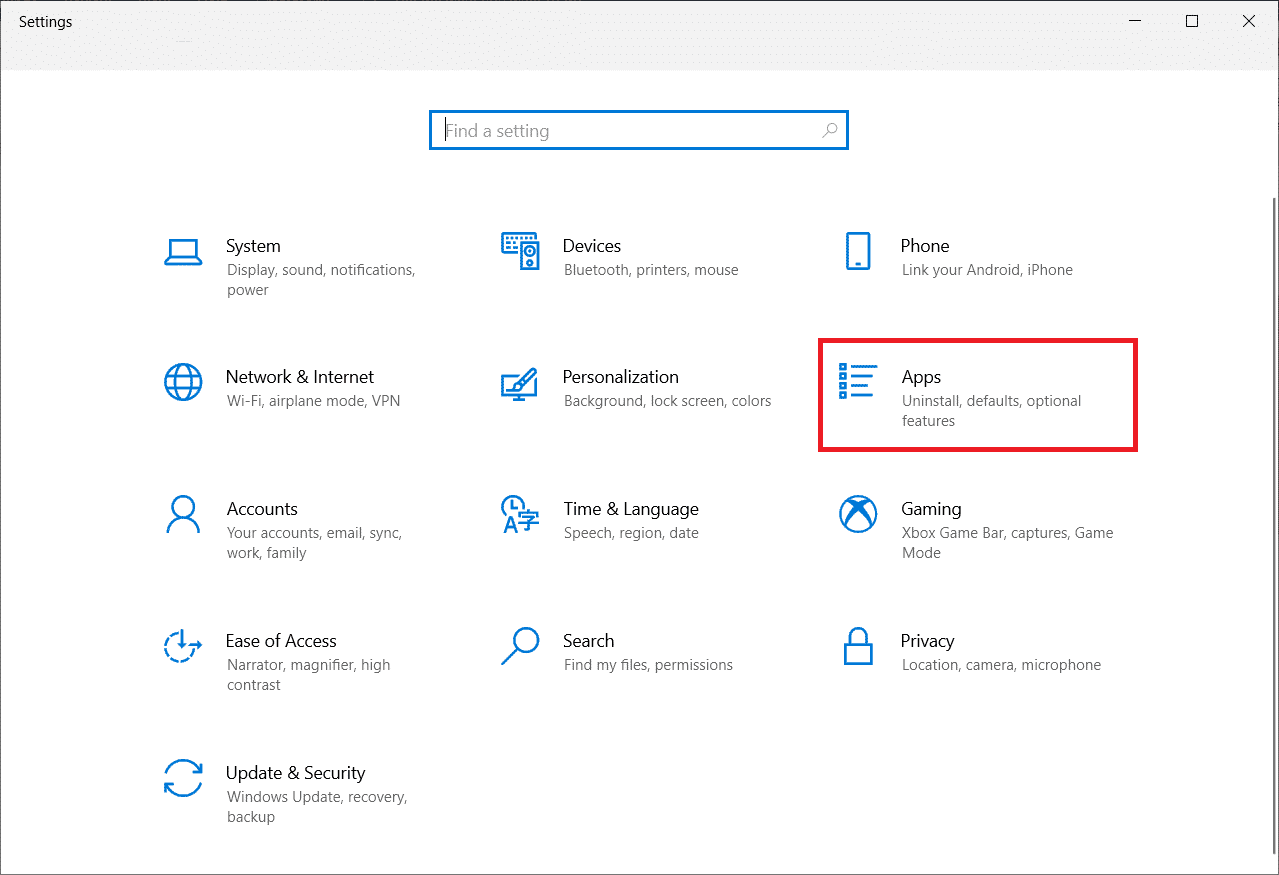
1. 길게 누르기 Windows + I 키 함께 열기 위해 Windows 설정.
2. 이제 클릭하십시오. 앱.
3. 이제 검색하고 클릭하세요. Skype: 선택 제거 옵션을 선택합니다.

4. 이제 프롬프트가 있으면 확인하고 PC를 재부팅 once you have uninstalled Skype.
5. Once the uninstallation process has finished, go to start menu search and type 마이크로 소프트 스토어 및 열 수 그것.
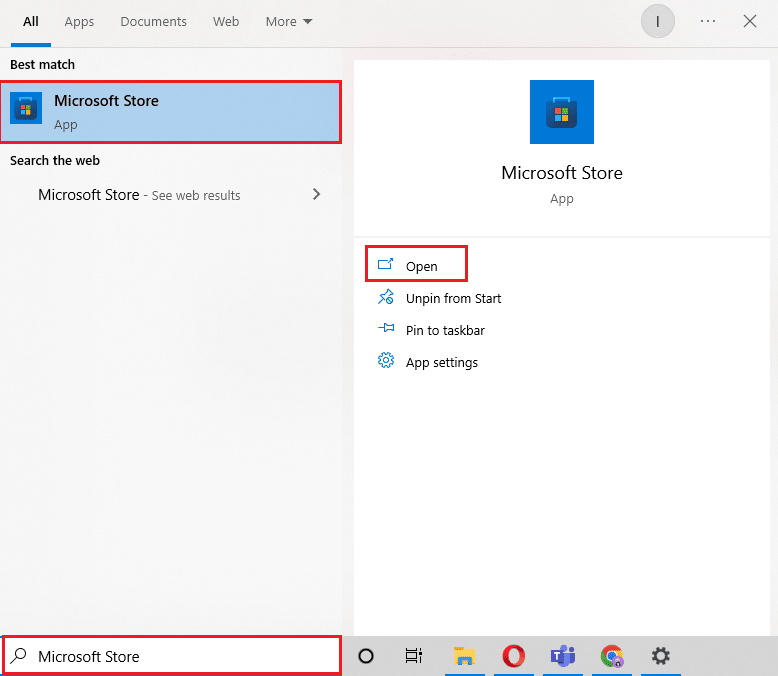
6. Microsoft Store에서 다음을 검색하세요. Skype:.
7. 클릭 돈을 받아가세요 button to install the Skype app on your device.
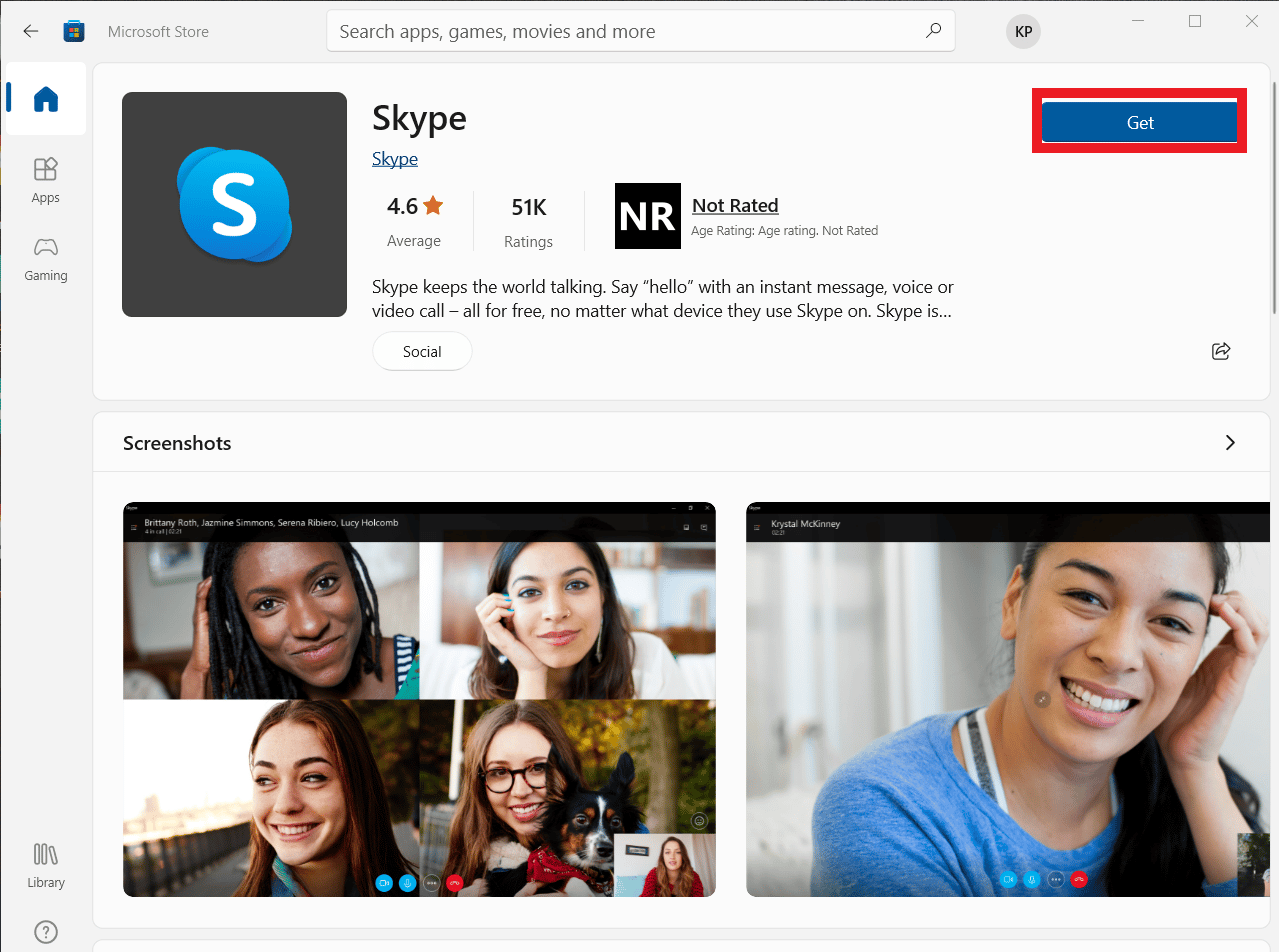
8. 설치가 완료될 때까지 기다리십시오.
Reinstalling the Skype app should resolve Skype playback error on your computer.
자주 묻는 질문
Q1. Why can’t I connect audio on Skype?
Ans. Audio errors are common Skype errors. This issue occurs due to failure in device audio drives and Skype settings.
Q2. How to resolve Skype audio issues?
Ans. There can be multiple methods to resolve the Skype audio errors, such as updating system drivers및 changing the Skype configuration settings.
Q3. What are audio issues on Skype?
Ans. Skype can run into many audio issues such as microphone issues, and speaker issues. These errors can lead to interruptions during video calls.
권장 사항 :
이 가이드가 귀하에게 도움이 되었고 문제를 해결할 수 있었기를 바랍니다. Skype error with playback device on Windows 10. Let us know which method worked for you. If you have any suggestions or queries, please let us know in the comment section.