Windows 10에서 시작 메뉴가 작동하지 않는 문제 수정

If you have recently updated or upgraded to Windows 10, then chances are your Start Menu may not work properly, making it impossible for users to navigate around Windows 10. Users are experiencing various issues with Start Menu such as Start Menu does not open, Start Button is not working, or Start Menu freezes etc. If your Start Menu isn’t working then don’t worry as today we will see a way to fix this issue.
This exact cause is different for different users because each user has a different system configuration and environment. But the problem can be related to anything like corrupted user account or drivers, damaged system files, etc. So without wasting any time, let’s see How to Fix Start Menu Not Working in Windows 10 with the help of the below-listed tutorial.
혹시라도 문제가 생길 경우를 대비해 복원 지점을 만들어 두시기 바랍니다.
To run Command Prompt as an administrator, press Ctrl + Shift + Esc를 to open Task Manager. Then click on 입양 부모로서의 귀하의 적합성을 결정하기 위해 미국 이민국에 그 다음에 새 작업 실행. 유형 cmd.exe를 그리고 체크표시 “관리자 권한으로이 작업 생성” then click OK. Similarly, to open PowerShell, type powershell.exe and again checkmark the above field then hit Enter.

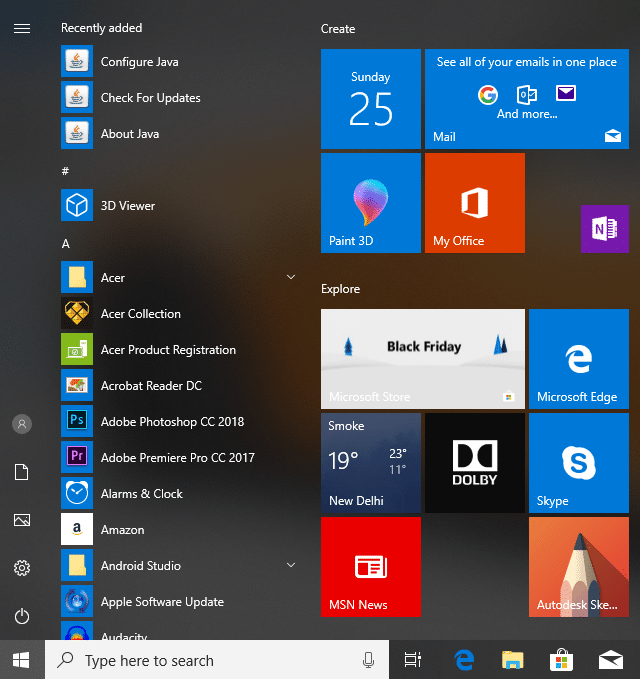
방법 1 : Windows 탐색기를 다시 시작하십시오.
1. 프레스 Ctrl + Shift + Esc를 키를 함께 사용하여 작업 관리자.
2. 찾기 Explorer.exe에서 목록에서 마우스 오른쪽 버튼을 클릭하고 작업 끝내기를 선택합니다.

3. 이제 탐색기가 닫히고 다시 실행됩니다. 파일 > 새 작업 실행을 클릭합니다.
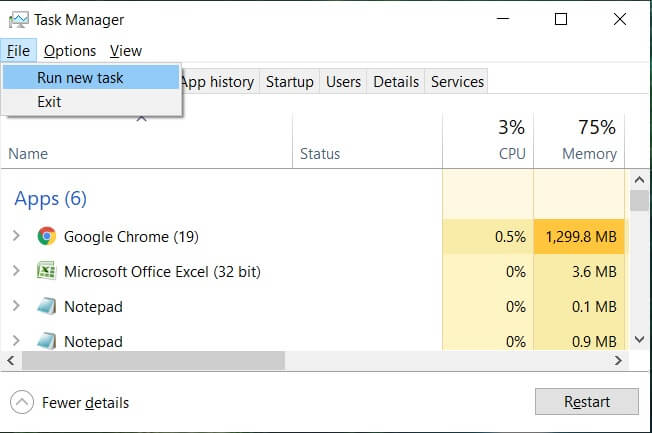
4. 유형 Explorer.exe에서 확인을 눌러 탐색기를 다시 시작하세요.

5. Exit Task Manager and see if you’re able to Fix Start Menu Not Working in Windows 10.
6. If you’re still facing the issue, then log out from your account and re-login.
7. 프레스 Ctrl+Shift+Del key at the same time and click on Signout.
8. Type in your password to login to Windows and see if you’re able to fix the issue.
Method 2: Create a new local administrator account
Microsoft 계정으로 로그인한 경우 먼저 다음 방법으로 해당 계정에 대한 링크를 제거하세요.
1. Windows 키 + R을 누르고 “ms- 설정 :”(따옴표 제외)를 입력하고 Enter 키를 누르세요.
2. 선택 계정 > 대신 로컬 계정으로 로그인하세요.
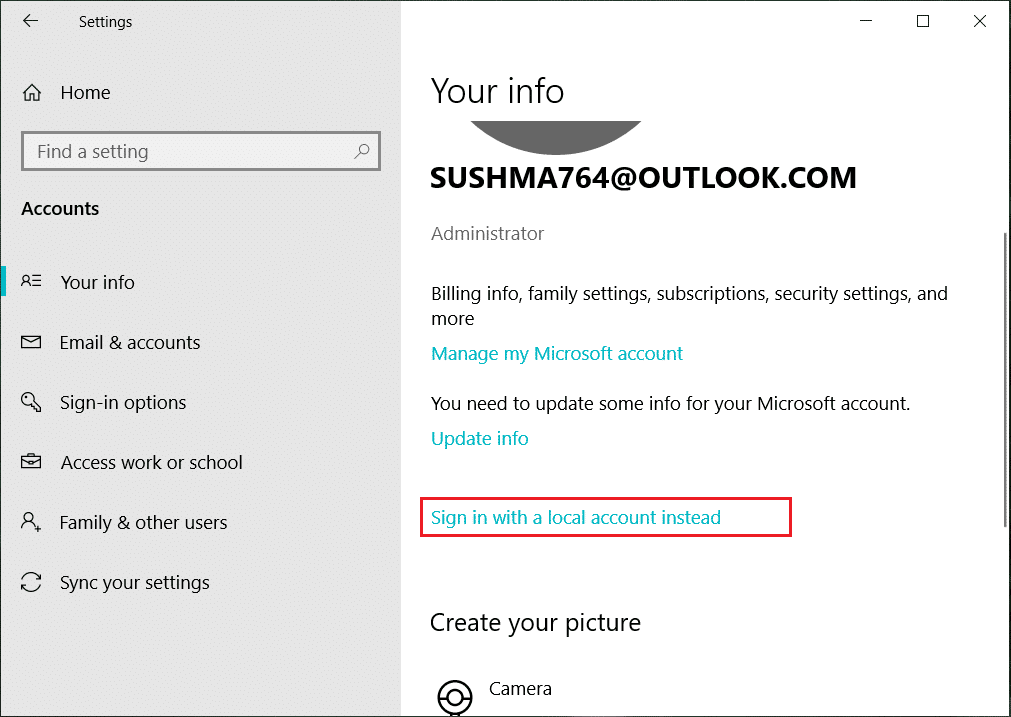
3. 입력 Microsoft 계정 암호 클릭 다음.
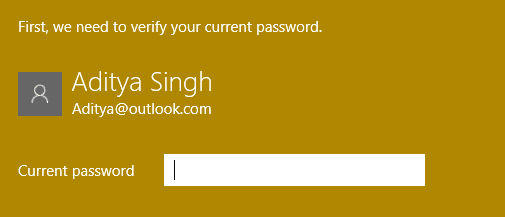
4. 선택 새 계정 이름과 비밀번호을 선택한 다음 마침 및 로그아웃을 선택합니다.
#1. Create the new administrator account:
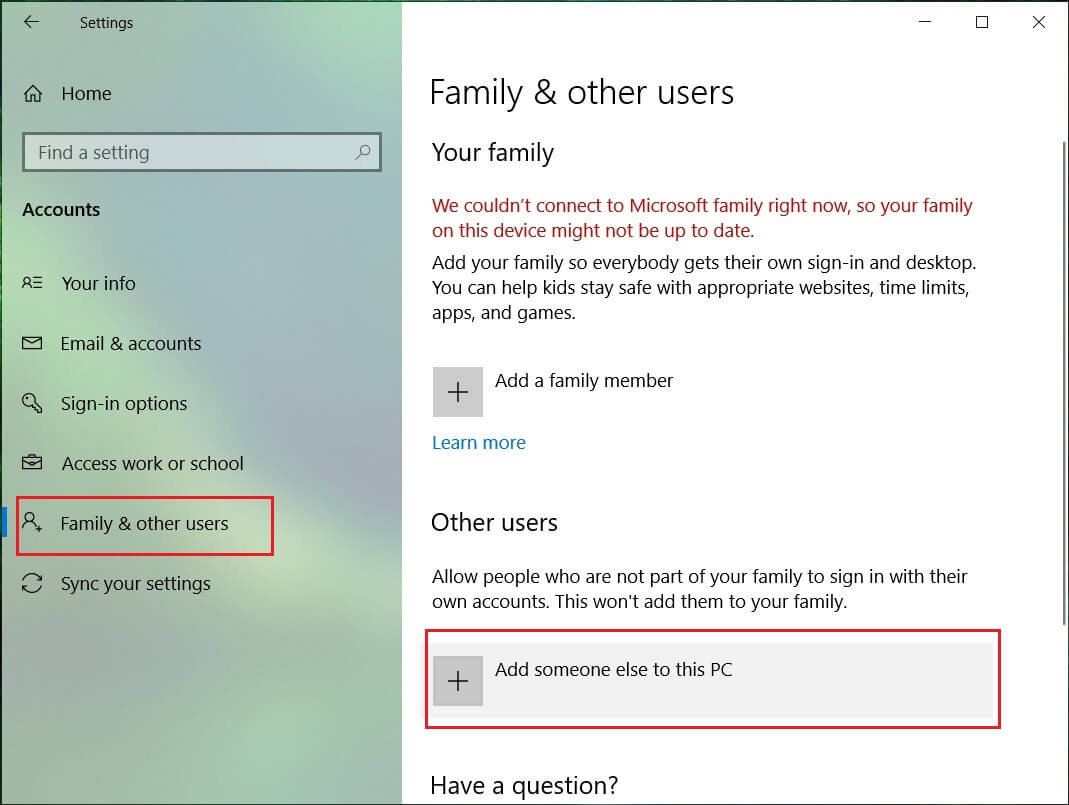
1. Windows 키 + I를 눌러 설정을 열고 다음을 클릭합니다. 계정.
2. 그런 다음 다음으로 이동합니다. 가족 및 다른 사람들.
3. 다른 사람 아래에서 “이 PC에 다른 사람을 추가하세요."
4. 다음으로, user and a password then select Next.
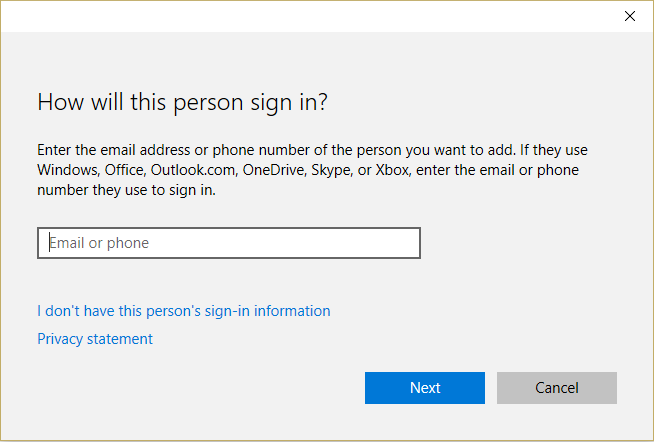
5. 세트 사용자 이름과 비밀번호다음 선택 다음> 마침.
#2. Next, make the new account an administrator account:
1. 다시 오픈 Windows 설정 그리고 클릭 계정.

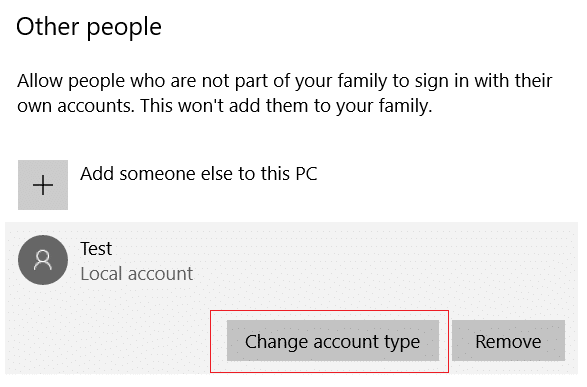
2. 로 이동 가족 및 기타 사용자 탭.
3. 다른 사람들이 방금 만든 계정을 선택한 다음 계정 유형을 변경하십시오.
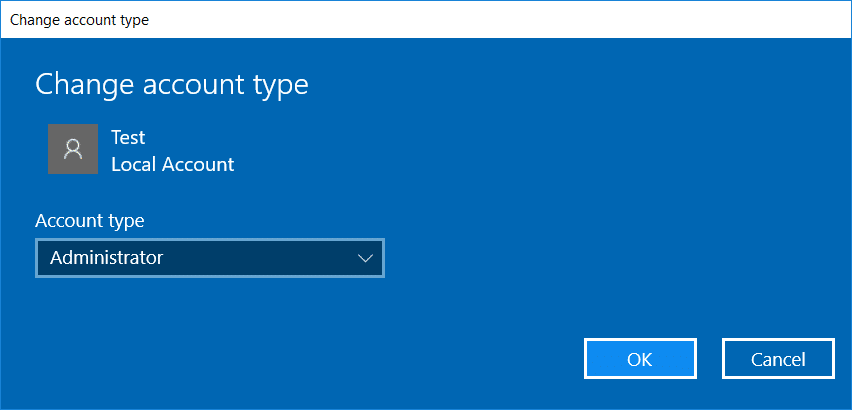
4. 계정 유형에서 다음을 선택합니다. 관리자 다음을 클릭하십시오. 좋아요.
#3. If the issue persists try deleting the old administrator account:
1. 다시 Windows 설정으로 이동한 다음 계정 > 가족 및 기타 사용자.
2. 다른 사용자 아래에서 이전 관리자 계정을 선택하고 없애다, 선택 계정 및 데이터를 삭제합니다.

3. If you were using a Microsoft account to sign in before, you can associate it with the new administrator by following the next step.
4. 에 Windows 설정 > 계정, 대신 Microsoft 계정으로 로그인을 선택하고 계정 정보를 입력하세요.
마지막으로, 당신은 할 수 있어야합니다 Windows 10에서 시작 메뉴가 작동하지 않는 문제 수정 as this step seems to fix the issue in most cases.
If you continue to experience Start Menu’s issue, it’s recommended to download and run Start Menu Troubleshooter.
1. Download and run Start Menu Troubleshooter.
2. 두 번 클릭하십시오. 다운로드 한 파일 다음을 클릭합니다 다음.
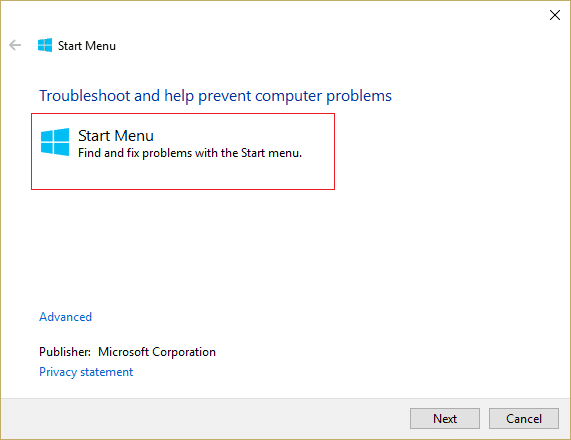
3. Let it finds and automatically Fixes Start Menu Not Working in Windows 10.
Method 4: Run System File Checker (SFC) and Check Disk
1. 명령 프롬프트를 엽니다. 사용자는 다음을 검색하여 이 단계를 수행할 수 있습니다. 'cmd' Enter를 누르십시오.

2. 이제 cmd에 다음을 입력하고 Enter 키를 누릅니다.
sfc /scannow sfc /scannow /offbootdir=c: /offwindir=c:windows

3. 위의 프로세스가 완료될 때까지 기다렸다가 완료되면 PC를 다시 시작합니다.
4. 다음으로 CHKDSK를 실행하세요. 디스크 검사 유틸리티(CHKDSK)를 사용하여 파일 시스템 오류를 수정하세요.
5. 위의 프로세스가 완료되면 PC를 다시 재부팅하여 변경 사항을 저장합니다.
Method 5: Force Cortana to Rebuild Settings
Open Command Prompt with administrative rights then type the following one by one and hit Enter after each command:
CD /d "%LOCALAPPDATA%PackagesMicrosoft.Windows.Cortana_cw5n1h2txyewy"
Taskkill /F /IM SearchUI.exe
RD /S /Q Settings
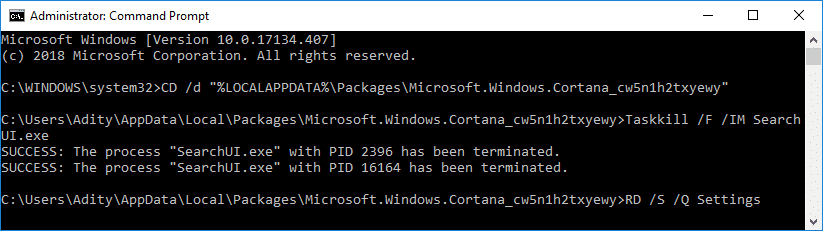
This will force Cortana to rebuild the settings and will Fix Start Menu and Cortana Not Working in Windows 10.
If the issue is still not resolved, follow this guide to fix any issues related to Cortana.
Method 6: Re-Register Windows App
1. 유형 PowerShell을 Windows Search에서 PowerShell을 마우스 오른쪽 버튼으로 클릭하고 관리자 권한으로 실행을 클릭합니다.
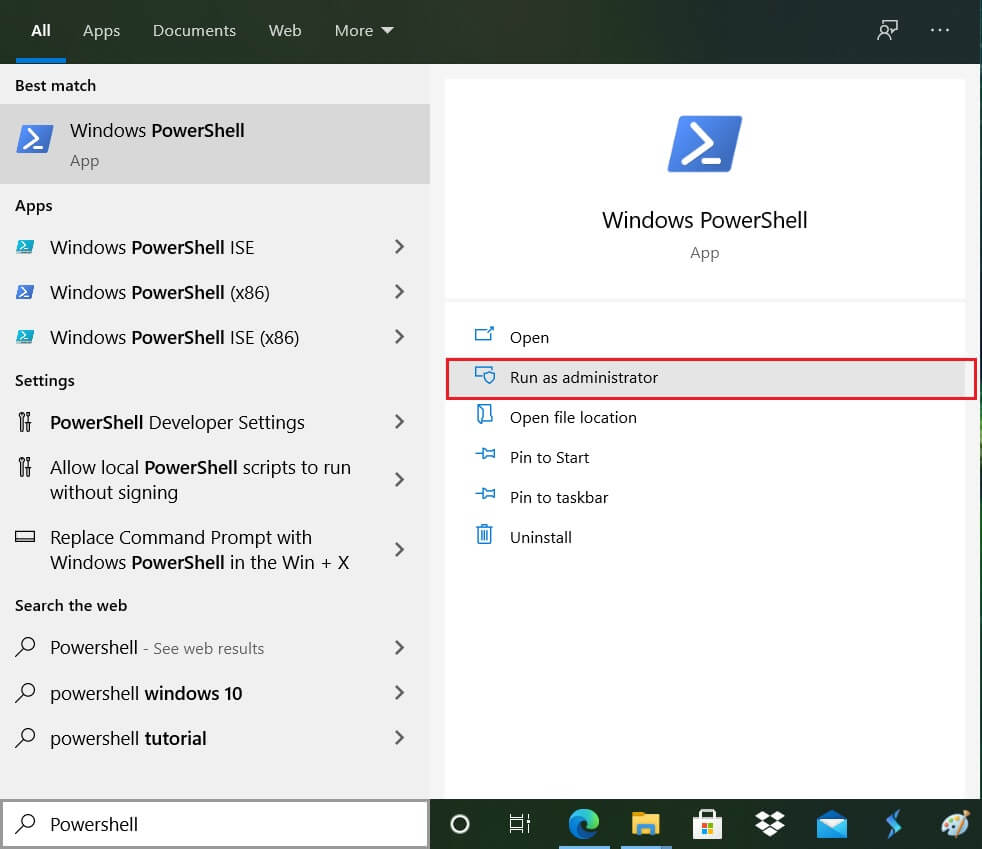
2. 이제 PowerShell 창에 다음 명령을 입력합니다.
Get-AppXPackage -AllUsers | Foreach {Add-AppxPackage -DisableDevelopmentMode -Resister "$ ($ _. InstallLocation) AppXManifest.xml"}

3. Powershell이 위 명령을 실행할 때까지 기다리고 발생할 수 있는 몇 가지 오류를 무시하십시오.
4. PC를 재부팅하여 변경 사항을 저장합니다.
방법 7: 레지스트리 수정
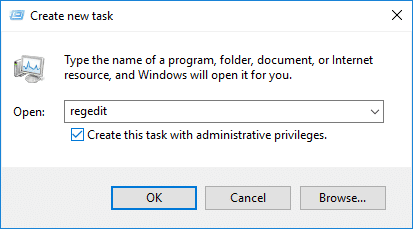
1. Press Ctrl + Shift + Esc to open Task Manager then click on 입양 부모로서의 귀하의 적합성을 결정하기 위해 미국 이민국에 선택 새 작업을 실행합니다.
2. 유형 regedit를 그리고 체크표시 “관리자 권한으로이 작업 생성” then click OK.
3. Now navigate to the following registry key in the Registry Editor:
ComputerHKEY_LOCAL_MACHINESYSTEMCurrentControlSetServicesWpnUserService
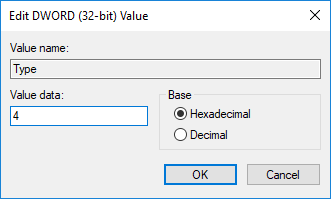
4. 꼭 선택하세요 WpnUserService then in the right window double-click on the DWORD를 시작하세요.
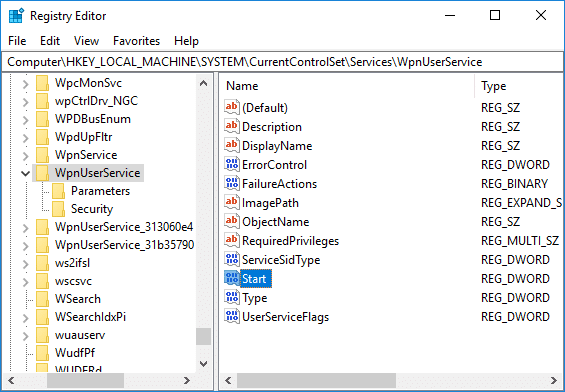
5. Change its value to 4 then click 좋아요.
6. PC를 재부팅하여 변경 사항을 저장합니다.
방법 8: Windows 10 새로 고침 또는 재설정
참고 : If you can’t access your PC, restart your PC a few times until you start 자동 수리. 그런 다음 다음으로 이동하십시오. 문제 해결 > 이 PC 초기화 > 모든 항목 제거.
1. Windows 키 + I를 눌러 설정을 연 다음 업데이트 및 보안 아이콘.
![]()
2. 왼쪽 메뉴에서 다음을 선택하세요. 복구.
3. 아래에 이 PC 재설정, “를 클릭하세요.시작하기"버튼을 누릅니다.

4. 다음 옵션을 선택하세요. 내 파일 보관.

5. For the next step, you might be asked to insert Windows 10 installation media, so ensure you have it ready.
6. Now, select your Windows version and click Windows가 설치된 드라이브에만 > remove my files.

5. 클릭 리셋 버튼.
6. 화면의 지시에 따라 재설정을 완료합니다.
권장 사항 :
그게 당신이 성공적으로 Windows 10에서 시작 메뉴가 작동하지 않는 문제 수정 하지만 이 튜토리얼에 관해 여전히 궁금한 점이 있으면 댓글 섹션에서 자유롭게 질문하세요.