VirtualBox 인터페이스에 활성 연결 오류 메시지가 있는 문제 수정

You might face VirtualBox interface has active connections error message when you are shutting down your PC especially when you use the old version of the BlueStacks emulator. This is an issue encountered by the users when they try to shut down their computer but can’t. In addition, configuring the Task Manager priorities of the BlueStacks can also cause the error VirtualBox interface BlueStacks. If you are also the one who is facing the same error, this guide will help you fix the same with effective troubleshooting steps.
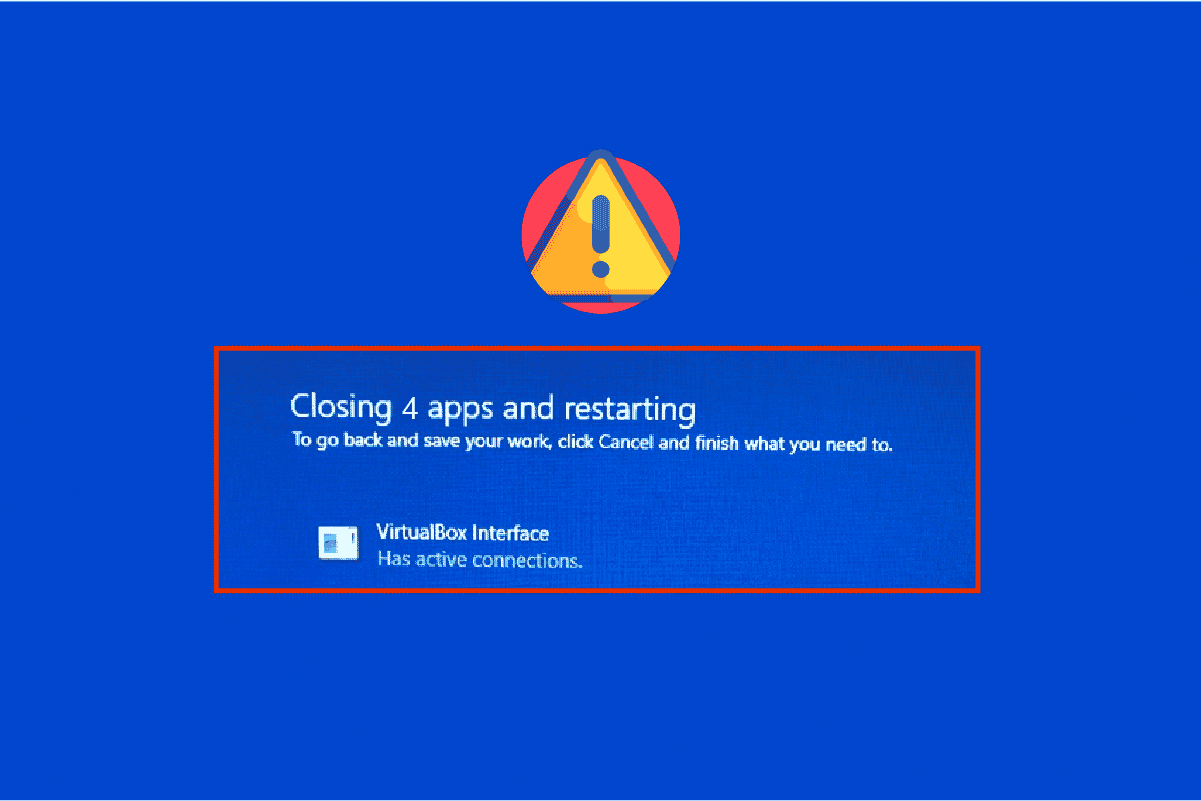
How to Fix VirtualBox Interface Has Active Connections Error Message
There are so many factors that contribute to VirtualBox interface unable to insert Virtual optical disk or Windows 10 shut down issue. A few of them are listed below.
- Conflicting background processes running on your PC.
- Startup tasks are interfering with BlueStacks.
- Inappropriate priorities are set to BlueStacks.
- Outdated emulator, Operating system, .NET framework, drivers on PC.
- Few apps are conflicting with BlueStacks.
- Conflicting user account and Windows version.
We have compiled a list of effective troubleshooting methods that will help you fix VirtualBox interface BlueStacks shutdown issue on your Windows 10 computer.
참고 : Before getting into the solution, make sure that you have not enabled the Notifications Mode in the BlueStacks.
Method 1: Close BlueStack Processes
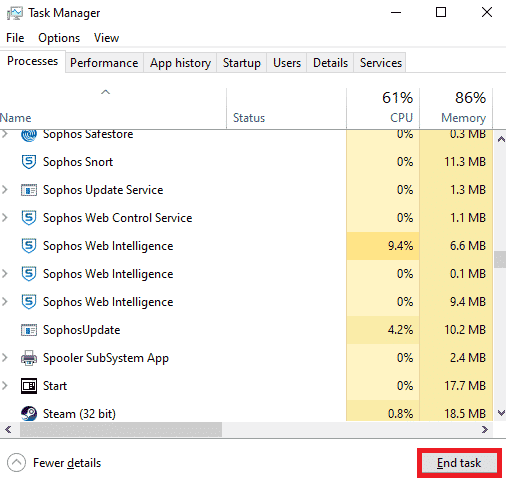
If BlueStacks is operating on your PC (even in the background), it makes your PC difficult in shutting down. In this case, exit the BlueStacks emulator completely with the use of Task Manager by closing all the processes which are related to BlueStacks forcefully by following our guide How to End Task in Windows 10. This will help you solve this issue. You can also create a batch file in achieving the functionality, follow the steps below to do it.
Now, shut down your PC and check if the error VirtualBox interface Windows 10 shut down issue is fixed. If the error is fixed, you could make a batch file and then click the batch file before shutting down your PC.
참고 : This function can also be done by creating a shutdown task either in a Group Policy Editor or in the Task Scheduler.
Now follow the given steps;
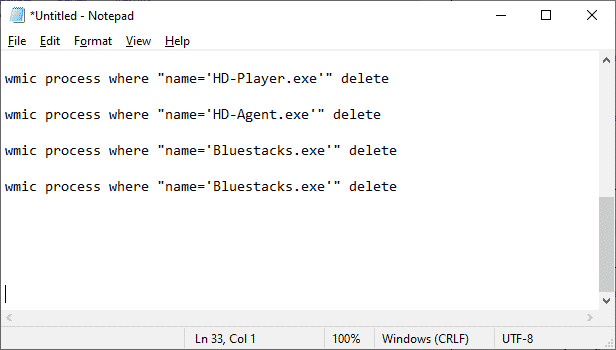
1. Copy the following text in a text editor for instance 메모장.
wmic process where "name="HD-Player.exe"" delete
wmic process where "name="HD-Agent.exe"" delete
wmic process where "name="Bluestacks.exe"" delete
wmic process where "name="Bluestacks.exe"" delete
2. 그런 다음 입양 부모로서의 귀하의 적합성을 결정하기 위해 미국 이민국에 그런 다음 다른 이름으로 저장.
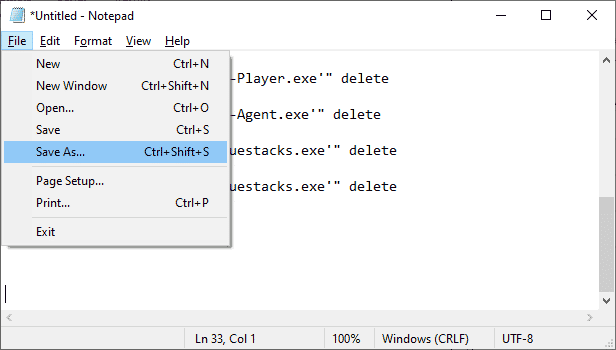
3. Now, change the dropdown menu of 다른 이름으로 저장 에 모든 파일, then save the file with the name having a CMD extension (example, Click it Before Shutting Down the Computer.cmd )
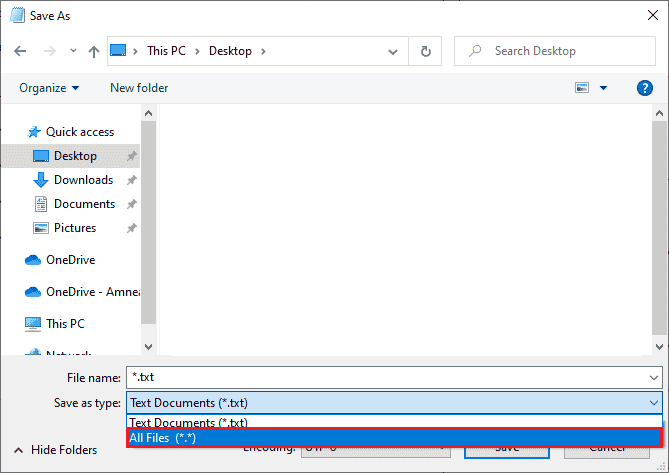
4. 클릭 입양 부모로서의 귀하의 적합성을 결정하기 위해 미국 이민국에 now and then shut down the computer and check if the VirtualBox interface has active connections error message is fixed.
Method 2: Disable Startup Processes
If the first method did not fix VirtualBox interface has active connections error message, you can try disabling all the startup processes with the Task Manager, and several users have suggested that this task has helped them a lot. To implement the method, follow our guide on 4 Ways to Disable Startup Programs in Windows 10.
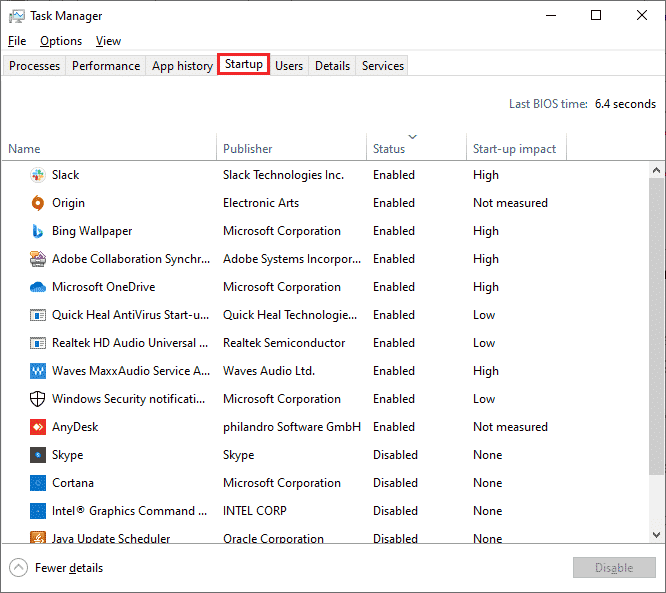
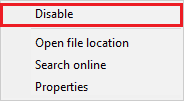
Click the start-up processes one by one and select 사용 안함.
When you are done disabling the tasks, restart your computer and check if the error VirtualBox interface error Windows 10 고쳐 졌어.
또한 읽기 : BlueStacks 엔진이 시작되지 않는 문제를 해결하는 5가지 방법
방법 3: 호환성 설정 수정
It is also possible that BlueStacks may not have enough security clearance to run on your PC. The security settings may be changed in the latest application update or Windows update. Follow the steps below to grant full control to BlueStacks.
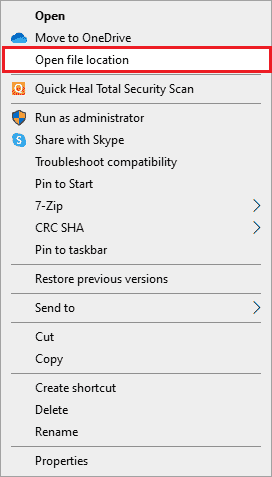
1. Right-click on the Desktop shortcut of 블루스 택스 선택하고 파일 위치 열기 in the option.
2. 해당 블루스택.exe file and right-click on it.
3. 선택 속성.
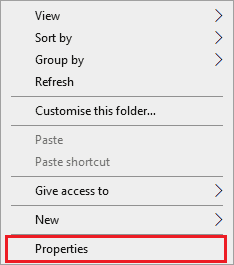
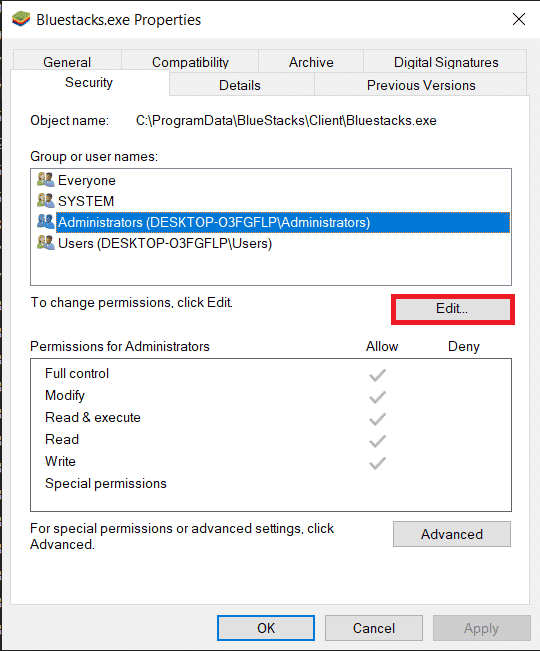
4. 이동 보안 tab of the Properties window and then click on the 편집 button which is next to To change permissions, click Edit.
5. At first, 사용자 이름을 선택하세요 from the list of users which are displayed under Group or user names, and under Permissions for everyone, check the box in the Allow column for Full control.
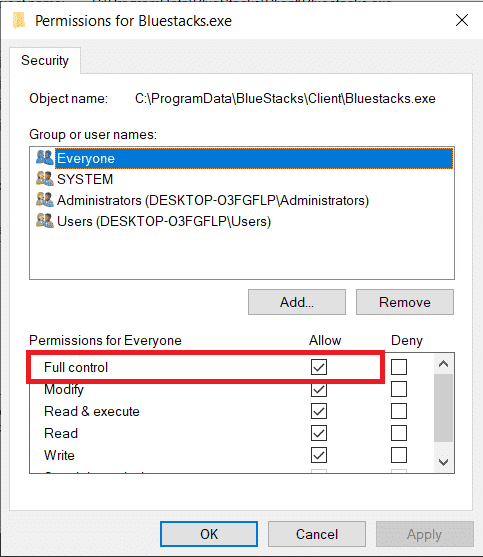
6. 을 클릭 신청 및 OK 을 클릭하여 변경 사항을 저장합니다.
Check if the issue VirtualBox interface BlueStacks shutdown is fixed. If the issue is not fixed yet, you can try running BlueStacks in compatibility mode in another Windows version if you are facing this issue after updating to a specific Windows version. Follow the steps below to do it.
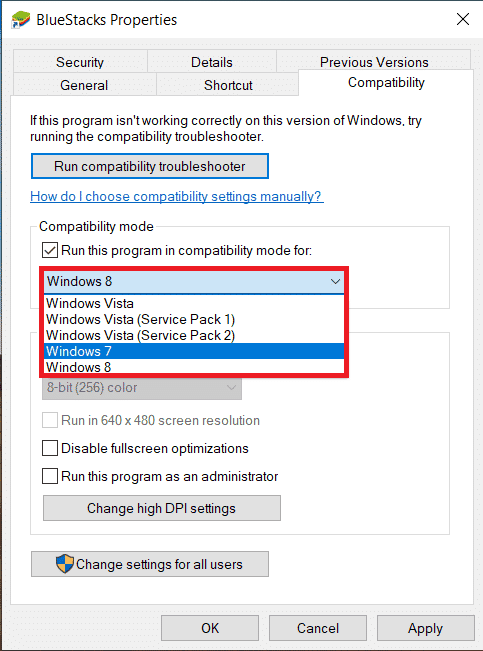
1. Right-click on the shortcut of 블루스 택스 지름길 아이콘을 선택한 다음 속성.
2.로 전환 호환성 탭을 클릭하십시오. 다음을 위해 호환성 모드에서이 프로그램을 실행하십시오. 상자.
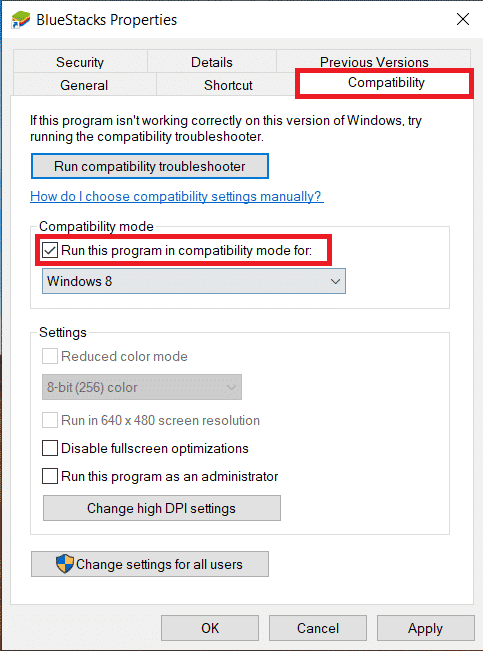
3. Select a Windows version that is appropriate to run Bluestacks in compatibility for and then click on 신청 다음에 오는 좋아요.
Method 4: Change Priorities of BlueStacks Processes
If the priorities of the BlueStacks processes are not set properly, you may face VirtualBox interface has active connections error message. If so, you can change the priorities of the BlueStacks processes in the Task Manager as instructed below.
참고 : Continue with great caution as changing the priorities of the processes carelessly may make your system unstable or extremely slow.
1. 누르세요 Ctrl 키 +Shift+Esc 키 함께 열기 위해 Task Manager.
2. 이제 세부 정보 tab and then right-click on HD-Player,exe.
3. 그런 다음 우선 순위를 설정 옵션을 선택한 다음 실시간.
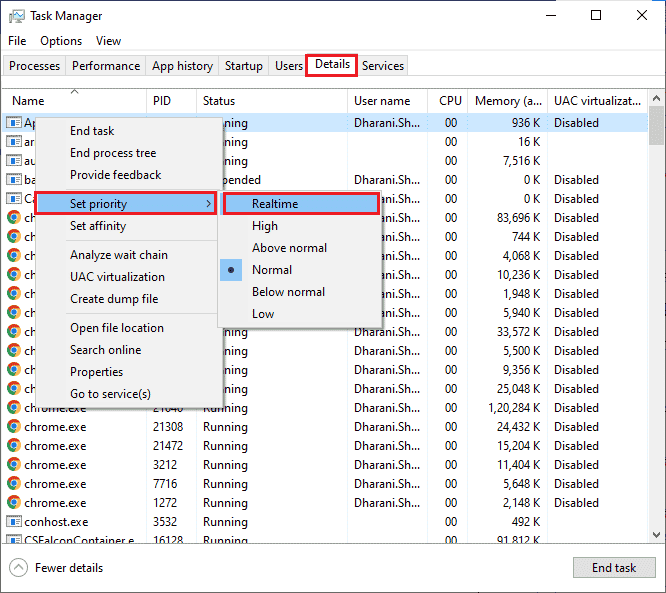
4. Now, set the priorities given below to the corresponding processes.
HD-Agent.exe        >> above normal
Bluestacks.exe      >> realtime
BstkSVC.exe          >> realtime
5. PC 재부팅 닫은 후 Task Manager and check if VirtualBox interface Windows 10 issue is solved.
6. If the issue is fixed, close all the open processes.
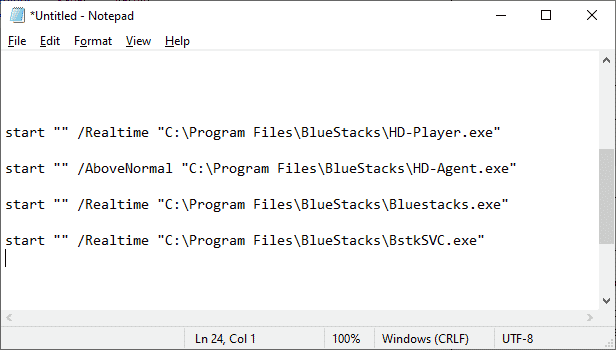
7. Now, open a text editor for instance Notepad, and then copy the following into it.
start "" /Realtime "C:Program FilesBlueStacksHD-Player.exe"
start "" /AboveNormal "C:Program FilesBlueStacksHD-Agent.exe"
start "" /Realtime "C:Program FilesBlueStacksBluestacks.exe"
start "" /Realtime "C:Program FilesBlueStacksBstkSVC.exe"
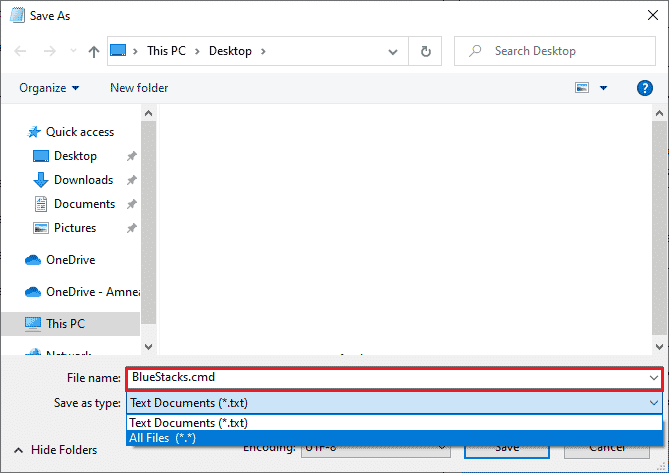
8. 이제 다른 이름으로 저장 인사말 입양 부모로서의 귀하의 적합성을 결정하기 위해 미국 이민국에 메뉴 막대.
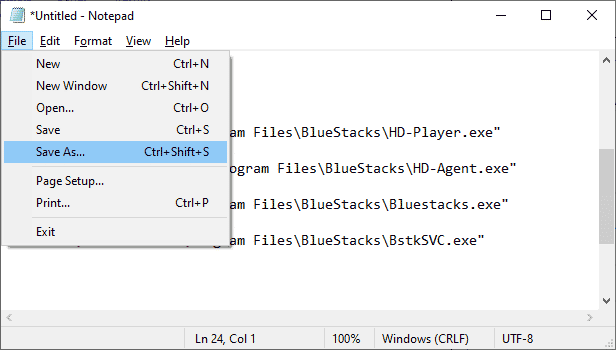
9. Now, change the dropdown menu of 다른 이름으로 저장 에 모든 파일, then save the file with the name having a CMD extension ( example, BlueStacks.cmd )
10. Launch the BlueStacks with the newly created command file and the issue will be fixed.
또한 읽기 : 15 Best Virtual Mailbox Free Service Providers
Method 5: Turn On Virtualization (If Applicable)
Bluestacks is a virtualizing application. Some chipsets of AMD and Intel include a virtualization technology that boosts the performance while virtualization software like Bluestacks is being used at the time. Such software runs more smoothly without any strain with the use of technology like this. Many users reported that turning on Virtualization is resolving VirtualBox interface BlueStacks shutdown issue. You have to check if this is available on your system as all computers are not equipped with this technology.
Follow the steps below to check if your computer (Intel system) supports Virtualization technology.
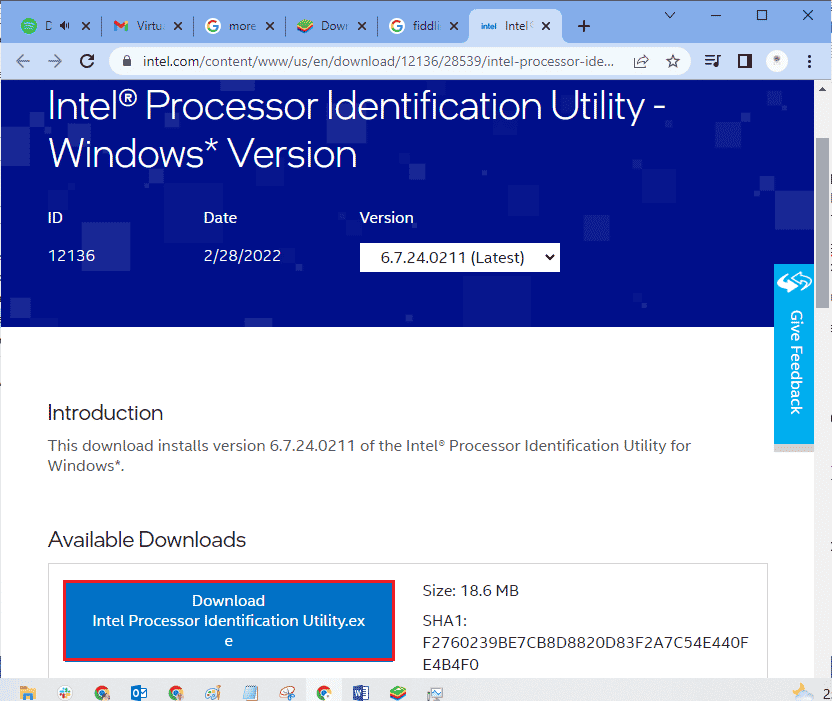
1. 다운로드 Processor Identification Utility of Intel by navigating to the 공식 사이트 클릭하여 다운로드 button which is on the left side.
2. Once downloaded the file, click the installation file from 내 다운로드 and follow the instructions to install Processor Identification Utility 귀하의 PC에.
3. 시작 신청 설치한 후.
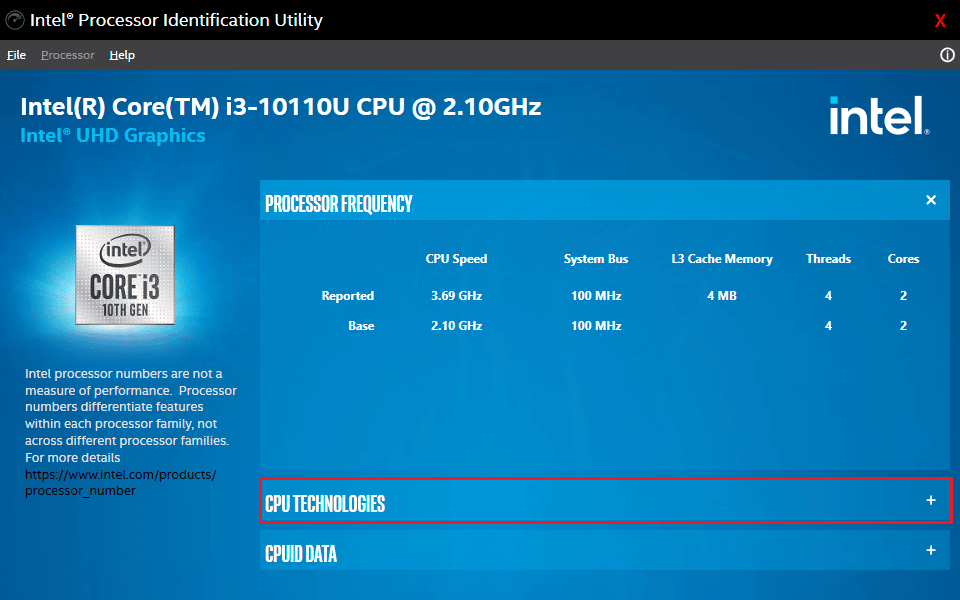
4. 확장 CPU TECHNOLOGIES 클릭하여 + 아이콘.
5. CPU 기술 목록을 스캔하여 Intel® Virtualization Technology, usually Intel® Virtualization Technology will be the very first item on the list.
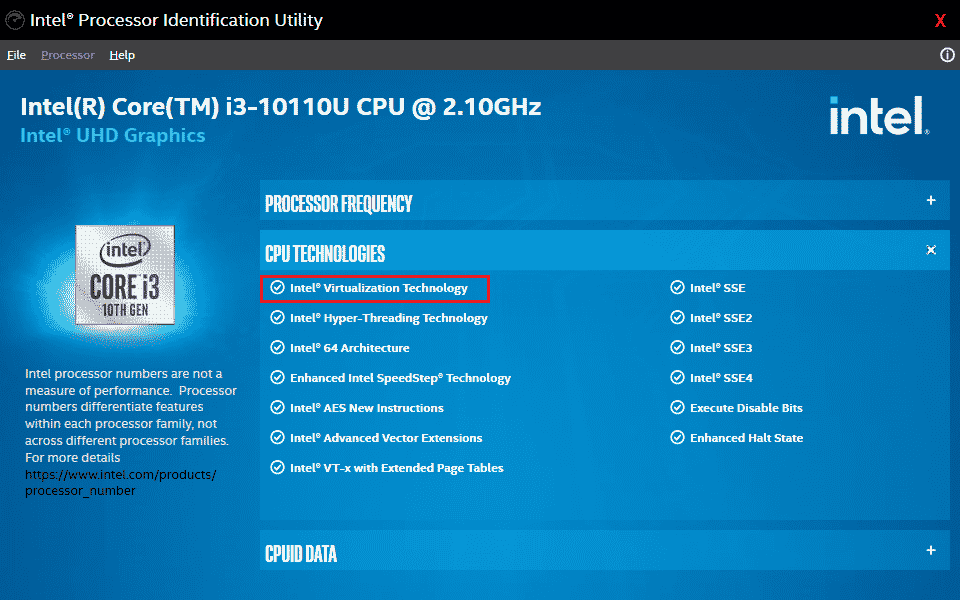
6. If the technology is supported on your computer, there will be a 가능 next to it or a 확인란 to its left.
Follow the steps below to check your PC (AMD) supports Virtualization.
1. 다운로드 AMD Virtualization Technology and Hyper V files required for your PC.
2. 클릭 .exe 파일 which is downloaded and follow the 화면 지침 그것을 설치하십시오.
3. Check if it supports Virtualization by opening the application. If it is supported you will receive a message 시스템은 Hyper-V와 호환됩니다.

If your PC supports Virtualization technology in Intel or AMD, follow the following steps to enable it. If not, move on to the next method.
1. You can enable the Virtualization from the BIOS menu, for that you have to restart your computer.
2. 클릭 스타트 button, now click on the 전원 옵션 다음을 선택하십시오. 다시 시작합니다.
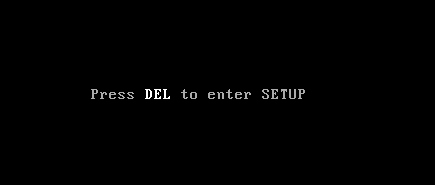
3. Press one of the following keys Esc, Del, F12, F10, or F8 repeatedly to enter the BIOS 메뉴. The BIOS key is not similar to all manufacturers so check the BIOS key papers which came along with your computer. Or you can simply Goggle search for your BIOS key
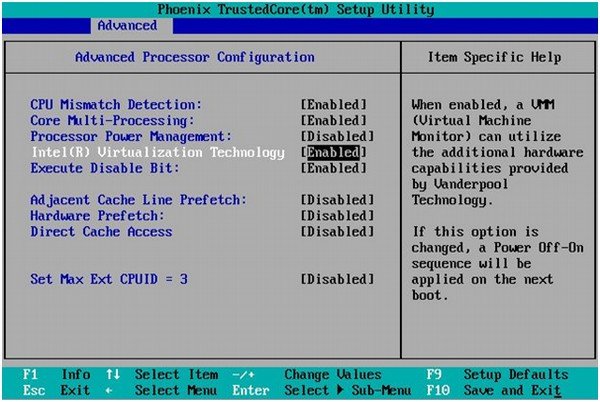
4. In the BIOS menu, go to 가상화 기술, Intel 가상화 기술, Direct I/O용 Intel VT 또는 이와 유사한 옵션 with the arrow keys and hit 엔터 버튼 를 활성화합니다.
5. Exit BIOS after saving your changed settings. Now, your computer reboots automatically, after it is done check if the issue VirtualBox interface BlueStacks shutdown issue is fixed.
또한 읽기 : Windows 10에서 가상화를 활성화하는 방법은 무엇입니까?
Method 6: Update BlueStacks Emulator
BlueStacks are being updated regularly to satisfy the technology advancements that are being made these days and fix the reported bugs like this one. So, updating the BlueStacks to the latest version may fix this issue. Follow the steps to update BlueStacks.
1. 시작 블루스 택스 emulator which is near the bottom right of the screen, open 설정 클릭하여 기어 아이콘입니다.
![]()
2. 을 클릭 소개 which is in the left pane of the window.
3. 이제 업데이트 확인 버튼을 클릭합니다.
4. 신청 the updates and then 다시 시작하다 에뮬레이터.
5. Now close the emulator, from the system tray also, and then check if the issue VirtualBox interface has active connections error message 고쳐 졌어.
방법 7: Windows 업데이트
If there are any bugs in your PC, they can only be fixed after a Windows update. Microsoft releases regular updates to fix all these bugs thereby VirtualBox interface Windows 10 shut down issue will also be fixed. Hence, ensure if you have updated your Windows Operating System and if any updates are pending in action, use our guide How to Download and Install Windows 10 Latest Update
After updating your Windows Operating System, check whether VirtualBox interface BlueStacks shutdown issue is fixed.
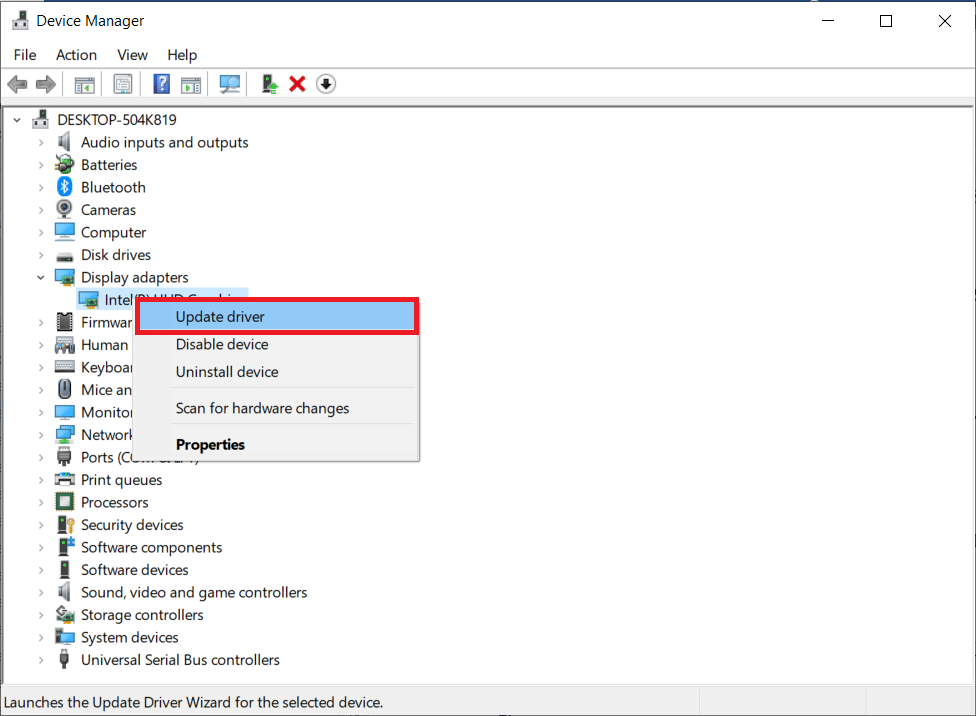
방법 8: 그래픽 드라이버 업데이트
If your PC makes use of outdated graphics drivers, you must update all of them to fix any gaming issues. You can do this task either manually or by using third-party software. Check our guide 4 Ways to Update Graphics Drivers in Windows 10 to update all the drivers manually and check if VirtualBox interface has active connections error message issue is fixed.
또한 읽기 : Windows 10에서는 프린터 드라이버 수정을 사용할 수 없습니다.
방법 9: 그래픽 드라이버 재설치
When you still face the error after updating the Graphical drivers, then reinstall device drivers to fix any incompatibility problems. There are so many methods to reinstall drivers on Windows. Yet, if you are confused about how to implement the same, check our guide How to Uninstall and Reinstall Drivers on Windows 10 and implement the same.
After reinstalling GPU drivers, check if you can enjoy games without VirtualBox interface BlueStacks shutdown issue.
방법 10: 그래픽 드라이버 롤백
현재 버전의 그래픽 드라이버가 게임과 호환되지 않으면 업데이트하거나 다시 설치해도 소용이 없습니다. Windows 10에서 드라이버를 롤백하는 방법 가이드에 따라 드라이버를 이전 버전으로 롤백하기만 하면 됩니다.
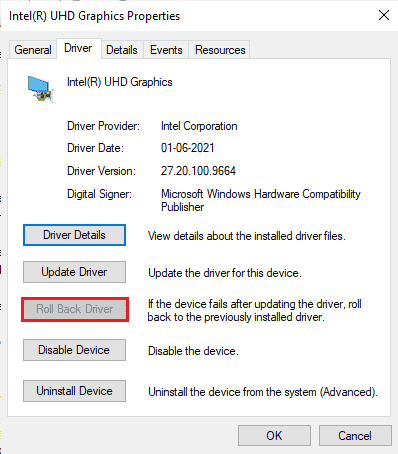
Check if you have fixed VirtualBox interface has active connections error message.
방법 11: .NET Framework 업데이트
.NET framework in Windows 10 computer is essential for uninterrupted service of modern apps and games. Many games have an auto-update feature for the .NET framework, and thus it will be updated automatically whenever an update is available. In another case, if an update prompts in your PC, you can manually install the latest version of the .NET framework, as discussed below, to fix VirtualBox interface Windows 10 issue.
1. 확인 새로운 업데이트 for .NET 프레임 워크 인사말 공식 Microsoft 웹 사이트.
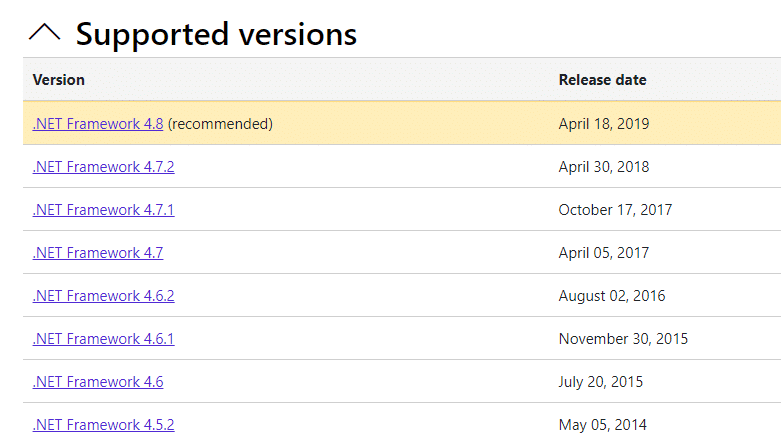
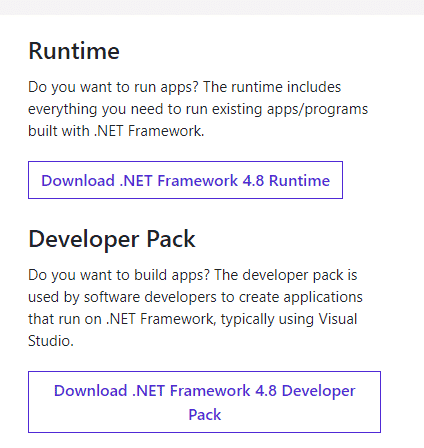
2. 업데이트가 있는 경우 해당/추천 링크 및 클릭 .NET Framework 4.8 런타임 다운로드 옵션을 선택합니다.
참고 : 클릭하지 마세요 .NET Framework 4.8 개발자 팩 다운로드 소프트웨어 개발자가 사용하기 때문입니다.
3. 이동 내 다운로드, 다운로드한 파일을 실행하려면 설치 파일을 두 번 클릭하고 다음 단계를 따르세요. 화면 지침 Windows PC에 .NET Framework를 성공적으로 설치하려면
4. Once done, check if you have fixed VirtualBox interface Windows 10 issue or not.
Method 12: Create New Administrator User
If none of the methods have helped you fix VirtualBox interface has active connections error message, there are some circumstances where your user account is corrupt or some of its configurations are inappropriate. In this case, you have to create a new administrator account as instructed below to fix the issue.
1. 누르세요 Windows + I 키 오픈을 위해 함께 설정.
2. 클릭 계정 환경.
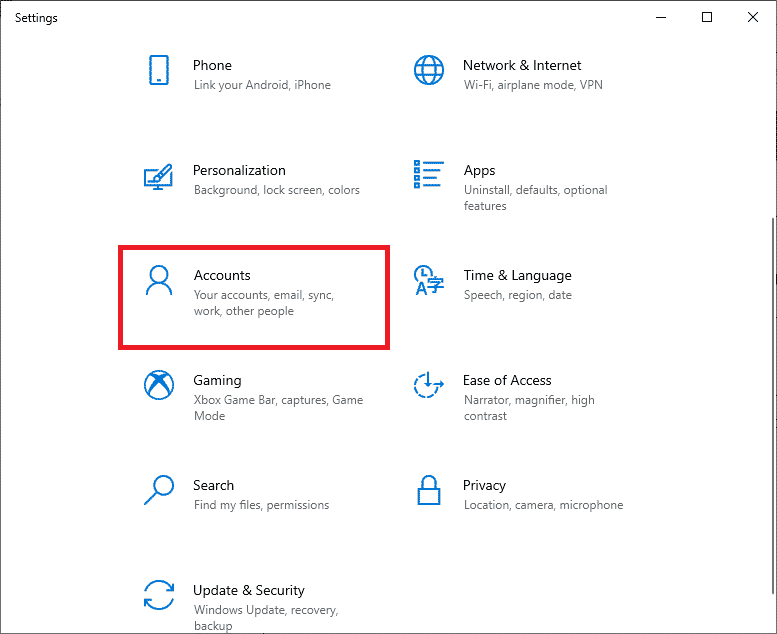
3. 그런 다음 가족 및 기타 사용자 menu from the left menu.
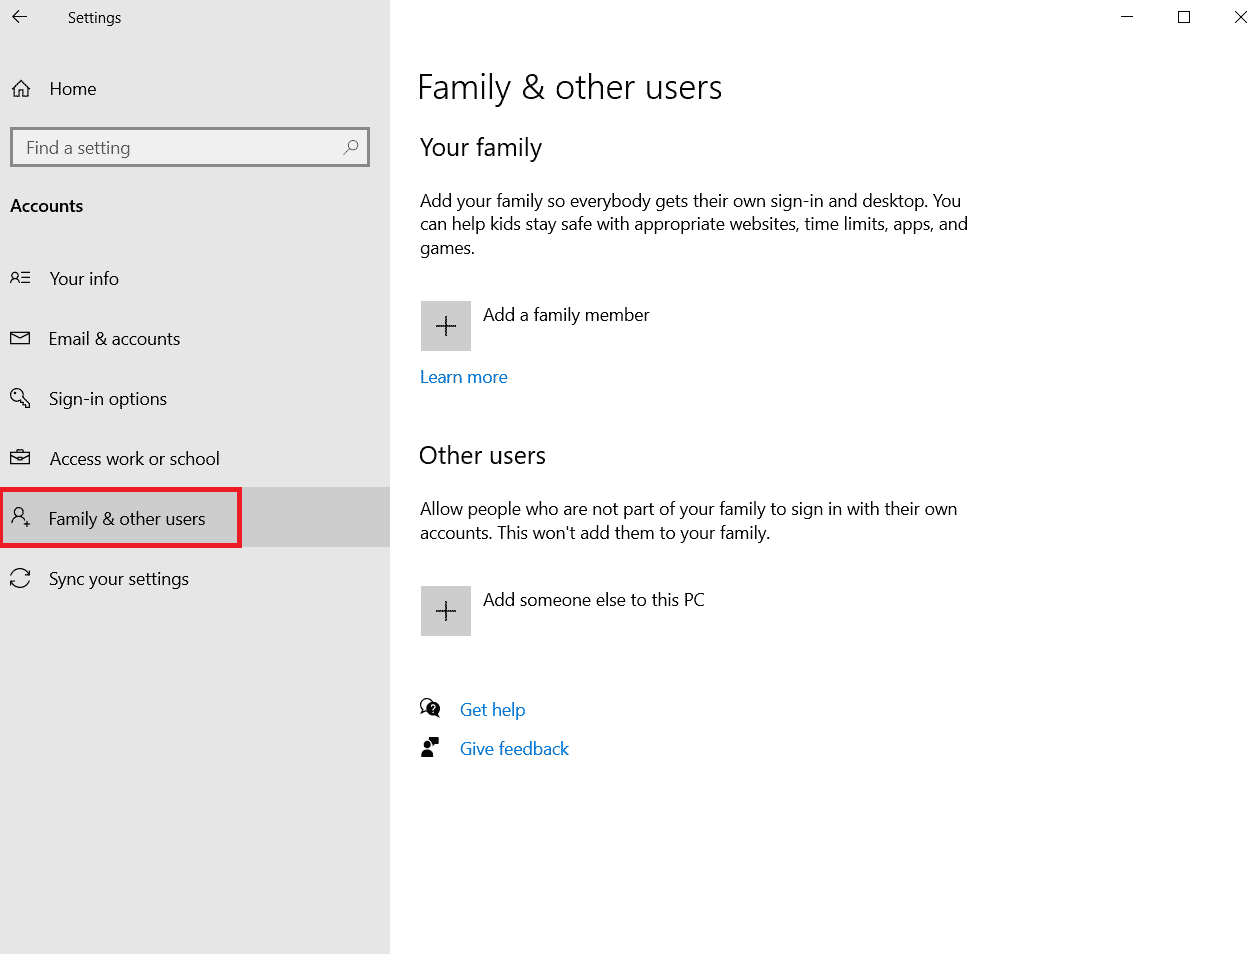
4. Under the 다른 사람들 섹션에서 계정을 선택한 후 다음을 클릭하세요. 계정 유형 변경.
참고 : If you do not find any account, then you can follow our guide to create a local account on Windows 10.
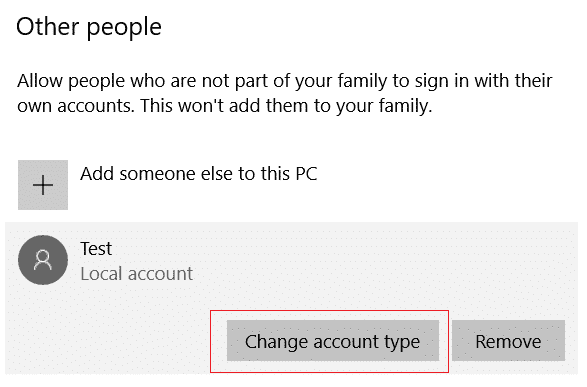
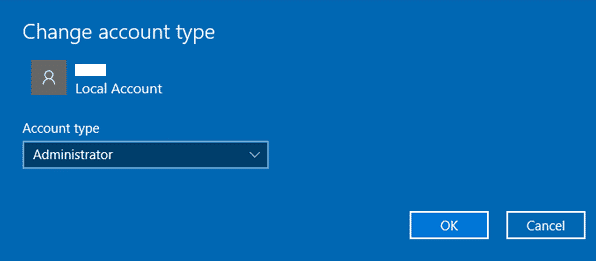
5. 마지막으로 관리자 아래 계정 유형 클릭 좋아요.
참고 : 이는 표준 계정 사용자에게는 적용되지 않습니다.
6. Finally, check if you have fixed VirtualBox interface BlueStacks problem or not.
또한 읽기 : Windows 10에서 네트워크 SSID에 제공된 잘못된 PSK 수정
Method 13: Uninstall Conflicted Apps in Safe Mode
Some applications and programs might interfere with BlueStacks during its operation. To confirm and to fix this, you have to boot to Safe Mode in Windows 10. The safe mode of Windows PC will shut all the non-essential tasks and runs with the most stable drivers. In safe mode, Windows PC will be in the most stable environment and hence you can find which app is conflicting with BlueStacks. You can boot your computer by following our guide How to Boot to Safe Mode in Windows 10 and once all the third-party software is disabled, check if you face the VirtualBox interface BlueStacks shutdown issue again.
If you do not face the problem, uninstall any recent program or application you have added to your computer.
Method 14: Uninstall Bluestacks and Reinstall in Safe Mode
If none of the above methods fixed VirtualBox interface has active connections error message, the fault may be with the inherent bug in the application itself. In this case, you have to uninstall the current version of the application and replace it with the latest version of BlueStacks.
1. First of all, end all BlueStacks processes which may be running in the background.
2. If you have your BlueStacks open, close it by clicking on the X 버튼 which will be at the top right of your screen.
3. Now, remove the BlueStacks icon from your system tray by right-clicking on the BlueStacks icon and then clicking 떠나다.
4. Delete all the temporary files on your computer as a precautionary measure. Follow the steps below to do it.
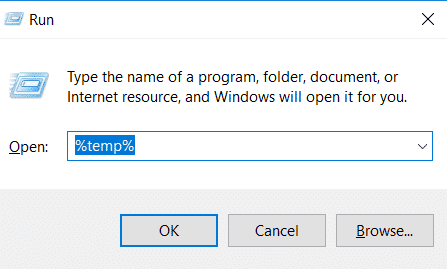
5. 프레스 Windows + R 키 simultaneously to access the 달리기 대화 상자 및 유형 % temp %를 in it and hit 키를 입력하십시오.
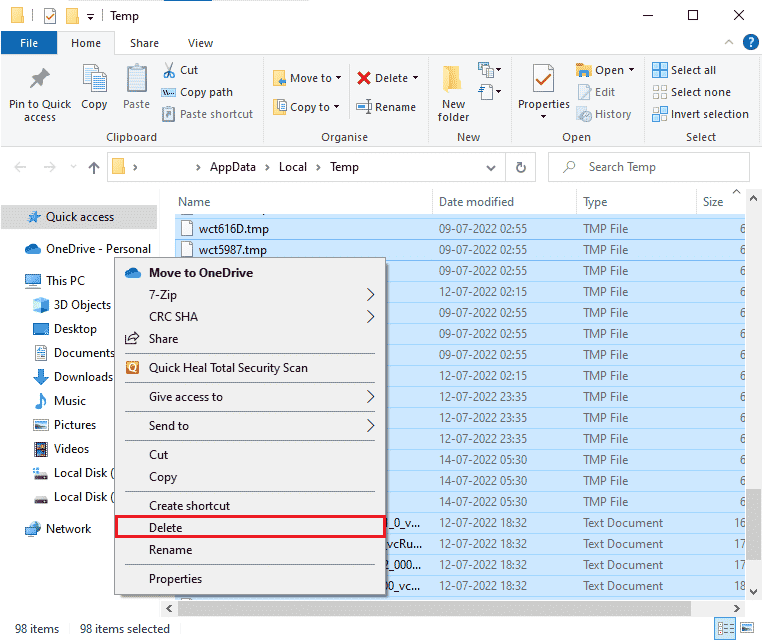
6. Select all the files, right-click on them and click on 삭제합니다.
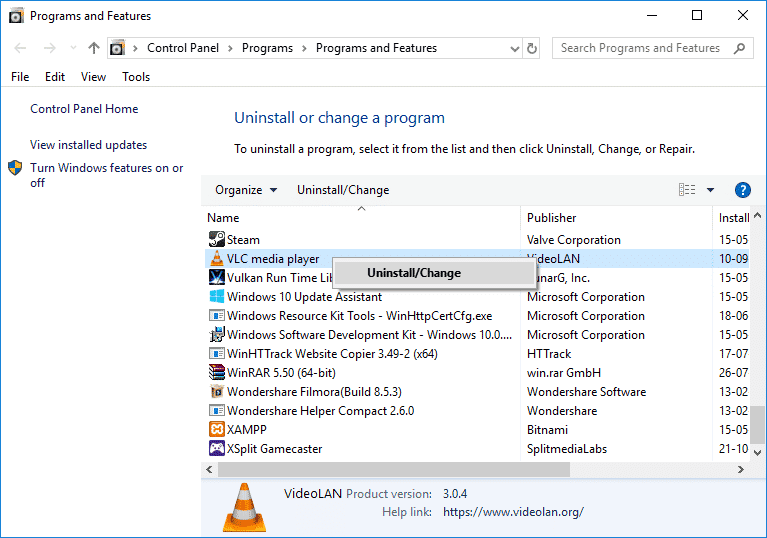
7. Use BlueStacks uninstaller to remove all the traces of it from your computer instead of following an unusual route to uninstall an application.
8. 방문 본 웹사이트 다운로드 BlueStacks uninstaller tool.
9. After installing it, run it to remove all of its files. Grant for permissions if it asks for many. Click on the OK button on the final screen.
Now, reinstall BlueStacks by following these steps.
10. 로 이동 Bluestacks 다운로드 페이지로 최신 버전을 다운로드하십시오.

11. We will be installing the application after booting into Safe Mode.
12. 창이 안전 모드에서 시작되면 폴더(다운로드) BlueStacks 설치 파일을 다운로드하고 실행한 곳입니다. 화면의 지시에 따라 설치를 완료합니다.
13. 이제 BlueStacks를 다시 설치했으므로 다음을 수행할 수 있습니다. 안전 모드 꺼 줘 정상적으로 부팅됩니다.
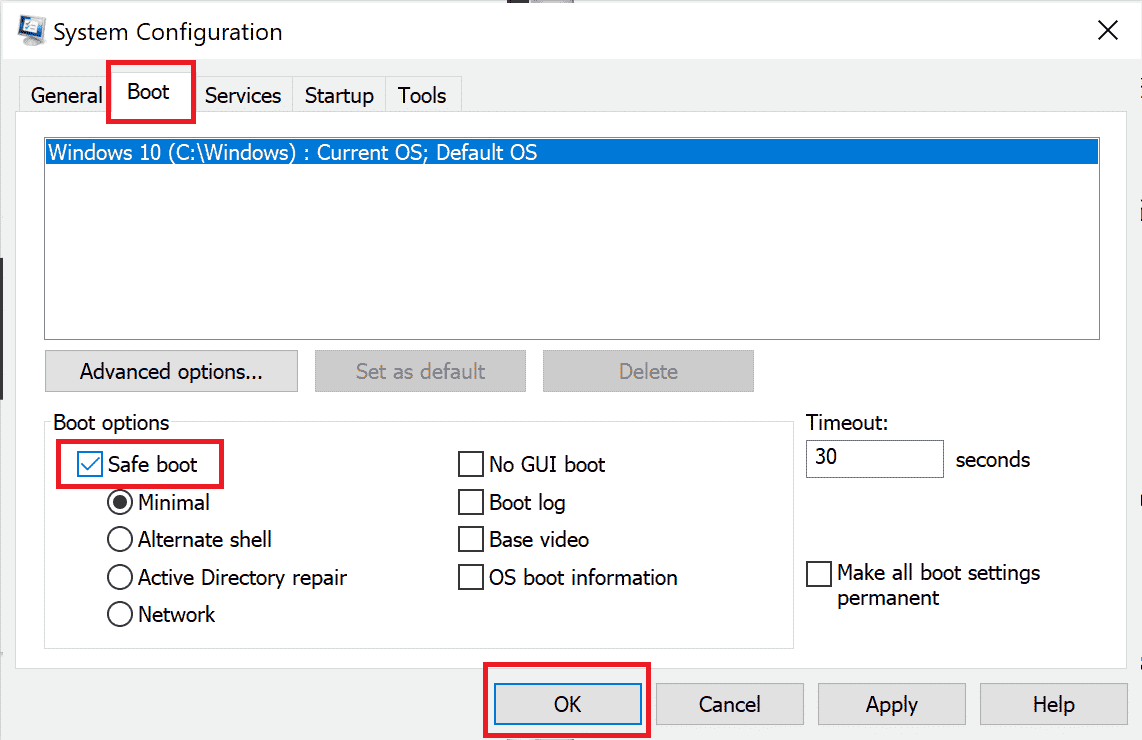
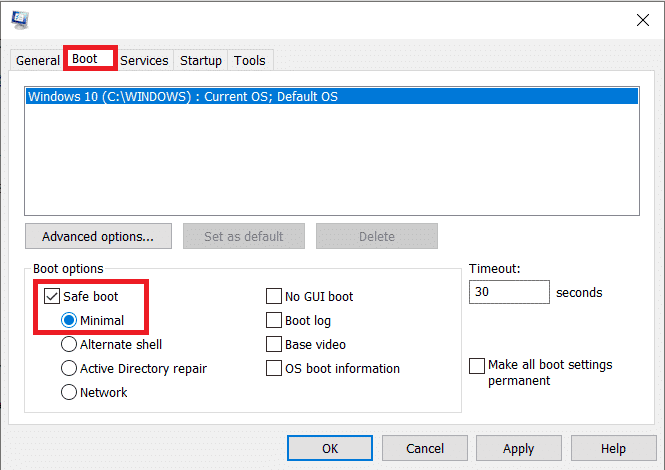
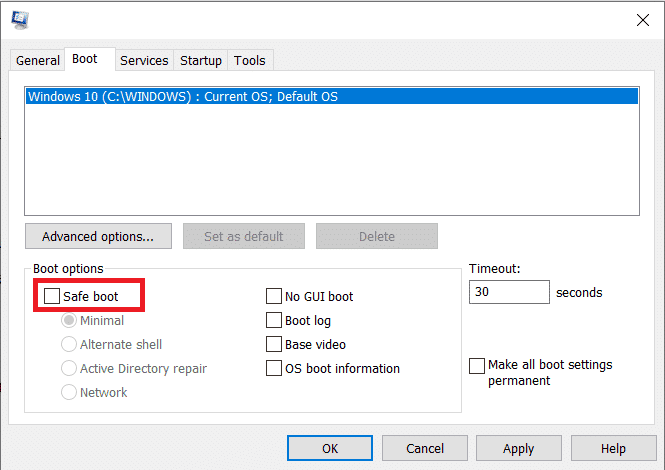
14. Open Run, type msconfig를, and press enter. In the Boot tab, 안전 모드 옆의 확인란을 선택 취소하세요. 그리고 클릭 OK.
15. 마지막으로, PC를 다시 시작 and run Bluestacks to check if VirtualBox interface Windows 10 problem has been resolved.
또한 읽기 : 오류 코드 0x80004005을 수정하는 방법
Method 15: Restore Windows
The latest Windows update may not be compatible with BlueStacks which leads to the VirtualBox interface Windows 10 issue. Try recalling if this error started after updating your Windows, if so you can either wait for a new update or revert to the previous version which did not cause this error.
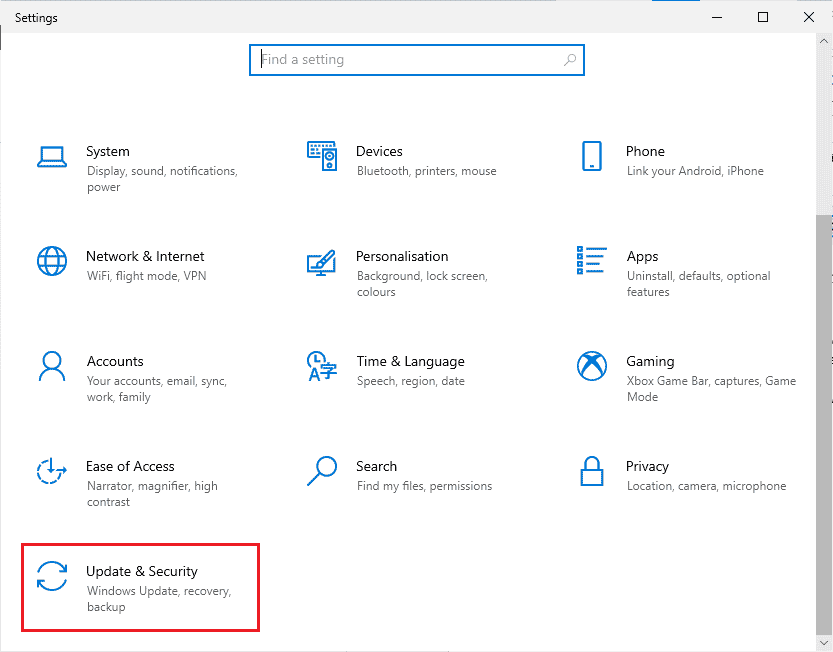
1. 이동 설정 ~을 누르면 Windows + I 키 동시에.
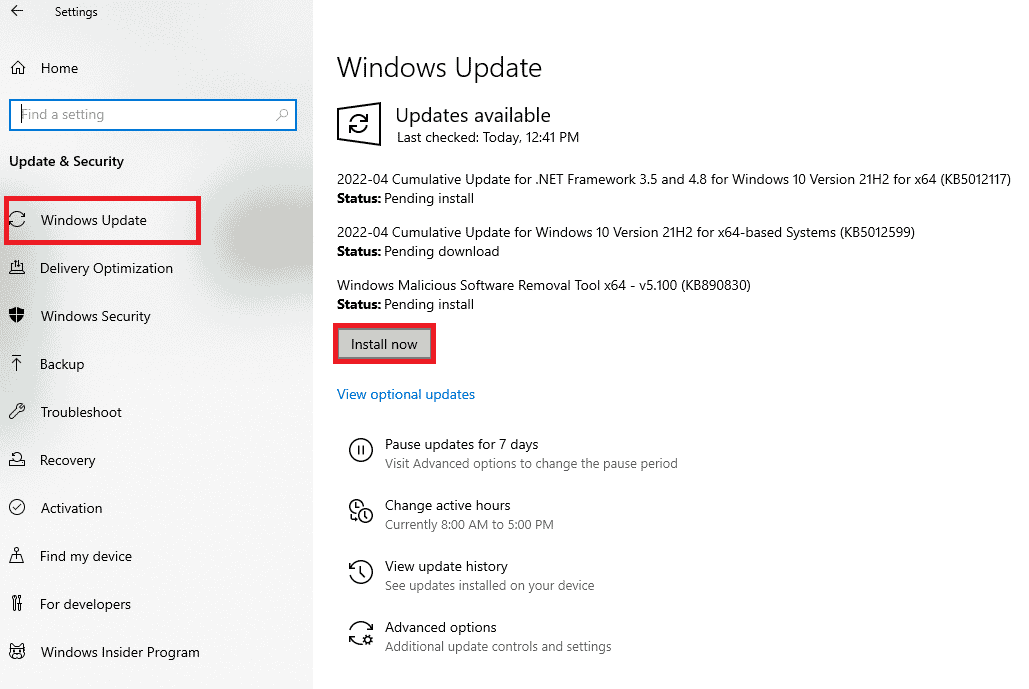
2. 을 클릭 업데이트 및 보안 설정.
3. Now, look for 회복 settings and click on it.
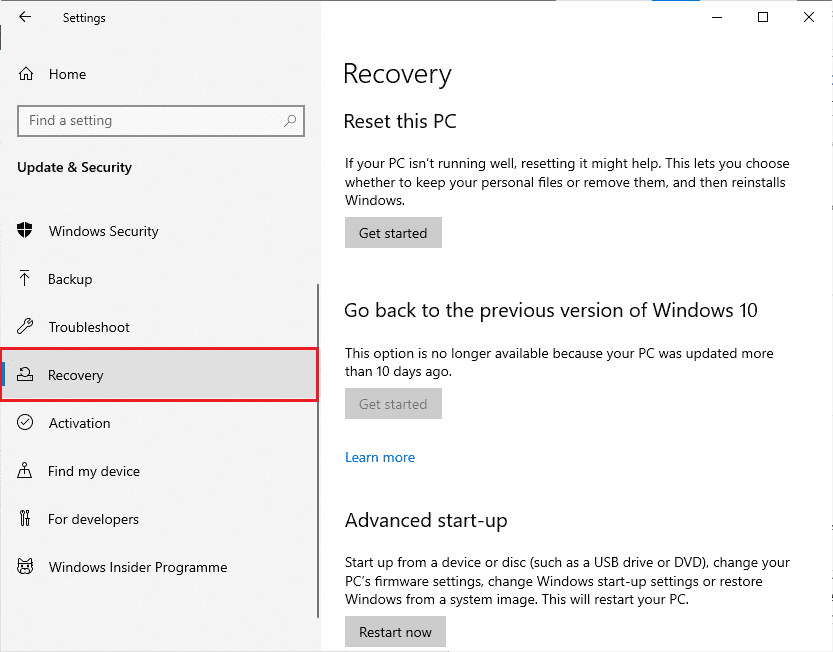
4. 이제 시작하기 button which will be under Go back to the previous version of Windows 10.
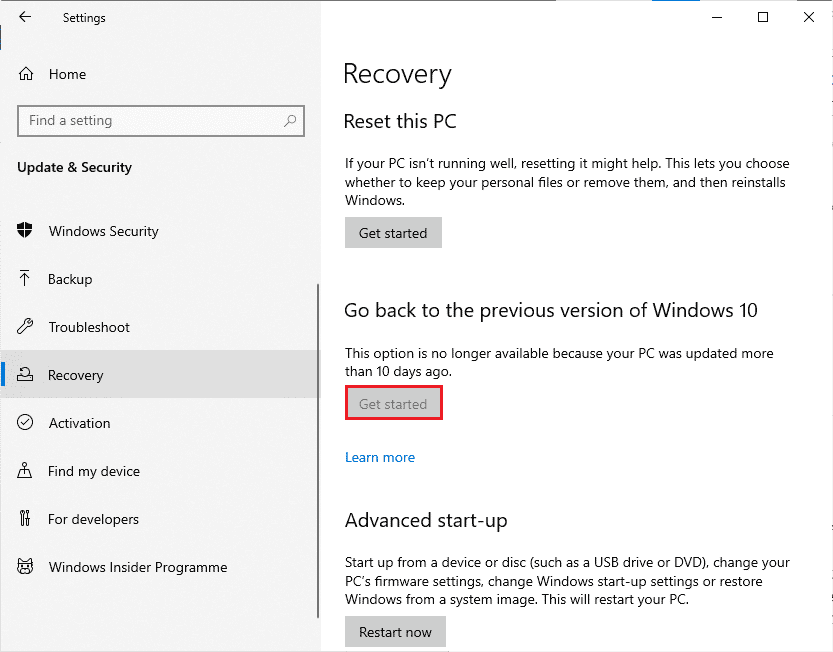
5. 다음을 수행하십시오. 화면 지침 to revert to the previous version of Windows.
6. If it has been 10 days since you last updated, the 시작하기 option will be greyed out, in that case, you have to wait until you get the next update.
또한 읽기 : Java Virtual Machine 또는 JVM을 찾을 수 없음 오류 수정
Pro Tip: How to Shut Down VirtualBox
VirtualBox is an open-source application that allows users to run an additional operating system environment from the desktop of PCs or Macs. For example, a Windows user could use VirtualBox to run Windows XP, Mac OS X, and Windows 7. But you have to close a VirtualBox with the 닫기 command after using the VirtualBox virtual machine.
1. 클릭 닫기 button which will be in the upper right corner of the screen.
2. Choose the radio button labeled as 기계 전원 끄기
3. Check the box which is next to Restore current snapshot if you want to load the recent snapshot.
4. Begin the shutdown process by Clicking the OK 버튼을 클릭합니다.
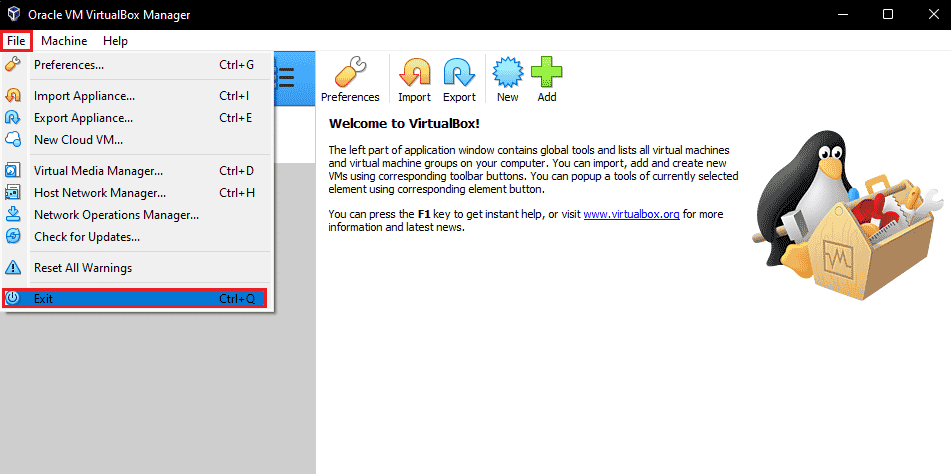
5. 열기 입양 부모로서의 귀하의 적합성을 결정하기 위해 미국 이민국에 메뉴 또는 VirtualBox and 선택 출구 when the shutdown is completed.
권장 사항 :
이 가이드가 도움이 되기를 바라며 문제 해결 방법을 배우셨기를 바랍니다. VirtualBox interface has active connections error message on Windows 10. Let us know how this article has helped you the best. Also, if you have any queries/suggestions regarding this article, then feel free to drop them in the comments section.