Install And Configure XAMPP on Windows 10: Whenever you code any website in PHP you will need something that can provide a PHP development environment and help connect the backend with the front end. There are many software’s which you can use to locally test your website such as XAMPP, MongoDB, etc. Now each software has its own advantages and disadvantages but in this guide, we will specifically talk about XAMPP for Windows 10. In this article, we will see how one can install and configure XAMPP on Windows 10.
XAMPP : XAMPP is an open source cross-platform web server developed by Apache friends. It is best for web developers who develop websites using PHP as it provides an easy way to install the necessary components required to run PHP based software like WordPress, Drupal, etc on Windows 10 locally. XAMPP saves the time and frustration of manually installing and configuring Apache, MySQL, PHP, and Perl on the device to create a test environment.
Each character in word XAMPP signifies one programming language which XAMPP helps to install and configure.
X stands as an ideographic letter which refers to cross-platform
A stands for Apache or Apache HTTP server
M stands for MariaDB which was known as MySQL
P stands for PHP
P stands for Perl
XAMPP also includes other modules like OpenSSL, phpMyAdmin, MediaWiki, WordPress and more. Multiple instances of XAMPP can exist on one computer and you can even copy XAMPP from one computer to another. XAMPP is available in both full and standard version called the smaller version.
Install And Configure XAMPP on Windows 10
혹시라도 문제가 생길 경우를 대비해 복원 지점을 만들어 두시기 바랍니다.
Windows 10에 XAMPP를 설치하는 방법
If you want to use XAMPP then first you need to download and Install XAMPP on your computers then only you will be able to use it. To download and Install XAMPP on your computers follow the below steps:
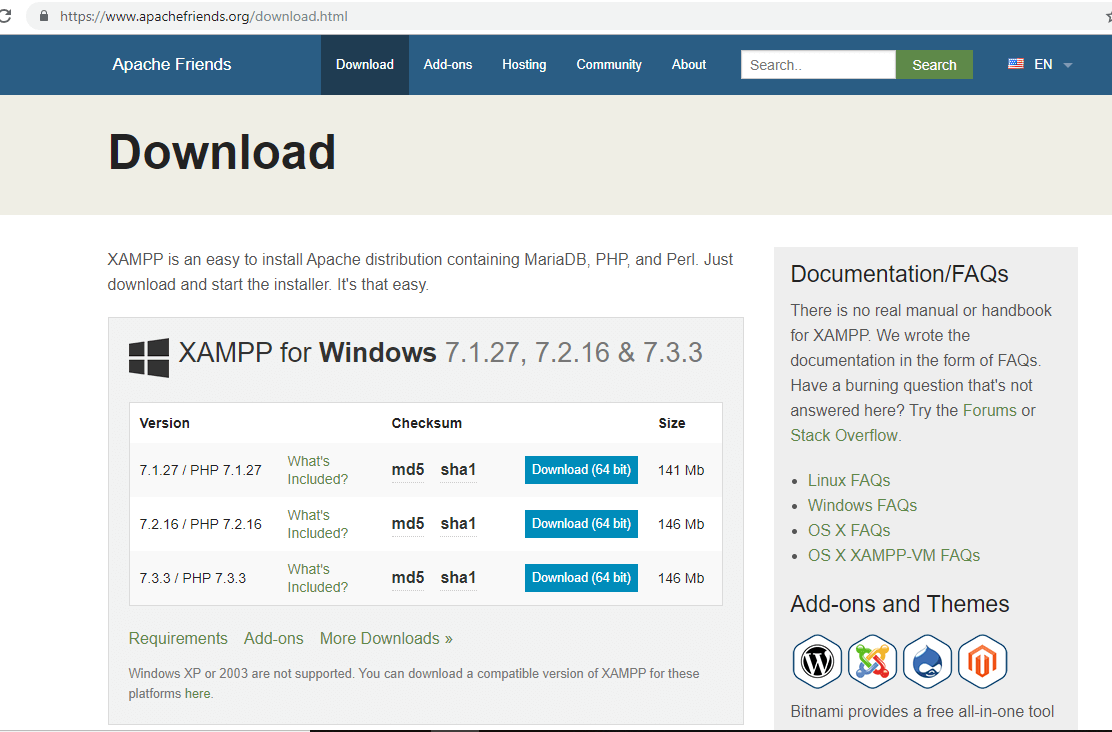
1.Download XAMPP from official website Apache friends or type the below URL in your web browser.
2.Choose the version of PHP for which you want to install XAMPP and click on the 다운로드 버튼을 in front of it. If you do not have any version restrictions then download the oldest version as it may help you to avoid any issues related to PHP based software.
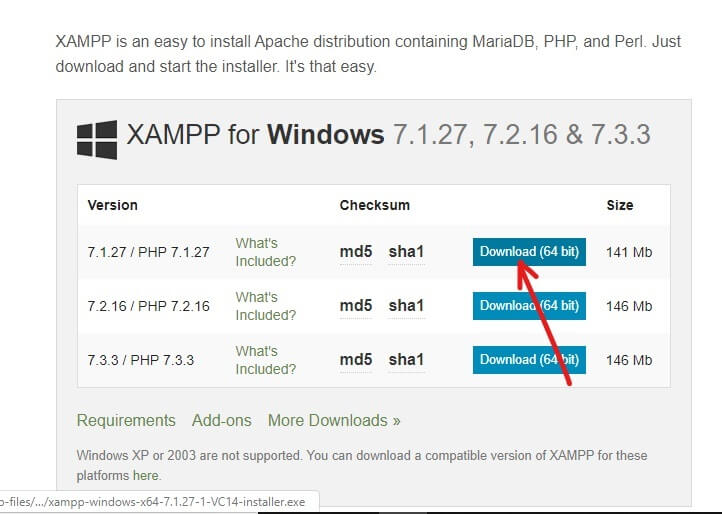
3.As soon as you click the Download button, XAMPP will start downloading.
4.When the download is completed, open the downloaded file by double-clicking on it.
5.When you will ask to allow this app to make changes in your PC은 클릭 가능 button and start the Installation process.
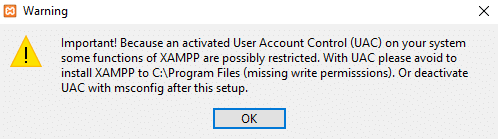
6.Below warning dialog box will appear. Click on the OK 버튼을 계속합니다.
7.Again click on the 다음 버튼.
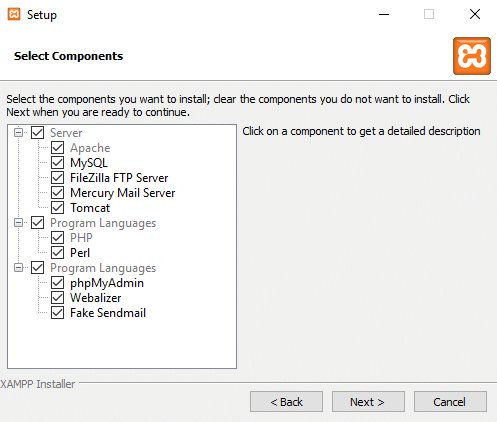
8.You will see a list of components that XAMPP allows to install such as MySQL, Apache, Tomcat, Perl, phpMyAdmin, etc. Check the boxes against the components you want to install.
참고 : 그것은 recommended to leave the default options checked and click on the 다음 보기 버튼을 클릭합니다.
9.입력 폴더 위치 원하는 곳 install XAMPP software or browse through the location by clicking on small icon available next to the address bar. It is recommended to use the default location settings to install XAMPP software.
![]()
10.Click 다음 보기 버튼을 클릭합니다.
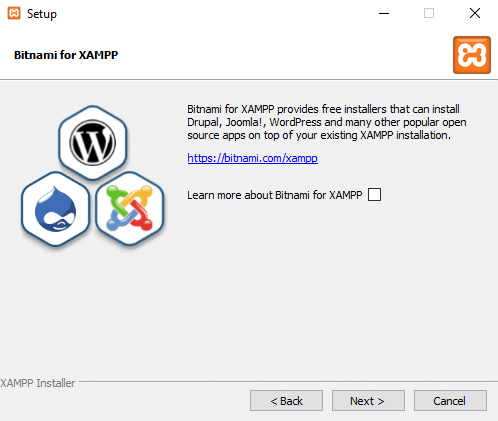
11.선택 취소 "XAMPP용 Bitnami에 대해 자세히 알아보기” option and click 다음.
참고 : If you want to learn about Bitnami then you can remain the above option checked. It will open a Bitnami page in your browser when you will click Next.
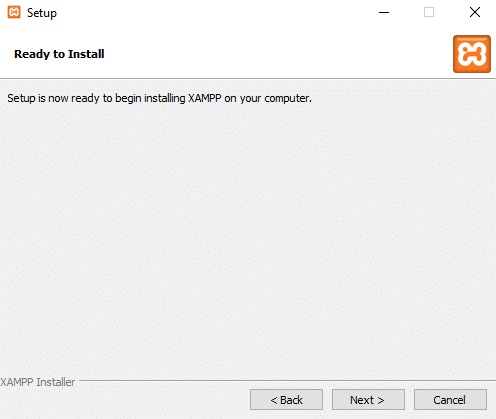
12.The below dialog box will appear saying that the setup is now ready to begin installing XAMPP on your computer. Again click on 다음 보기 버튼을 계속합니다.
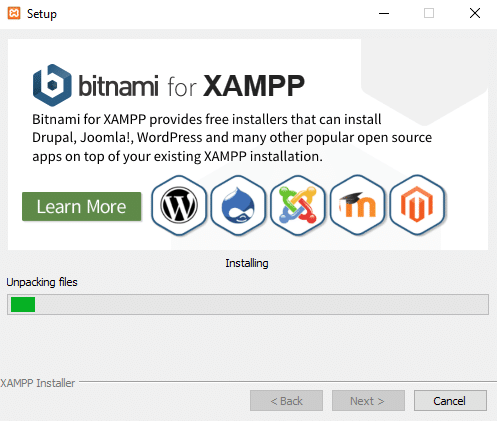
13.Once you click 다음 보기, 당신은 볼 것이다 XAMPP has begun installing on Windows 10. Wait for the Installation process to complete.
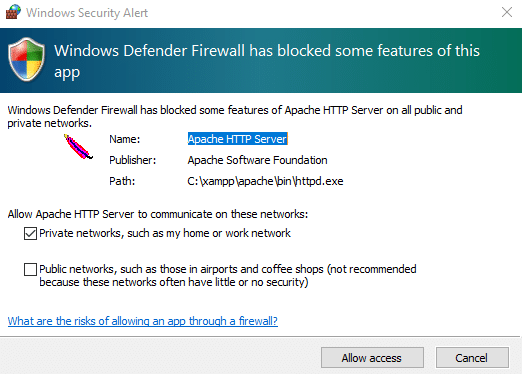
14.After the installation is completed, a dialog box will appear which will ask to allow the app through the Firewall. Click on the 액세스 허용 버튼을 클릭합니다.
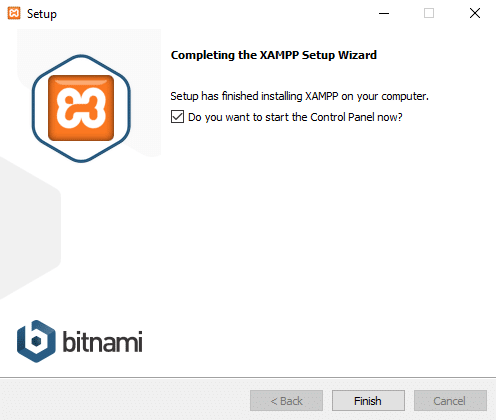
15.Click 완료 버튼 과정을 완료합니다.
참고 : If you let the “Do you want to start the Control Panel now?” option check then after 클릭 마감재 your XAMPP control panel will open up automatically but if you unchecked it then you have to manually open the XAMPP control panel.
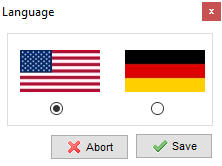
16.Choose your language either English or German. By default English is selected and click on the 저장 버튼.
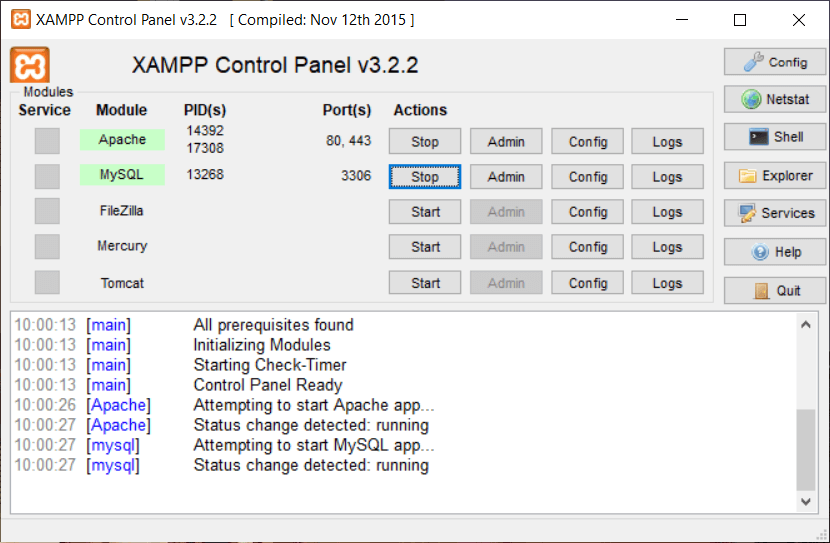
17.Once the XAMPP Control Panel opens up, you can start using it to test your programs and can begin the web server environment configuration.
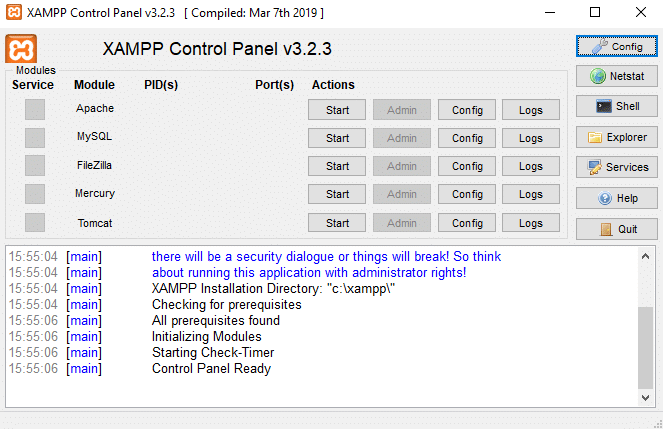
참고 : The XAMPP icon will appear in the Taskbar whenever XAMPP is running.
![]()
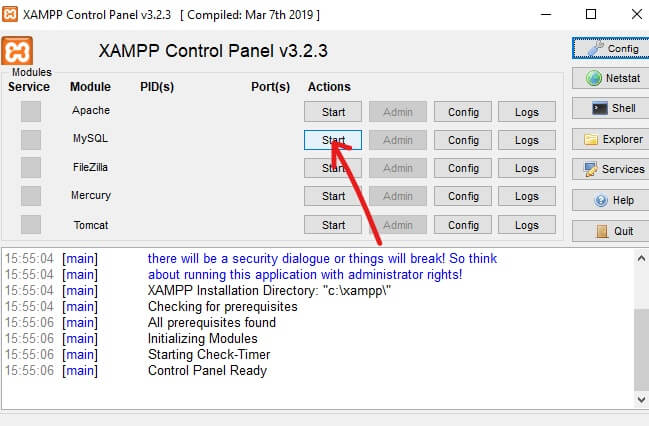
18.Now, start some services like 아파치, MySQL 를 클릭하여 시작 버튼 corresponding to the service itself.
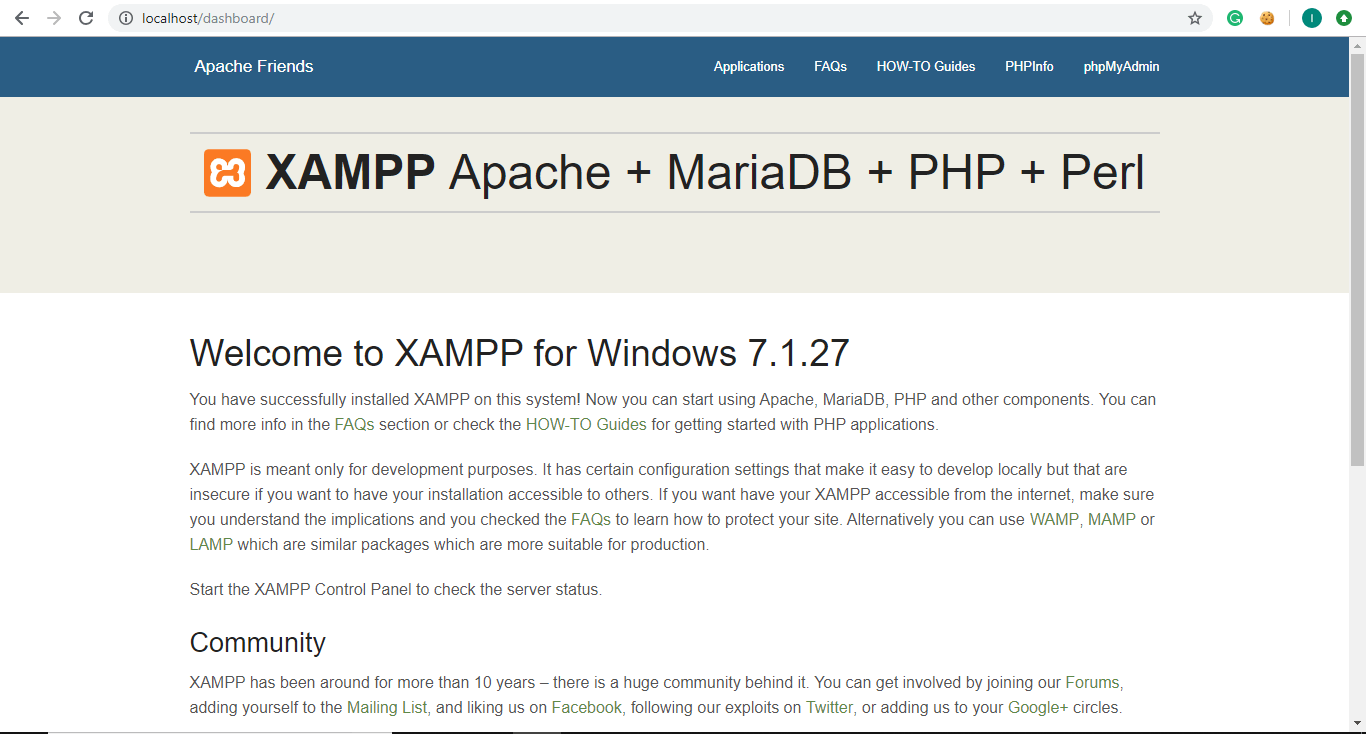
19.Once all the services have started successfully, open localhost by typing http://localhost 브라우저에서.
20.It will redirect you to the XAMPP dashboard and the default page of the XAMPP will open.
21.From the XAMPP default page, click on 은 phpinfo from the menu bar to see all the details and information of PHP.

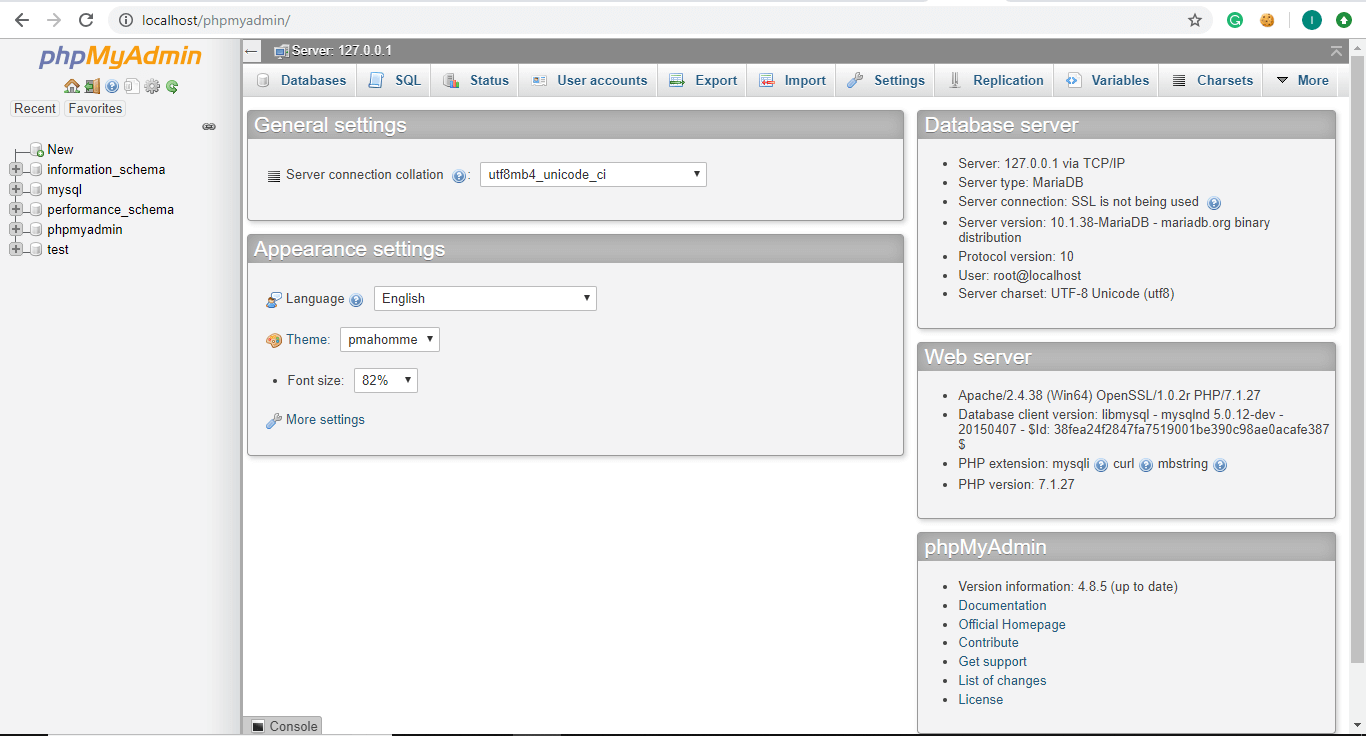
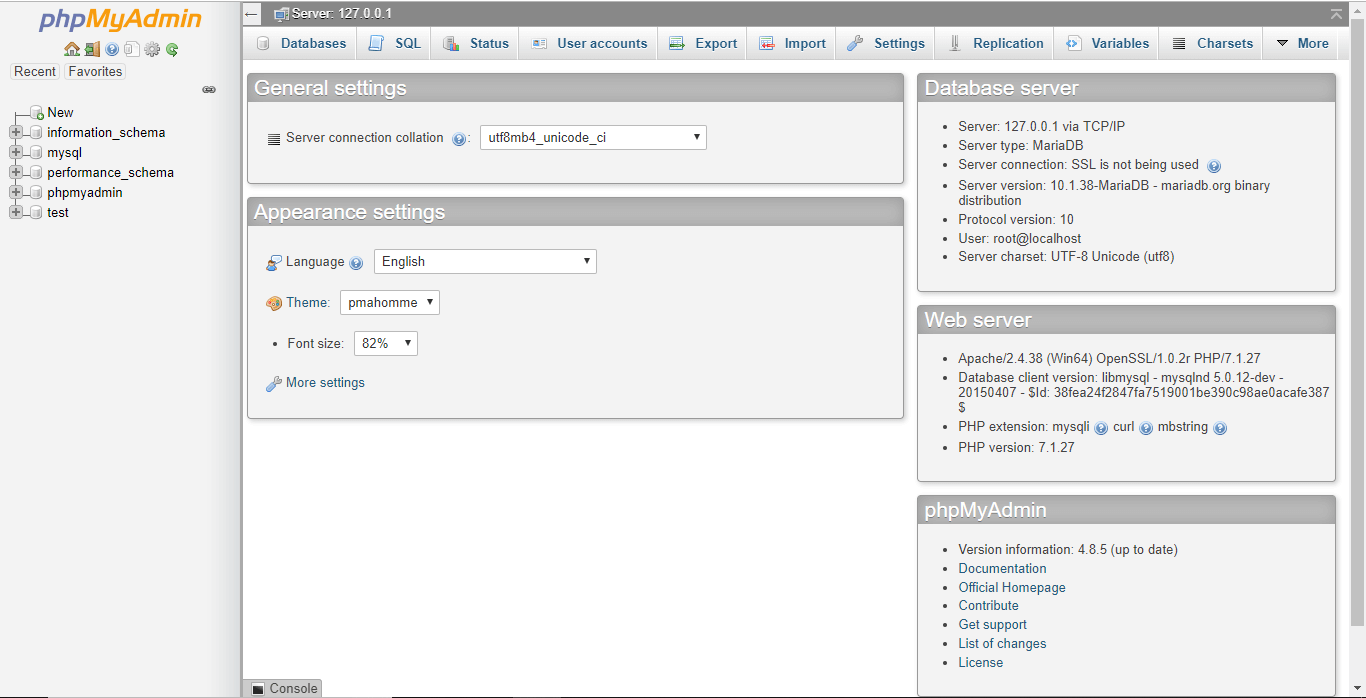
22.Under the XAMPP default page, click on phpMyAdmin을 to see the phpMyAdmin console.
How to configure XAMPP on Windows 10
XAMPP Control Panel consists of several sections and each section has its own significance and use.
모듈
Under Module, you will find a list of services provided by the XAMPP and there is no need to install them separately on your PC. The following are the services provided by XAMPP: Apache, MySQL, FileZilla, Mercury, Tomcat.
행위
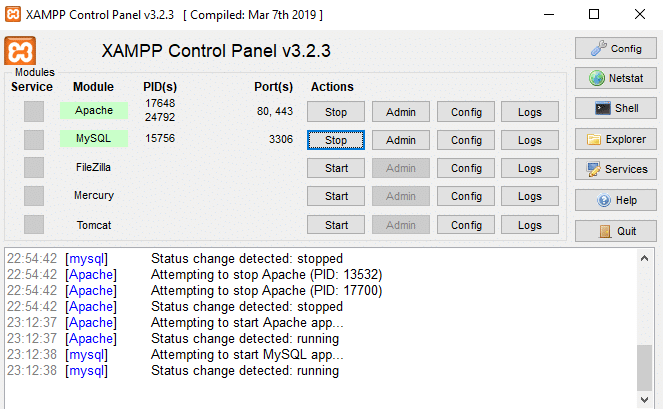
Under Action section, Start and Stop buttons are there. You can start any service by clicking on the 시작 버튼.
1. 원한다면 start MySQL service은 클릭 스타트 button corresponding to the MySQL module.
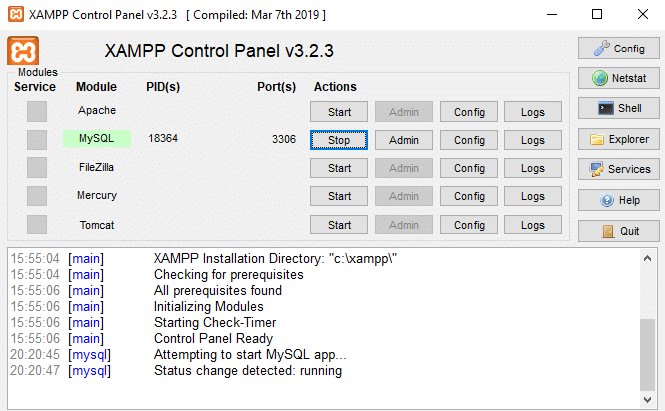
2.Your MySQL service will start. The MySQL module name will become green and it will confirm that MySQL has started.
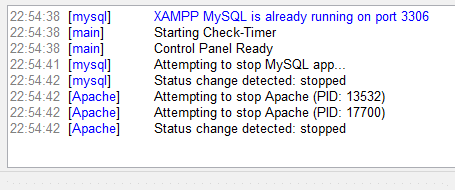
참고 : Also you can check the status from the below logs.
3.Now, if you want to stop MySQL from running, click on the 중지 버튼 corresponding to the MySQL module.
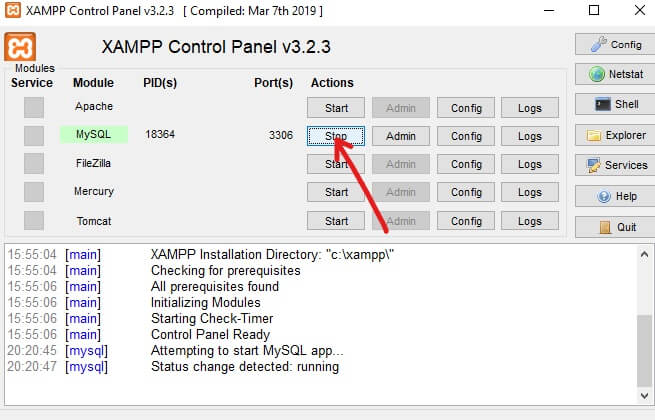
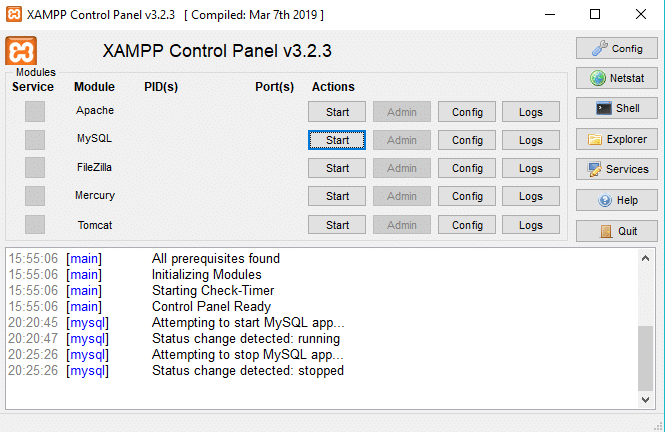
4.너의 MySQL service will stop running and its status will become stopped as you can see in the logs below.
항구
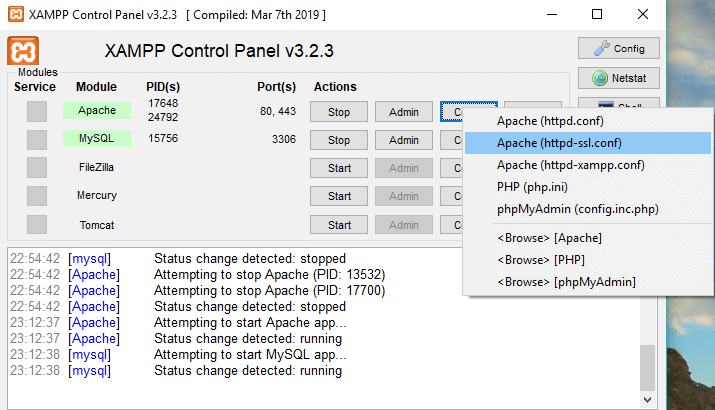
When you will start services like Apache or MySQL by clicking on the Start button under the action section, you will see a number below the Port(s) section and corresponding to that particular service.
이 숫자는 TCP/IP port numbers which each service uses when they are running. For example: In the above figure, Apache is using TCP/IP Port Number 80 and 443 and MySQL is using 3306 TCP/IP port number. These port numbers are considered to be there default port numbers.
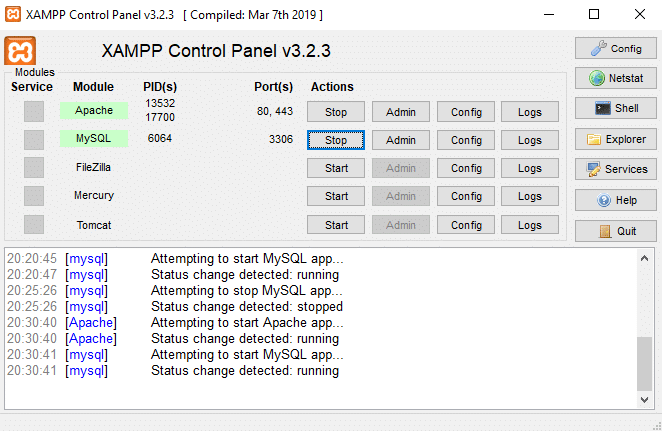
PID(s)
When you will start any service provided under the Module section, you will see some numbers will appear next to that particular service under the PID section. These numbers are the 프로세스 ID for that particular service. Each service running on the computer has some process ID.
For example: In the above figure, Apache and MySQL are running. The process ID for Apache is 13532 and 17700 and process ID for MySQL is 6064.
관리자
Corresponding to the running services, the Admin button becomes active. By clicking on it you can get access to the administration dashboard from where you can check if everything is working correctly or not.
Below figure shows a screen which will open up after clicking at 관리 버튼 corresponding to MySQL service.
구성
Corresponding to each service under the Module section, 구성 button is available. If you click on the Config button, you can easily configure each of the above services.
At the extreme right side, one more Config button is available. If you click on this Config button then you can 구성 which services to automatically start when you launch XAMPP. Also, some options are available which you can modify according to your need and requirements.
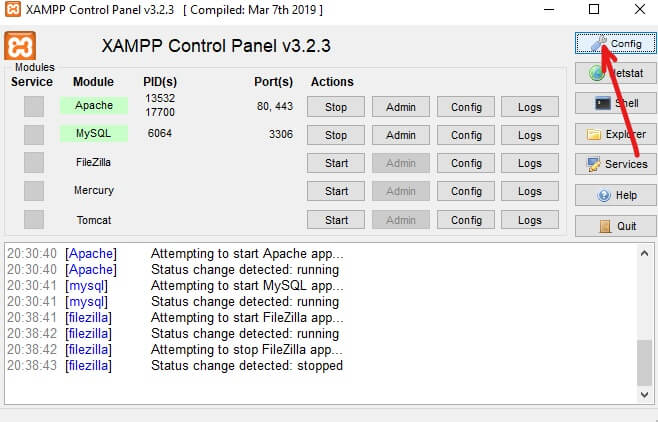
By clicking on above Config button, below dialog box will appear.
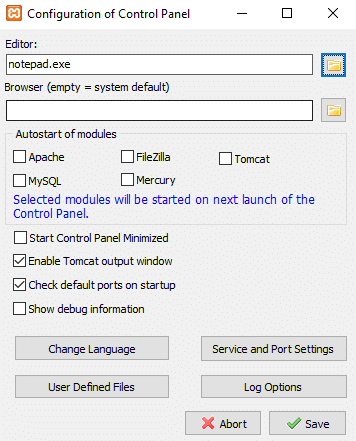
1.Under Autostart of modules, you can check the services or modules which you want to start automatically when XAMPP is launched.
2.If you want to change the language of XAMPP then you can click on the 언어 변경 버튼을 클릭합니다.
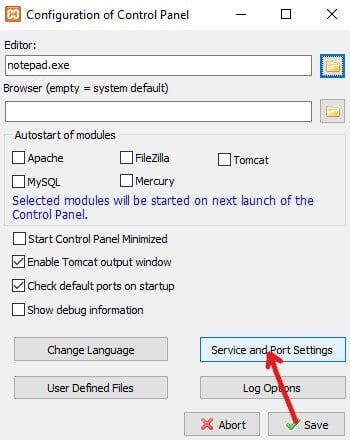
3.You can also modify Service and Port Settings.
For example: If you want to change the default port for Apache server follow the below steps:
a.Click on Service and Port Settings button.
b.Below Service Settings dialog box will open up.
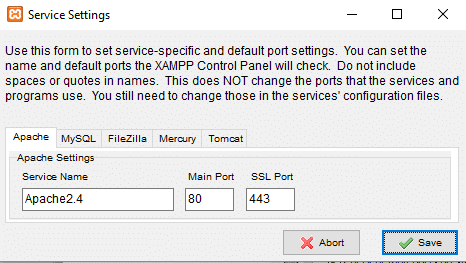
c.Change the Apache SSL Port from 443 to any other value like 4433.
참고 : You should note down the above port number somewhere safe as it may be needed in the future.
d.After changing the port number, click on the 저장 버튼.
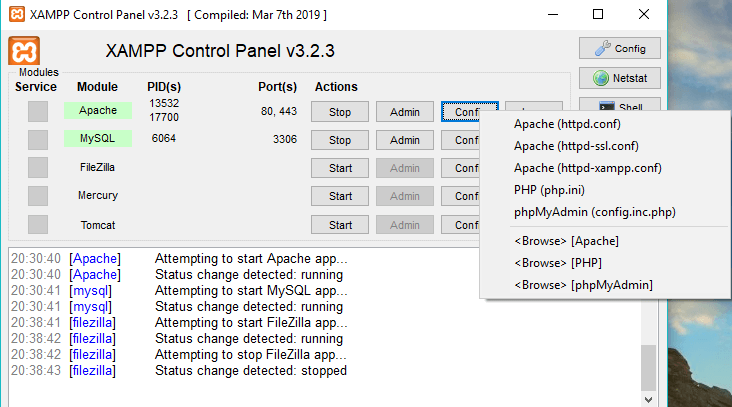
e.Now click on the Config button next to Apache under the Module section in XAMPP Control Panel.
f.Click on 아파치(httpd-ssl.conf) 컨텍스트 메뉴에서.
g.Search for “조각” under the text file which just opened and change the port value to which you earlier noted in step c. Here it will be 4433 but in your case, it will be different.

h.Also look for <VirtualHost _default_:previous port number>. Change the port number to the new port number. In this case, it will look like
i.Save the changes.
4.After making changes, click on the 저장 버튼.
5.If you do not want to save the changes then click on the Abort button and your XAMPP will roll back to the previous state.
Netstat
On the extreme right side, below the Config button, Netstat button is available. If you will click on it, it will give you a list of services or sockets currently running and accessing which network, their process ID and TCP/IP port information.
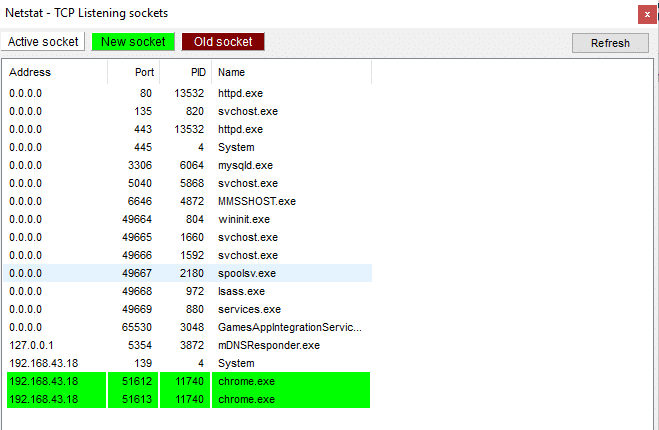
List will be divided into three parts:
- Active Sockets/Services
- New Sockets
- Old Sockets
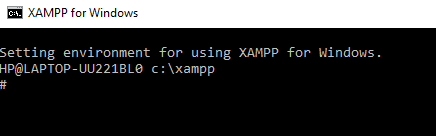
껍질
On the extreme right side, below the Netstat button, Shell button is available. If you click on the Shell button then it would open the shell command line utility where you can type commands to access the services, apps, folders, etc.
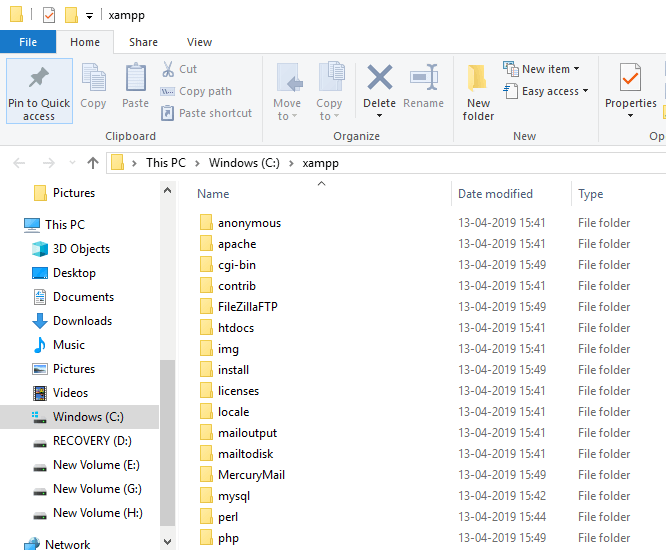
블록체인 탐색기
Below the Shell button, there is an Explorer button, by clicking on it you can open the XAMPP folder in File Explorer and can see all the available folders of XAMPP.
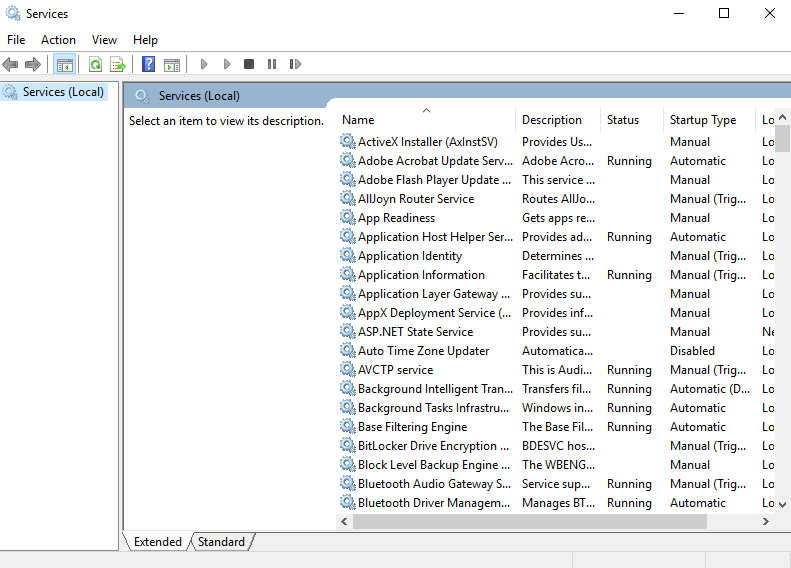
서비스
If you click on the Services button below the Explorer button, it will open the Services dialog box which will give you the details of all the services running on your computer.
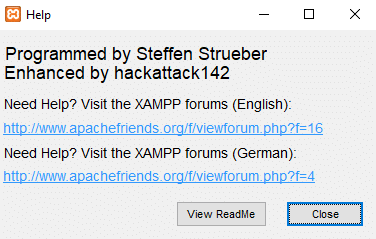
도움말
By clicking on Help button present below the Service button, you can look for any help you want by clicking on the available links.
종료
If you want to exit from XAMPP Control Panel, then click on the 종료 버튼 available on the extreme right side below the Help button.
Log Section
At the bottom of the XAMPP Control Panel, present a box of logs where you can see which activities are currently running, what errors are faced by the running services of XAMPP. It will provide you with information on what happens when you start a service or when you stop service. Also, it will provide you information regarding each and every action taking place under XAMPP. This is also the first place to look when something goes wrong.
Most of the times, your XAMPP will work perfectly using the default settings to create a testing environment to run the website you have created. However, sometimes depending on the availability of port or your setup configuration you may need to change the TCP/IP port number of the running services or set the password for phpMyAdmin.
To change these settings, use the Config button corresponding to the service for which you want to make changes and save the changes and you will be good to use the XAMPP and the other services provided by it.
권장 사항 :
이 기사가 도움이 되었기를 바랍니다. 이제 쉽게 할 수 있습니다. Install And Configure XAMPP on Windows 10, 하지만 이 튜토리얼에 관해 여전히 질문이 있는 경우 댓글 섹션에서 자유롭게 질문하세요.
")
