Remove Administrative Tools in Windows 10

Remove Administrative Tools in Windows 10: Administrative Tool is a folder in Control Panel which contains tools for system administrators and advanced users. So it’s pretty safe to assume that the guest or novice Windows users should not have access to Administrative Tools and in this post, we will exactly see how to hide, remove or disable Administrative Tools in Windows 10. These tools are critical and messing with them can damage your system and that’s why restricting access to them is a good idea.
There are few ways via which you can easily disable or remove Administrative Tools for guest users but we are going to discuss each of them in detail. So without wasting any time let’s see how to Remove Administrative Tools in Windows 10 with the help of the below-listed guide.
Remove Administrative Tools in Windows 10
혹시라도 문제가 생길 경우를 대비해 복원 지점을 만들어 두시기 바랍니다.
1. Windows 키 + R을 누른 후 다음을 입력하고 Enter 키를 누릅니다.
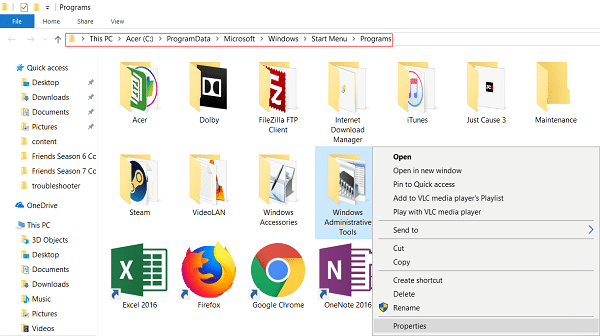
C : ProgramDataMicrosoftWindowsStart MenuPrograms
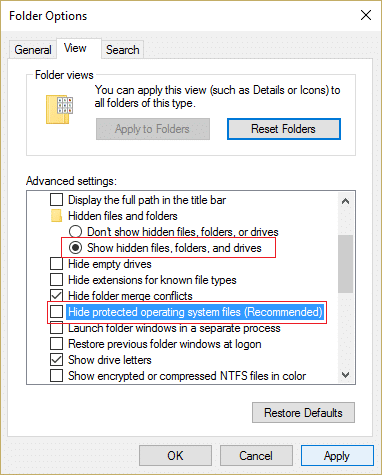
참고 : Make sure show hidden files and folders are enable in File Explorer.
2. 아래 프로그램 folder search for Windows Administrative Tools, 그런 다음 마우스 오른쪽 버튼을 클릭하고 선택하십시오. 속성.
3.전환 보안 탭 클릭 편집 버튼.

4.Select 누구나 from Group or user name and checkmark Deny next to Full Control.
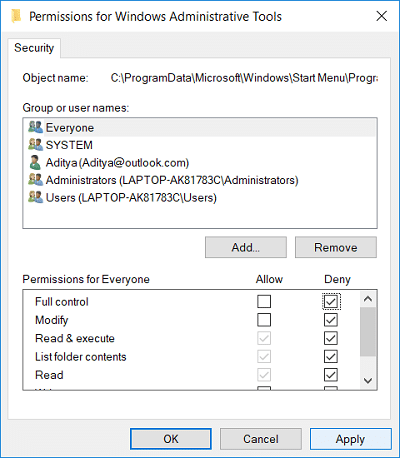
5.Do this for every account you want to restrict access to.
6.If this doesn’t work then you can simply select Everyone and select Remove.
7. PC를 재부팅하여 변경 사항을 저장합니다.
Method 2: Remove Administrative Tools Using Group Policy Editor
참고 : 이 방법은 Windows 10 Home Edition 사용자에게는 작동하지 않습니다.
1. Windows 키 + R을 누른 다음 입력 gpedit.msc를 Enter를 누르십시오.

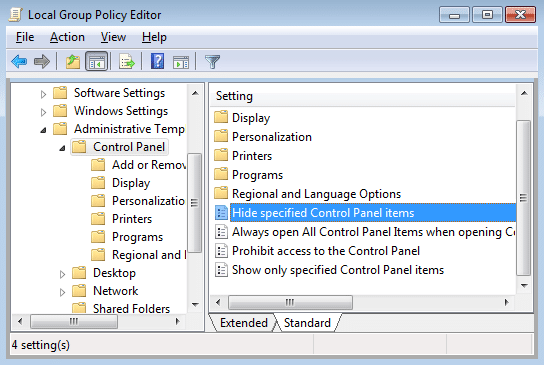
2.Next, navigate to the following path:
사용자 구성> 관리 템플릿> 제어판
3.Make sure to select Control Panel then in the right window double click on Hide Specified Control Panel Items.
4.Select 사용 그리고 클릭 버튼 표시 옵션에서.
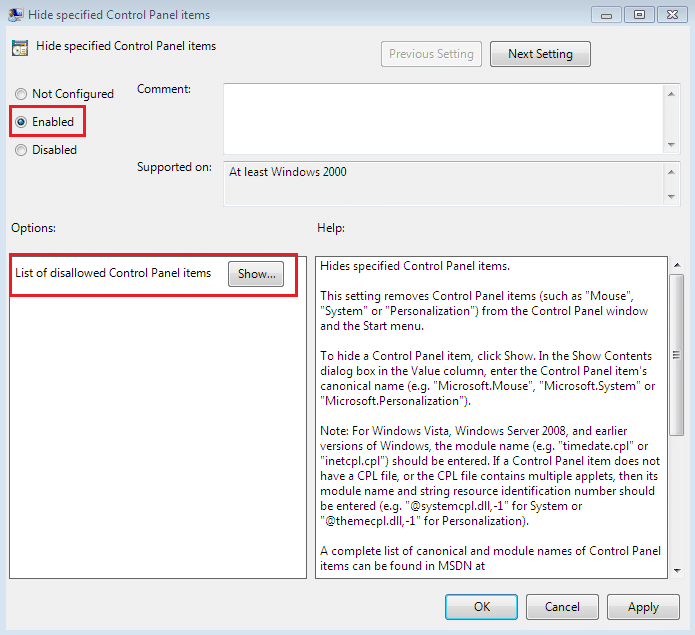
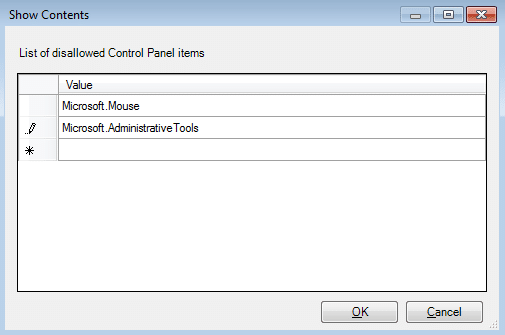
5.In the Show context box type the following value and click OK:
Microsoft.AdministrativeTools
6. 적용을 클릭한 다음 확인을 클릭합니다.
7. PC를 재부팅하여 변경 사항을 저장합니다.
Method 3: Remove Administrative Tools Using Registry Editor
1. Windows 키 + R을 누른 다음 입력 regedit를 Enter를 누르십시오.

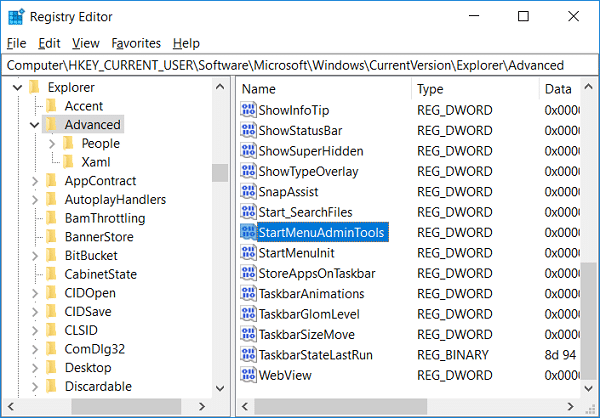
2. 다음 레지스트리 키로 이동합니다.
HKEY_CURRENT_USERSoftwareMicrosoftWindowsCurrentVersionExplorerAdvanced
3.Select Advnaced then from the right window pane double-click on StartMenuAdminTools.
4.Set the value to 0 in the value data field in order to disable it.
To disable Administrative Tools: 0
To enable Administrative Tools: 1
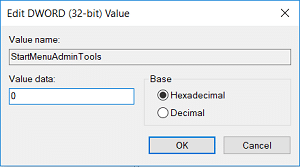
5.Click OK and close Registry Editor.
권장 사항 :
그게 당신이 성공적으로 Remove Administrative Tools in Windows 10 but if you still have any questions regarding this post then feel free to ask them in the comment’s section.