Windows 10에서 USB 장치가 작동하지 않음 [해결됨]

USB Device not working in Windows 10 is a common problem that arises when dealing with USB. Typically USB Device not working error is shown after a USB device such as a printer, scanner, External drive, Hard disk, or Pen drive is connected to the computer. Sometimes when this error occurs, the Device Manager may list an “Unkown Device” in Universal Serial Bus controllers.
In this guide, you can find all information regarding the USB Device not working in Windows 10 issue. After spending a lot of time we have come up with these few working solutions on how to fix USB Device not working issue. Please try all the methods listed below, before you come to any conclusion.
Different types of error you may receive when dealing with USB Device not working:
- USB 장치를 인식 할 수 없습니다
- Unrecognized USB device in Device Manager
- USB Device driver software was not successfully installed
- 문제를 보고했기 때문에 Windows에서 이 장치를 중지했습니다(코드 43).
- Windows can’t stop your “Generic volume” device because a program is still using it.
![Fix USB Device Not Working in Windows 10 [SOLVED]](https://lbsite.org/wp-content/uploads/2023/01/Fix-USB-not-working-Windows-10.png)
Fix USB Device Not Working in Windows 10 [SOLVED]
Common Causes of the USB Device not working error:
- Corrupted or outdated USB drivers.
- The USB device may have malfunctioned.
- Host controller hardware malfunction.
- The computer does not support USB 2.0 or USB 3.0
- USB Generic Hub drivers are not compatible or are corrupted.
Now let’s see How to Fix USB Device Not Working in Windows 10 with the help of the below-listed troubleshooting guide.
Method 1: Disable EnhancedPowerManagementEnabled
1. Press Windows Key + R and type “devmgmt.msc를” 그런 다음 Enter 키를 눌러 장치 관리자를 엽니다.

2. Now expand 범용 직렬 버스 컨트롤러.
3. Next, plug in your USB device which is experiencing a problem, and notice the change in the Universal Serial Bus controllers i.e. you will see the list updated with your Device.
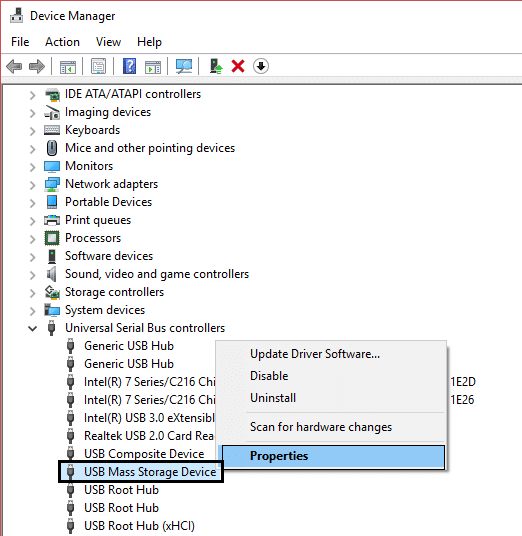
참고 : You may have to use hit and trial in order to identify your device and in doing so you have to connect/disconnect your USB device multiple times. Always use the “Safely remove” option when disconnecting your USB device.
4. After you have identified your device in Universal Serial Bus controllers, right-click on it and select 속성.
5. Next switch to Details tab and from Property drop-down select “Device instance path."
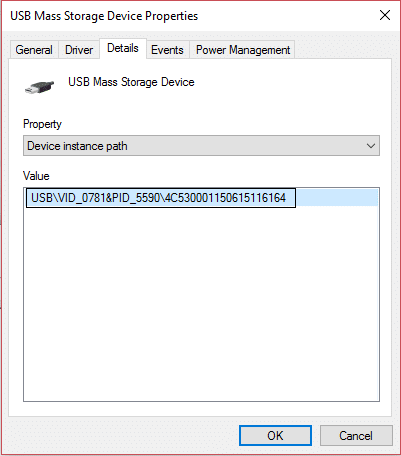
6. 메모해 두세요 value of the Device instance path because we will need it further or right-click and copy it.
7. 프레스 Windows 키 + R "regedit를” then hit enter to open Registry Editor.

8. Navigate to the following:
HKEY_LOCAL_MACHINESYSTEMCurrentControlSetEnumUSB<Device Instance Path>Device Parameters
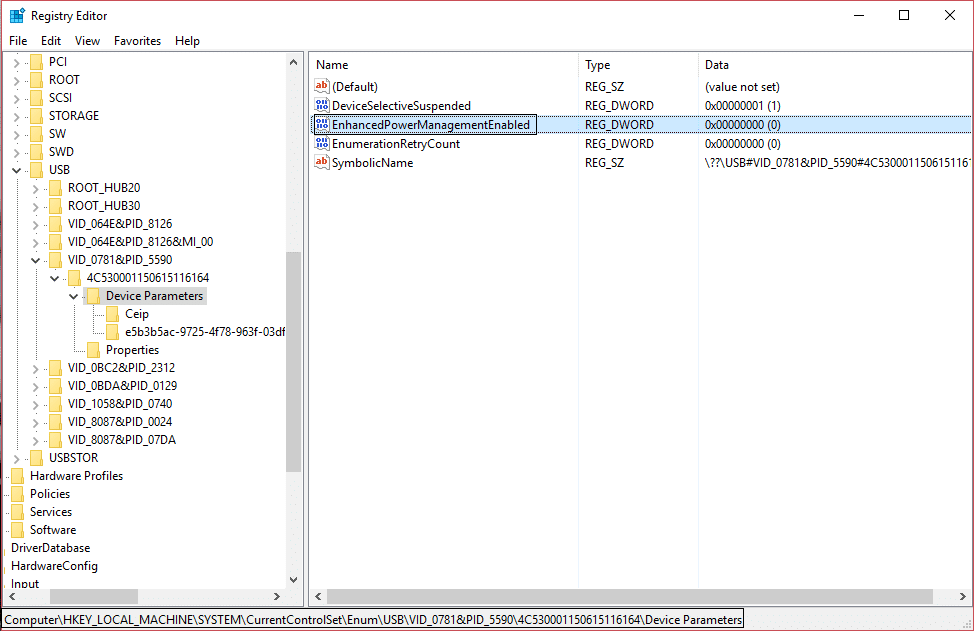
9. Now search for the DWORD EnhancedPowerManagementEnabled and Double click on it.
참고 : If you couldn’t find the DWORD create one by right-click, then select New and then DWORD (32-bit) value. And name the DWORD as “EnhancedPowerManagementEnabled” then enter 0 in the value and click OK.
10. 값을 다음에서 변경합니다. 1 ~ 0 확인을 클릭하십시오.
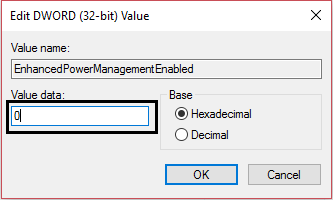
11. You may now close the Registry Editor as well as Device Manager.
12. Reboot your PC to apply changes and this may be able to fix USB Device Not Working in Windows 10 issue.
방법 2: 하드웨어 및 장치 문제 해결사 실행
1. Open Control Panel using the Windows search bar.
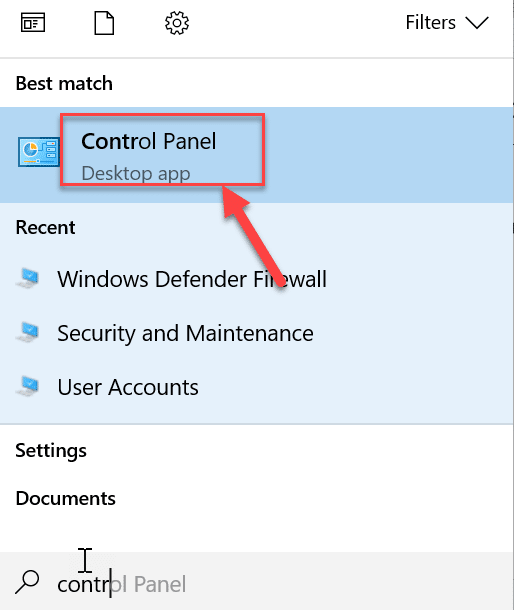
2. 선택 제어 패널 from the search list. The Control Panel window will open up.
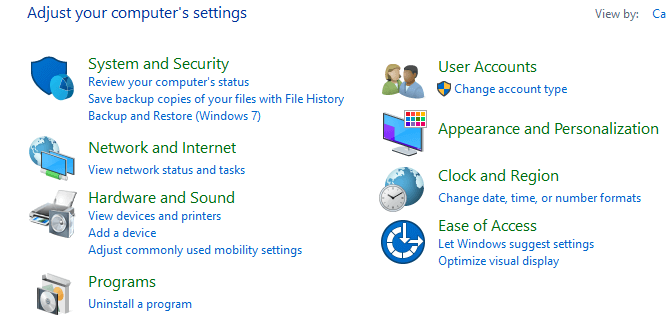
3. 검색 분쟁 조정자 using the search bar on the top right corner of the Control Panel screen.

4. 을 클릭 문제해결 검색 결과에서.
5. The troubleshooting window will open up.
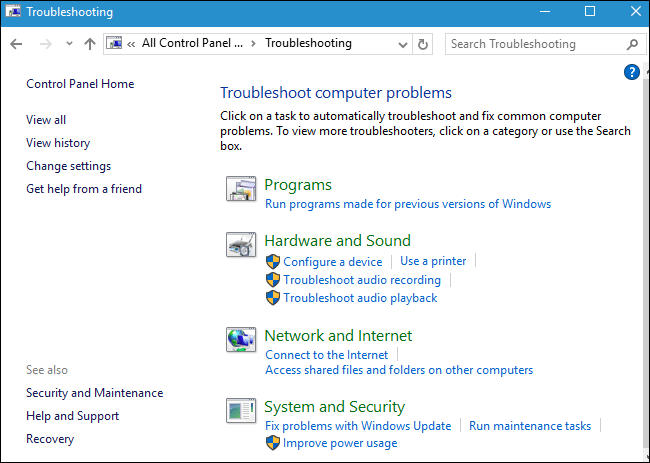
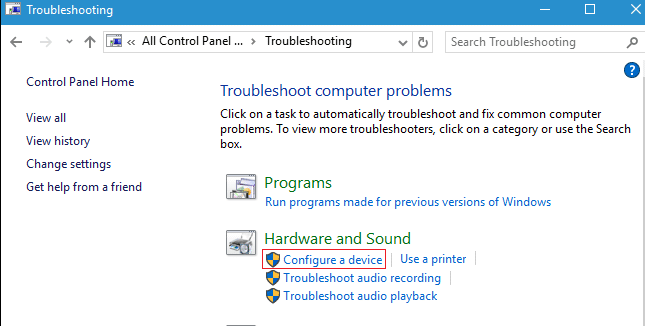
6. 을 클릭 Hardware and Sound option.
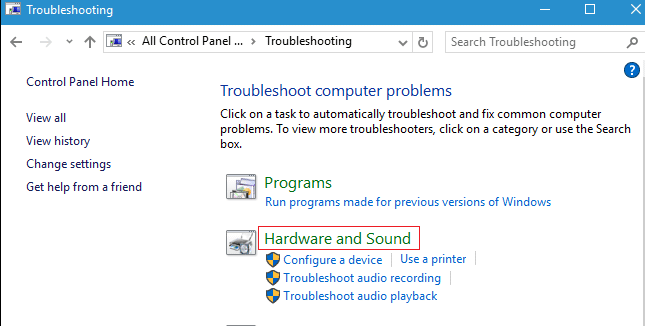
7. Under Hardware and Sound, click on Configure a device option.
8. You will be prompted to find and enter the administrator password. Enter the password and then click on the confirmation.
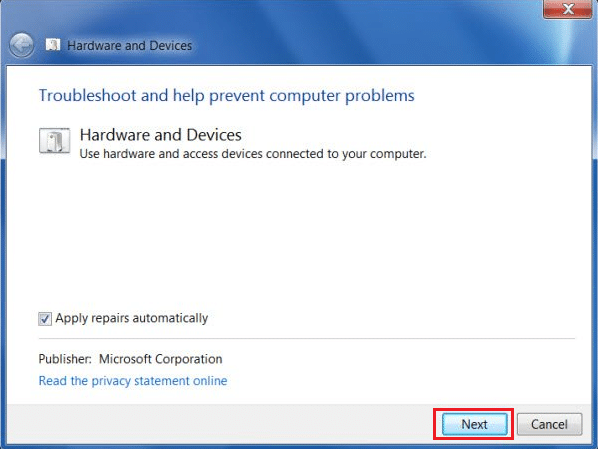
9. The Hardware and Devices Troubleshooter window will open up.
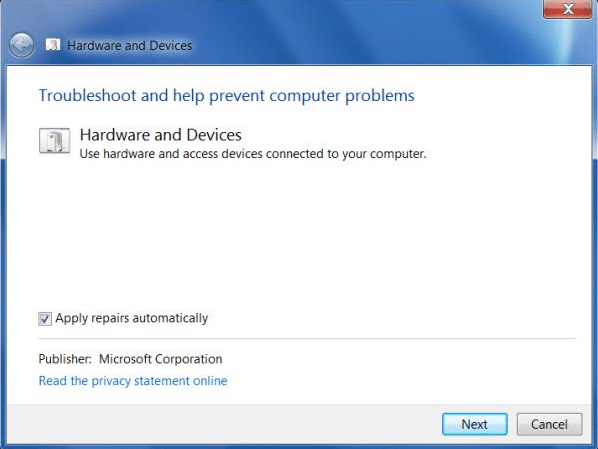
10. 클릭 다음 버튼 that will be on the bottom of the screen to run the Hardware and Devices troubleshooter.
11. The troubleshooter will start detecting issues. If issues are found on your system, then you will be prompted to fix the issues.
Method 3: Update your Device Driver
1. 프레스 Windows 키 + R "devmgmt.msc를” 그런 다음 Enter 키를 눌러 장치 관리자를 엽니다.
2. Now expand 범용 직렬 버스 컨트롤러.
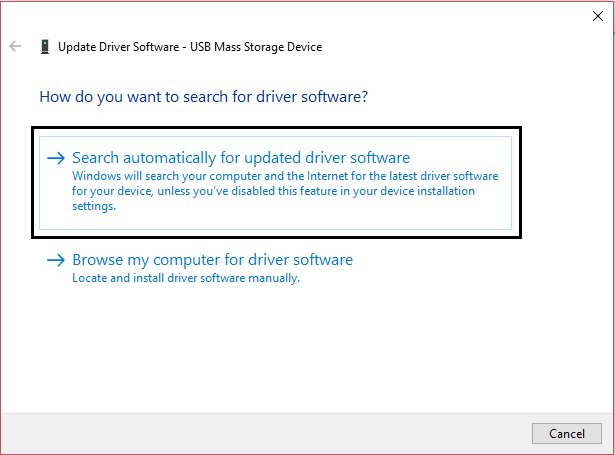
3. Next right-click on the device which you earlier identified in Method 1 and select “드라이버 소프트웨어를 업데이트하십시오."
4. 고르다 "업데이트 된 드라이버 소프트웨어를 자동으로 검색합니다."

5. Let the process finish and see if you’re able to fix the issue.
6. If not, then again repeat step 3. This time select “내 컴퓨터에서 드라이버 소프트웨어 찾아보기."
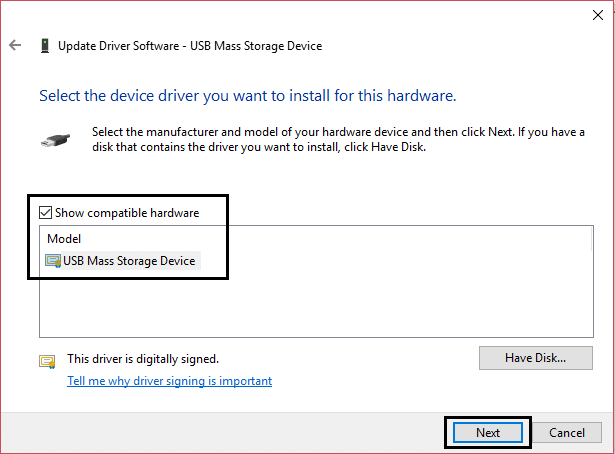
7. 고르다 "컴퓨터의 장치 드라이버 목록에서 선택하겠습니다."
8. 다음으로 USB 대용량 저장 장치 다음을 클릭하십시오.
참고 : Make sure Show compatible hardware is checked.
9. Click close and also close the Device Manager.
10. Reboot to apply your changes and this may be able to Fix USB Device Not Working in Windows 10.
Method 4: Automatically diagnose and fix Windows USB problems
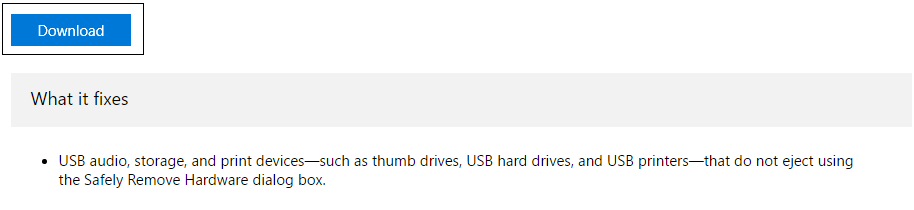
1. Navigate to this link 다운로드 버튼을 클릭합니다.
2. When the page has finished loading, scroll down, and click 다운로드 할 수 있습니다.
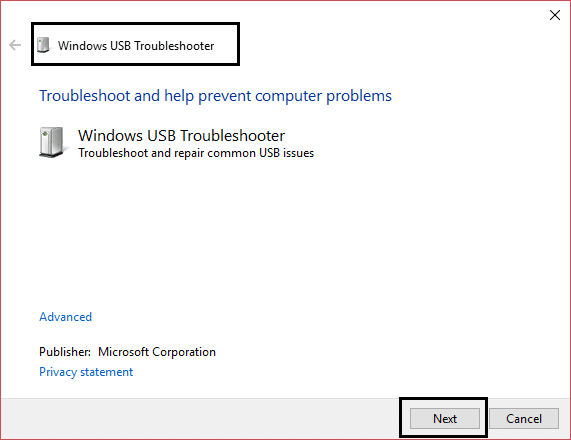
3. Once the file is downloaded, double-click the file to open the Windows USB Troubleshooter.
4. Click next and let Windows USB Troubleshooter run.
5. IF you have any attached devices then USB Troubleshooter will ask for confirmation to eject them.
6. Check the USB device connected to your PC and click Next.
7. If the problem is found, click on 이 수정 사항을 적용하십시오.
8. PC를 다시 시작하십시오.
Method 5: Install the latest Intel device drivers.
1. 인텔 드라이버 업데이트 유틸리티를 다운로드합니다.
2. 드라이버 업데이트 유틸리티를 실행하고 다음을 클릭하세요.
3. 라이센스 계약에 동의 설치를 클릭합니다.
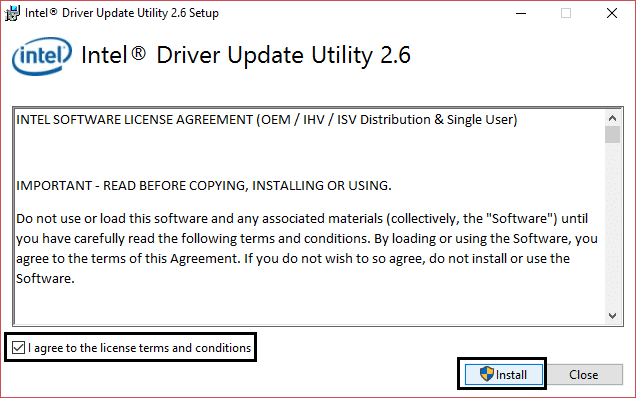
4. Wait for Intel Driver Update Utility to initialize and install all required programs and files.
5. After System Update has finished click 시작하다.
6. 이제 선택 스캔 시작 and when the driver scan is completed, click on 다운로드 할 수 있습니다.
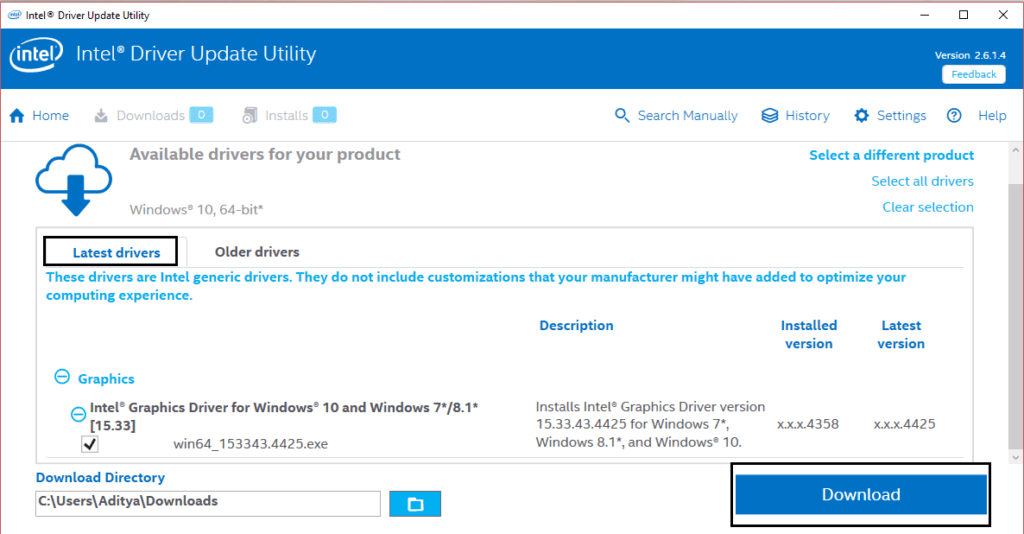
7. All the Drivers will be downloaded to your default download directory mentioned in the bottom left.
8. 마지막으로 설치 to install the latest Intel drivers for your PC.
9. When the driver installation is completed, reboot your computer.
당신이 할 수 있는지 확인 fix USB Device Not Working in Windows 10 issue, 그렇지 않은 경우 다음 방법을 계속 진행하세요.
Method 6: Run Windows Disk Error Checking
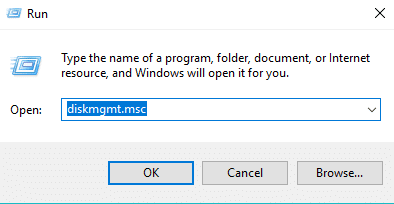
1. 프레스 Windows 키 + R 다음을 입력하십시오. diskmgmt.msc를 Enter를 누르십시오.
2. Next right-click on your USB 드라이브 선택 속성.
3. 이제 도구 탭 inside properties.
4. 을 클릭 Check-in Error Checking.
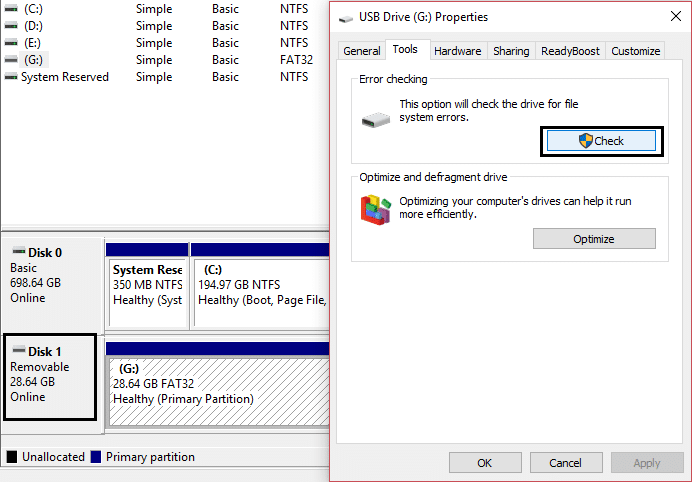
5. When the USB Error Checking is completed, close everything, and Reboot.
당신을 위해 추천 된:
That’s it, you have successfully Fix USB Device Not Working in Windows 10 issue. I hope one of the above-listed methods has fixed your problem/issue successfully and if you still have any queries regarding this guide feel free to ask them in comments. And share this post with your family or friends to help them in dealing with USB errors.