Meriv çawa di Windows 11-ê de Amûra Grafîkê saz dike

DirectX Graphics Tools is not installed by default in Windows 11. But, it can be added via operating system Optional features. Today, we bring to you a helpful guide that will teach you how to install or uninstall Graphics Tool in Windows 11, as need be. A few noteworthy features of this tool include:
- It is essential for performing graphics diagnostics and other related functions.
- Ew jî dikare were bikar anîn create Direct3D debug devices.
- Moreover, it can be used to develop DirectX games & applications.
- In addition to 3D-related functions, this technology also allows you to track real-time GPU consumption and when & which apps or games employ Direct3D technology.
How to Install In-built DirectX Graphics Tool in Windows 11
Follow the given steps to install Graphics Tool on Windows 11 PC:
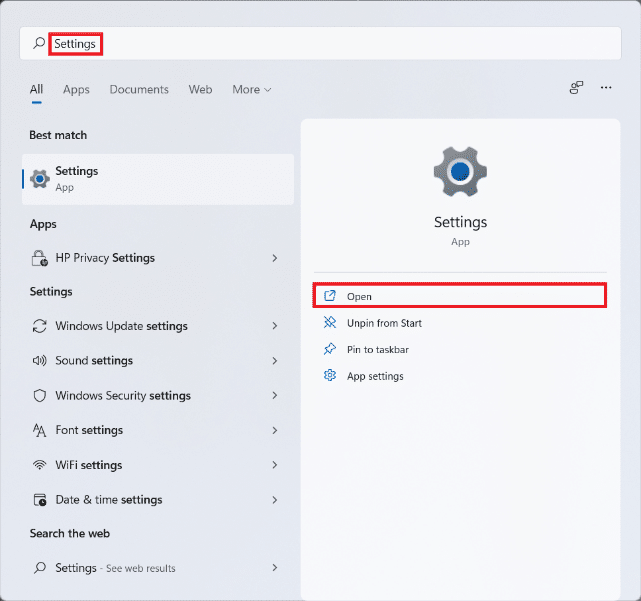
1. Li ser binêrin Icon icon û cureyê Mîhengên, paşê bitikîne Vekirî, wekî ku tê xuyang kirin.
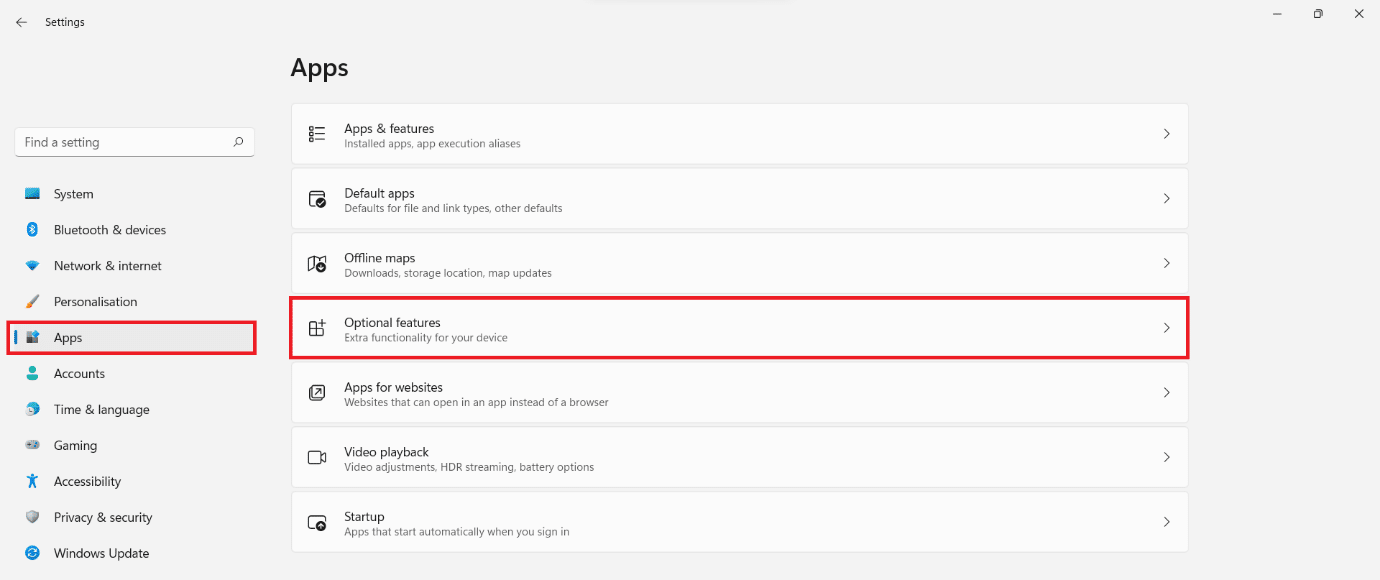
2. Kılik lı ser Apps li milê çepê.
3. Piştre, li ser bitikîne Bixwe features, wek ku li jêr tê nîşandan.
4. Dûv re, bikirtînin Dîtinî features.

5. Awa graphics tools in the search bar provided in the Taybetmendiyek vebijarkî lê zêde bike pace.
6. Qutiya nîşankirî kontrol bikin Graphics Tools û bitikîne Piştî, wekî ku li jêr tê destnîşan kirin.

7. Niha, li ser bitikîne Lêkirin pişkov.
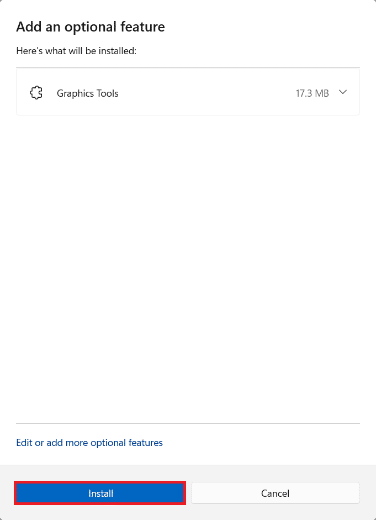
8. Bila Graphics Tools be Sazkirin. You can see the progress under Çalakiyên dawî liq.

Her weha bixwîne: How to Install XPS Viewer in Windows 11
How to Use DirectX Graphics Tools on Windows 11
Microsoft hosts a dedicated page on DirectX Programming. Here are the steps to use Windows 11 Graphics Diagnostic Tools:
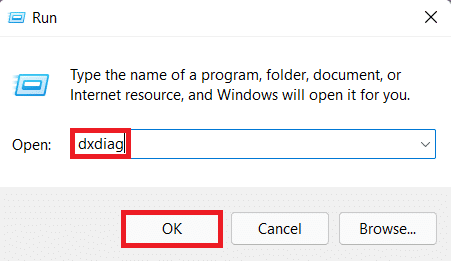
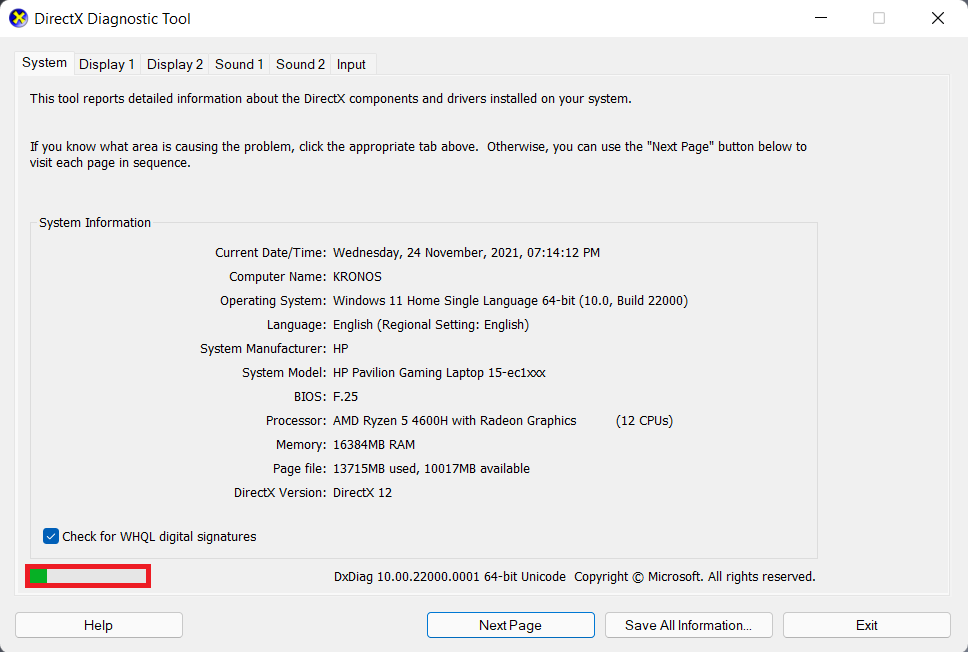
1. Rojnamevanî Bişkojkên Windows + R di heman demê de vekin Rev boxa dialog
2. Awa dxdiag û bitikîne OK destpêkirin Amûra Diagnostîkê ya DirectX pace.
3. You may notice a green progress bar at the bottom left corner, shown highlighted. This means that the diagnostic process is active. Wait for the process to be completed.
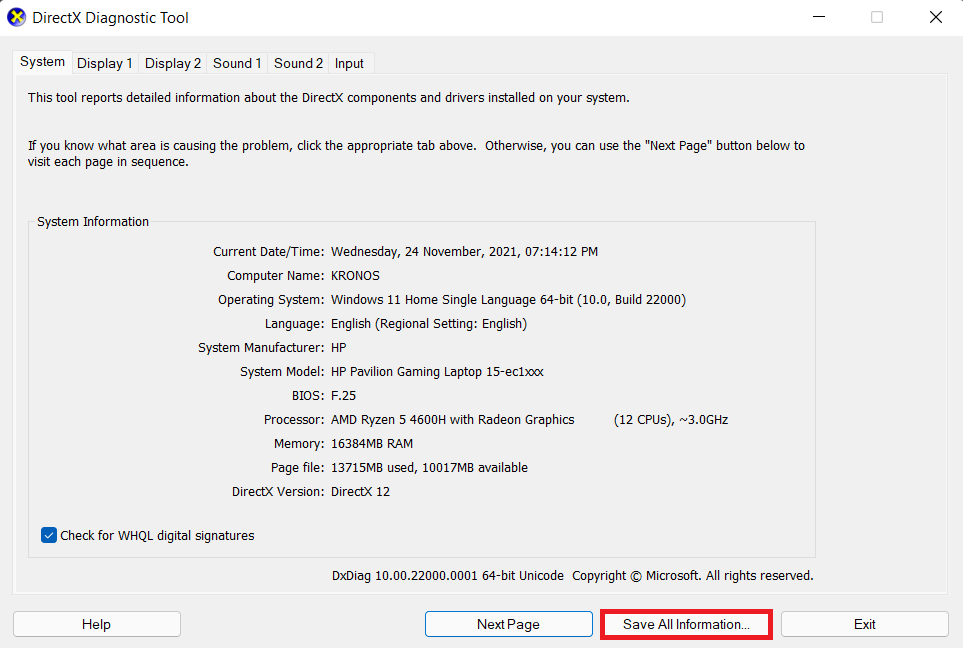
4. When the diagnosis is complete, the green progress bar will disappear. Click on Save All Information… bişkojka ku li jêr tê xuyang kirin.
Her weha bixwîne: How to Use PowerToys on Windows 11
How to Uninstall DirectX Graphics Tools
To uninstall Windows 11 Graphics Tools, follow the steps mentioned below:
1. Destpêkirin Mîhengên wekî ku tê xuyang kirin.
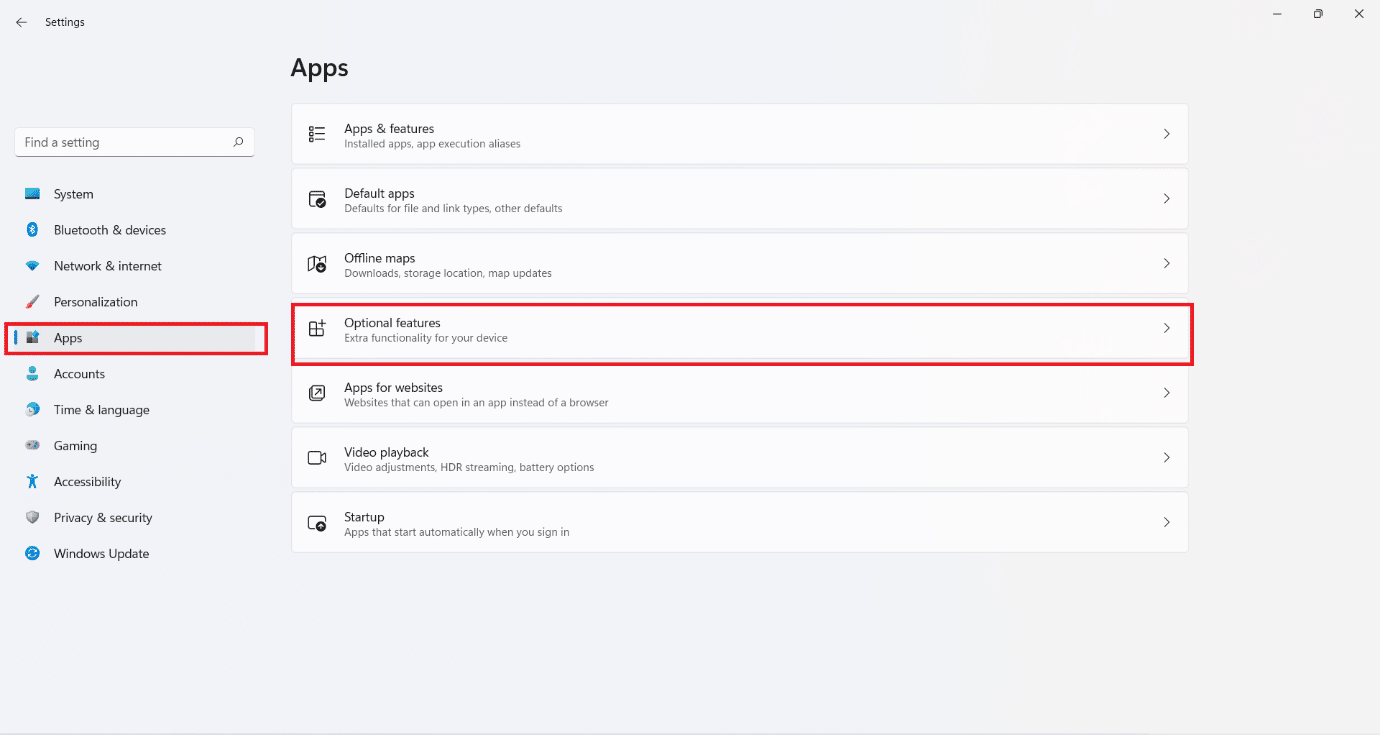
2. Biçe Apps > Taybetmendiyên alternatîf, wekî ku tê xuyang kirin.
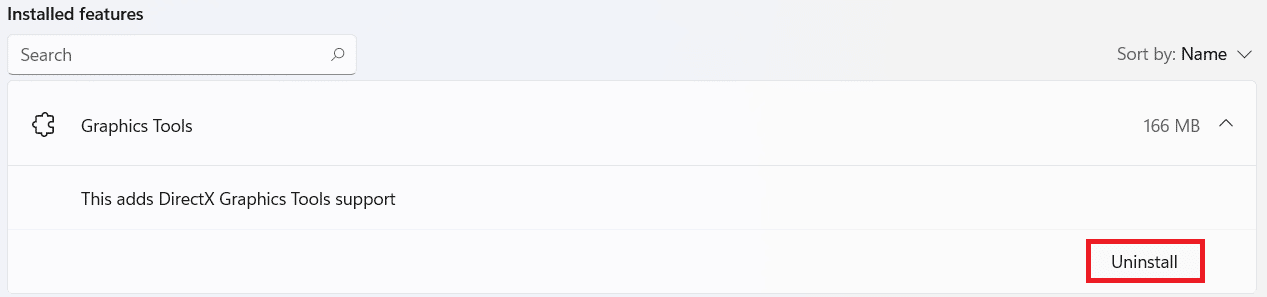
3. Scroll down the list of Taybetmendiyên sazkirî an lêgerîn Graphics Tools in the search bar provided to locate it.
4. Bitikînin downward-pointing arrow di Graphics Tools tile and click on Rakirin, wekî ku tê xuyang kirin.
5. Once the uninstallation process is finished, you will see Rakir tag under Çalakiyên dawî liq.

Baştir e:
We hope you found this article helpful about how to install, use or uninstall DirectX Graphics Tool in Windows 11. Drop your suggestions and queries in the comment section below. We would love to hear from you. Stay tuned for more such info!