ປິດການໃຊ້ງານ Touchpad ໂດຍອັດຕະໂນມັດເມື່ອເມົາສ໌ເຊື່ອມຕໍ່
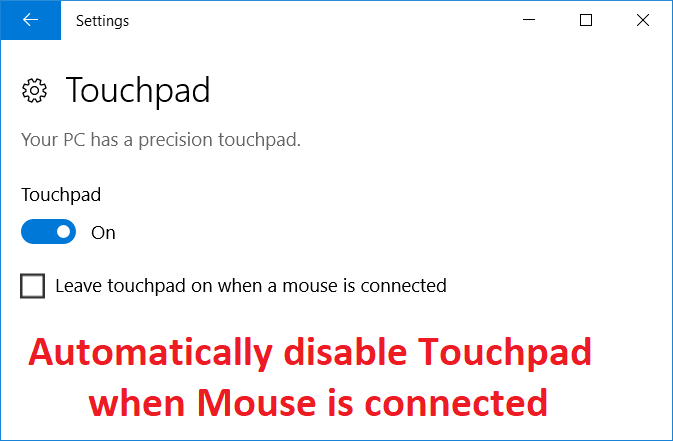
If you use a traditional mouse over Touchpad, you could automatically disable touchpad when you plug in the USB Mouse. This can be easily done via Mouse Properties in Control Panel where you have a label called “Leave touchpad on when a mouse is connected”, so you need to uncheck this option and you’re good to go. If you have Windows 8.1 with the latest update, you could easily configure this option right from PC settings.

This option makes it easier for users to navigate and you don’t need to worry about accidental touch or click over touchpad when using a USB Mouse. So without wasting any time let’s see How to Automatically disable Touchpad when Mouse is Connected in Windows 10 with the help of the below-listed guide.
ປິດການໃຊ້ງານ Touchpad ໂດຍອັດຕະໂນມັດເມື່ອເມົາສ໌ເຊື່ອມຕໍ່
ໃຫ້ແນ່ໃຈວ່າສ້າງຈຸດຟື້ນຟູພຽງແຕ່ໃນກໍລະນີທີ່ມີບາງຢ່າງຜິດພາດ.
Method 1: Disable Touchpad when Mouse is connected via Settings
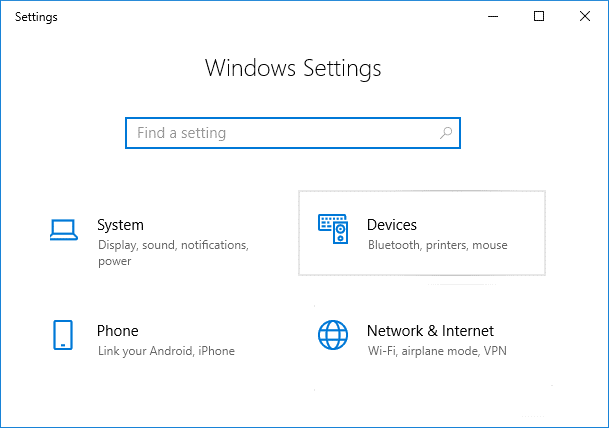
1. ກົດ Windows Key + I ເພື່ອເປີດ ການຕັ້ງຄ່າ ຈາກນັ້ນກົດເຂົ້າ ອຸປະກອນ.
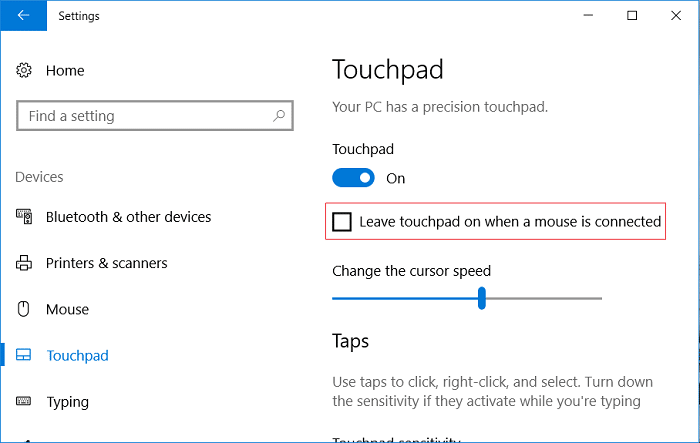
2. ຈາກເມນູຊ້າຍມື, ເລືອກເອົາ ແທັບເລັດ.
3. Under Touchpad uncheck "ເປີດ touchpad ເມື່ອເມົາສ໌ເຊື່ອມຕໍ່".
4. Reboot PC ຂອງທ່ານເພື່ອບັນທຶກການປ່ຽນແປງ.
Method 2: Disable Touchpad when Mouse is connected via Mouse Properties
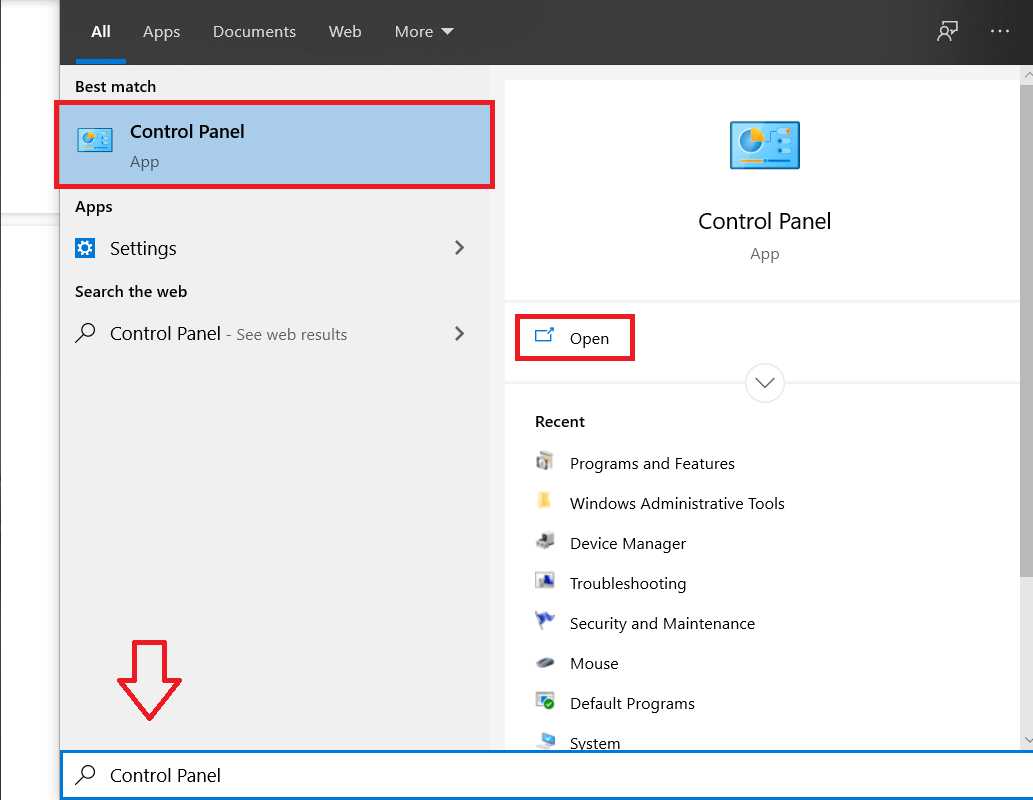
1. ກົດ Windows Key + Q ເພື່ອເປີດ Search, ພິມ ຄວບຄຸມ, ແລະຄລິກໃສ່ ກະດານການຄວບຄຸມ ຈາກຜົນການຄົ້ນຫາ.
2. ຖັດໄປ, ກົດເຂົ້າ ຮາດແວແລະສຽງ.
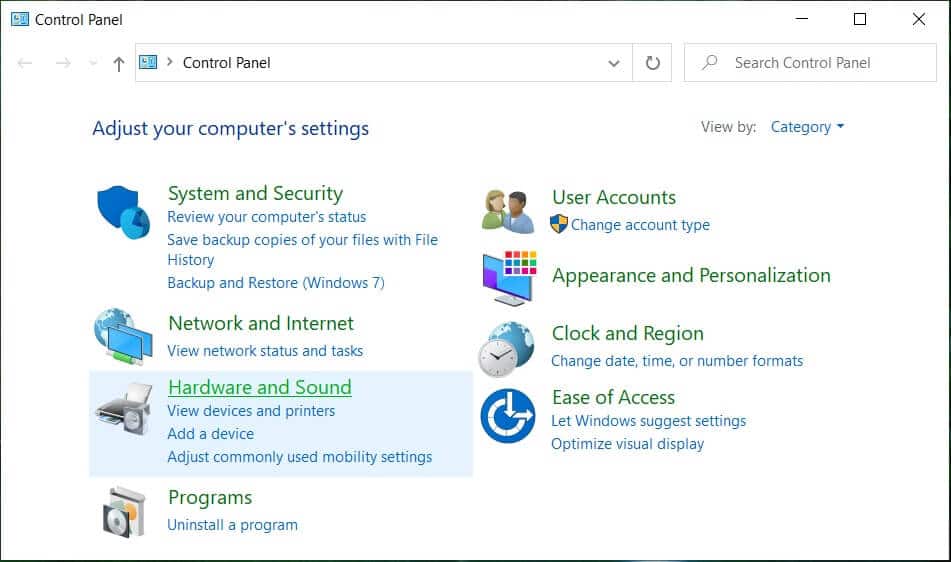
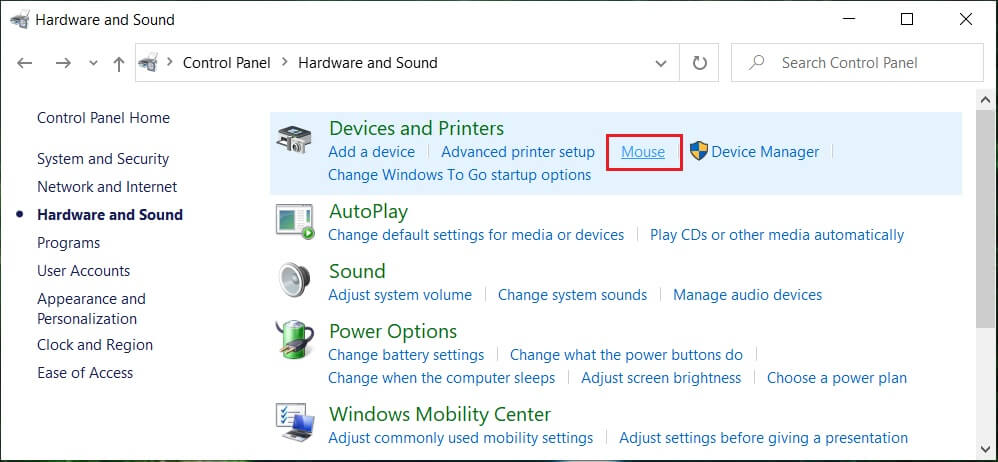
3. Under Devices and Printers click on ໜູ.
4. ປ່ຽນເປັນ ELAN or Device Settings tab then uncheck "Disable internal pointing device when the external USB pointing device is attached"ທາງເລືອກ.
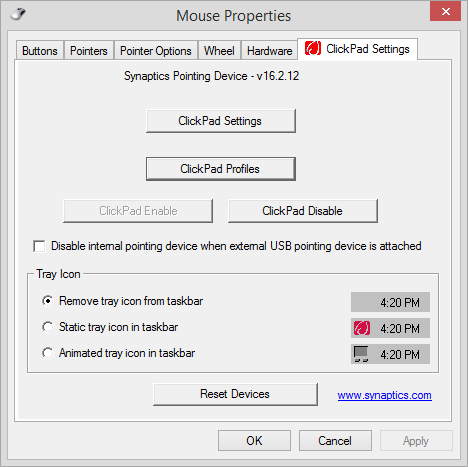
5. ກົດ Apply, ຕາມດ້ວຍ ຕົກລົງ.
Method 3: Disable Dell Touchpad when Mouse is connected
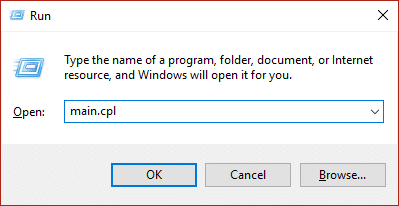
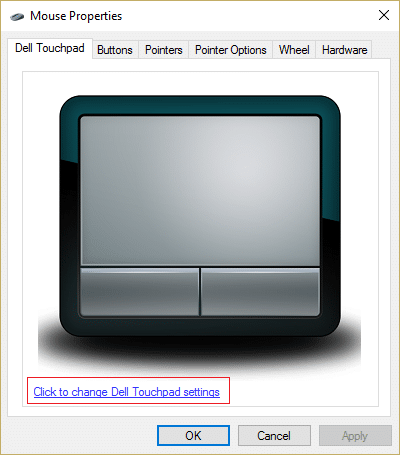
1. ກົດ Windows Key + R ແລ້ວພິມ main.cpl ແລະກົດ Enter ເພື່ອເປີດ ຄຸນສົມບັດຂອງຫນູ.
2. Under Dell Touchpad tab, click on “Click to change Dell Touchpad settings".
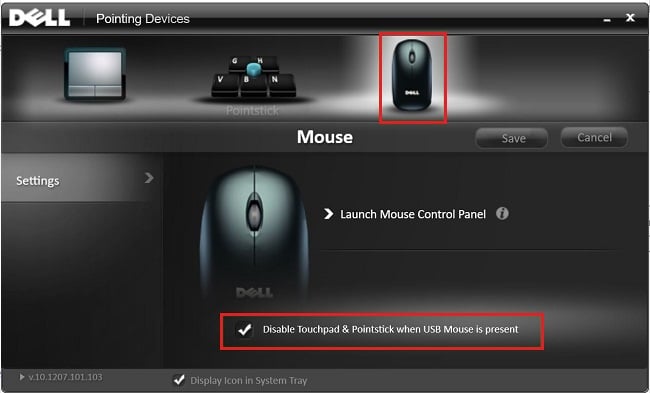
3. From Pointing Devices, select the Mouse picture from the top.
4. Checkmark “Disable Touchpad when USB mouse is present".
5. Reboot PC ຂອງທ່ານເພື່ອບັນທຶກການປ່ຽນແປງ.
Method 4: Disable Touchpad when Mouse is connected via Registry
1. ກົດ Windows Key + R ແລ້ວພິມ regedit ແລະກົດ Enter ເພື່ອເປີດ Registry Editor.

2. ທ່ອງໄປຫາກະແຈການລົງທະບຽນຕໍ່ໄປນີ້:
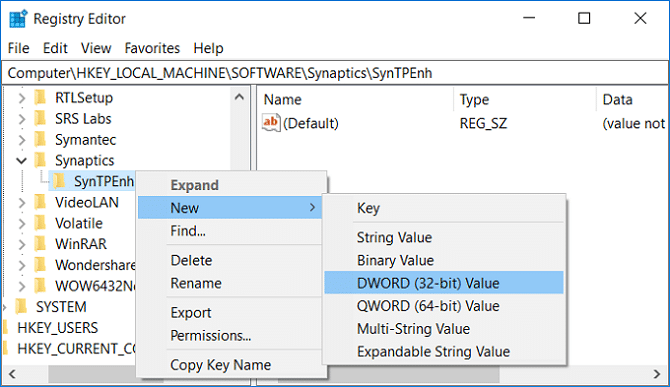
HKEY_LOCAL_MACHINESOFTWARESynapticsSynTPEnh
3. ກົດຂວາໃສ່ SynTPEnh ຫຼັງຈາກນັ້ນເລືອກເອົາ ໃໝ່ > ຄ່າ DWORD (32-ບິດ).
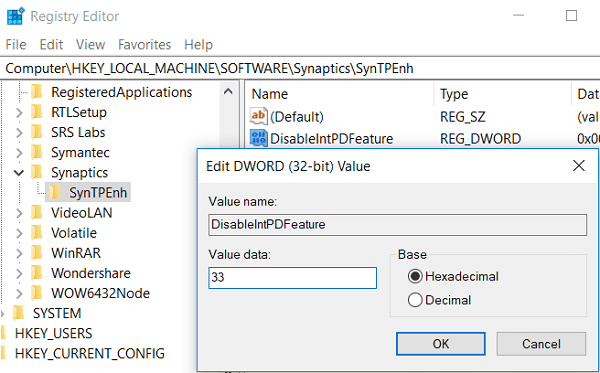
4. Name this DWORD as DisableIntPDFeature and then double click on it to change its value.
5. ຮັບປະກັນວ່າ Hexadecimal is selected under Base then change its value to 33 ແລະກົດ OK.
6. Reboot PC ຂອງທ່ານເພື່ອບັນທຶກການປ່ຽນແປງ.
Method 5: Disable Touchpad when Mouse is Connected in Windows 8.1
1. Press Windows Key + C key to open ການຕັ້ງຄ່າ ສະເນ່.
2 ເລືອກເອົາ ປ່ຽນການຕັ້ງຄ່າ PC than from the left-hand menu click on PC and Devices.
3. ຈາກນັ້ນກົດເຂົ້າ ເມົາສ໌ແລະ Touchpad, then from the right window look for an option labelled as “ເປີດ touchpad ເມື່ອເມົາສ໌ເຊື່ອມຕໍ່".
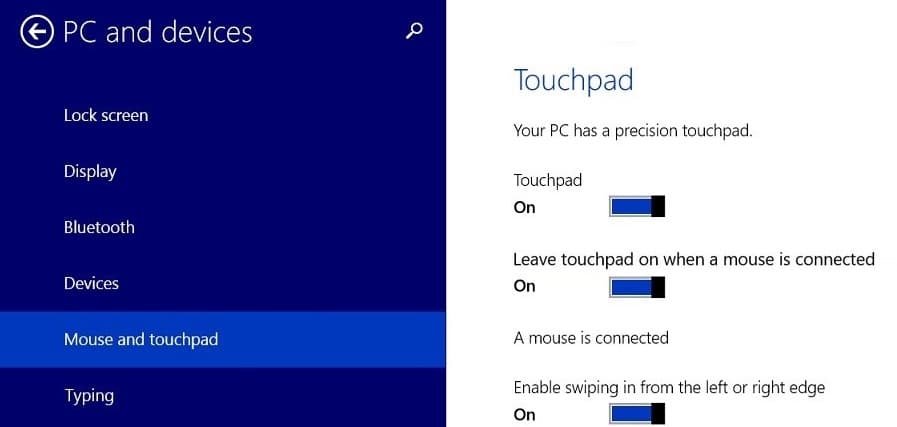
4. ໃຫ້ແນ່ໃຈວ່າ disable or turn off the toggle for this option.
5. Reboot your PC to save changes, and this will automatically disable Touchpad when Mouse is connected.
ແນະນໍາໃຫ້:
ນັ້ນແມ່ນທ່ານໄດ້ສໍາເລັດຜົນ Disable Touchpad when Mouse is Connected in Windows 10 ແຕ່ຖ້າທ່ານຍັງມີຄໍາຖາມໃດໆກ່ຽວກັບຄູ່ມືນີ້, ກະລຸນາຖາມພວກເຂົາຢູ່ໃນສ່ວນຄໍາເຫັນ.