ວິທີການຕັ້ງຮູບພື້ນຫລັງສໍາລັບ Microsoft Word

Microsoft Word has become one of the basic requirements in this digital world. Are you bored of the regular text in Word and wish to customize the document a little? How about setting a background picture for Word document? Yes, you can set a background picture for Microsoft Word. This article focuses on the methods to set a picture as background for either a page or for the entire document. Additionally, you will learn the answer to the question of how to insert picture as background in Word.
ວິທີການຕັ້ງຮູບພື້ນຫລັງສໍາລັບ Microsoft Word
Below we have shown how to set background picture for Microsoft Word for entire document and single page.
Method 1: Set Background for Entire Document
Using the methods described in this section, you can set a background picture for Word document. The options let you set the same background for the entire word document.
Option I: Use Page Color Button
This option lets you set the picture as a Background for your entire Word document using the Page Color button.
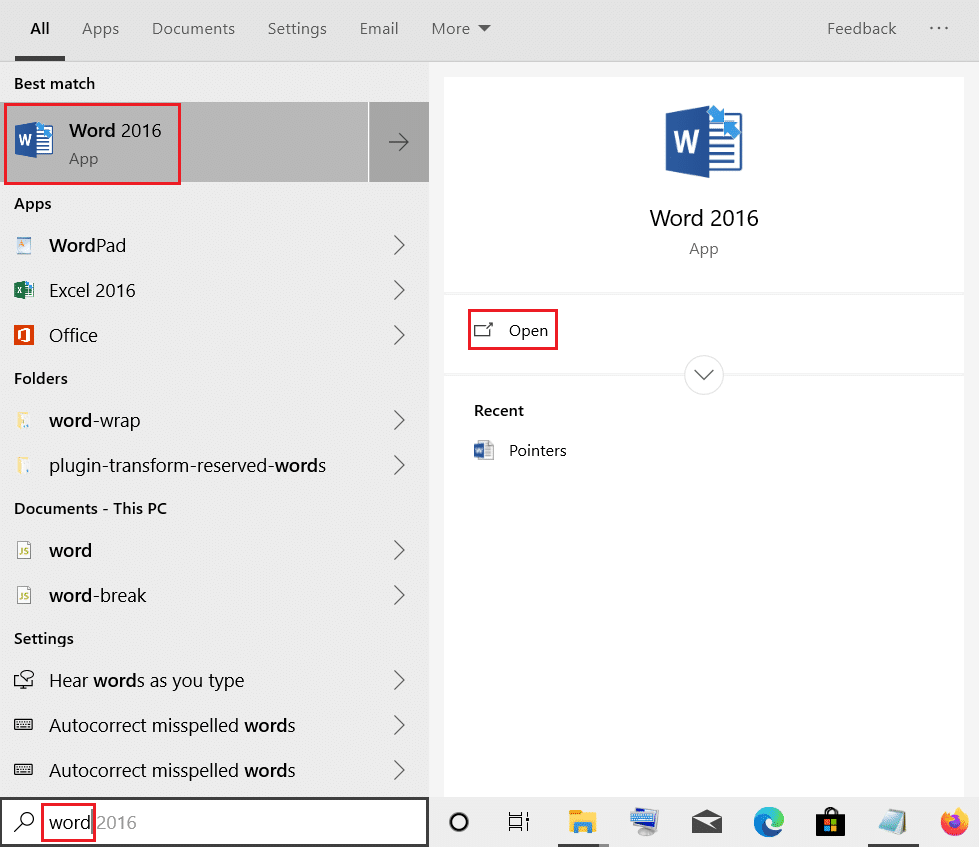
1. ຕີໄດ້ ປຸ່ມ Windows, ປະເພດ ຄໍາ, ແລະກົດເຂົ້າ ເປີດ.
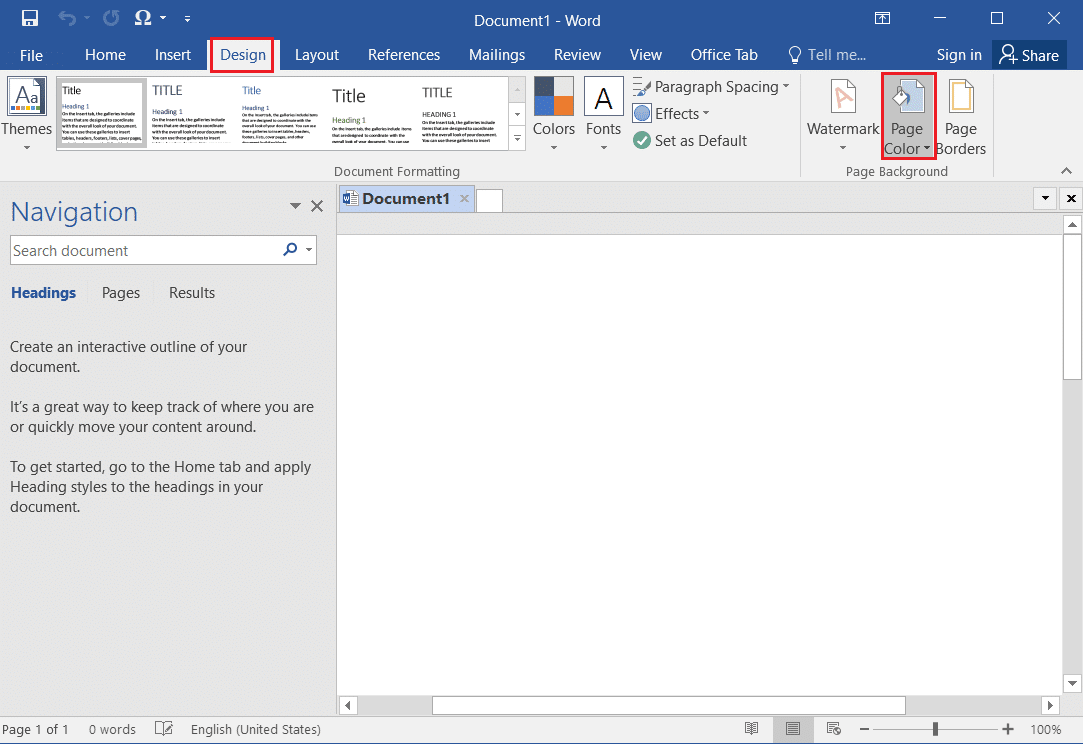
2 ໄປຫາ ການອອກແບບ tab in the Ribbon and click on the Page Color button in the Page Background section.
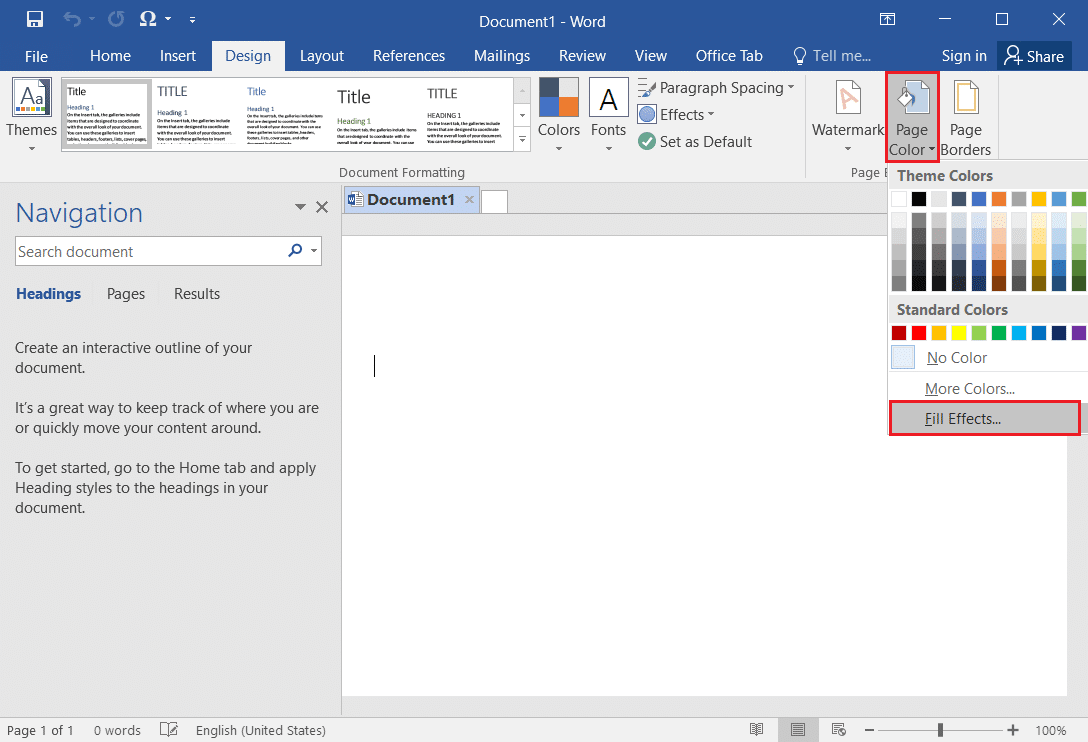
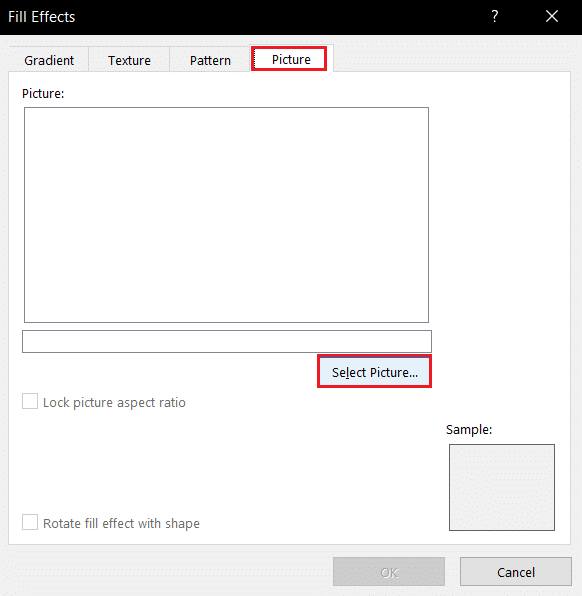
3. ເລືອກທາງເລືອກ ຕື່ມຜົນກະທົບ... ຢູ່ໃນເມນູທີ່ສະແດງ.
4. In the Fill Effects window, navigate to the ຮູບພາບ ແລະກົດທີ່ Select Picture… ປຸ່ມ.
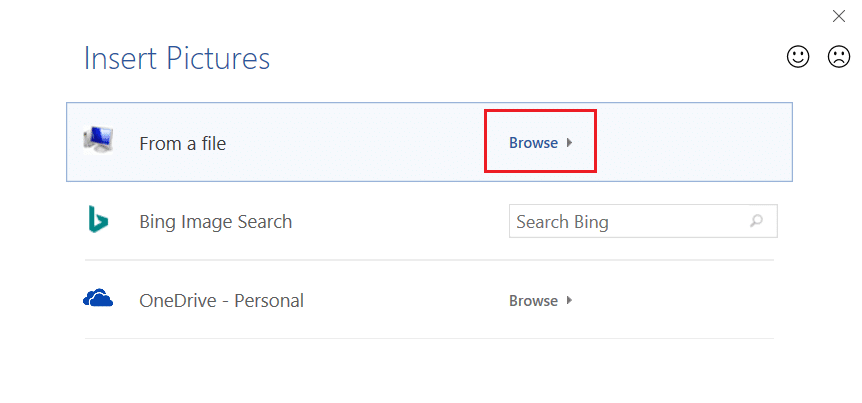
5 ໃຫ້ຄລິກໃສ່ ເອີ້ນເບິ່ງ option next to From a file tab in the Insert Pictures window.
ຫມາຍເຫດ: You can also search for online pictures using the Bing Image Search or select the picture from your OneDrive.
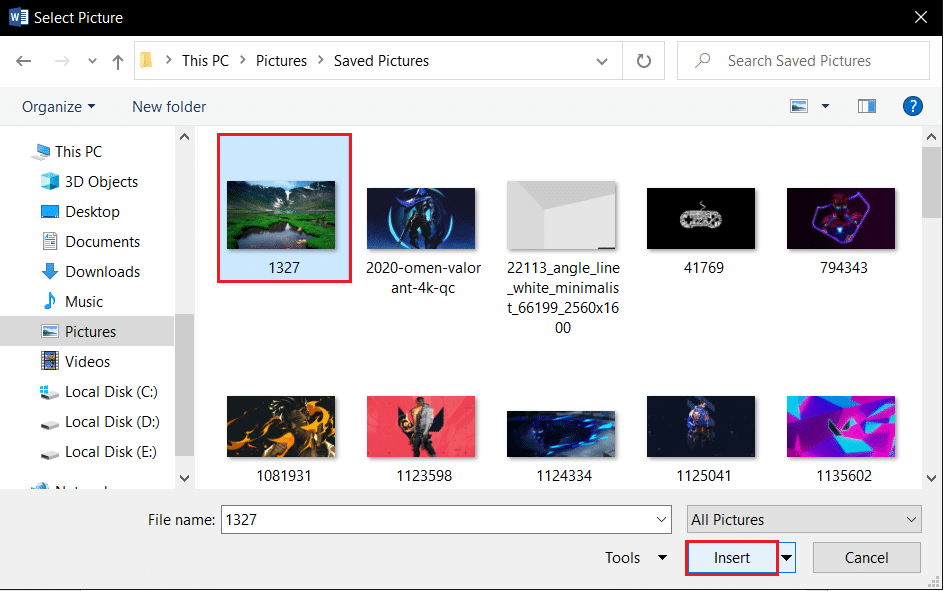
6. Browse for the file in the next window, select it and click on the Insert button. You will see the picture inserted as a background for the document.
Option II: Use Watermark Button
You can set the picture as the background using the Watermark button. This button will treat your picture as a Watermark for the entire document.
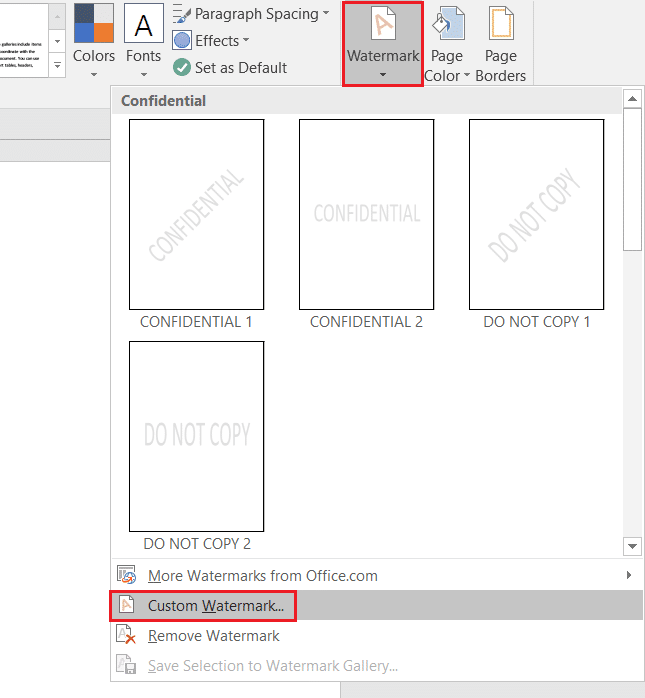
ກົດປຸ່ມ ປຸ່ມ Windows, ປະເພດ ຄໍາ, ແລະກົດເຂົ້າ ເປີດ.
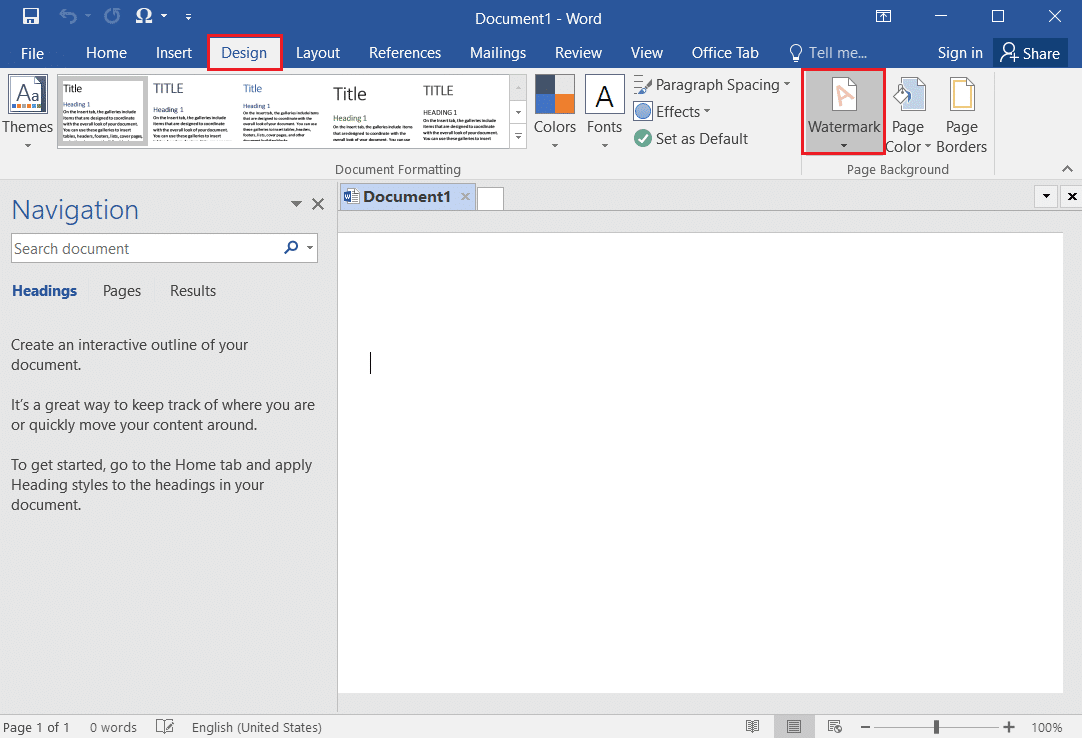
2. ທ່ອງໄປຫາ ການອອກແບບ tab in the Ribbon and click on the ລາຍນ້ໍາ button in the Page Background section.
3 ເລືອກເອົາ Custom Watermark… ທາງເລືອກໃນເມນູທີ່ມີຢູ່.
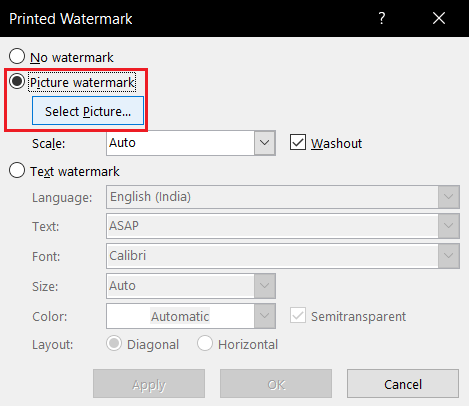
4. In the Printed Watermark window, select the option Picture watermark ແລະຄລິກໃສ່ Select Picture… ປຸ່ມ.
ໃຫ້ສັງເກດ 1: You can set the scale of the picture using the drop-down menu in the ຂະຫນາດ ຕັ້ງ.
ໃຫ້ສັງເກດ 2: If you wish to have a more transparent Background image, you can select the ການລ້າງ option in the window.
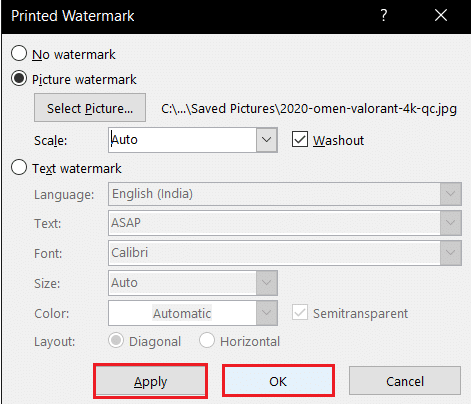
5 ໃຫ້ຄລິກໃສ່ ເອີ້ນເບິ່ງ option next to From a file tab in the Insert Pictures window.
ຫມາຍເຫດ: You can also search for online pictures using the Bing Image Search or select the picture from your OneDrive.
6. Browse for the image in the Insert Picture window, select the picture and click on the Insert ປຸ່ມ.
7 ໃຫ້ຄລິກໃສ່ ສະຫມັກຂໍເອົາ ແລະຫຼັງຈາກນັ້ນ OK buttons to set the image as your background.
ຍັງອ່ານ: ວິທີການເພີ່ມຕາຕະລາງເນື້ອໃນໃນ Google Docs
Method 2: Set Background for Single Page
If you don’t like to have a uniform background picture for Word document, you can use the methods in this section. The options described in this method have the added advantage of customizing the background for individual pages. You can also have varying backgrounds on the same page. Also, you can resize the background-size manually, unlike the previous method, which has size restrictions.
Option I: Insert Picture
You can manually insert a picture on a page and make the text overlay the picture. This way the inserted picture will be treated as Background.
1. ເປີດ Microsoft Word ຈາກ Windows Search ບາ.
2 ໄປຫາ Insert tab on the Ribbon and click on the ຮູບພາບ ປຸ່ມ.
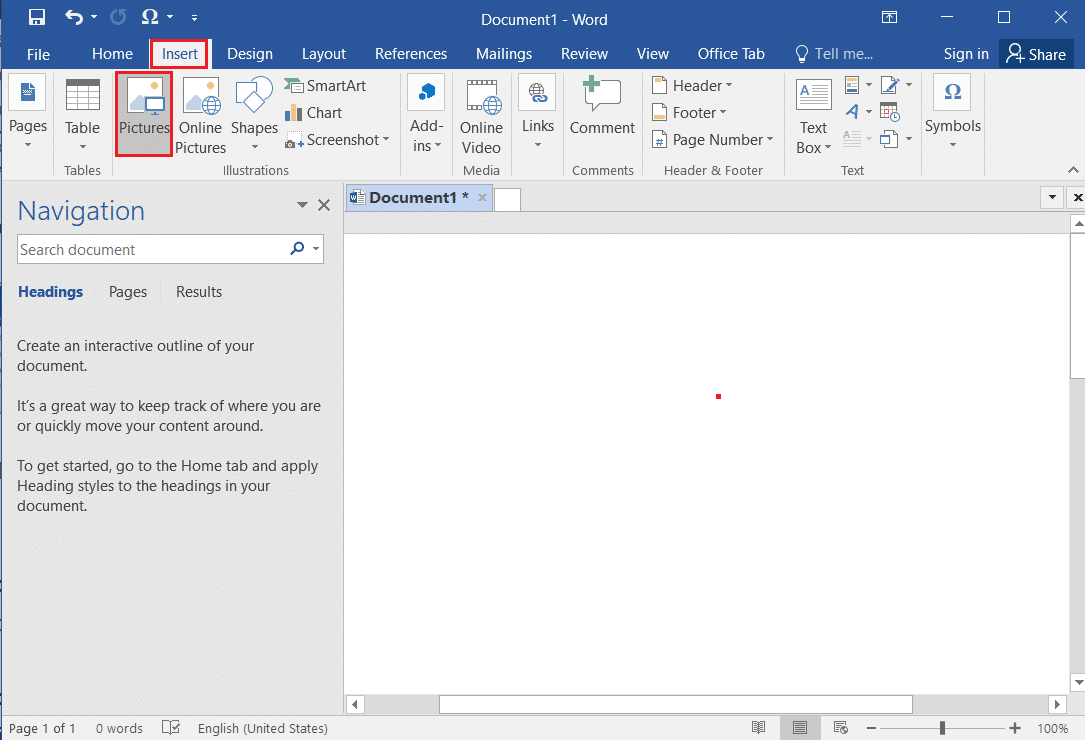
3. Browse for the picture in the Insert Picture window, select it and click on the Insert button to insert the picture on the page.
ໃຫ້ສັງເກດ 1: You can browse for the picture in Windows Explorer, select it, and drag and drop it to the document manually to insert the image.
ໃຫ້ສັງເກດ 2: You can browse for the picture in Windows Explorer manually, select it, copy it using the keys Ctrl+ C and paste it into the document using the keys Ctrl+V to insert the image.
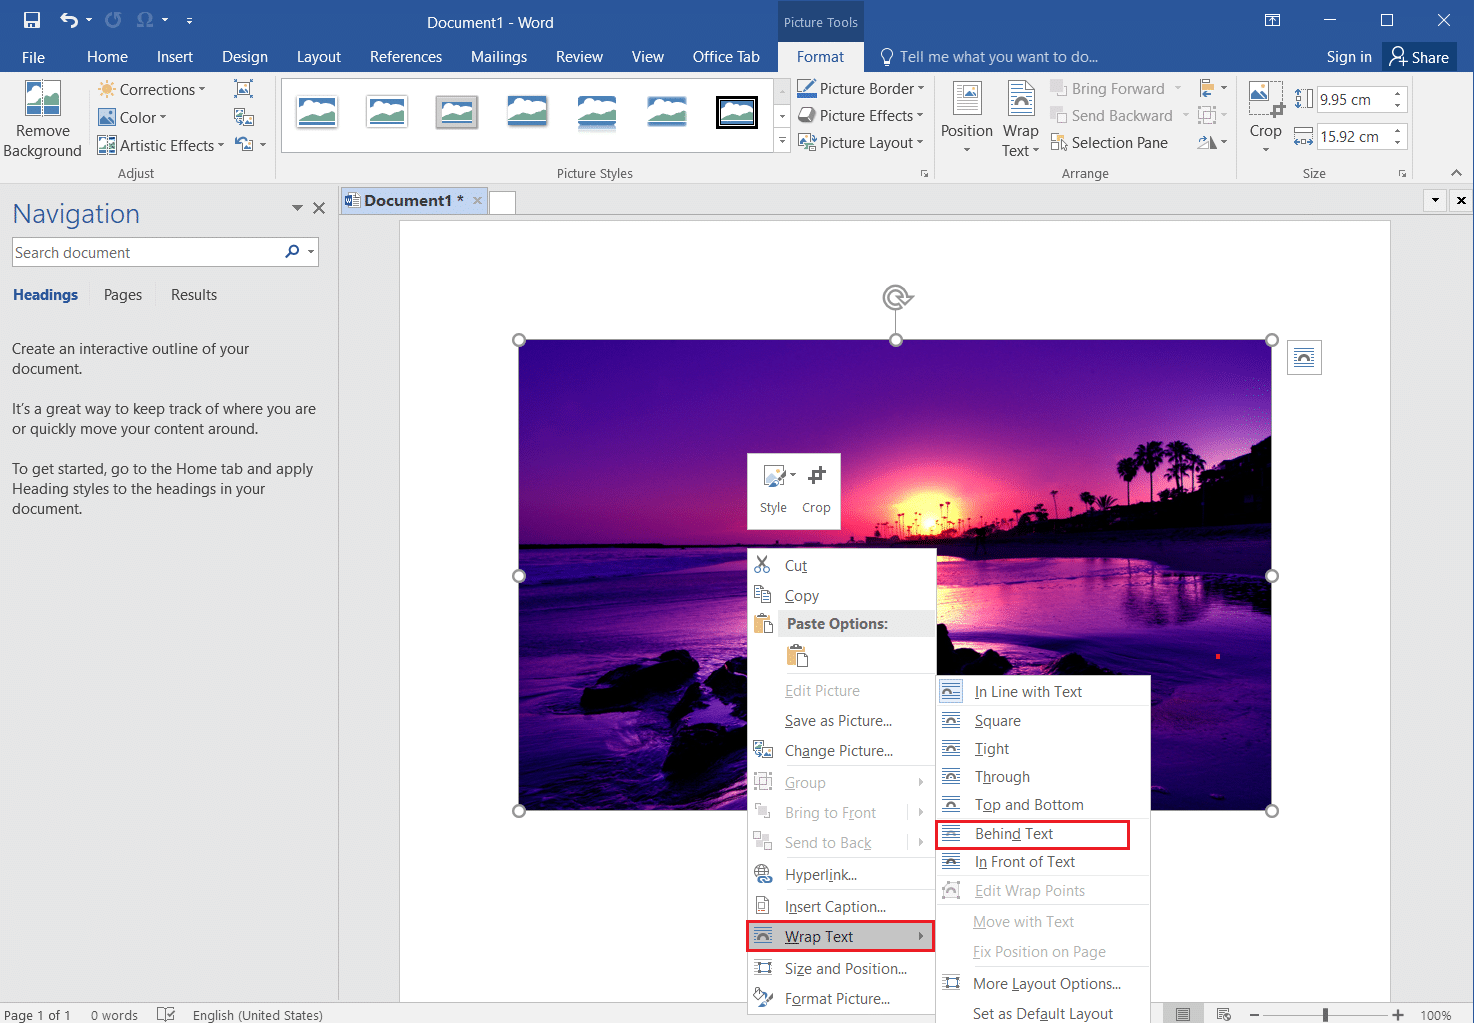
4. Right-click on the image and move your cursor over the option ຫໍ່ຂໍ້ຄວາມ ໃນບັນຊີລາຍຊື່.
ຫມາຍເຫດ: You can manually resize the image by adjusting the corners of the image on the page.
5. ເລືອກທາງເລືອກ ຫລັງຂໍ້ຄວາມ in the list available to set the image as background.
ຍັງອ່ານ: ວິທີການແປງ Word ເປັນ JPEG
Option II: Customize Inserted Shape
You can insert a shape, alter its size and fill using this method. You can set the picture as the fill for the shape boundary and set the shape as the background for your page.
1 ເປີດຕົວ Microsoft Word ຈາກ Windows Search ບາ.
2. ທ່ອງໄປຫາ Insert tab in the Ribbon, click on the ຮູບຮ່າງ button in the Illustrations section and select the ຮູບສີ່ແຈສາກ shape in the list.
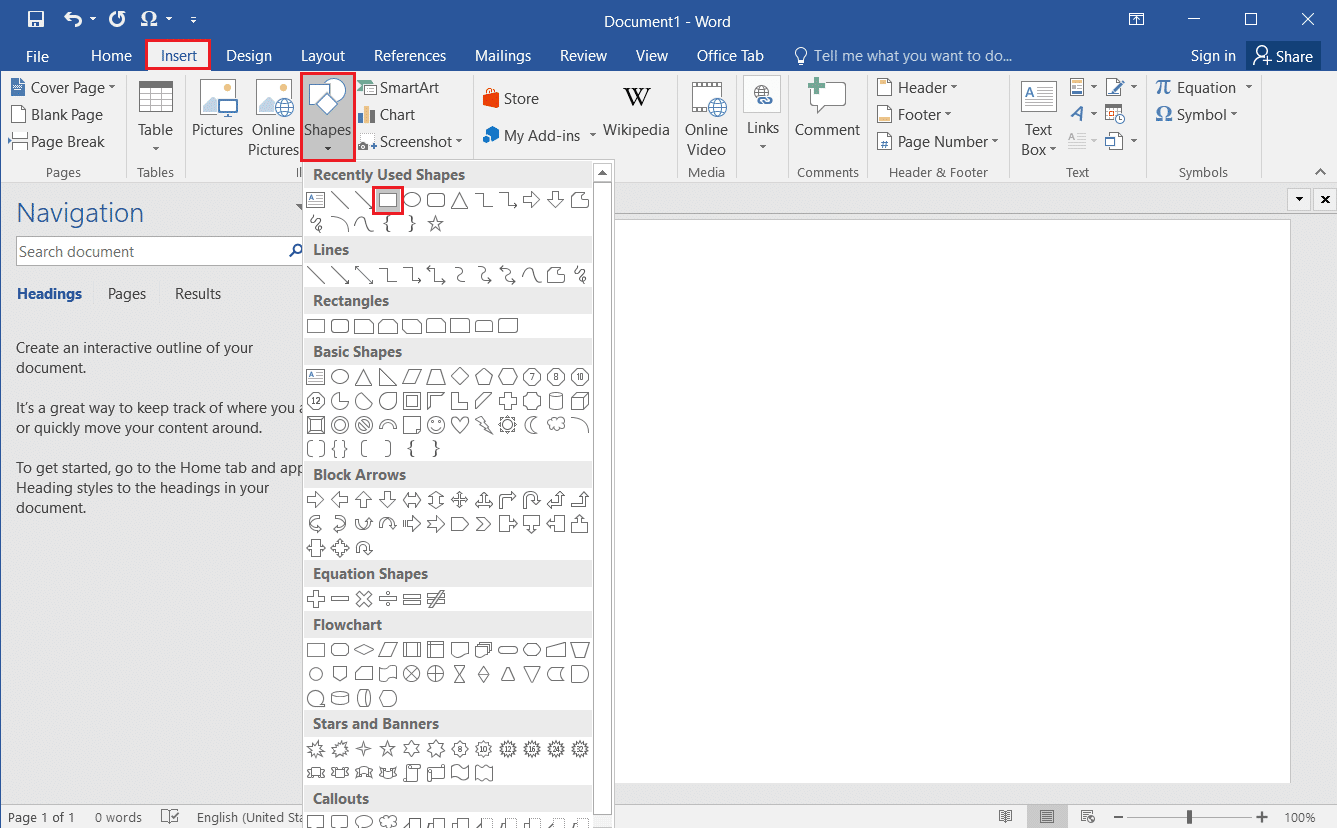
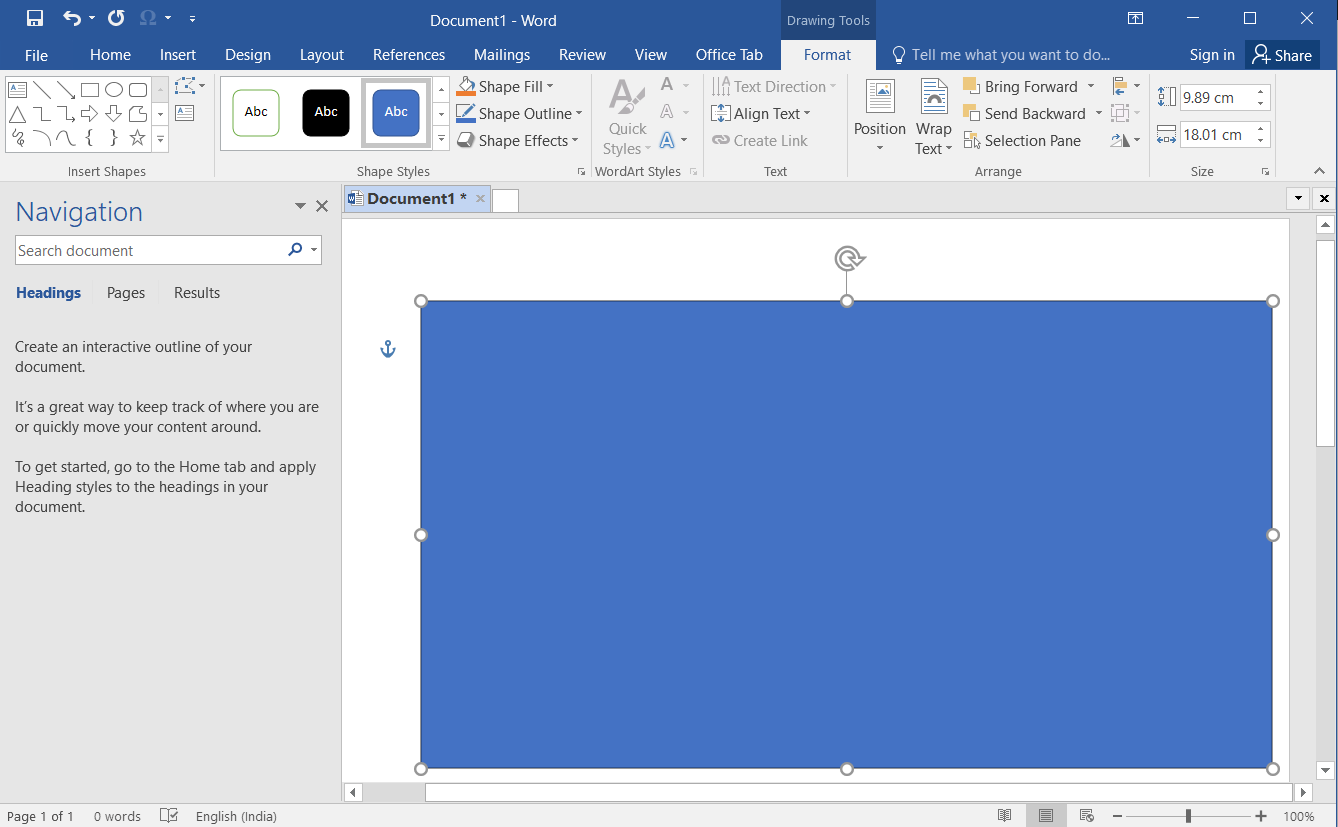
3. Draw a Rectangle covering the entire page of the document manually.
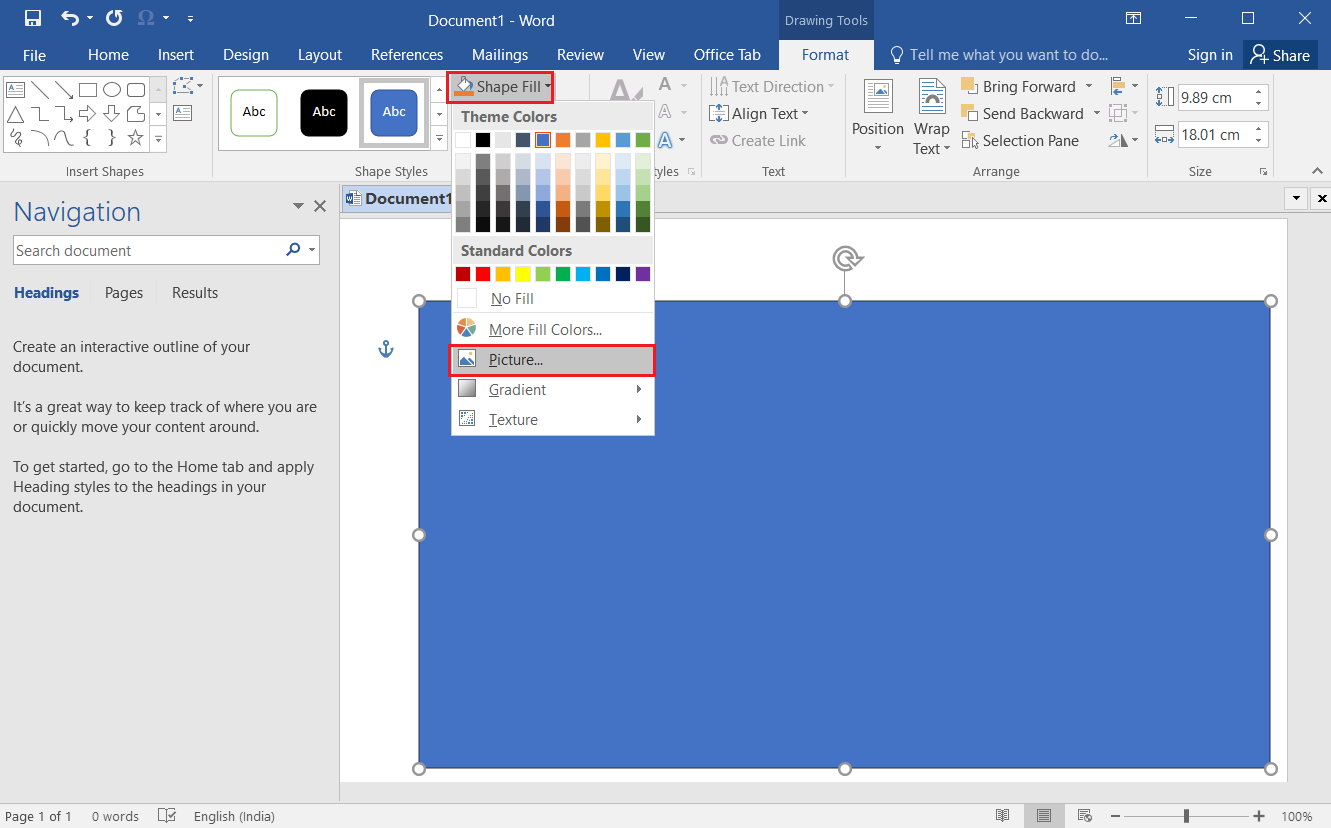
4. Select the Rectangle, navigate to the ຮູບແບບ tab in the Ribbon, and click on the Shape Fill button in the Shape Styles section.
ຫມາຍເຫດ: You can change the settings of the picture such as Brightness in the Format tab.
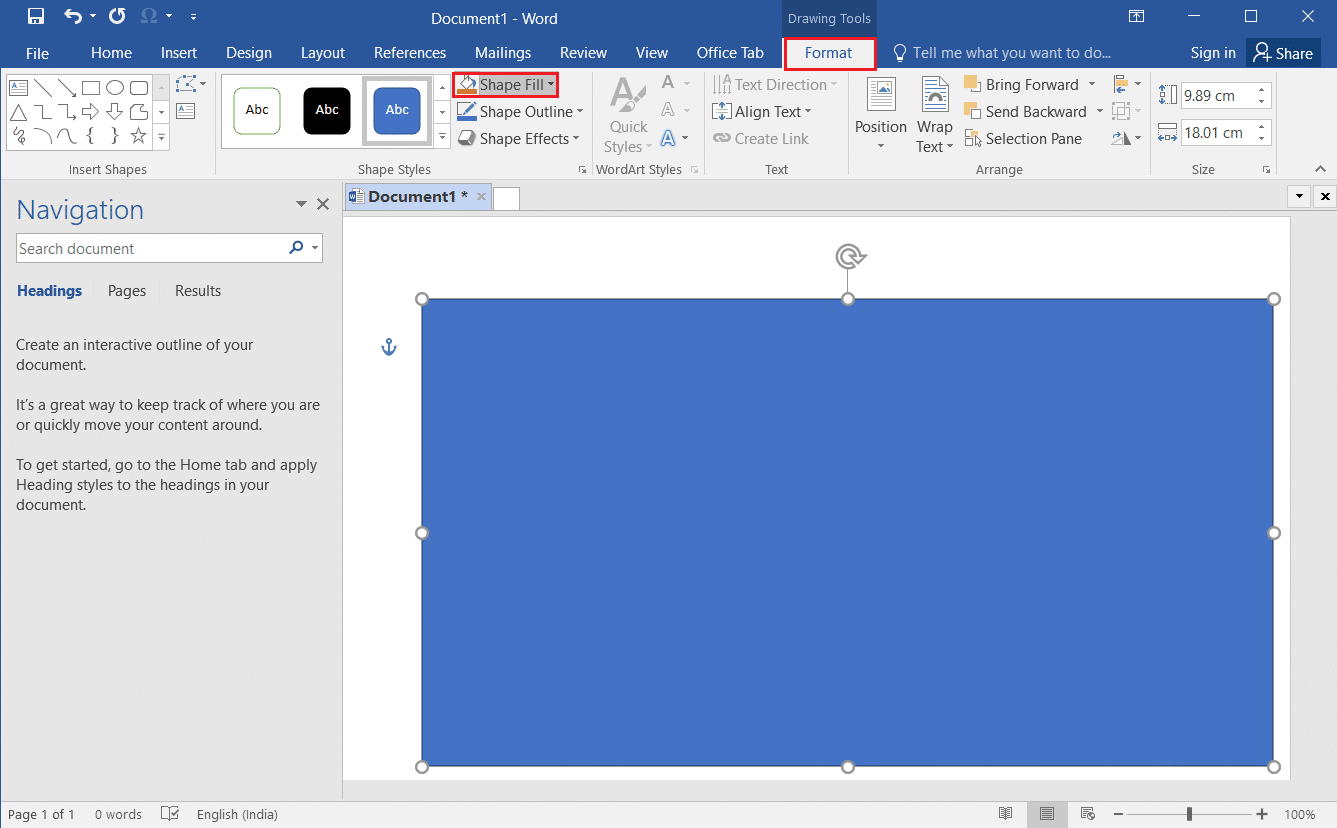
5. ເລືອກທາງເລືອກ ຮູບ... ໃນບັນຊີລາຍການສະແດງໃຫ້ເຫັນ.
6 ໃຫ້ຄລິກໃສ່ ເອີ້ນເບິ່ງ button next to the From a file tab in the ໃສ່ຮູບ window.
7. Browse for the picture in the Insert Picture window, click on it and click on the Insert ປຸ່ມ.
8. Right-click on the picture and select the option ຫໍ່ຂໍ້ຄວາມ ໃນເມນູ
9. ເລືອກທາງເລືອກ ຫລັງຂໍ້ຄວາມ in the list displayed to set the picture as your background.
Frequently asked Questions (FAQs)
Q1. Can we insert a picture as a background for the Word document?
Ans ແມ່ນແລ້ວ, you can insert a picture as a background for a page in the Word document. The detailed process is explained in this article.
Q2. How to set the same picture background for the entire Word document?
Ans You can use the methods described in this article and set a picture as a uniform background for the entire document.
ແນະນໍາໃຫ້:
We hope that you have learned the methods to set background picture for Microsoft Word. Please share your suggestions and queries in the comments section.