- in langai by Administratorius
Fix Can’t adjust screen brightness in Windows 10

Fix Can’t adjust screen brightness in Windows 10: If you have recently upgraded to Windows 10 then you may be facing this annoying issue where you can’t adjust the screen brightness, in short, screen brightness settings stopped working. If you try to adjust the brightness using Windows Settings apps, you won’t be able to change anything, as dragging the brightness level up or down will do nothing. Now if you try to adjust brightness using the brightness keys on the keyword then it would display the brightness level going up and down, but nothing would actually happen.
Why I am unable to adjust screen brightness on Windows 10?
If you have enabled automatic battery management then if the battery starts to become low the brightness will be automatically changed to dim settings. And you won’t be able to adjust the brightness again until you will change the battery management settings or charge your laptop. But the issue can be a number of different things for example corrupted drivers, incorrect battery configuration, ATI bugIr tt
This is quite a common issue which a lot of Windows 10 users are facing right now. This issue can also be caused because of the corrupt or incompatible display driver and thankfully this issue can be easily resolved. So without wasting any more time let’s see how to actually fix can’t adjust screen brightness in Windows 10 with the help of below-listed steps.
Fix Can’t Adjust Screen Brightness in Windows 10
Būtinai sukurkite atkūrimo tašką, jei kas nors nutiktų.
1 metodas: atnaujinkite ekrano adapterio tvarkykles
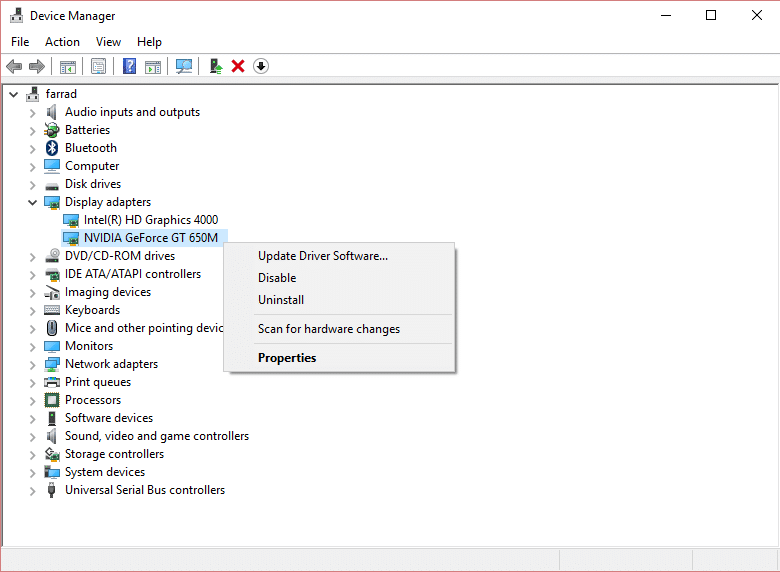
1. Paspauskite „Windows“ klavišą + R, tada įveskite devmgmt.msc ir paspauskite Enter, kad atidarytumėte Įrenginių tvarkytuvė.

2. Išskleisti Vaizdo adapteriai and then right-click on the integrated graphics card and select Atnaujinti tvarkyklę.
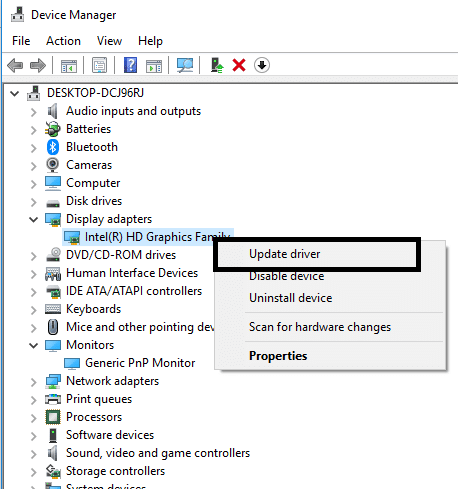
Pastaba: The integrated graphics card would be something like „Intel HD Graphics 4000“.
3. Tada spustelėkite Atnaujinta tvarkyklės programinė įranga automatiškai ieškoma and let it install the driver automatically.
Pastaba: Make sure you have a good internet connection in order for Windows to automatically download the latest drivers.

4. Reboot your PC and see if the issue is resolved or not.
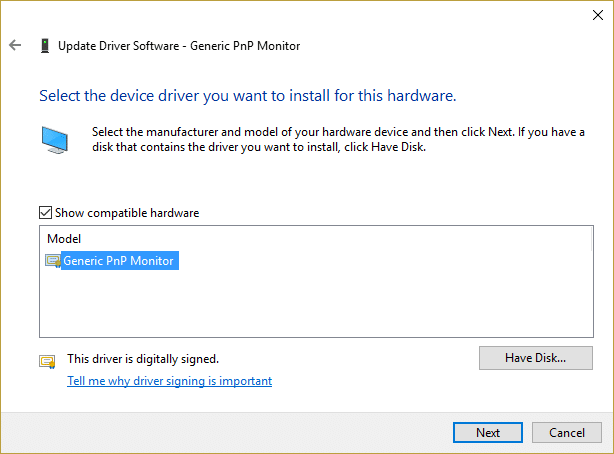
5. If not then again select Update Driver and this time click on Naršykite kompiuterį tvarkyklės programinei įrangai.
6. Tada spustelėkite Leiskite pasirinkti kompiuterių turimų tvarkyklių sąrašą parinktis apačioje.

7. Dabar varnelė "Rodyti suderinamą aparatinę įrangą” then from the list select "Microsoft" pagrindinis vaizdo adapteris ir spauskite Kitas.
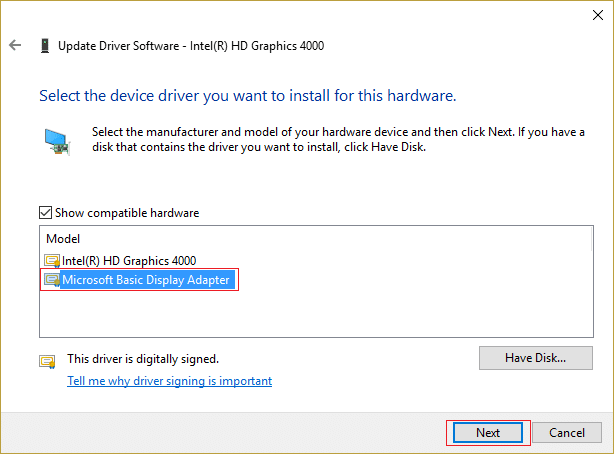
8. Let it install the basic Microsoft display driver and reboot your PC to save changes.
Method 2: Adjust the brightness from Graphics Settings
1. Right-click in an empty area on the desktop then select "Intel" grafikos nustatymai.
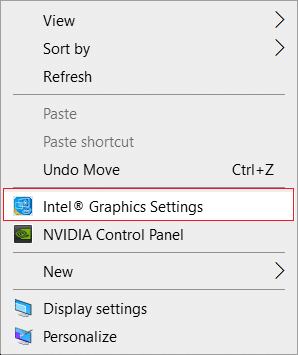
2. Dabar spustelėkite displėjus from the Intel HD Graphics Control Panel.

3. Kairiajame meniu pasirinkite Color Settings.
4. Adjust the Brightness slider according to your liking and once done, click Taikyti

Metodas 3: Adjust screen brightness using Power Options
1. Dešiniuoju pelės mygtuku spustelėkite Maitinimo piktograma užduočių juostoje ir pasirinkite Maitinimo parinktys.
![]()
2. Dabar spustelėkite Keisti plano parametrus next to currently active power plan.
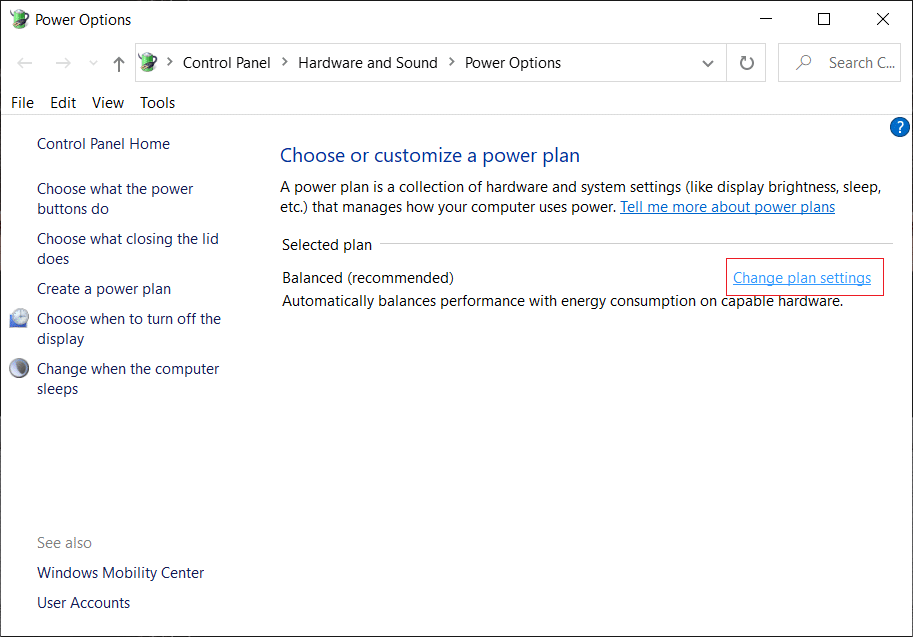
3. spragtelėjimas Keisti papildomus maitinimo parametrus apačioje.
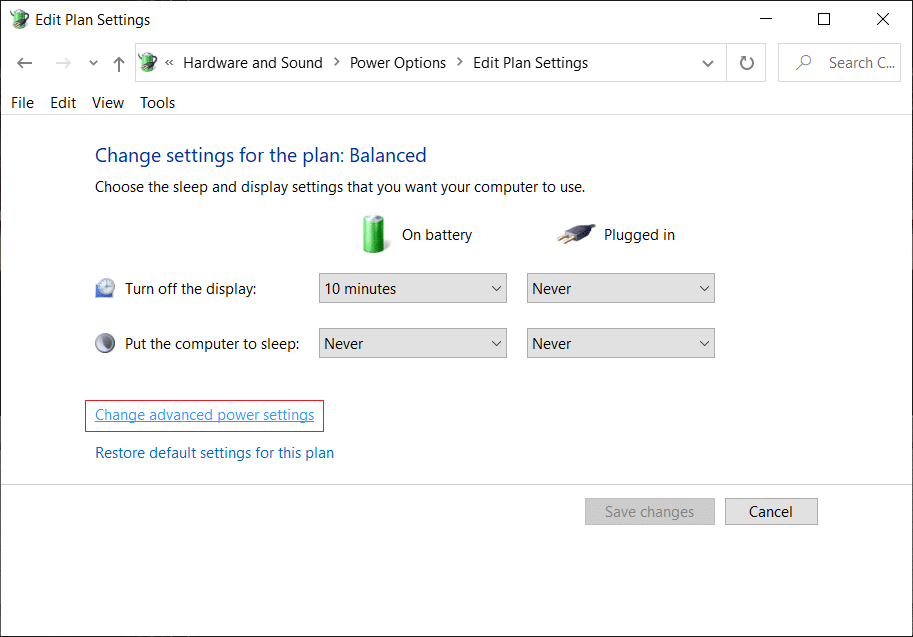
4. From the Advanced settings window, find and expand Ekranas.
5. Now locate and click each of the following to expand their respective settings:
Ekrano ryškumas
Dimmed display brightness
Įgalinti adaptuotą ryškumą
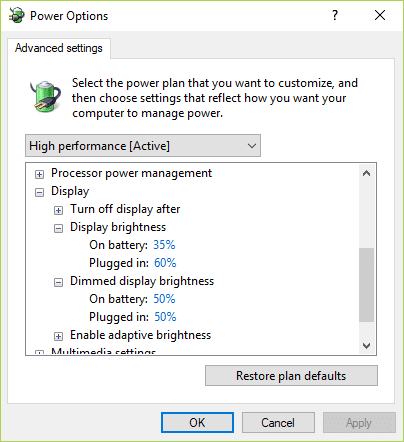
5. Change each of these to the settings you wish, but make sure “Įgalinti adaptuotą ryškumąYra išjungė.
6. Once done, click Apply followed by OK.
7. Iš naujo paleiskite kompiuterį, kad išsaugotumėte pakeitimus.
4 metodas: įjunkite bendrąjį PnP monitorių
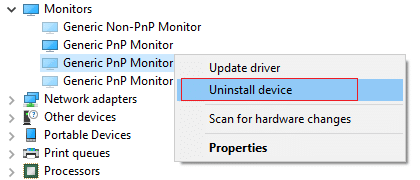
1. Paspauskite „Windows“ klavišą + R, tada įveskite devmgmt.msc ir paspauskite Enter, kad atidarytumėte įrenginių tvarkytuvę.
2. Išskleisti Monitoriai ir tada dešiniuoju pelės mygtuku spustelėkite Bendras PnP monitorius ir pasirinkite Įgalinti.
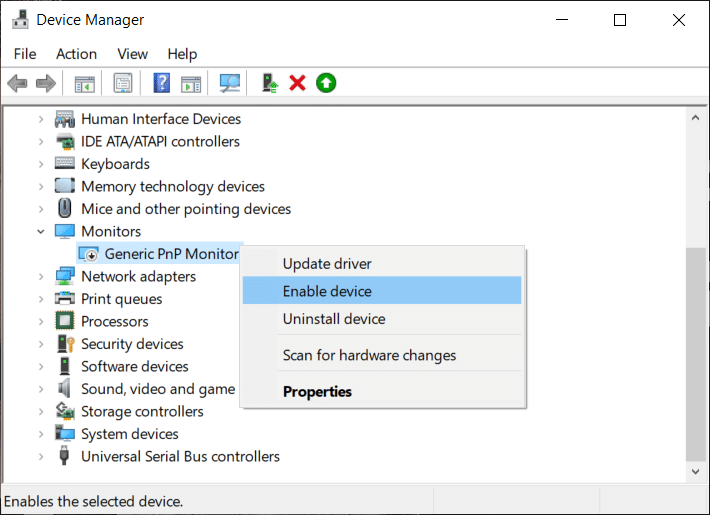
3. Iš naujo paleiskite kompiuterį, kad išsaugotumėte pakeitimus ir patikrintumėte, ar galite tai padaryti fix can’t adjust screen brightness in Windows 10 issue.
5 metodas: atnaujinkite bendrąją PnP monitoriaus tvarkyklę
1. Paspauskite „Windows“ klavišą + R, tada įveskite devmgmt.msc ir paspauskite "Enter".
2. Išskleisti Monitoriai ir tada dešiniuoju pelės mygtuku spustelėkite Bendras PnP monitorius ir pasirinkite Atnaujinti tvarkyklę.
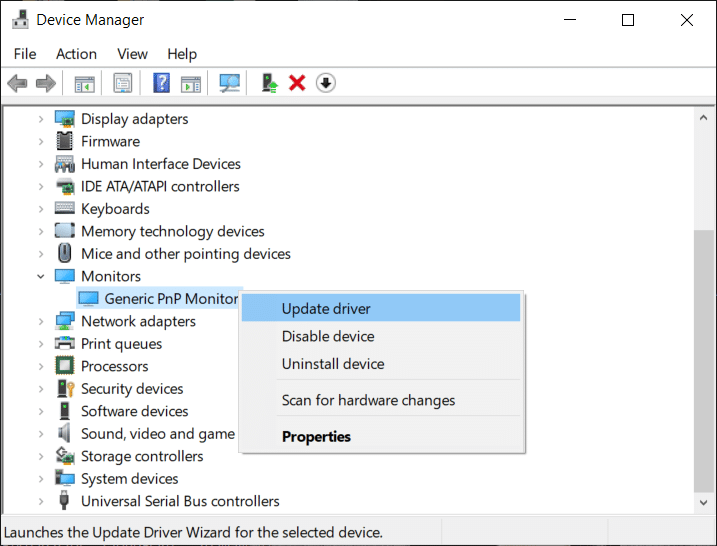
3. pasirinkti Naršykite kompiuterį tvarkyklės programinei įrangai.

4. Tada spustelėkite Leiskite pasirinkti kompiuterių turimų tvarkyklių sąrašą parinktis apačioje.
5. Dabar pasirinkite Bendras PnP monitorius ir spustelėkite Toliau.
6. Iš naujo paleiskite kompiuterį, kad išsaugotumėte pakeitimus ir patikrintumėte, ar galite tai padaryti fix unable to adjust screen brightness on Windows 10 issue.
6 būdas: atnaujinkite vaizdo plokštės tvarkyklę
If the Nvidia Graphics drivers are corrupted, outdated or incompatible then you won’t be able to adjust screen brightness in Windows 10. When you update Windows or install a third-party app then it can corrupt the video drivers of your system. In order to resolve this issue, you need to update your graphics card drivers in order to fix the underlying cause. If you face any such issues then you can easily update graphics card drivers with the help of this guide.
1. Paspauskite „Windows“ klavišą + R, tada įveskite devmgmt.msc ir paspauskite "Enter".
2. Now from Device Manager menu click Rodinys> Rodyti paslėptus įrenginius.

3. Right-click on each of the hidden devices listed under Monitoriai ir pasirinkite Pašalinti Įrenginys.
4. Iš naujo paleiskite kompiuterį, kad išsaugotumėte pakeitimus ir patikrintumėte, ar galite tai padaryti adjust screen brightness in Windows 10.
8 būdas: registro taisymas
Pastaba: This method is only for users who have ATI graphics card and have Catalyst installed.
1. Paspauskite „Windows“ klavišą + R, tada įveskite regedit ir paspauskite Enter, kad atidarytumėte registro rengyklę.

2. Eikite į šį registro raktą:
HKEY_LOCAL_MACHINE SYSTEM ControlSet001 ControlClass {4d36e968-e325-11ce-bfc1-08002be10318} 0000
3. Now double-click on the following Registry keys and set their value to 0 then click OK:
MD_EnableBrightnesslf2
KMD_EnableBrightnessInterface2
4. Next, navigate to the following key:
HKEY_LOCAL_MACHINE SYSTEM CurrentControlSet Control Class {4d36e968-e325-11ce-bfc1-08002be10318} 0001
5. Again double-click on MD_EnableBrightnesslf2 and KMD_EnableBrightnessInterface2 then set their value’s to 0.
6. Close everything and restart your PC to save changes.
Rekomenduota jums:
Tikiuosi, kad aukščiau pateikti veiksmai buvo naudingi ir jums tai pavyko fix Can’t Adjust Screen Brightness in Windows 10 but if you still have any questions regarding this post feel free to ask them in the comment section.