- in langai by Administratorius
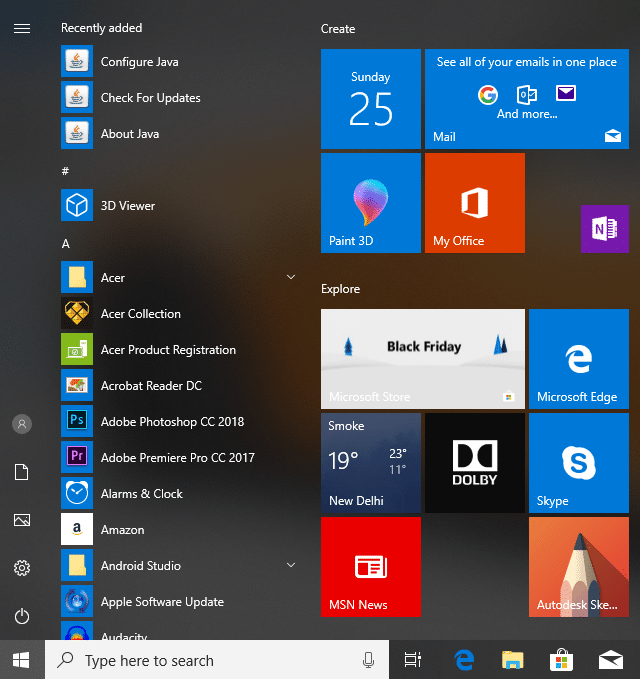
Pataisykite meniu Pradėti neveikiantį „Windows 10“.

If you have recently updated or upgraded to Windows 10, then chances are your Start Menu may not work properly, making it impossible for users to navigate around Windows 10. Users are experiencing various issues with Start Menu such as Start Menu does not open, Start Button is not working, or Start Menu freezes etc. If your Start Menu isn’t working then don’t worry as today we will see a way to fix this issue.
This exact cause is different for different users because each user has a different system configuration and environment. But the problem can be related to anything like corrupted user account or drivers, damaged system files, etc. So without wasting any time, let’s see How to Fix Start Menu Not Working in Windows 10 with the help of the below-listed tutorial.
Būtinai sukurkite atkūrimo tašką, jei kas nors nutiktų.
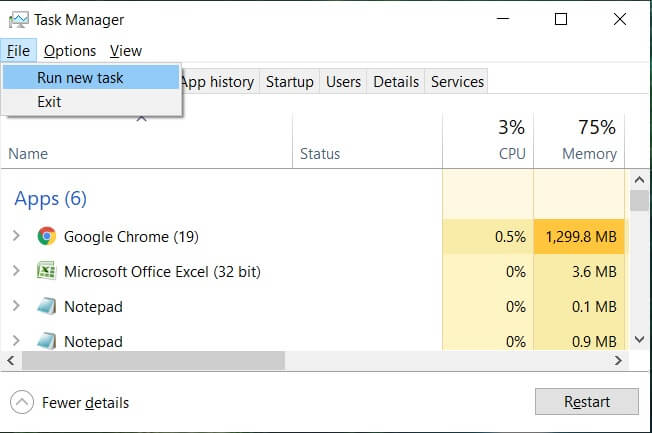
To run Command Prompt as an administrator, press Ctrl + Shift + Esc to open Task Manager. Then click on filė tada pasirinkite Pradėti naują užduotį. Įveskite cmd.exe ir pažymėkite "Sukurkite šią užduotį su administratoriaus teisėmis” then click OK. Similarly, to open PowerShell, type powershell.exe and again checkmark the above field then hit Enter.

1 metodas: paleiskite „Windows Explorer“ iš naujo
1. Paspauskite Ctrl + Shift + Esc klavišus kartu, kad paleistumėte Užduočių vadovas.
2. Raskite explorer.exe sąraše, tada dešiniuoju pelės mygtuku spustelėkite jį ir pasirinkite Baigti užduotį.

3. Dabar naršyklė bus uždaryta ir, jei norite ją paleisti iš naujo, spustelėkite Failas > Vykdyti naują užduotį.
4. Įveskite explorer.exe ir paspauskite Gerai, kad paleistumėte naršyklę iš naujo.

5. Exit Task Manager and see if you’re able to Fix Start Menu Not Working in Windows 10.
6. If you’re still facing the issue, then log out from your account and re-login.
7. Paspauskite „Ctrl“ + „Shift“ + Del key at the same time and click on Signout.
8. Type in your password to login to Windows and see if you’re able to fix the issue.
Method 2: Create a new local administrator account
Jei esate prisijungę naudodami „Microsoft“ paskyrą, pirmiausia pašalinkite nuorodą į tą paskyrą:
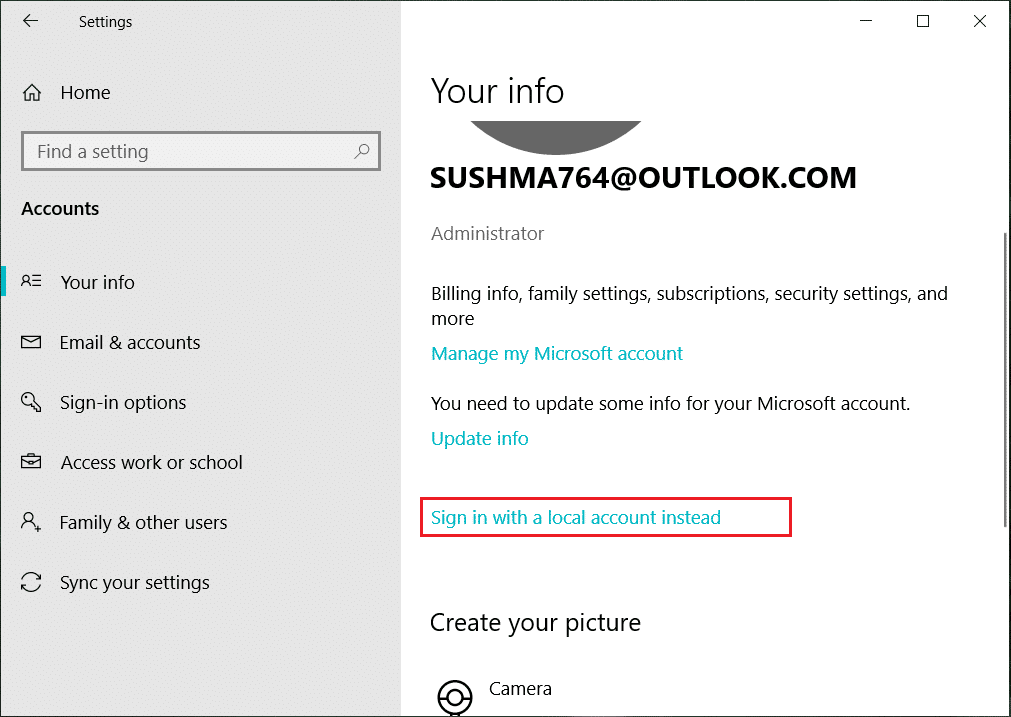
1. Paspauskite „Windows“ klavišą + R, tada įveskite „ms-settings:“ (be kabučių) ir paspauskite Enter.
2. pasirinkti Paskyra > Vietoje to prisijunkite naudodami vietinę paskyrą.
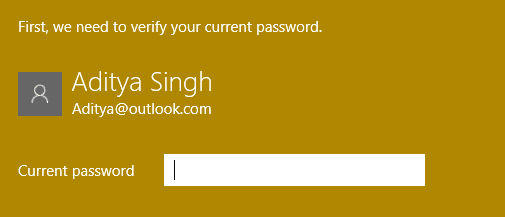
3. Įveskite savo „Microsoft“ paskyros slaptažodis ir spauskite Kitas.
4. Pasirinkite a naujas paskyros vardas ir slaptažodis, tada pasirinkite Baigti ir atsijunkite.
#1. Create the new administrator account:
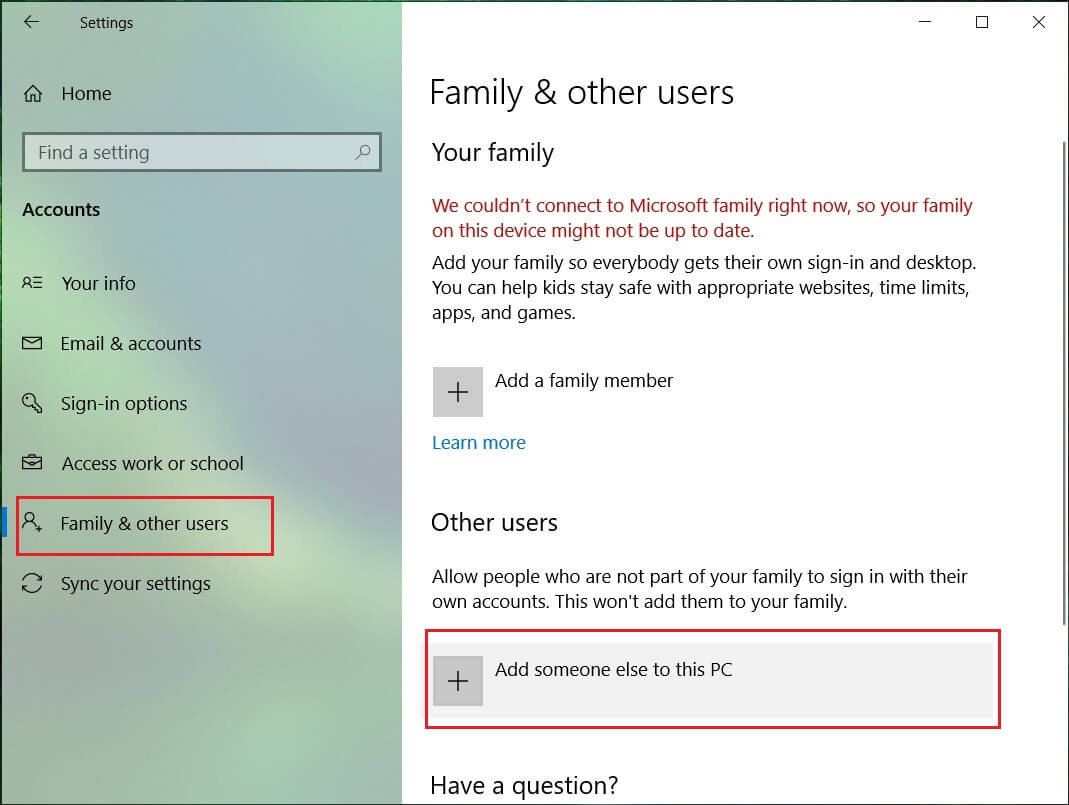
1. Paspauskite Windows Key + I, kad atidarytumėte Nustatymai, tada spustelėkite Sąskaitos.
2. Tada eikite į Šeima ir kiti žmonės.
3. Dalyje Kiti žmonės spustelėkite „Pridėkite ką nors kitą prie šio kompiuterio."
4. Tada nurodykite pavadinimą user and a password then select Next.
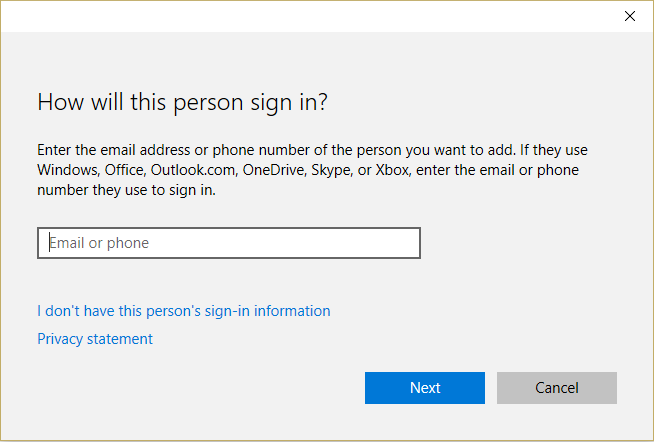
5. Nustatykite a vartotojo vardas ir slaptažodis, Tada pasirinkite Kitas> Baigti.
#2. Next, make the new account an administrator account:
1. Vėl atidarykite "Windows Nustatymai ir spauskite Sąskaita

2. Eiti į Skirtukas Šeima ir kiti žmonės.
3. Kiti žmonės pasirenka paskyrą, kurią ką tik sukūrėte, tada pasirinko a Pakeiskite paskyros tipą.
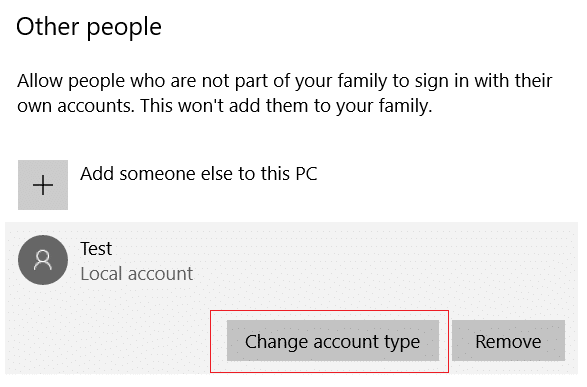
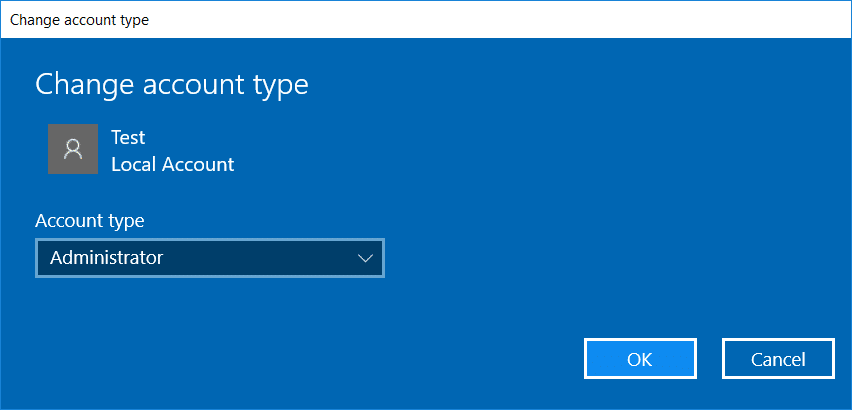
4. Skiltyje Paskyros tipas pasirinkite administratorius tada spustelėkite Gerai.
#3. If the issue persists try deleting the old administrator account:
1. Tada vėl eikite į „Windows“ nustatymus Paskyra > Šeima ir kiti žmonės.
2. Dalyje Kiti vartotojai pasirinkite seną administratoriaus paskyrą, spustelėkite Pašalinti, ir pasirinkite Ištrinkite paskyrą ir duomenis.

3. If you were using a Microsoft account to sign in before, you can associate it with the new administrator by following the next step.
4. į „Windows“ nustatymai > Paskyros, vietoj to pasirinkite Prisijungti naudojant „Microsoft“ paskyrą ir įveskite paskyros informaciją.
Galiausiai, jūs turėtumėte sugebėti Pataisykite meniu Pradėti neveikiantį „Windows 10“. as this step seems to fix the issue in most cases.
If you continue to experience Start Menu’s issue, it’s recommended to download and run Start Menu Troubleshooter.
1. Download and run Start Menu Troubleshooter.
2. Dukart spustelėkite atsisiųstas failas tada spustelėkite Kitas.
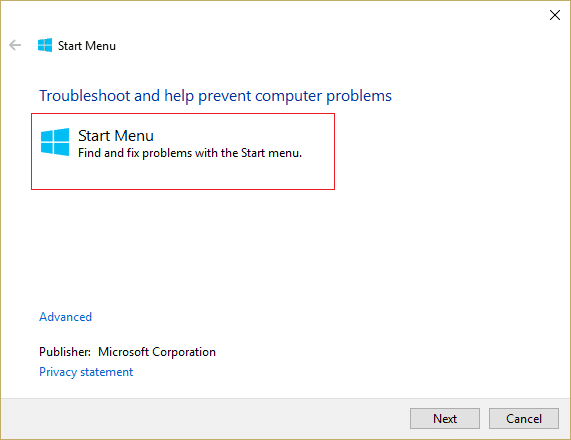
3. Let it finds and automatically Fixes Start Menu Not Working in Windows 10.
Method 4: Run System File Checker (SFC) and Check Disk
1. Atidarykite komandų eilutę. Vartotojas gali atlikti šį veiksmą ieškodamas „cmd“ Ir tada paspauskite "Enter".

2. Dabar į cmd įveskite šį tekstą ir paspauskite Enter:
Sfc /scannow sfc /scannow /offbootdir=c: /offwindir=c:langai

3. Palaukite, kol baigsis aukščiau nurodytas procesas, ir atlikę iš naujo paleiskite kompiuterį.
4. Tada paleiskite CHKDSK iš Ištaisykite failų sistemos klaidas naudodami „Check Disk Utility“ (CHKDSK).
5. Užbaikite aukščiau nurodytą procesą ir dar kartą perkraukite kompiuterį, kad išsaugotumėte pakeitimus.
Method 5: Force Cortana to Rebuild Settings
Open Command Prompt with administrative rights then type the following one by one and hit Enter after each command:
CD /d "%LOCALAPPDATA%PackagesMicrosoft.Windows.Cortana_cw5n1h2txyewy"
Taskkill /F /IM SearchUI.exe
RD /S /Q Settings
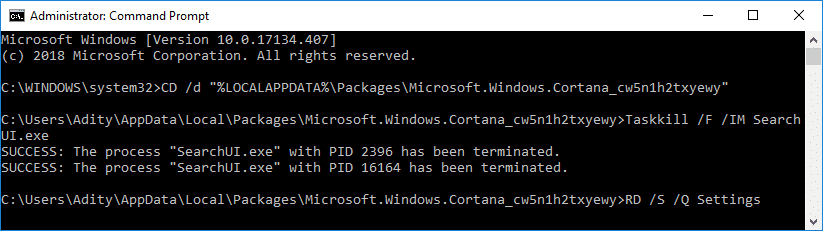
This will force Cortana to rebuild the settings and will Fix Start Menu and Cortana Not Working in Windows 10.
If the issue is still not resolved, follow this guide to fix any issues related to Cortana.
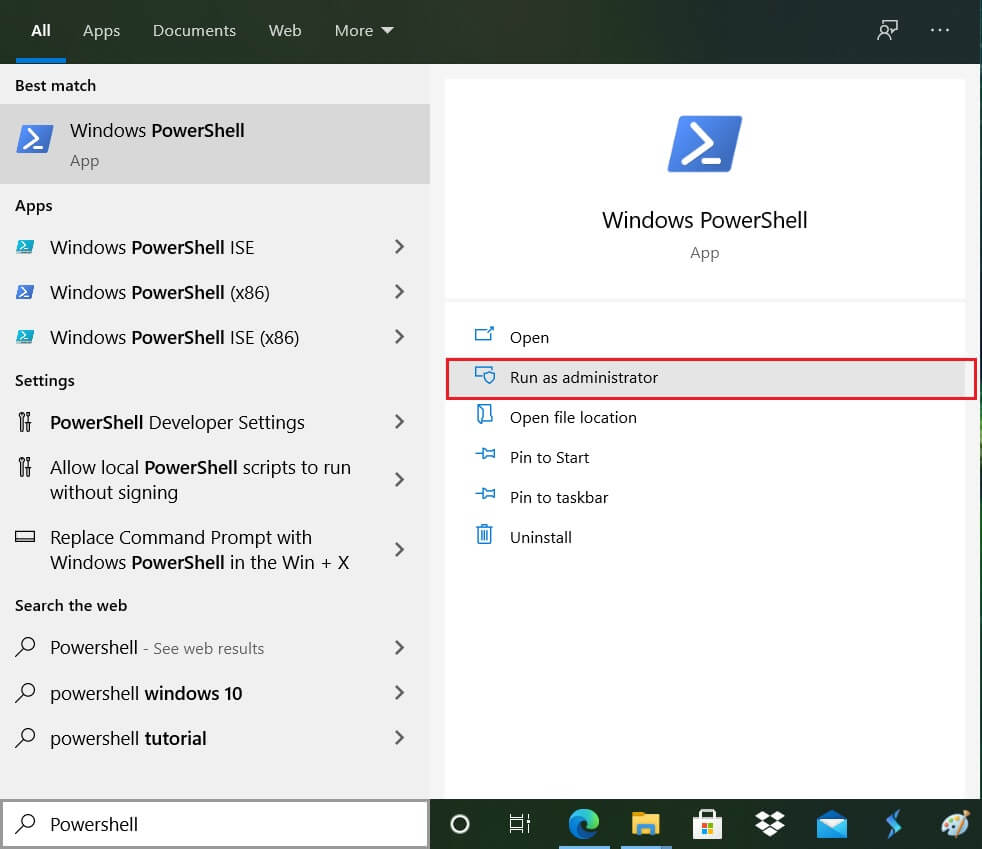
Method 6: Re-Register Windows App
1. Įveskite PowerShell " Windows paieškoje, tada dešiniuoju pelės mygtuku spustelėkite PowerShell ir pasirinkite Vykdyti kaip administratorius.
2. Dabar PowerShell lange įveskite šią komandą:
Get-AppXPackage -AllUsers | Foreach {Add-AppxPackage -DisableDevelopmentMode -Registruokite "$ ($ _. InstallLocation) AppXManifest.xml"}

3. Palaukite, kol Powershell įvykdys aukščiau pateiktą komandą, ir nekreipkite dėmesio į kelias klaidas, kurios gali atsirasti.
4. Iš naujo paleiskite kompiuterį, kad išsaugotumėte pakeitimus.
7 būdas: registro taisymas
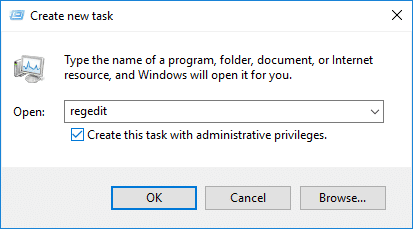
1. Press Ctrl + Shift + Esc to open Task Manager then click on filė ir pasirinkite Vykdykite naują užduotį.
2. Įveskite regedit ir pažymėkite "Sukurkite šią užduotį su administratoriaus teisėmis“, tada spustelėkite Gerai.
3. Now navigate to the following registry key in the Registry Editor:
ComputerHKEY_LOCAL_MACHINESYSTEMCurrentControlSetServicesWpnUserService
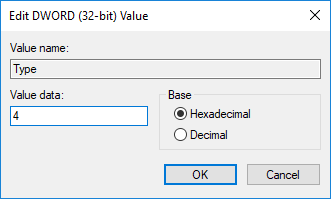
4. Būtinai pasirinkite WpnUserService then in the right window double-click on the Paleiskite DWORD.
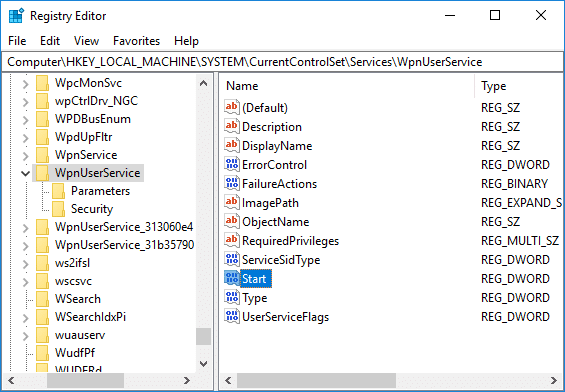
5. Change its value to 4 then click Gerai.
6. Iš naujo paleiskite kompiuterį, kad išsaugotumėte pakeitimus.
8 būdas: atnaujinkite arba iš naujo nustatykite „Windows 10“.
Pastaba: If you can’t access your PC, restart your PC a few times until you start Automatinis remontas. Tada eikite į Trikčių šalinimas > Iš naujo nustatyti šį kompiuterį > Pašalinti viską.
1. Paspauskite Windows Key + I, kad atidarytumėte nustatymus, tada spustelėkite Atnaujinimo ir saugos piktograma.
![]()
2. Kairiajame meniu pasirinkite Atkūrimo.
3. Pagal Iš naujo nustatyti šį kompiuterį spustelėkite "Pradėkite"Mygtuką.

4. Pasirinkite parinktį Laikykite mano failus.

5. For the next step, you might be asked to insert Windows 10 installation media, so ensure you have it ready.
6. Now, select your Windows version and click tik diske, kuriame įdiegta „Windows“. > remove my files.

5. Spustelėkite ant Perkrovimo mygtukas.
6. Vykdykite ekrane pateikiamas instrukcijas, kad užbaigtumėte atstatymą.
Rekomenduojama:
Tai tau pavyko Pataisykite meniu Pradėti neveikiantį „Windows 10“. bet jei vis dar turite klausimų dėl šios pamokos, nedvejodami paklauskite jų komentarų skiltyje.