- in Android by Administratorius
Kaip įjungti „Always On Display“ „Android“.

Always On Display Android
Android devices keep coming with new features that we never thought were needed until they were released. Continuing this tradition, Android introduced the Visada įjungtas feature. Although, it was initially released for Samsung devices but has now made its way to most Android smartphones. This feature allows you to keep your screen on at all times to view time and other important notifications. The Always On Screen has a black background and is really dim thus, minimizes battery consumption. Read our short guide and learn how to enable Always on display Android.

Kaip įjungti „Always On Display“ „Android“.
Just like most users, you must also feel that the Always On feature and is a convenient and handy feature. Therefore, follow the methods explained in this article to Enable Always on Display on Android devices.
Method 1: Use in-built Always On Display feature
While the feature is not available on all Android devices, you should be able to enable the Always on display feature on your device with Android version 8 or higher. Simply, follow these steps:
Taip pat žiūrėkite:
Kaip pataisyti neveikiančius „Twitter“ pranešimus („Android“ ir „iOS“)
Kaip pataisyti „Android“ neveikiantį balso paštą
Kaip pataisyti neveikiantį „Android Auto“.
Kaip ištrinti iš anksto įdiegtas programas „Android“ (paprastas būdas)
Kaip iš naujo nustatyti „Google Chrome“ „Android“.
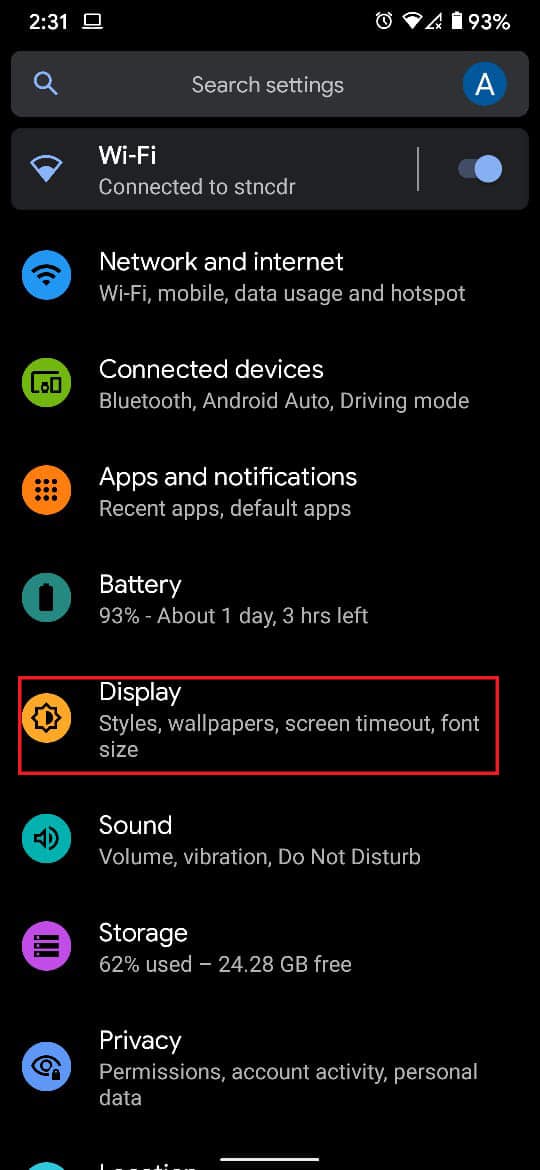
1. Atidarykite įrenginį Nustatymai ir palieskite displėjus parinktis, kaip parodyta.
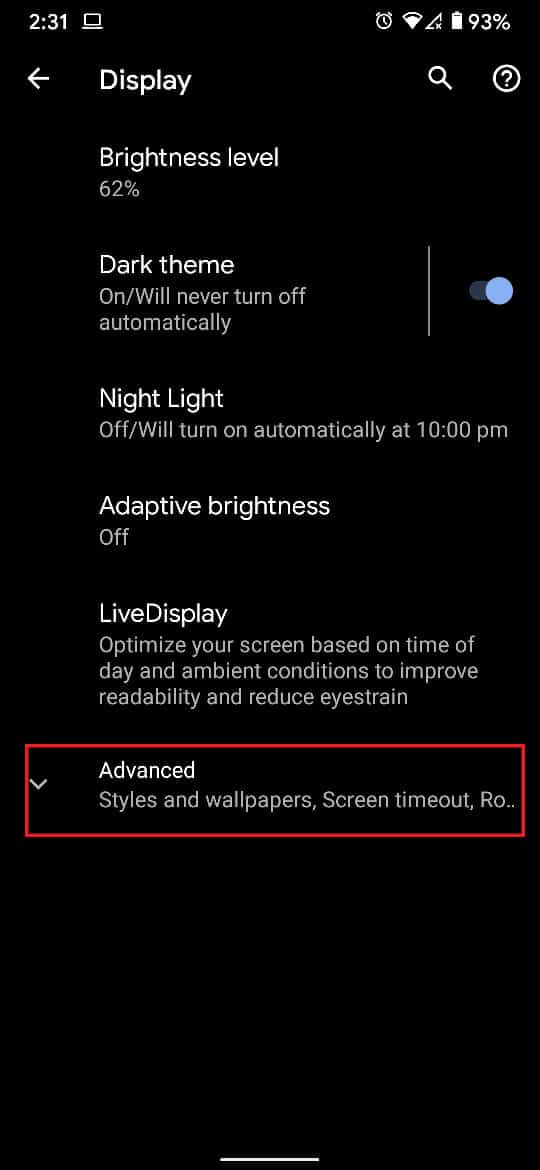
3. Paspausti pažangus to view all display settings.
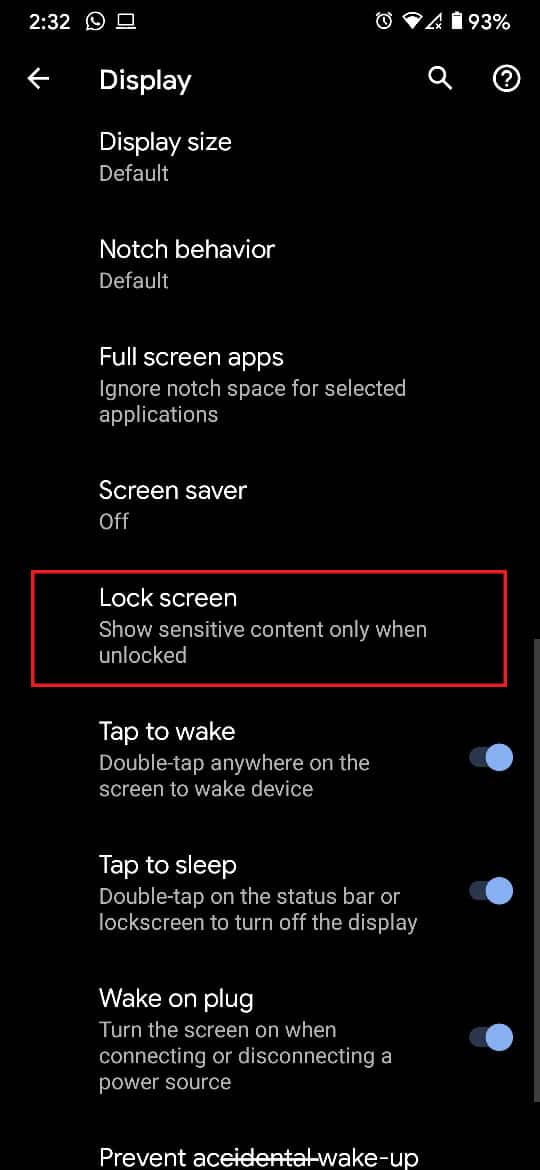
4. Scroll down and tap the option titled Užrakinti ekraną, kaip paryškinta toliau.
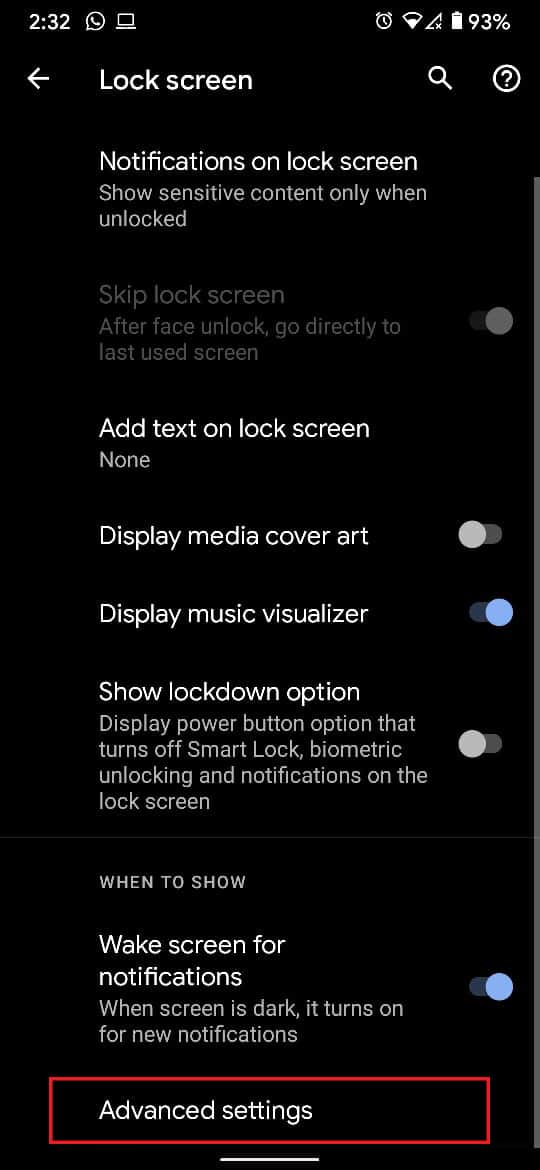
5. Viduje Kada parodyti skyriuje, bakstelėkite Papildomi nustatymai.
6. Turn the toggle ON for the Aplinkos ekranas funkcija.
Pastaba: On other Android devices like Samsung and LG, the ambient display feature is visible as Always on display.
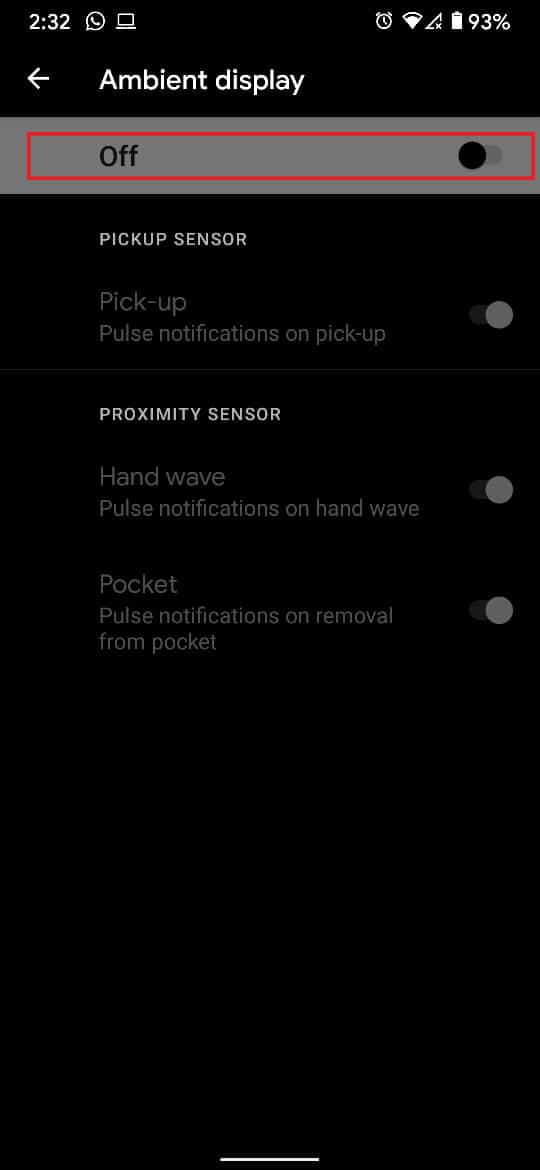
If you are unable to view the Always-on feature, then enable all the toggle switches on the Aplinkos ekranas screen. Next, flip the phone around a few times to enable Always on display.
Taip pat perskaitykite: Kaip išjungti „Google Assistant“ užrakinimo ekrane
Method 2: Use third-party Always On Display App
The inbuilt Always On feature on Android although effective, is not really customizable. Moreover, the feature is not available on many Android devices. Thus, users have no choice but to opt for third-party applications. Visada įjungta AMOLED app, however, is more than just an Always On Display application. It offers several customization options for Always on display while the AMOLED display helps save a ton of battery life. Here’s how to enable Always On Display Android using this app:
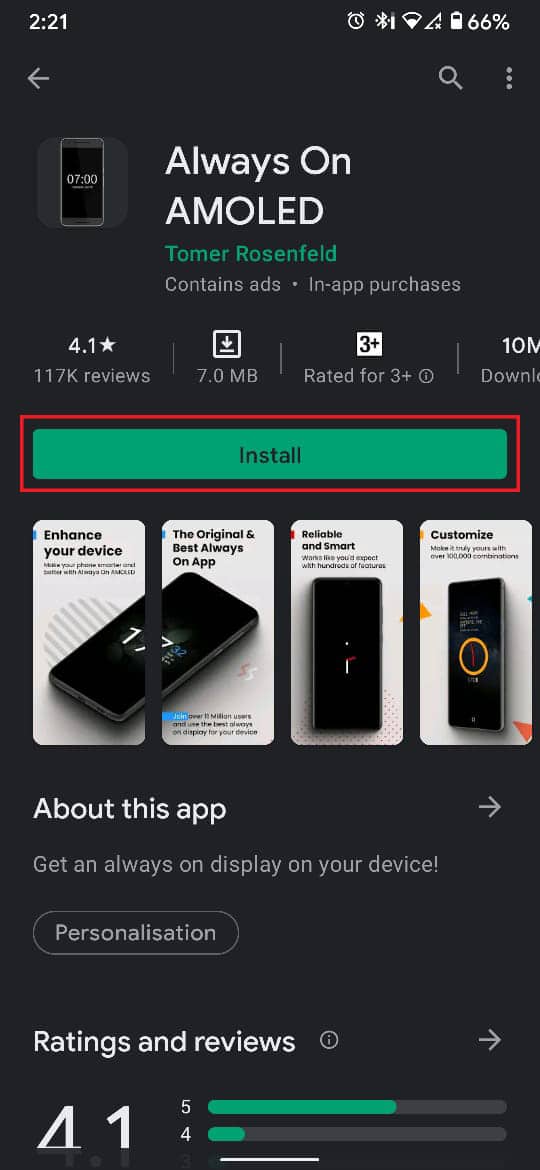
1. Atidarykite Google Groti parduotuvė ir atsisiųskite Visada įjungta AMOLED.
2. Spauskite ant Atviras to run Always on Display APK file.
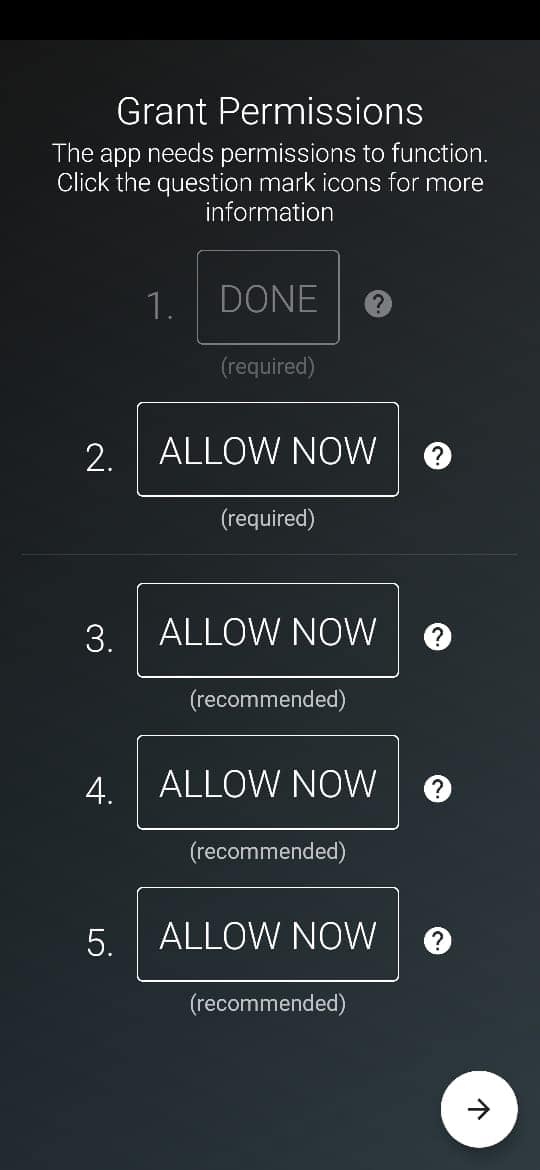
3. Suteikite leidimus that are required for the app to function at optimal capacity.
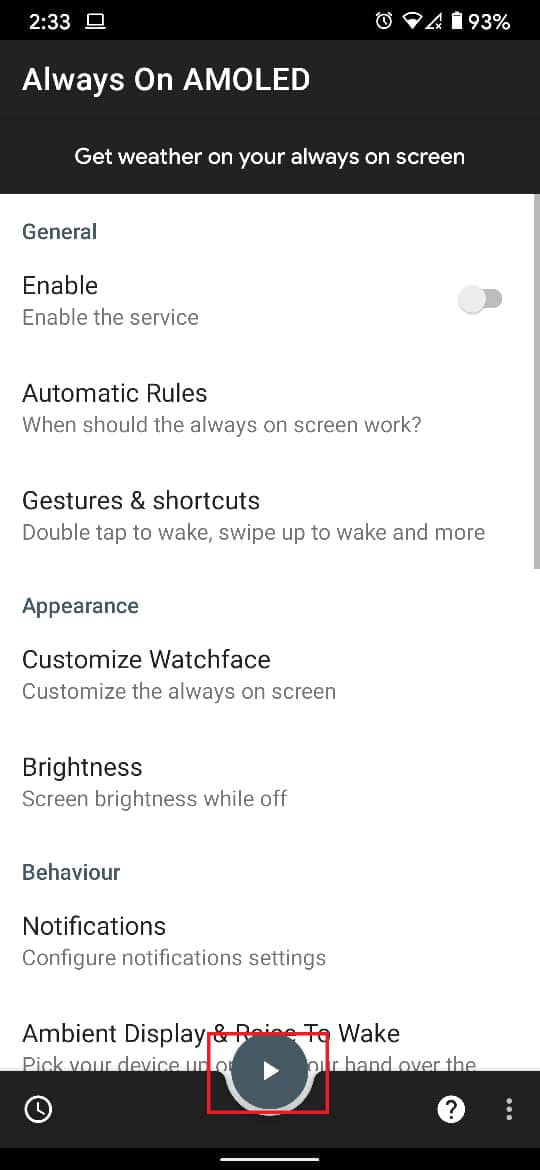
4. Next, adjust the options to alter the brightness, the style of the clock, the duration of the ambient display, the parameters for activation, etc. to customize your Always on Display Android screen.
5. Dabar bakstelėkite Groti mygtukas displayed at the bottom of the screen to preview the ambient display.
Rekomenduojama:
Tikimės, kad jums pavyko suprasti how to enable Always on display Android as well as utilize the Always On Display app. Let us know which method worked for you. Have any queries or suggestions? Drop them in the comment section below.