Fix Computer does not start until restarted multiple times

Fix Computer does not start until restarted multiple times: There seems to be a new issue with PC users, which is when they first turn ON their PC the power comes ON, fans start to spin but everything suddenly stops and PC never gets a display, in short, PC automatically turned OFF without any warning. Now if the user, powers off the PC and then turned it back ON, the computer boots normally without any additional issues. Basically, Computer does not start until restarted multiple times which is very annoying for basic Windows users.
Sometimes you need to boot up to 4-5 time before you could see the display or even boot your PC, but there is no guarantee that it will boot. Now living in this uncertainty, that you may or may not be able to use your PC next day is not such a good thing, so you need to address this problem immediately.
Now there are only a few issues which can cause this problem, so you can definitely troubleshoot this issue easily. The problem sometimes can be related to software like the main culprit seems to be Fast Startup in many cases and disabling it seems to fix the issue. But if this doesn’t fix the issue then you can be sure that the issue is related to hardware. In hardware, this can be a memory issue, faulty power supply, BIOS Settings or CMOS battery dried up, etc. So without wasting any time let’s see how to Fix Computer does not start until restarted multiple times with the help of the below-listed guide.
Fix Computer does not start until restarted multiple times
Погрижете се да создадете точка за враќање, само во случај нешто да тргне наопаку.
Забелешка: Some of the methods require expert supervision as you can seriously damage your PC while performing the steps, so if you don’t know what you’re doing then take your laptop/PC to a service repair center. If your PC is under warranty then opening the case can temper/void the warranty.
Метод 1: Исклучете го брзото стартување
1. Притиснете Windows Key + R, потоа напишете контрола и притиснете Enter за да се отвори Контролен панел.

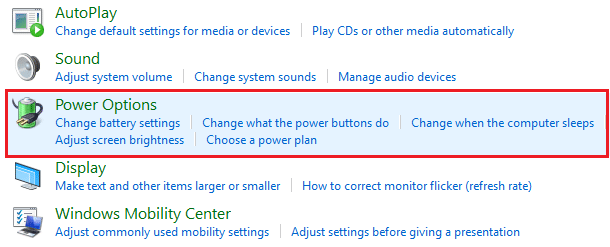
2.Кликнете на Хардвер и звук потоа кликнете на Опции за напојување.
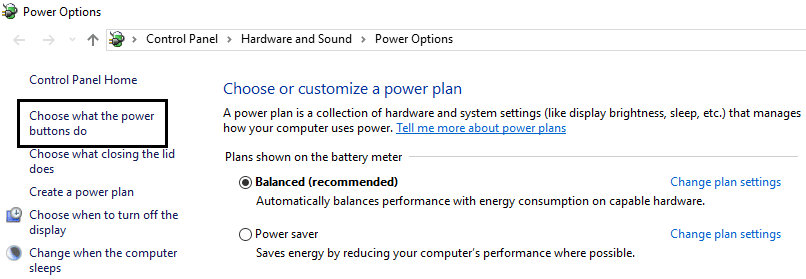
3. Потоа од левиот прозорец на прозорецот изберете „Изберете што прават копчињата за напојување."
4. Сега кликнете на „Променете ги поставките кои во моментов не се достапни."

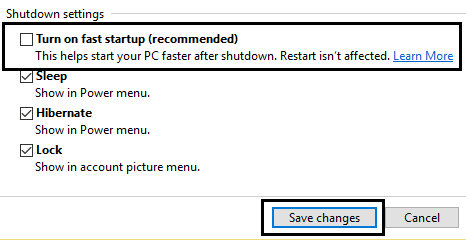
5. Отштиклирајте „Вклучете брзо стартување“ и кликнете на Зачувај промени.
Метод 2: Извршете автоматска поправка
1.Вметнете го DVD-то за инсталација на Windows 10 што може да се подигне и рестартирајте го компјутерот.
2.When prompted to притисни било кое копче за да се подигне од ЦД или ДВД, притиснете кое било копче за да продолжите.

3.Изберете ги вашите јазични параметри и кликнете Next. Кликнете на Поправка вашиот компјутер во долниот лев агол.

4.На изберете екран со опции, кликнете Смена на проблеми.

5.На екранот за решавање проблеми, кликнете Напредна опција.
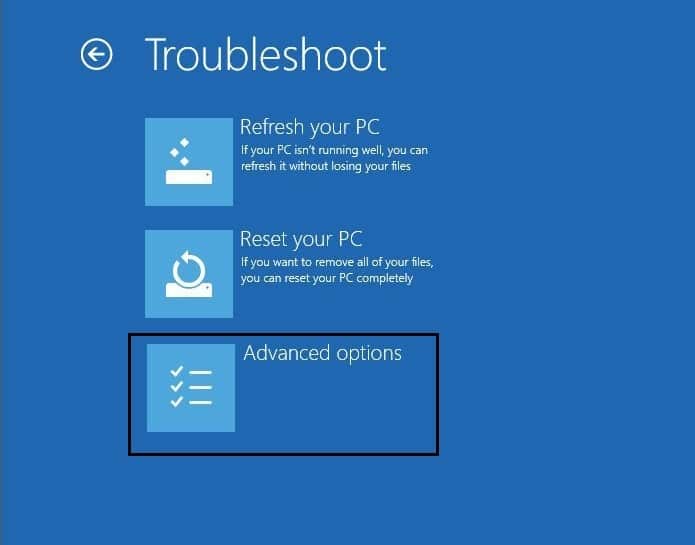
6.На екранот Напредни опции, кликнете Автоматска поправка или поправка на стартување.
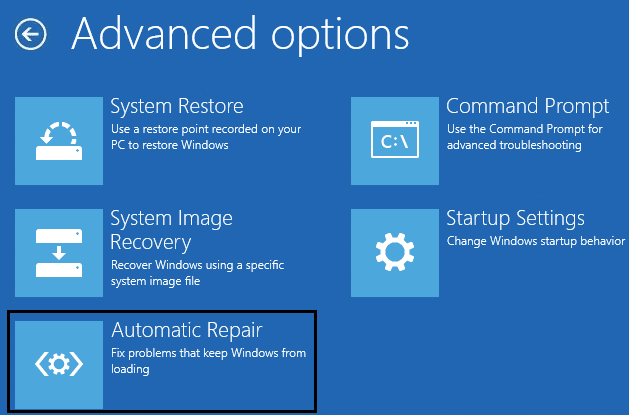
7. Почекајте до Поправки за автоматско/стартување на Windows заврши.
8.Рестартирај и успешно Fix Computer does not start until restarted multiple times issue, ако не, продолжи.
Исто така, прочитајте Како да се поправи Автоматската поправка не може да го поправи вашиот компјутер.
Метод 3: Ресетирајте го BIOS-от на стандардните поставки
1.Исклучете го лаптопот, па вклучете го и истовремено притиснете F2, DEL или F12 (во зависност од вашиот производител) за да влезете во Поставување на BIOS-от.

2.Now you’ll need to find the reset option to вчитајте ја стандардната конфигурација и може да биде именуван како Reset to default, Load factory default, Clear BIOS settings, Load setup default или нешто слично.

3.Select it with your arrow keys, press Enter, and confirm the operation. Your BIOS-от сега ќе го користи својот стандардни поставки.
4.Once you’re logged into Windows see if you’re able to Fix Computer does not start until restarted multiple times issue.
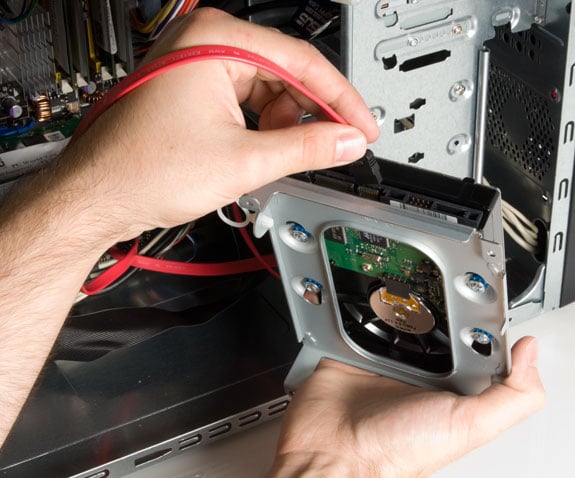
Method 4: Check if hard disk is failing
In many cases, the issue occurs because of the failing hard disk and to check if this is the problem here you need to disconnect the hard disk from your PC and connect it to another PC and try to boot from it. If you can boot from the hard disk without any issue on the other PC then you can be sure that the issue is not related to it.
Another way to test your hard disk is download and burn the SeaTools for DOS on a CD then run the test to check if your hard disk is failing or not. You will need to set the first boot to CD/DVD from BIOS in order for this to work.
Метод 5: Проверете го напојувањето
A faulty or failing Power Supply is generally the cause for PC not starting at the first boot. Because if the power consumption of hard disk is not met, it won’t get enough power to run and subsequently you may need to restart the PC several times before it can take the adequate power from PSU. In this case, you may need to replace the power supply with a new one or you could borrow a spare power supply to test if this is the case here.
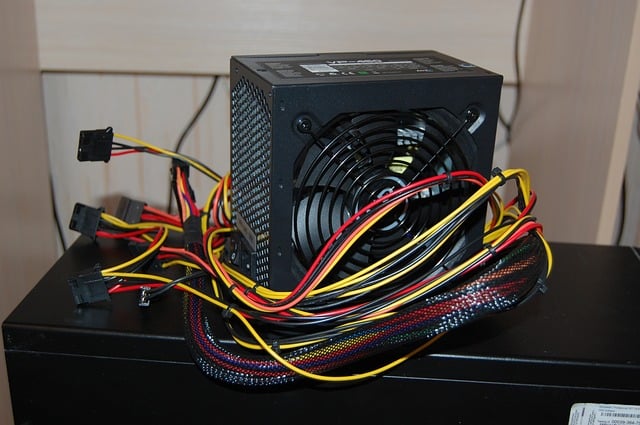
If you have recently installed a new hardware such as video card then chances are the PSU is not able to deliver the necessary power needed by the graphic card. Just temporary remove the hardware and see if this fixes the issue. If the issue is resolved then in order to use the graphic card you may need to purchase a higher voltage Power Supply Unit.
Method 6: Replace CMOS battery
If CMOS battery has dried up or no longer deliver powers then your PC won’t start and after few days it will eventually start hanging up. In order to fix the issue, it’s advised to replace your CMOS battery.
Метод 7: ATX ресетирање
Забелешка: Овој процес генерално се однесува на лаптопите, па ако имате компјутер тогаш оставете го овој метод.
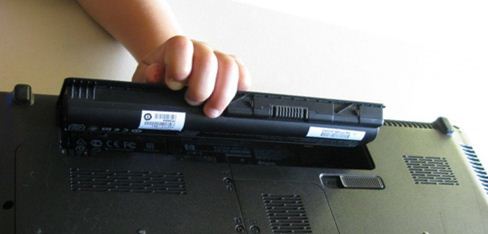
1.Power off your laptop then remove the power cord, leave it for few minutes.
2. Сега извадете ја батеријата одзади и притиснете и задржете го копчето за вклучување 15-20 секунди.
Забелешка: Сè уште не поврзувајте го кабелот за напојување, ние ќе ви кажеме кога да го направите тоа.
3.Now plug in вашиот кабел за напојување (батеријата не треба да се става) и се обидувате да го подигнете вашиот лаптоп.
4.If it’s boot properly then again turn off your laptop. Put in the battery and again start your laptop.
If the problem is still there again turn off your laptop, remove power cord & battery. Press & hold the power button for 15-20 seconds and then insert the battery. Power on the laptop and this should fix the issue.
Now if any of the above methods weren’t helpful then it means the problem is with your motherboard and unfortunately, you need to replace it in order to fix the issue.
Препорачано:
Тоа е тоа што го имате успешно Fix Computer does not start until restarted multiple times issue но ако сè уште имате прашања во врска со овој водич, слободно прашајте ги во делот за коментари.