Поправете го MultiVersus што не се стартува во Windows 10

MultiVersus is a famous online multiplayer fighting game that is rocking today’s gaming world. Yet, few users complain about the MultiVersus not launching issue when the game is launched on their Windows 10 PC. If you are in the same boat, the troubleshooting hacks discussed in this article will help you sail the problem.
How to Fix MultiVersus Not Launching in Windows 10
If you are vexed by MultiVersus won’t launch issue in your Windows 10 computer, here are a few possible reasons why you must analyze them carefully to sort out the problem.
- Компјутерот не ги исполнува основните барања на играта.
- Некоја друга програма во заднина ја попречува играта.
- Користите непроверена верзија на драјвери.
- Графичките поставки на играта се погрешно конфигурирани.
- Присуство на малициозен софтвер и вируси.
- .NET рамката и оперативниот систем не се ажурирани на нивната најнова верзија.
- Верзијата на DirectX не е ажурирана.
- Оверклокување.
- Проблемот го предизвикуваат и сите погрешно конфигурирани или оштетени датотеки за инсталација на играта.
- Датотеките што се редистрибуираат на Microsoft C++ не се компатибилни со играта и со компјутерот.
Here are a few possible troubleshooting methods that will help you fix the discussed issue.
Метод 1: Основни методи за решавање проблеми
Следете ги овие основни методи за решавање проблеми за да го решите споменатиот проблем.
1A. Check System Requirements
Мулти наспроти Минимални побарувања на системот
- Процесорот: Intel Core i5-2300 или AMD FX-8350
- RAM меморија: 4 GB
- ВИДЕО КАРТИЧКА: Nvidia GeForce GTX 550 Ti or AMD Radeon HD 5850 | Intel UHD 750
- СЕЈДЕР ПИКСЕЛ: 5.0
- ТЕРЕКСНИ СЕНКИ: 5.0
- БЕСПЛАТЕН ПРОСТОР НА ДИСК: 6 GB
- ПОСВЕТЕН ВИДЕО РАМ: 1024 MB
Мулти наспроти Препорачани Барања
- Процесорот: Intel Core i5-3470 or AMD Ryzen 3 1200
- RAM меморија: 8 GB
- ВИДЕО КАРТИЧКА: Nvidia GeForce GTX 660 or AMD Radeon R9 270
- СЕЈДЕР ПИКСЕЛ: 5.0
- ТЕРЕКСНИ СЕНКИ: 5.0
- БЕСПЛАТЕН ПРОСТОР НА ДИСК: 6 GB
- ПОСВЕТЕН ВИДЕО РАМ: 2048 MB
1B. Check your internet connection
Unstable internet connection leads to MultiVersus is not working issue, also if there are any obstacles between your router and your computer, they may interfere with the wireless signal and will cause intermittent connection problems.
Можете да трчате а брзински тест да се знае оптималното ниво на брзина на мрежата потребно за правилно поврзување.
Погрижете се вашиот уред да ги задоволува долунаведените критериуми.
- Најдете ја јачината на сигналот на вашата мрежа и ако е многу ниска, исчистете ги сите пречки меѓу патот.
- Избегнувајте премногу уреди поврзани на истата мрежа.
- Секогаш купувајте модем/рутер потврден од вашиот интернет провајдер (ISP) и тие се без конфликти.
- Не користете стари, скршени или оштетени кабли. Заменете ги каблите доколку е потребно.
- Проверете дали жиците од модемот до рутерот и модемот до ѕидот се стабилни и не се вознемирени.
Ако има какви било проблеми со интернет конекцијата, проверете го нашиот водич Како да ги решите проблемите со мрежно поврзување на Windows 10 за да ги решите истите проблеми.
1C. Stop Overclocking
- Every high-end computer is built with the option of Overclocking which helps in outputting more juice than your specifications that you already have. Running the graphics card or processor faster than the default speed refers to overclocking.
- Кога тоа ќе се случи, вашиот компјутер ќе ја достигне максималната температура по одредено време. Компјутерот го открива ова и ја прилагодува брзината на часовникот на нормалната брзина додека не се излади. Брзината на часовникот повторно се зголемува откако ќе се изладат.
- Ова ги зголемува перформансите на вашиот компјутер и е голема помош доколку немате моќен компјутер.
- It must be noted that all the games do not support overclocking. The same applies to MultiVersus. So, you must try disabling all overclocking on your computer and try launching the game. If it launches well, the issue is fixed.
1D. Извршете скенирање на малициозен софтвер
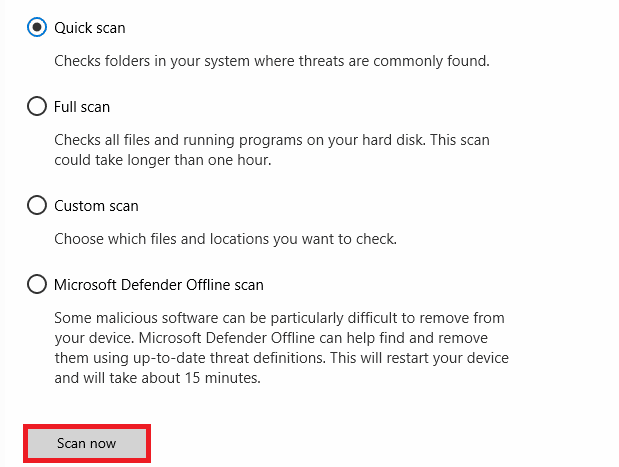
The presence of a virus or malware attack will result in gaming problems on your computer. If in case, the virus attack is very severe, you cannot connect to any online game continuously at all. To resolve the problem, you have to remove the virus or malware completely from your Windows 10 computer.
Ви препорачуваме да го скенирате вашиот компјутер како што е наведено во нашиот водич Како да извршам скенирање за вируси на мојот компјутер?
Исто така, ако сакате да отстраните малициозен софтвер од вашиот компјутер, проверете го нашиот водич Како да отстраните малициозен софтвер од вашиот компјутер во Windows 10.
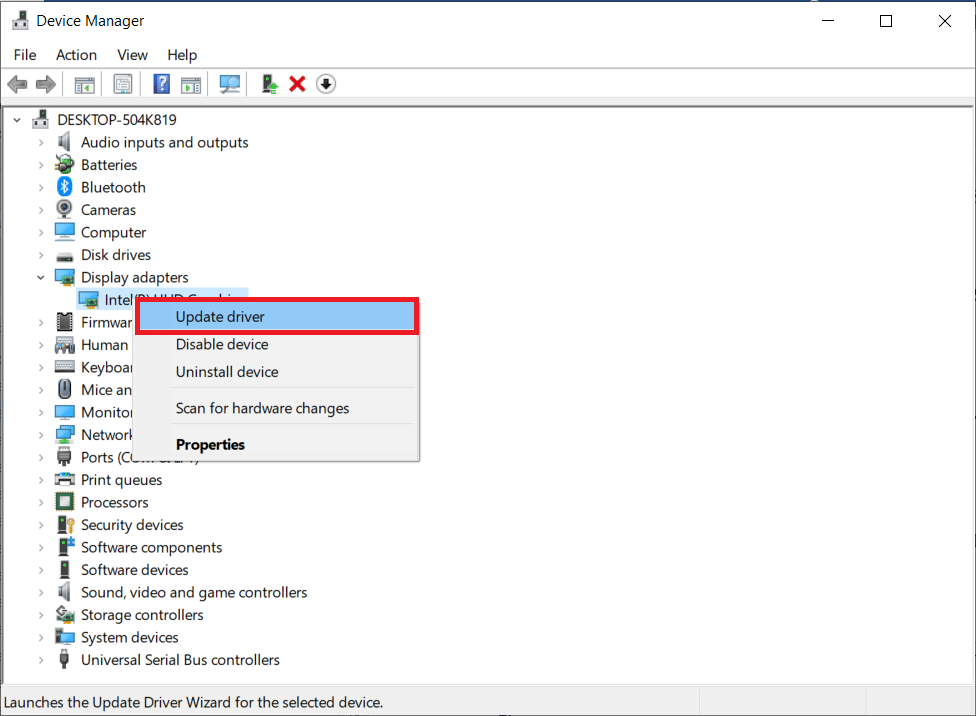
1E. Update GPU Drivers
Graphical drivers are responsible for heavy graphical images and video processing games. If you face any launching conflicts in the MultiVersus game, make sure you use an updated version of device drivers, as they serve as a link between the hardware and Operating System of your PC. Many users have suggested that updating drivers have fixed MultiVersus not working issue. Read and implement the steps instructed in our guide 4 Ways to Update Graphics Drivers in Windows 10 to do so.
Исто така прочитајте: Поправете ги пронајдените драјвери на Windows за вашиот уред, но наидовте на грешка
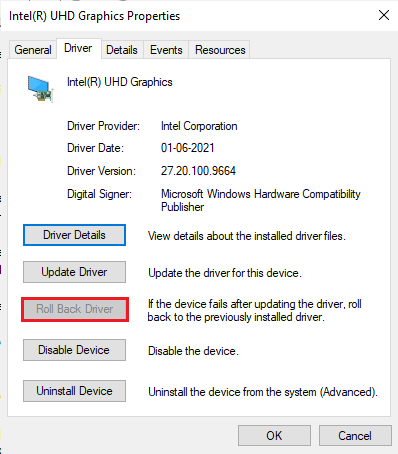
1F. Roll Back GPU Drivers
Sometimes, the current version of GPU drivers may cause the discussed launching issue in MultiVersus, and in this case, you have to restore previous versions of installed drivers. This process is called враќање на возачите и лесно можете да ги вратите драјверите на вашиот компјутер во нивната претходна состојба следејќи го нашиот водич Како да ги вратите драјверите на Windows 10.
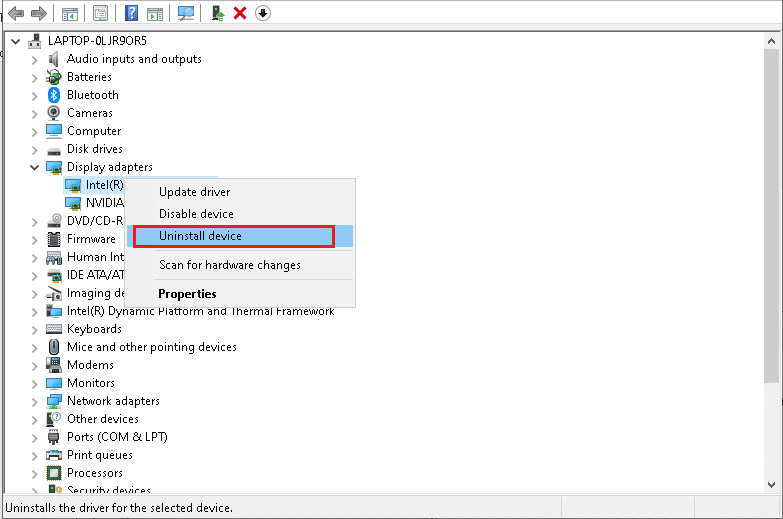
1G. Reinstall GPU Driver
If you still face MultiVersus not starting issue after updating your GPU drivers, then reinstall device drivers to fix any incompatibility issues. There are several ways to reinstall drivers on your computer. Yet, you can easily reinstall Graphical drivers as instructed in our guide How to Uninstall and Reinstall Drivers on Windows 10.
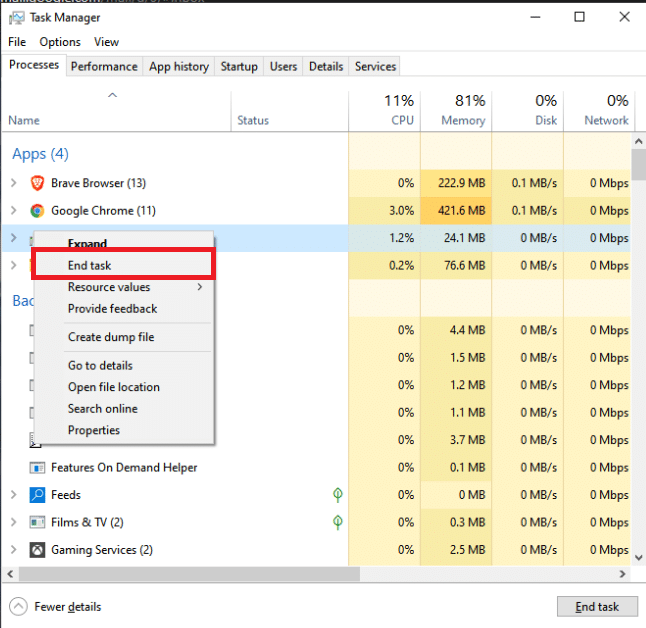
1H. End Background Processes
Several users have confirmed that MultiVersus not starting on PC can be resolved by closing all the background tasks running on your PC. To implement the task, follow our guide How to End Task in Windows 10, and proceed as instructed.
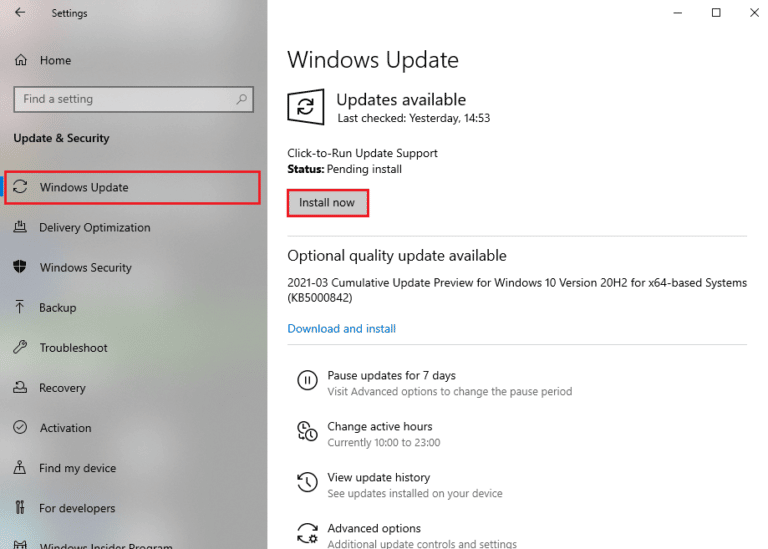
1I. Update Windows
You can also eradicate bugs in your computer and game by updating your Operating System. Always ensure if you have updated your Windows Operating System and if any updates are pending in action, use our guide How to Download and Install Windows 10 Latest Update
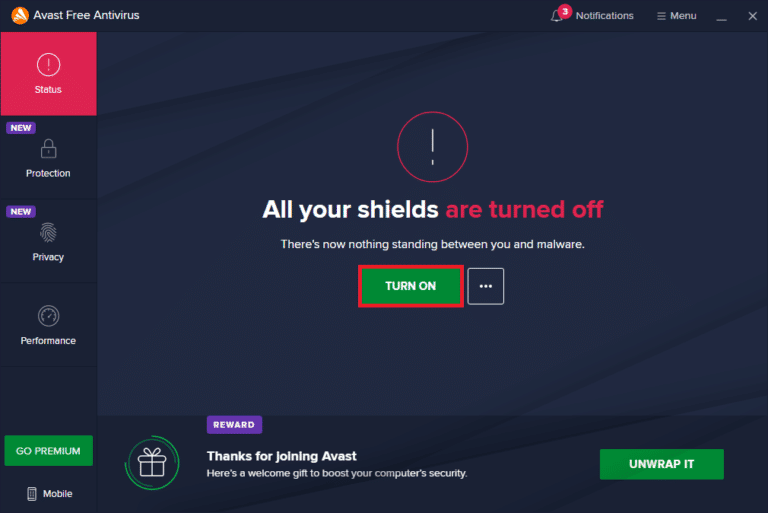
1J. Disable Antivirus Temporarily (If Applicable)
Some incompatible antivirus programs installed on your computer will cause MultiVersus launching problem. To avoid conflicts, you must ensure the security settings of your Windows 10 computer and check if they are stable or not. To find whether the antivirus suite is the reason for the discussed issue, disable it once and try connecting to a network.
Прочитајте го нашиот водич за Како привремено да го оневозможите антивирусот на Windows 10 и следете ги упатствата за привремено да ја оневозможите вашата антивирусна програма на вашиот компјутер.
If you have a fix for your problem after disabling the antivirus program on your computer, you are advised to uninstall the program completely from your PC.
Read our guide Force Uninstall Programs which won’t Uninstall in Windows 10 to uninstall your antivirus program on your computer.
Исто така прочитајте: Како да го деинсталирате McAfee LiveSafe во Windows 10
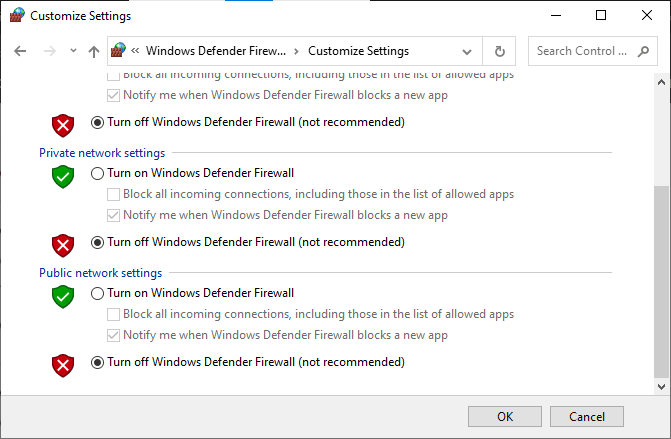
1K. Turn Off Windows Defender Firewall (Not Recommended)
Your computer will face MultiVersus is not working issue, due to an over-protective firewall suite in the Windows 10 PC. To resolve the problem, you can either add a new rule for your game, whitelist the game or as the last fix, disable the firewall temporarily.
Our guide on How to Disable Windows 10 Firewall will help you.
1L. Поправка на системски датотеки
If there are any missing or damaged files on your Windows 10 PC, you will face MultiVersus takes forever to launch issue. Yet, you are repairing these corrupt files by using inbuilt utilities namely, Системска датотека тајна Управување со сервисирање и управување со распоредување.
Прочитајте го нашиот водич за Како да ги поправите системските датотеки на Windows 10 и следете ги чекорите како што е наведено за да ги поправите сите ваши оштетени датотеки.
Method 2: Run MultiVersus Game as Administrator
If MultiVersus does not have required administrative privileges, a few essential features of the game will be limited causing you MultiVersus not launching issue whenever you open the game or install any updates. Follow the below-mentioned instructions to run the game as an administrator.
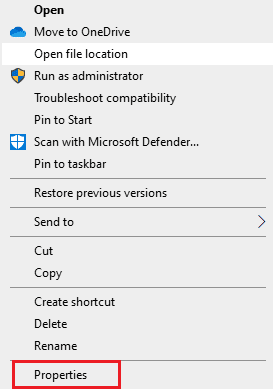
1. Десен-клик на MultiVersus shortcut на работната површина.
Забелешка: Можете исто така да одите на директориум за инсталација и десен клик на неа.
2. Потоа, изберете го Својства опција.
3. Сега, преминете на Компатибилност јазичето и кликнете на Извршете ја оваа програма како администратор.
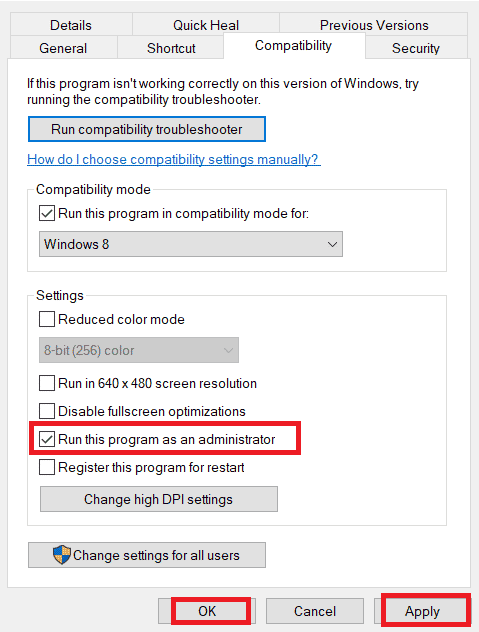
4. На крајот, кликнете на Аплицирај> Во ред за да ги зачувате промените.
Check if you have fixed MultiVersus launching issues.
Исто така прочитајте: Fix WoW Takes Forever to Launch in Windows 10
Метод 3: Променете го приоритетот на процесот на игра
The preference of an application or process tells the computer the importance and if it should be given preference over the others while allocating the resources. The priority of every application is normal except the system processes, by default. MultiVersus might crash if it didn’t get enough resources.
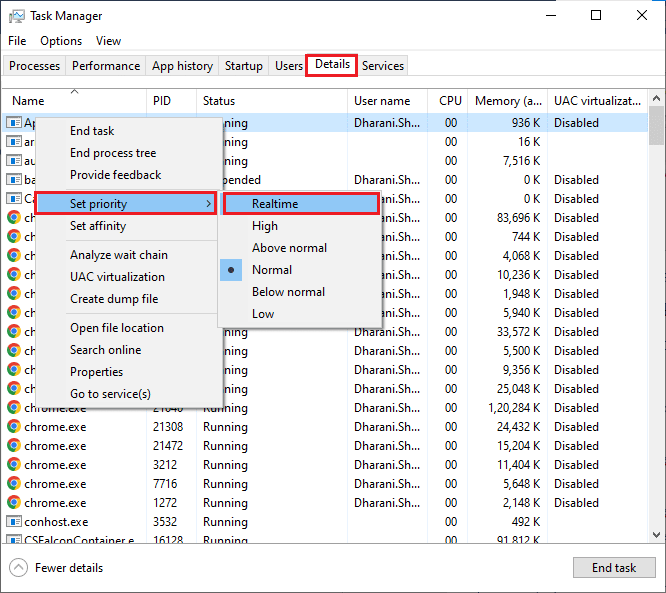
1. Притиснете го копчето Копчиња Ctrl + Shift + Esc заедно да се отвори Таскбарот.
2. Сега, побарајте MultiVersus process.
3. Потоа сменете го приоритетот во Висок приоритет и проверете дали ова функционира.
Забелешка: Променете го приоритетот со голема претпазливост бидејќи менувањето на приоритетот на процесот безгрижно може да го направи вашиот систем исклучително бавен или нестабилен.
4. Затворете го Задачата на менаџерот се рестартира вашиот компјутер.
Метод 4: Поставете високи перформанси
Можете исто така да ја оптимизирате вашата игра кога ги поставувате поставките за вашиот план за напојување со високи перформанси. Овие планови за напојување се развиени за управување со поставките за напојување на преносливите поставки. Следете ги долунаведените упатства за да ги користите поставките за планот за напојување со високи перформанси во вашиот систем.
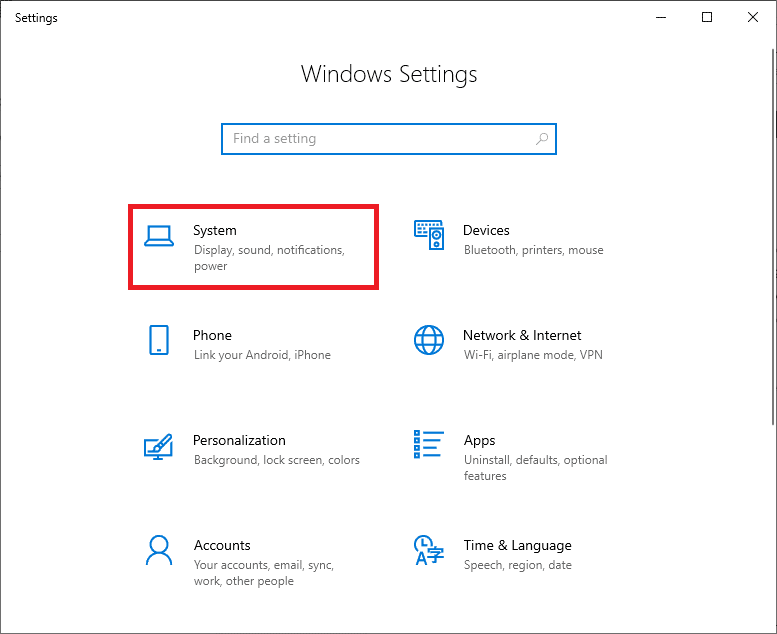
1. Притиснете го копчето Копчиња Windows + I истовремено да се отвори Поставки за Windows.
2. Сега, кликнете на Систем амбиент.
3. Сега, изберете го Моќ и спиење опција и кликнете на Дополнителни поставки за напојување под Поврзани прилагодувања.
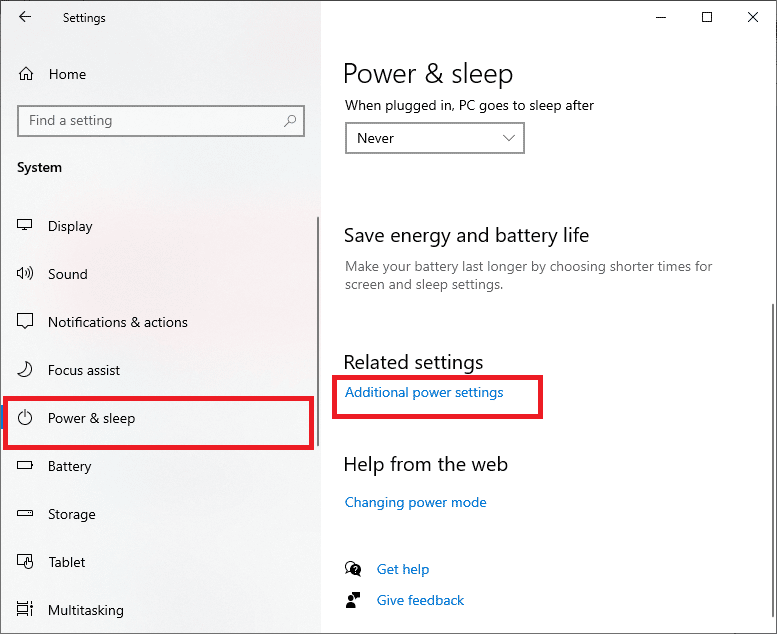
4. Сега, изберете го Високи перформанси опција под Високи дополнителни планови како што е прикажано на сликата подолу.
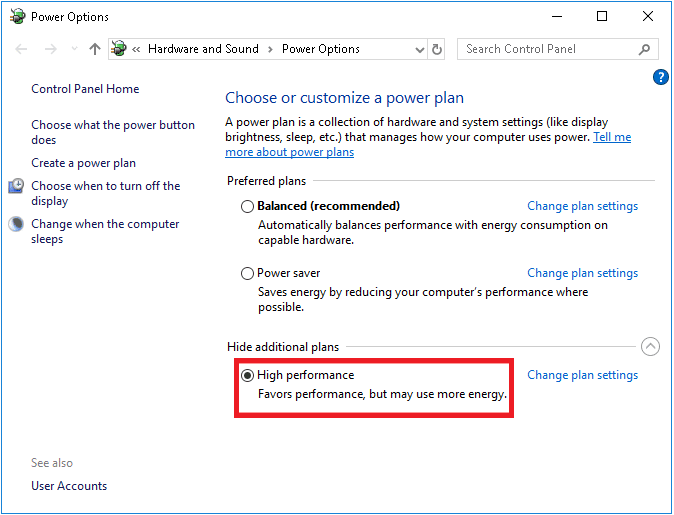
Now you have optimized your system, check if you have fixed MultiVersus won’t launch on startup issue.
Исто така прочитајте: Поправете ја грешката на исчезнатите преземени датотеки на Steam
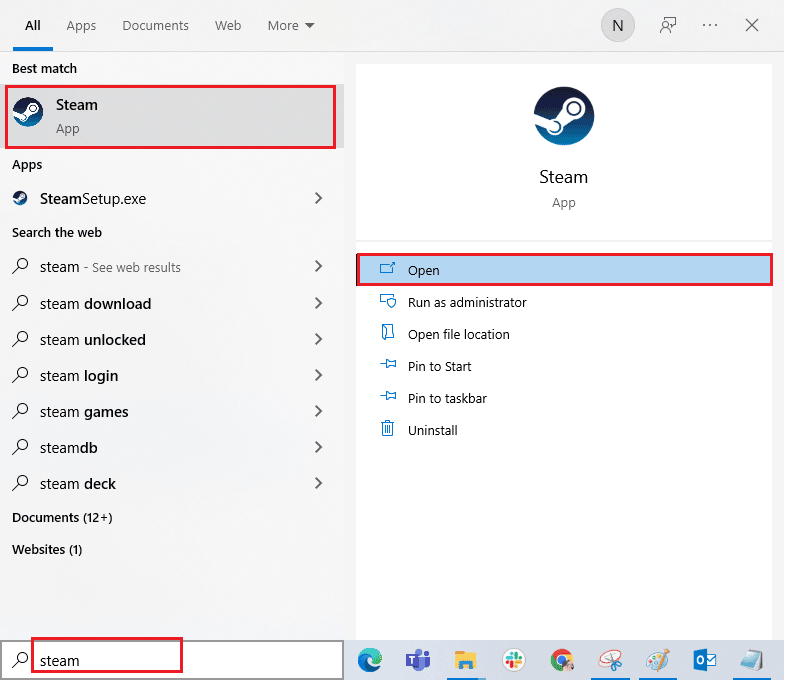
Method 5: Update Steam App & MultiVersus Game
If you use an outdated Steam application, you cannot access any games smoothly. Hence always make sure you use an updated version of Steam and MultiVersus game before launching it.
1. Удри Windows клуч и тип Пареа, потоа кликнете на Отвори.
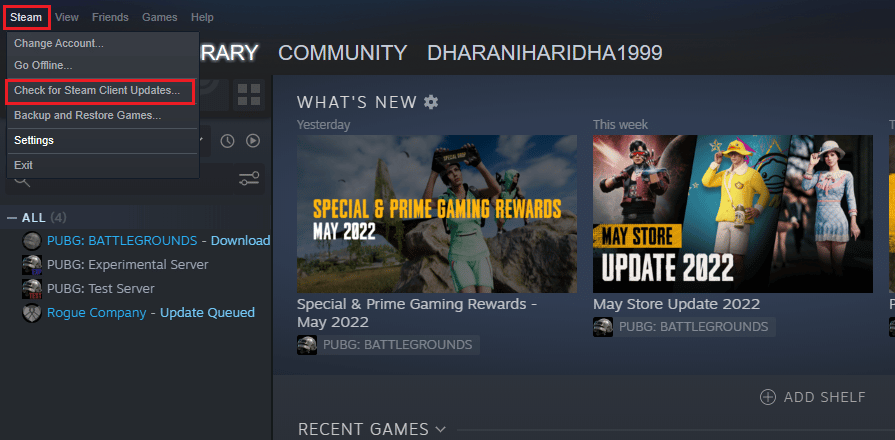
2. Сега, кликнете на Пареа во горниот лев агол на екранот проследено со Проверете дали има ажурирања за клиентите на Steam… како што е нагласено подолу.
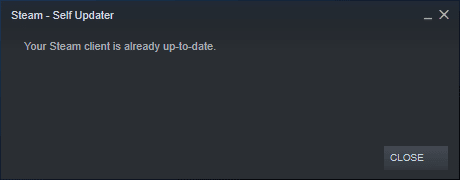
3. Ако имате нови ажурирања за преземање, инсталирајте ги и погрижете се вашиот Steam клиент е ажуриран.
4. Сега, рестартирајте го Steam и проверете дали проблемот е решен сега.
Likewise, it is always essential that your game run at its latest version to avoid any conflicts. Until your game is updated, you cannot log in to MultiVersus servers successfully.
До ажурирајте ја вашата игра, следете ги долунаведените чекори.
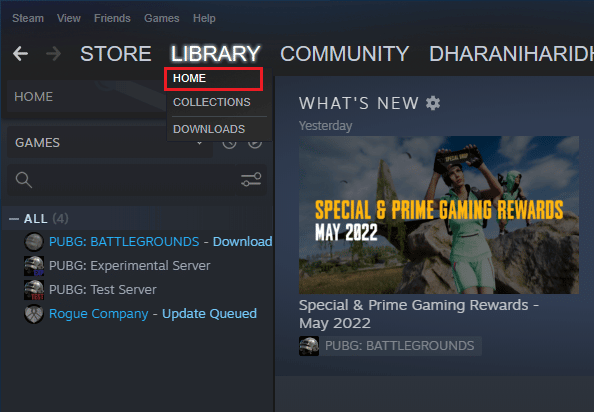
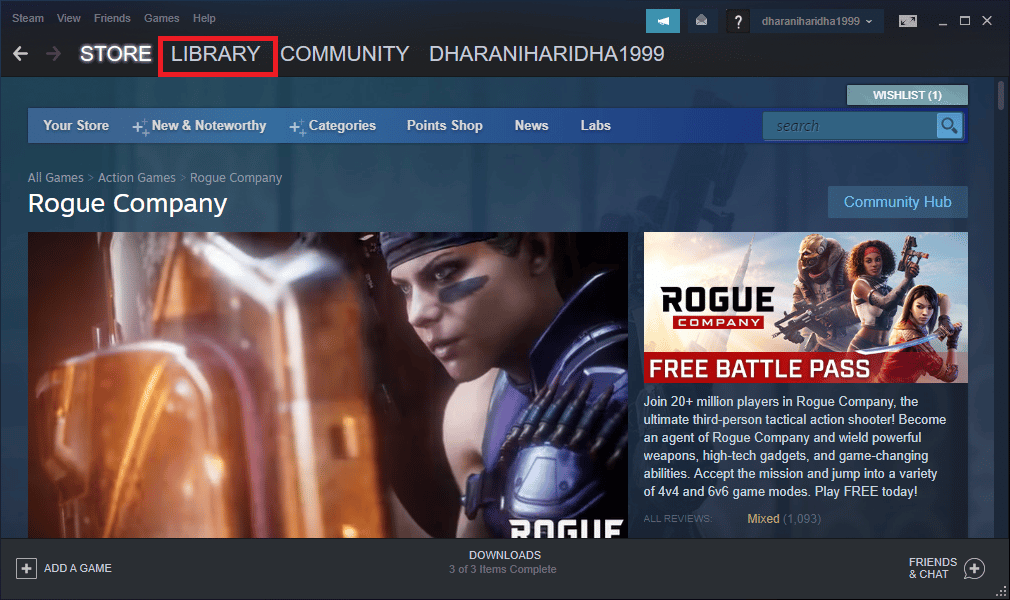
1. Лансира Пареа и отидете до Библиотека.
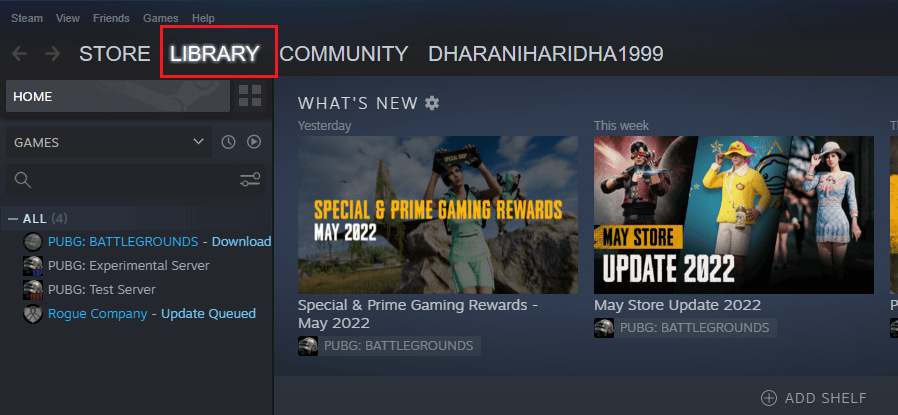
2. Сега, кликнете на ДОМ and search for MultiVersus.
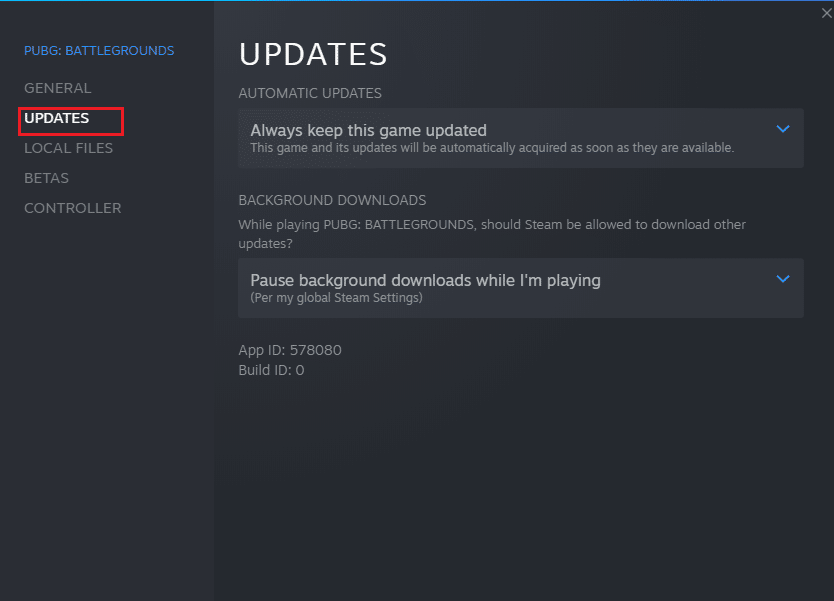
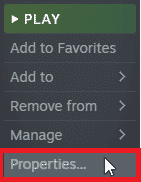
3. Потоа, кликнете со десното копче на играта и изберете го Својства… опција.

4. Сега, префрлете се на АЖУРИРАЊА табот и проверете дали некои ажурирања чекаат во акција. Ако е така, следете ги упатствата на екранот за да ги преземете најновите ажурирања.
After an update, check if MultiVersus not launching issue is fixed.
Метод 6: Оневозможете ги оптимизациите на цел екран
Few users have suggested that disabling full-screen optimizations on PC has helped them fix MultiVersus is not launching issue. Follow as instructed.
1. Navigate to the Steam Библиотека мени.
2. Now, right-click on the MultiVersus game and click on Својства…
3. Сега, префрлете се на ОПШТИ јазичето и кликнете на ПОСТАВЕТЕ ОПЦИИ ЗА СТАРУВАЊЕ… како што е прикажано.
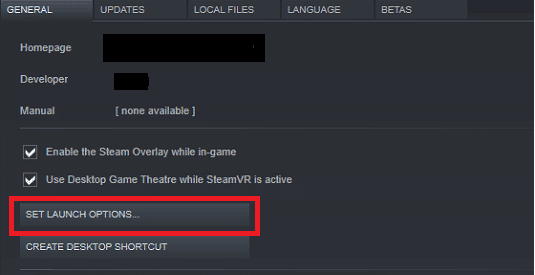
4. Сега, ќе се отвори нов прозорец со предупредување за напредно корисник. За да ја отворите играта во прозорски режим, напишете го -прозорец параметар.
5. Сега, зачувајте ги промените со кликнување OK и излезете од прозорецот Својства.
6. Сега, повторно стартување играта and ensure that it runs in windowed mode.
Забелешка: You can also navigate to ПОСТАВЕТЕ ОПЦИИ ЗА СТАРУВАЊЕ… повторно и внесете ги следните параметри наместо последниот параметар.
-прозорец -w 1024
7. Now, save the changes by clicking on OK.
Овој параметар ќе постави играта да се стартува во прозорски режим.
Исто така прочитајте: Поправете ја конфигурацијата на апликацијата Steam која не е достапна во Windows 10
Метод 7: Оневозможи преклопување во играта
The Steam Overlay is a piece of Steam that allows the users to access friends list, and web browser and allows in-game purchasing. It is a significant tool, yet it sometimes triggers MultiVersus not launching on startup issue. If you want to solve this problem, then turn off the Steam game overlay.
1. Отворете го Пареа стан и кликнете на Библиотека.
2. Сега, кликнете со десното копче Мулти наспроти и кликнете на Својства…

3. Сега, префрлете се на ОПШТИ табот и отштиклирајте го полето што содржи Овозможете Steam Overlay додека сте во играта.
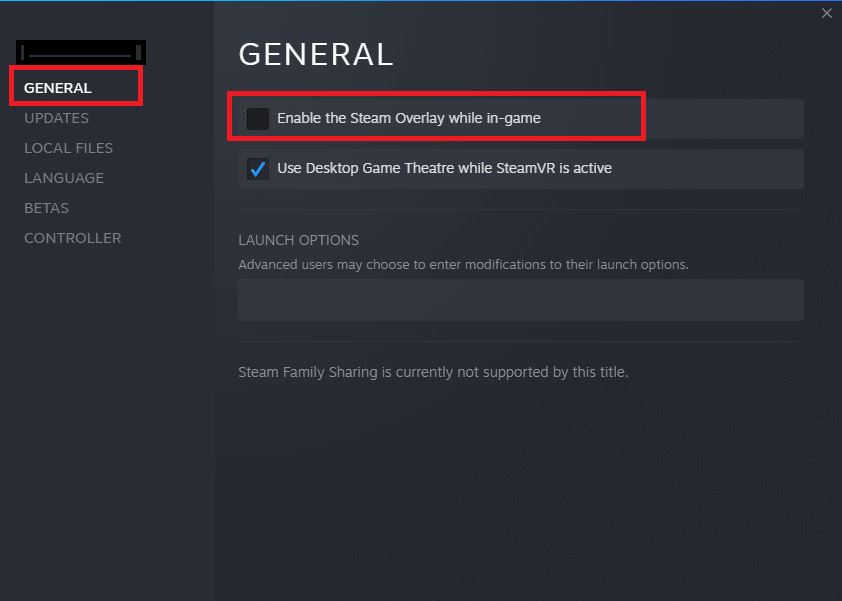
4. Конечно, рестартирајте ја играта and check if the MultiVersus launching issue is solved.
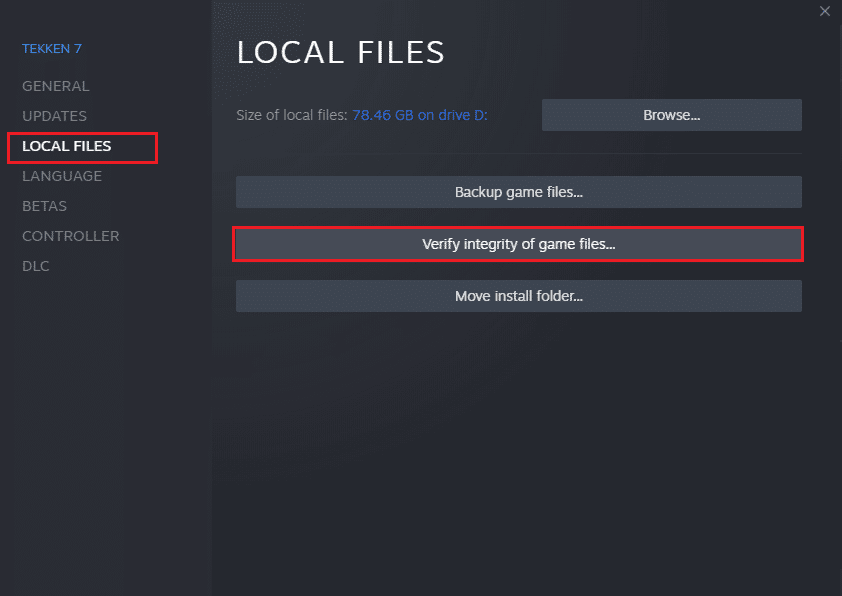
Метод 8: Потврдете го интегритетот на датотеките на играта
We have seen many cases in which the game files are either missing or corrupt or it had incomplete installations. Users could also experience MultiVersus not starting on PC issue if they are interrupted by the update process or if the game files are being moved. In this method, you will be opening Steam and using the built-in function for verifying the integrity of the game. It will be replaced if the application finds something. Read our guide on how to verify integrity of game files on Steam.
Исто така прочитајте: Fix Steam Client Bootstrapper Not Responding in Windows 10
Метод 9: Ажурирајте го .NET Framework
.NET framework in Windows 10 computer is essential for uninterrupted service of modern apps and games. Many games have an auto-update feature for the .NET framework, and thus it will be updated automatically whenever an update is available. In another case, if an update prompts in your PC, you can manually install the latest version of the .NET framework, as discussed below, to fix MultiVersus not launching issue.
1. Проверете дали има нови надградби за .NET рамка од официјална веб-страница на Мајкрософт.
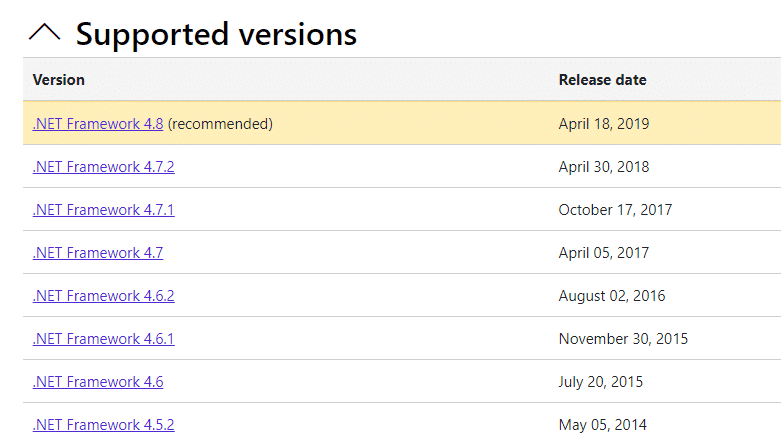
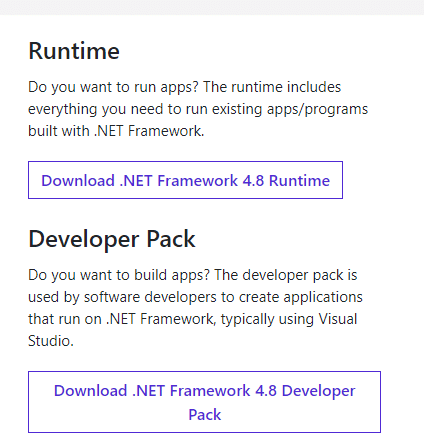
2. Доколку има ажурирања, кликнете на соодветните/препорачува линк и кликнете Преземете .NET Framework 4.8 Runtime опција.
Забелешка: Не кликнувајте на Преземете го .NET Framework 4.8 програмерски пакет како што се користи од развивачите на софтвер.
3. Оди до Мои преземања, кликнете двапати на датотеката за поставување за да ја извршите преземената датотека и следете ја упатства на екранот to install the .NET framework successfully on your Windows PC. Once done, check if you have fixed the discussed issue or not.
Метод 10: Ажурирајте го DirectX
To enjoy a seamless multimedia experience on MultiVersus, you have to make sure whether DirectX is installed, and it is updated to its latest version. DirectX helps you improve the visual media experience for graphical games and applications especially. It is worth updating DirectX needed for this game.
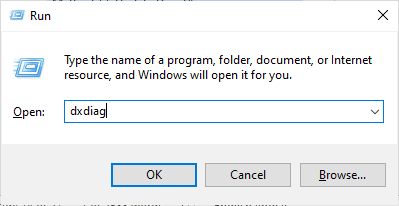
1. Удри на Windows + R копчиња истовремено за лансирање на Испратена дијалог-кутија.
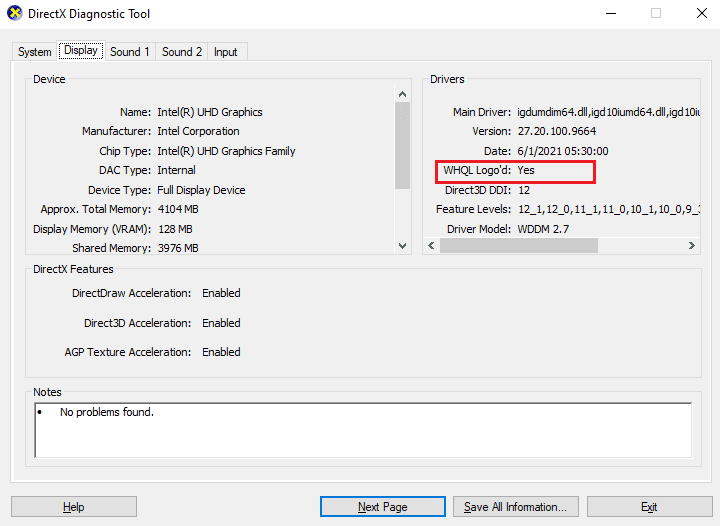
2. Тип dxdiag и притиснете го копчето Внесете клуч да се отвори Алатка за дијагностицирање DirectX.
3. Проверете го Верзија за DirectX, if it contains DirectX 12 или не.
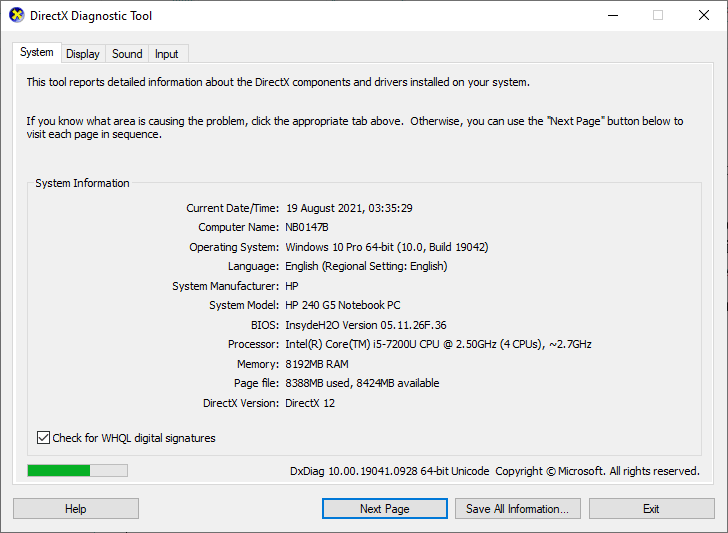
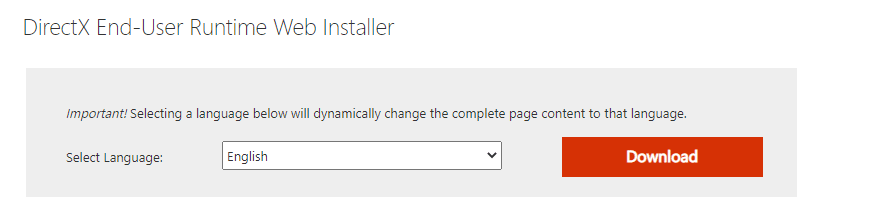
4. If you do not have DirectX 12 in your system, download and install it from the Страница за преземање на DirectX следејќи ги упатствата на екранот.
After installing DirectX, check if the issue occurs again.
Забелешка: Обезбеди Проверете дали има дигитални потписи WHQL полето е означено Систем табот и во сите јазичиња, проверете дали Лого на WHQL да биде поставен на Да.
Метод 11: Поправете го Microsoft Visual C++ Redistributable
Alternately, you can try to repair the Microsoft Visual C++ Redistributable packages to fix MultiVersus not launching issue as follows:
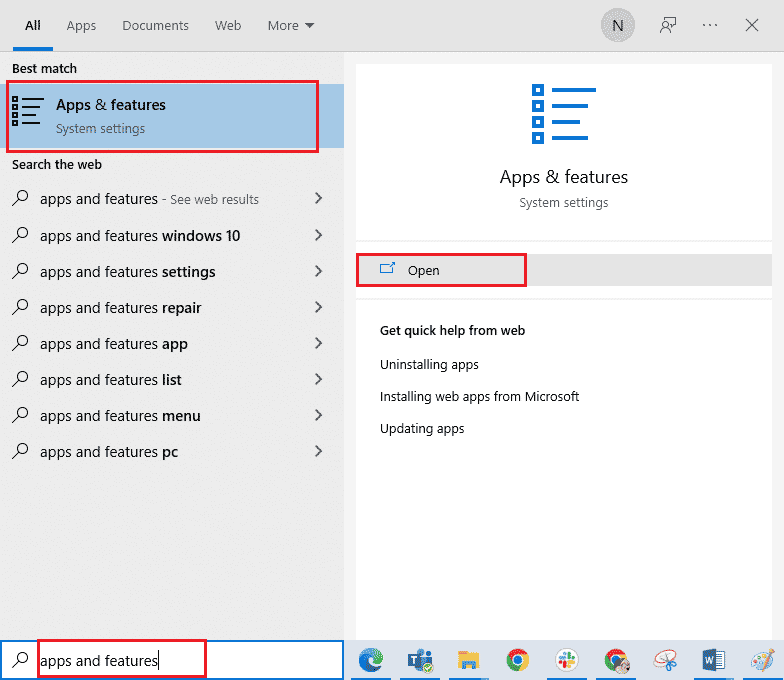
1. Удри на Windows клуч, тип Апликации и одлики, потоа кликнете на Отворено.
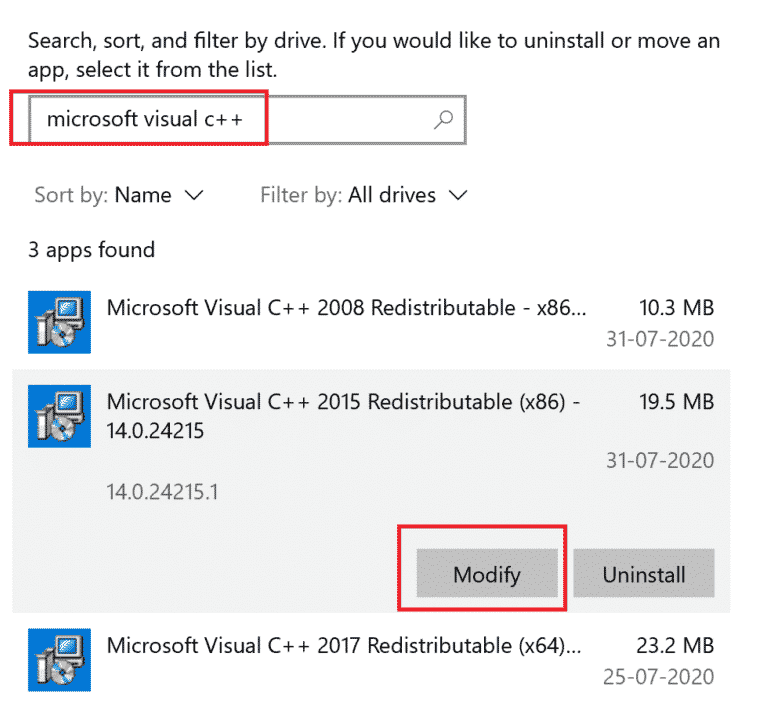
2. Пребарување за Microsoft Visual C ++ прераспределен пакет.
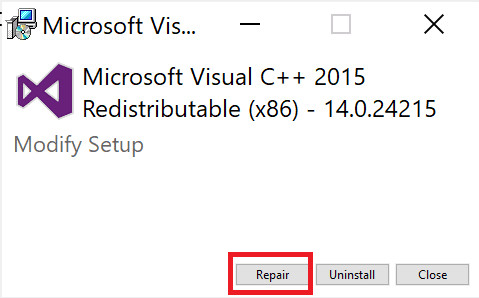
3. Then, select the package, and click on Измени опција.
4. Потоа, кликнете Да на Корисничка сметка контрола дијалог-кутија.
5. In the pop-up window that appears, click on поправка. Почекајте процесот да заврши.
6. Repeat the above steps to modify all the Microsoft Visual C++ Redistributable packages.
7. Конечно, рестартирајте го компјутерот.
Open the application that you were unable to open previously. If this did not work, try reinstalling the C++ redistributable instead.
Исто така прочитајте: Поправете ја грешката 2015x0 за неуспешно поставување на Microsoft Visual C++ 80240017
Метод 12: Повторно инсталирајте Microsoft Visual C++ Redistributable
If the previous method of repairing the Microsoft C++ Visual Redistributable did not fix MultiVersus won’t launch issue, then you will have to reinstall the redistributable. Follow the given steps to uninstall & then install these again.
1. Отворете го Апликации и одлики системски поставки.
2. Изберете Microsoft Visual C ++ прераспределен package, then click on Избриши опција.
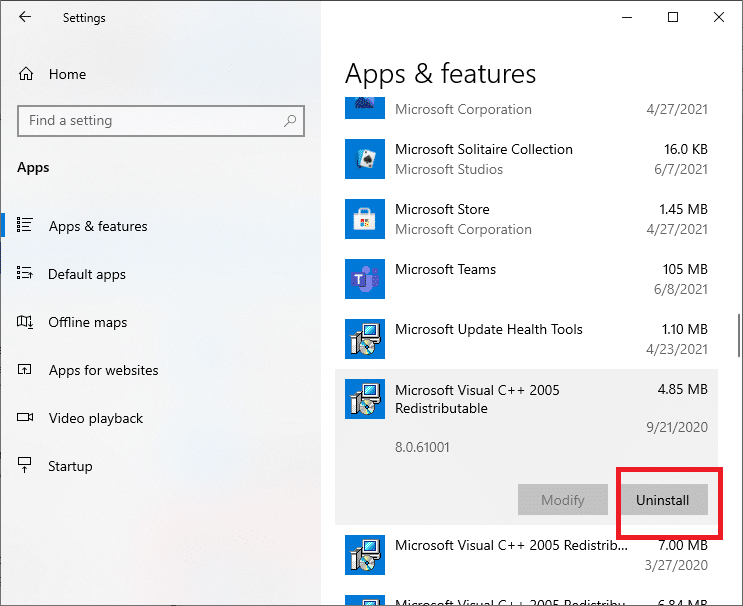
3. Кликнете на Избриши option again to confirm and remove the package.
Забелешка: Make sure to uninstall all the Microsoft Visual C++ Redistributable packages.
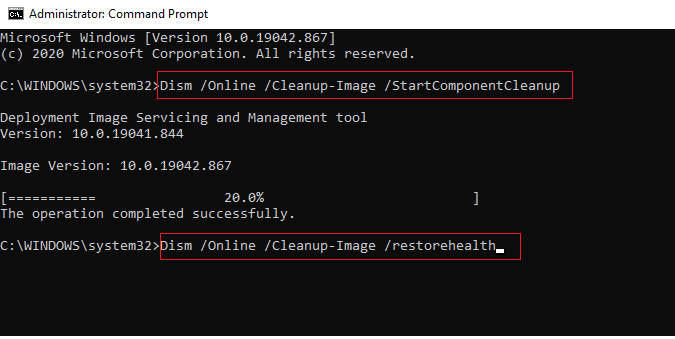
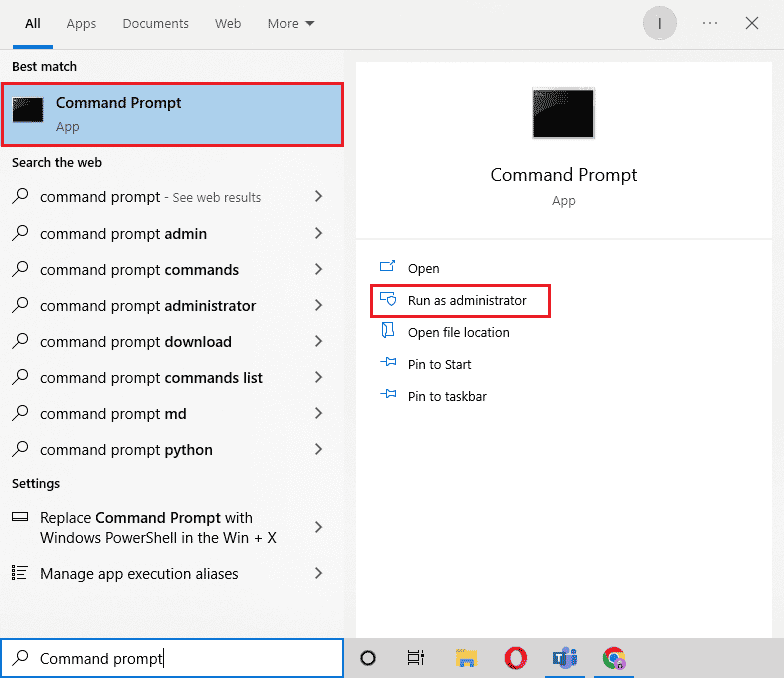
4. Удри на Windows клуч, тип Command Prompt, потоа кликнете на Стартувај како администратор.
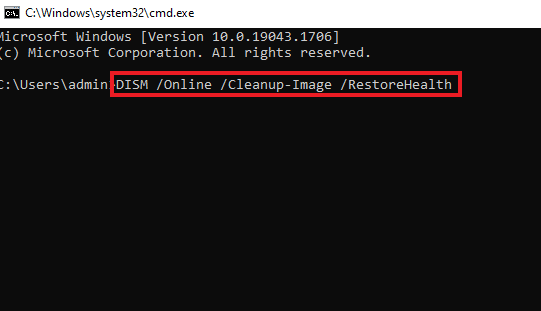
5. Напишете го следново команди и притиснете Внесете клучните после секое:
DISM /online /Cleanup-Image /StartComponentCleanup
DISM /online /Cleanup-Image /RestoreHealth
6. Откако ќе заврши процесот, рестартирајте го компјутерот.
7. Следно, посетете го Microsoft Visual C++ Redistributable webpage to download the latest C++ package as shown here.
8. Once downloaded, open the преземена датотека by double-clicking on it in Мои преземања. Инсталирајте the package by following the on-screen instructions.
9. Once the installation is complete, finally рестартирајте го компјутерот.
Препорачано:
Се надеваме дека овој водич беше корисен и дека можете да го поправите MultiVersus not launching issue on your Windows 10 PC. Let us know which method worked for you the best. Feel free to reach out to us with your queries and suggestions via the comments section below.