Windows 10 дээр оношилгооны өгөгдөл харагчийг идэвхжүүлэх эсвэл идэвхгүй болгох

You may be aware that Windows collect diagnostic and usage data information and send it to Microsoft to improve the product & services associated with the overall Windows 10 experience. It also helps in patching bugs or security loopholes faster. Now starting with Windows 10 v1803, Microsoft has added a new Diagnostic Data Viewer tool that lets you review the diagnostic data your device is sending to Microsoft.

Diagnostic Data Viewer Tool is disabled by default, and to use it, and you need to enable Diagnostic Data Viewer. Enabling or Disabling this tool is very simple as it is integrated into the Settings App under Privacy. So without wasting any time, let’s see How to Enable or Disable Diagnostic Data Viewer in Windows 10 with the help of the below-listed tutorial.
Windows 10 дээр оношилгооны өгөгдөл харагчийг идэвхжүүлэх эсвэл идэвхгүй болгох
Ямар нэг зүйл буруу болсон тохиолдолд сэргээх цэг үүсгэхээ мартуузай.
Method 1: Enable or Disable Diagnostic Data Viewer in Windows 10 Settings
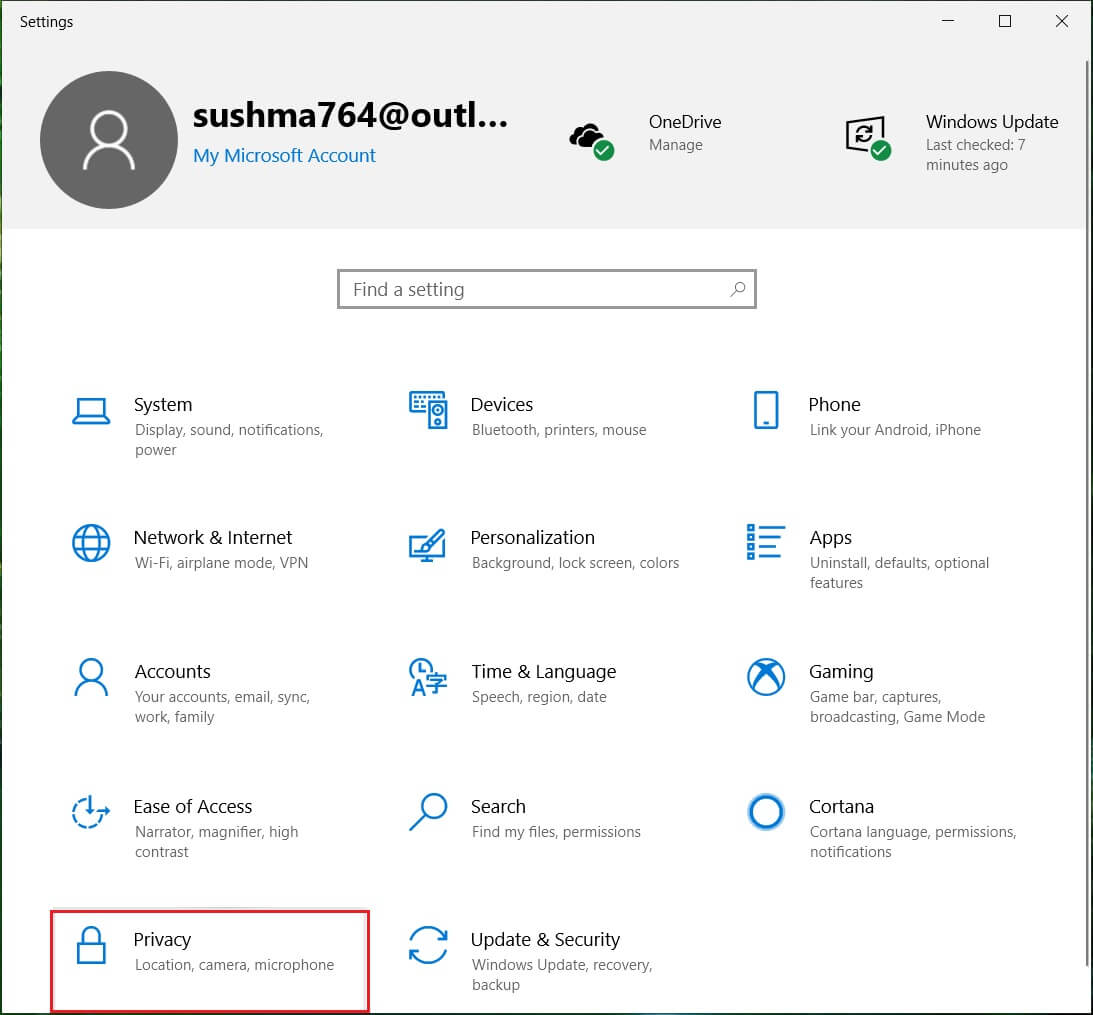
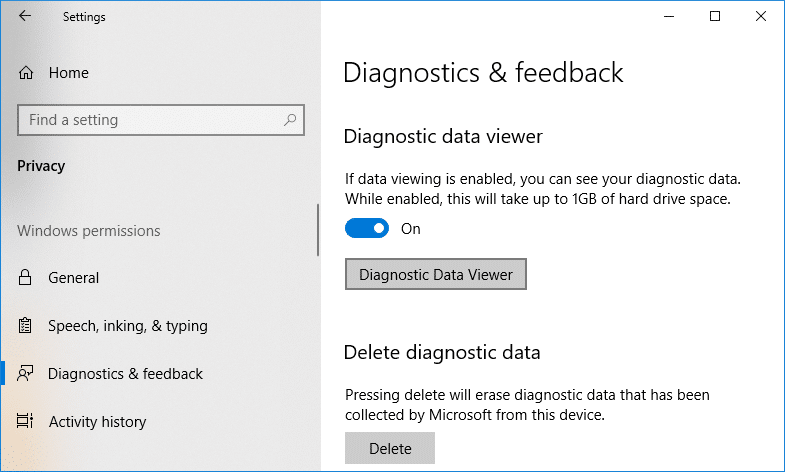
1. Press Windows Key + I to open the Тохиргоо app then click on the Privacy icon.
2. Now, from the left-hand side menu, click on Оношлогоо, санал хүсэлт.
3. From the right window pane scroll down to Diagnostic Data Viewer section.
4. Under Diagnostic Data Viewer make sure to turn ON or enable the toggle.
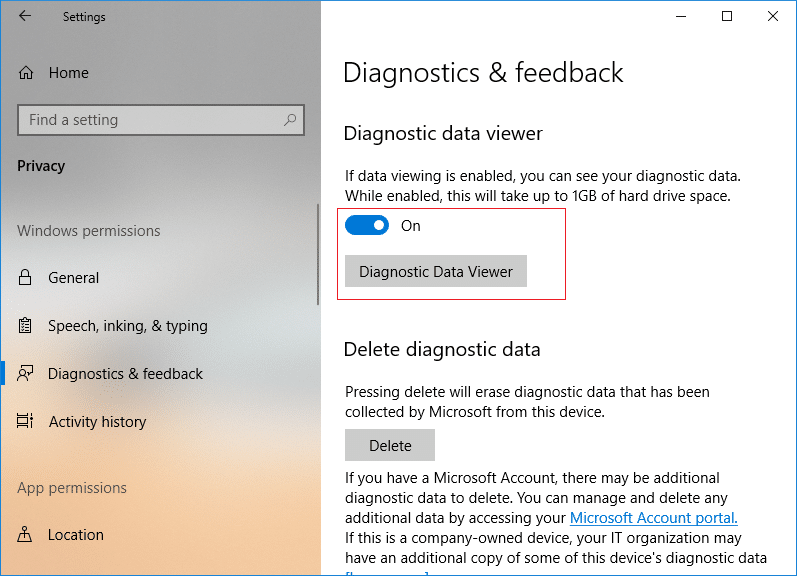
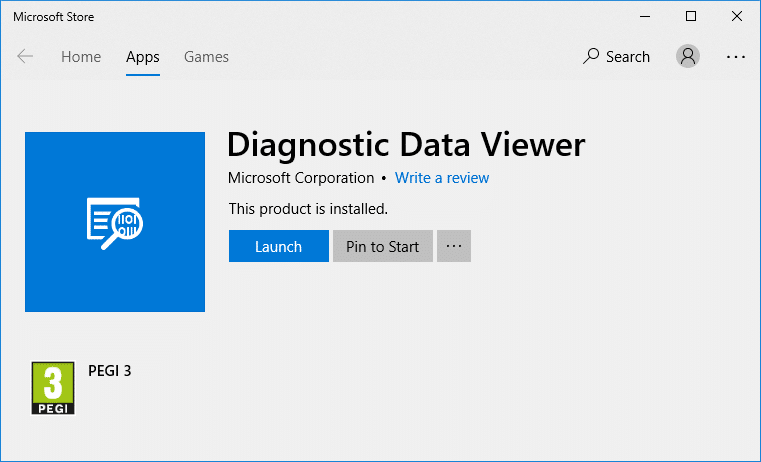
5. If you’re enabling the Diagnostic Data Viewer Tool, you need to click on Diagnostic Data Viewer button, which will then take you to the Microsoft Store to click on “авах” to download and install Diagnostic Data Viewer app.

6. Once the app is installed, click on “Эхлэх” to open the Diagnostic Data Viewer app.
7. Close everything, and you can restart your PC.
Method 2: Enable or Disable Diagnostic Data Viewer in Registry Editor
1. Windows Key + R товчийг дараад бичнэ үү regedit Бүртгэлийн засварлагчийг нээхийн тулд Enter дарна уу.

2. Дараах бүртгэлийн түлхүүр рүү очно уу:
HKEY_LOCAL_MACHINESOFTWAREMicrosoftWindowsCurrentVersionDiagnosticsDiagTrackEventTranscriptKey
3. Одоо хулганы баруун товчийг дарна уу EventTranscriptKey Дараа нь сонгоно уу Шинэ > DWORD (32 бит) утга.
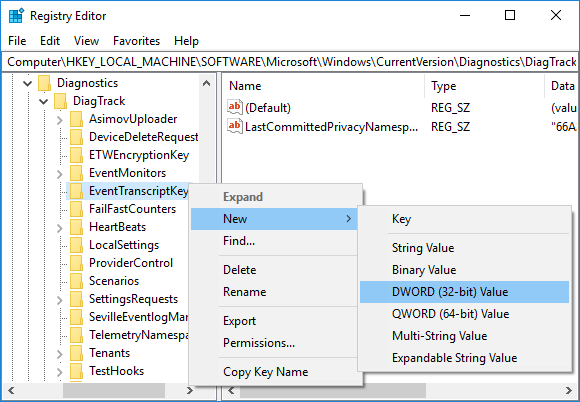
4. Name this newly created DWORD as EnableEventTranscript болон Enter дараарай.
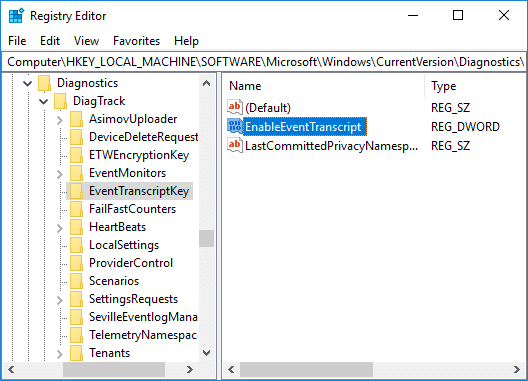
5. Double-click on EnableEventTranscript DWORD to change its value according to:
0 = Disable Diagnostic Data Viewer Tool
1 = Enable Diagnostic Data Viewer Tool
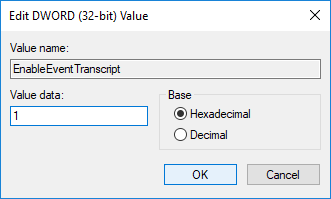
6.Once you changed the DWORD value, click OK and close registry editor.
7. Finally, Restart your PC to save changes.
Мөн уншина уу: Quest Diagnostics нь алхаж авдаг уу?
How to View your Diagnostics Events
1. Windows Key + I товчлуурыг дарж нээнэ үү Тохиргоо дээр дарна уу Privacy icon.
2. Зүүн талын цэснээс сонгоно уу Оношлогоо ба санал хүсэлт дараа нь Идэвхжүүлэх the toggle for Diagnostic Data Viewer and then click on Diagnostic Data Viewer button.
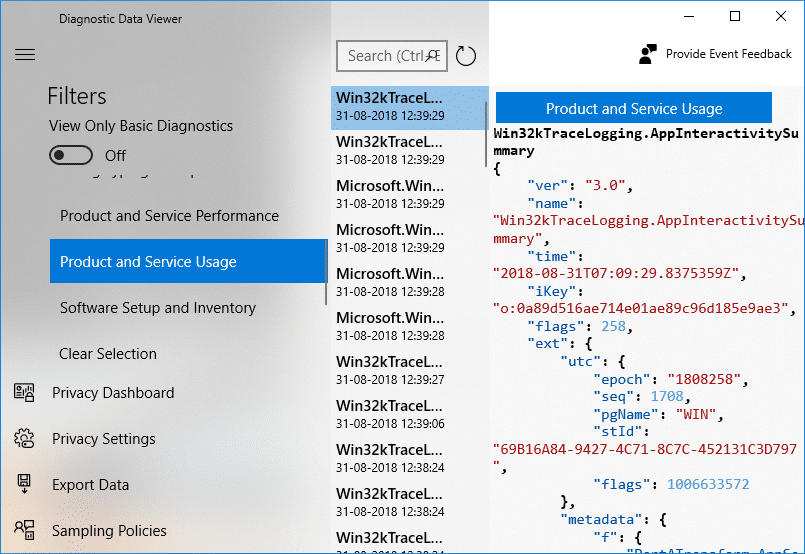
3. Once the app opens, from the left column, you can review your diagnostic events. Once you select a particular event than in the right window, you will see the detailed event view, showing you the exact data uploaded to Microsoft.
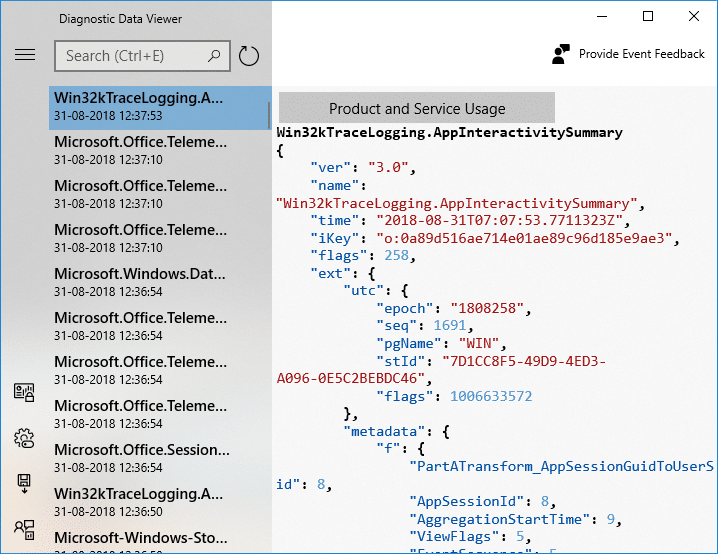
4. You can also search for a particular diagnostic event data using the search box at the top of the screen.
5. Now click on the three parallel lines (Menu button) which will open the detailed Menu from where you can select particular filters or categories, which define how Microsoft uses the events.
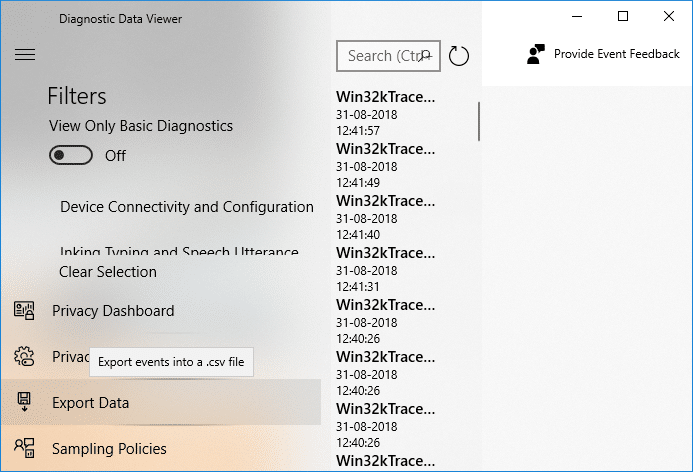
6. If you need to Export data from the Diagnostic Data Viewer app again click on the menu button, then select Export Data.
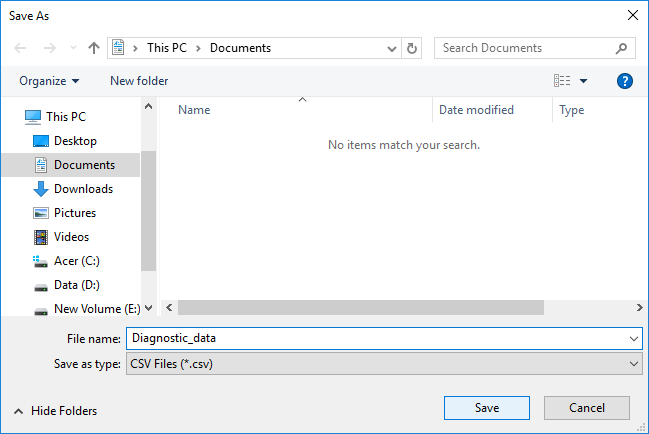
7 дугаартай. Дараачийн, you need to specify a path where you want to save the file and give the file a name. To save the file, you need to click on the Save button.
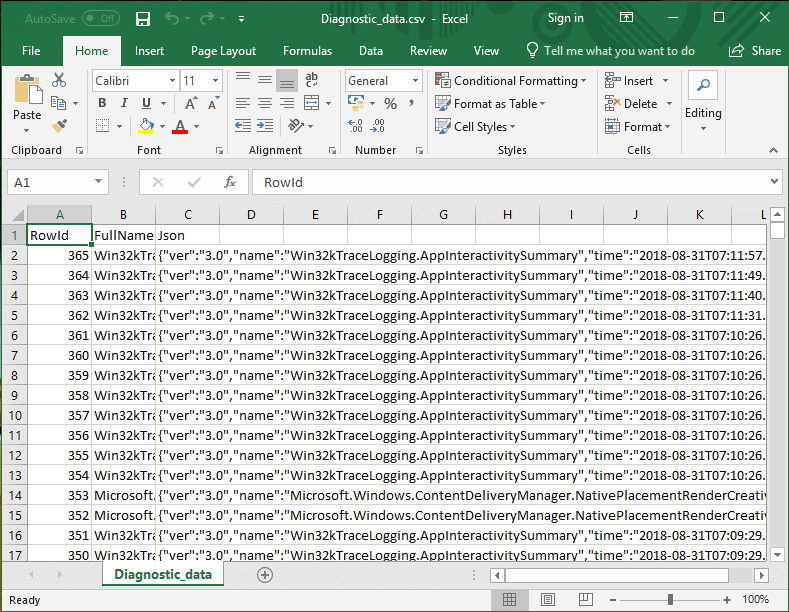
8. Once done, the diagnostic data will be exported to a CSV file to your specified location, which can then be used on any other device to analyze the data further.
Зөвлөмж:
Үүнийг л та амжилттай сурсан How to Enable or Disable Diagnostic Data Viewer in Windows 10 Гэхдээ танд энэ заавартай холбоотой асуулт байгаа бол коммент хэсэгт асуугаарай.