Fix Windows Modules Installer Worker High CPU Usage
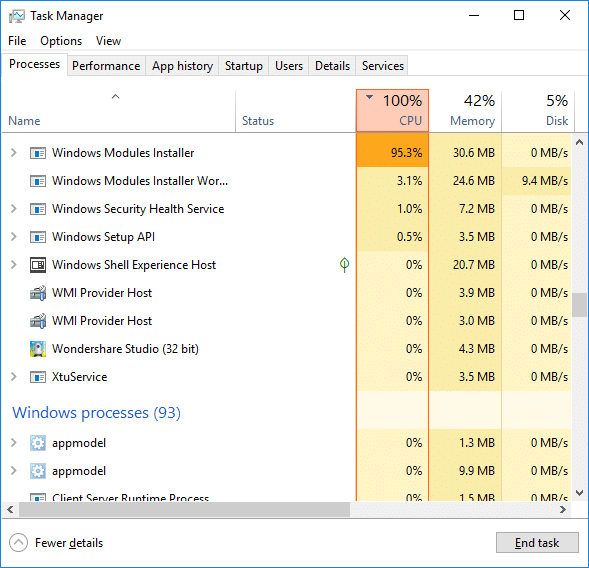
If you are facing the High CPU Usage by Windows Modules Installer Worker, then don’t worry as thousands of other users are also facing the similar problem and therefore, there are many working fixes which we will be discussing today in this article. To verify if you are facing this issue open Task Manager (Ctrl + Shift + Esc) and you will find that the Windows Modules Installer Worker is consuming High CPU or Disk Usage.

Pro Зөвлөгөө: You may leave your PC overnight or for a few hours to see the issue rectify itself once the Windows is finished downloading and installing updates.
What is Windows Modules Installer worker (WMIW)?
Windows Modules Installer worker (WMIW) is a service which takes cares of automatically installing Windows Update. According to its service description, WMIW is a system process that enables automatic installation, modification, and removal of Windows updates and optional components.
This process is responsible for finding new Windows Update automatically and installing them. As you might be aware that Windows 10 automatically install newer builds (i.e. 1803 etc.) via Windows Updates, so this process is responsible for installing these updates in the background.
Although this process is called Windows Modules Installer worker (WMIW) and you will see the same name in the Processes tab in the Task Manager, but if you switch to Details tab, then you will find the name of the file as TiWorker.exe.
Why Is Windows Modules Installer worker Using So Much CPU?
As Windows Modules Installer worker (TiWorker.exe) runs continuously in the background, sometimes it might utilize high CPU or disk usage when installing or uninstalling Windows Updates. But if its constantly using high CPU then the Windows Modules Installer worker may have become unresponsive while checking new updates. As a result, you may be experiencing lags, or your system might hang or freeze completely.
The first thing users do when they experience freezing, or lagging issues on their system is to restart their PC, but I assure you that this strategy won’t work in this case. This is because the issue will not resolve by itself until and unless you fix the underlying cause.
Fix Windows Modules Installer Worker High CPU Usage
Ямар нэг зүйл буруу болсон тохиолдолд сэргээх цэг үүсгэхээ мартуузай.
Windows Modules Installer Worker (WMIW) is an important service, and it should not be disabled. WMIW or TiWorker.exe is not a virus or malware, and you cannot just delete this service from your PC. So without wasting any time let’s see How to Fix Windows Modules Installer Worker High CPU Usage доор жагсаасан алдааг олж засварлах гарын авлагын тусламжтайгаар.
Арга 1: Windows Update алдаа засварлагчийг ажиллуул
1. Windows Key + I товчлуурыг дарж нээнэ үү Тохиргоо дээр дарна уу Шинэчлэх & Аюулгүй байдлын дүрс тэмдэг.
![]()
2. Зүүн талын цэснээс сонгоно уу Асуудлыг шийдэх дор “Босож, гүйх" дээр товшино уу Windows шинэчлэх.
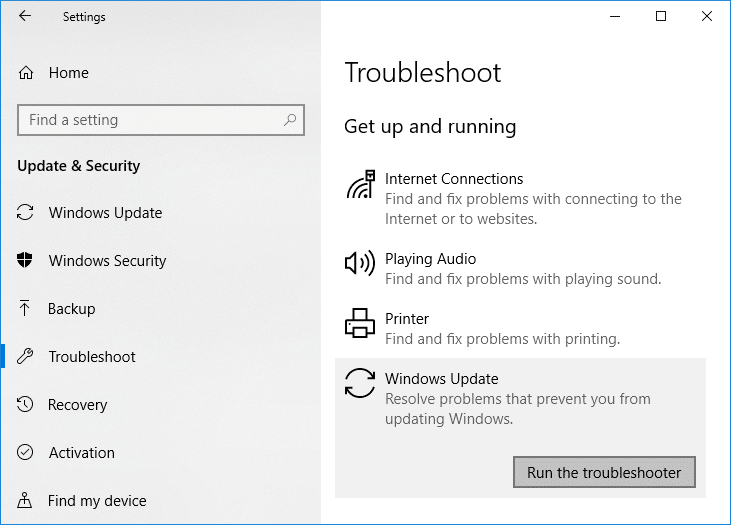
3. Одоо “дээр дарна ууАюулгүй байдлыг ажиллуулна уу” under Windows Update.
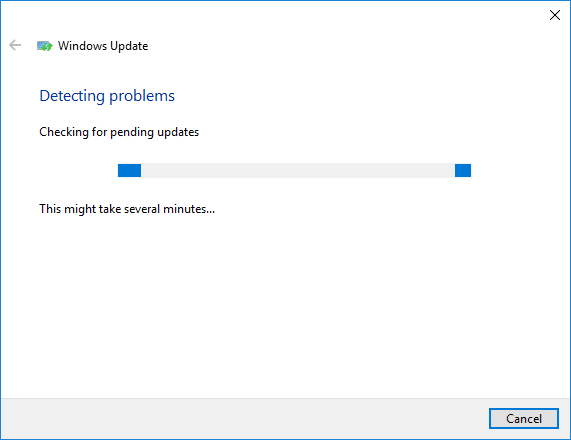
4. Let the troubleshooter run, and it will automatically fix any issues found with Windows Update taking forever.
Method 2: Manually Check for Windows Updates
1. Windows Key + I товчийг дараад сонгоно уу Шинэчлэлт ба аюулгүй байдал.
2. Зүүн гар талаас цэс дээр дарна Windows шинэчлэх.
3. Одоо " дээр дарна уу.Шинэчлэлтүүдийг шалгах” товчийг дарж байгаа шинэчлэлтүүдийг шалгана уу.

4. Хэрэв ямар нэгэн шинэчлэлт хүлээгдэж байгаа бол дээр дарна уу Шинэчлэлтүүдийг татаж аваад суулгана уу.

5. Шинэчлэлтүүдийг татаж авсны дараа суулгаснаар таны Windows шинэчлэгдэх болно.
Method 3: Configure Windows Update to Manual
Анхааруулга: This method will switch Windows Update from automatically installing the new updates to the manual. This means you have to manually check for Windows Update (weekly or monthly) to keep your PC secure. But follow this method, and you can again set the Updates to Automatic once the issue is resolved.
1. Windows Key + R товчийг дараад бичнэ үү services.msc болон Enter дараарай.

2. Scroll down and find Windows модулиуд суулгагч service in the list.
3. хулганы баруун товчийг дарна уу Windows модуль суулгагч үйлчилгээ сонгох Үл хөдлөх хөрөнгө.
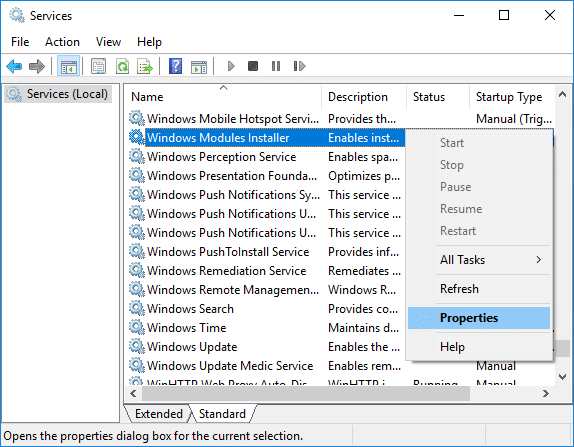
4. Одоо дарна уу Зогс then from the Эхлэх төрөл drop-down select Гарын авлага.
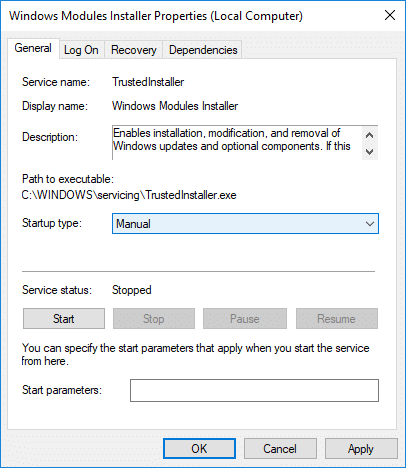
5. Apply товчийг дараад дараа нь дарна уу БОЛЖ БАЙНА УУ.
6. Similarly, follow the same step for the Windows Update үйлчилгээ.
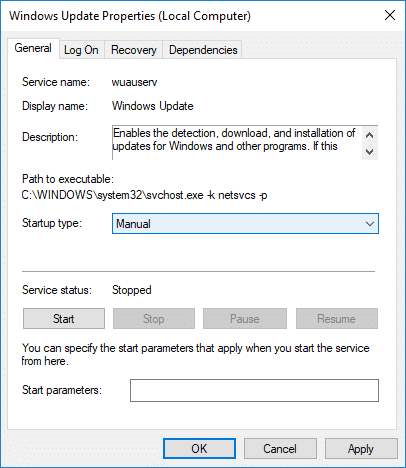
7. Өөрчлөлтүүдийг хадгалахын тулд компьютерээ дахин ачаална уу.
8. Дахин шалгах Windows Updates Manually болон хүлээгдэж буй шинэчлэлтүүдийг суулгана уу.
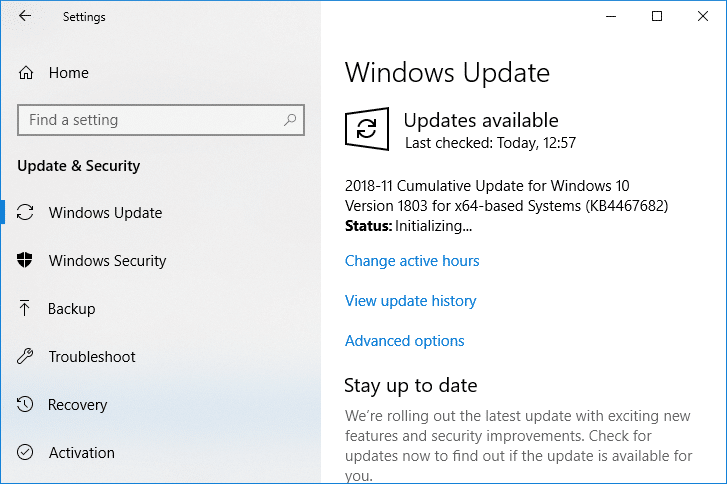
9. Once is done, again go back to services.msc window and open the Windows Modules Installer & Windows Update Properties цонх.
10. тохируулах Эхлэх төрөл to автомат болон дарна уу Start. Then click Apply followed by OK.
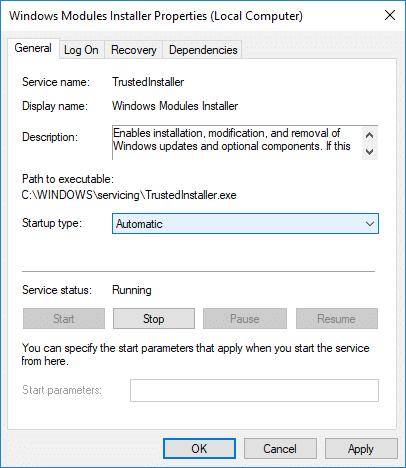
11. Өөрчлөлтүүдийг хадгалахын тулд компьютерээ дахин ачаална уу.
Арга 4: Системийн засвар үйлчилгээний алдааг олж засварлагчийг ажиллуул
1. Windows Key + R товчийг дараад control гэж бичээд Enter дарж нээнэ үү Хяналтын самбар.
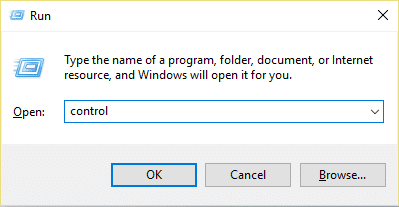
2. Troubleshoot гэж хайгаад дээр дарна уу Алдааг олж засварлах.

3. Дараа нь, дээр дарна уу Бүгдийг харах зүүн талд байгаа.
4. Дээр товшино уу “System Maintenance” нь ажиллуулах System Maintenance Troubleshooter.

5. Асуудал шийдэгч боломжтой байж магадгүй Fix Windows Modules Installer Worker High CPU Usage, but if it didn’t, then you need to run System Performance Troubleshooter.
6. Command Prompt-г нээнэ үү. Хэрэглэгч хайлт хийснээр энэ алхамыг хийж болно 'cmd' Дараа нь Enter дарна.

7. cmd дээр дараах тушаалыг бичээд Enter дарна уу:
msdt.exe / id PerformanceDiagnostic
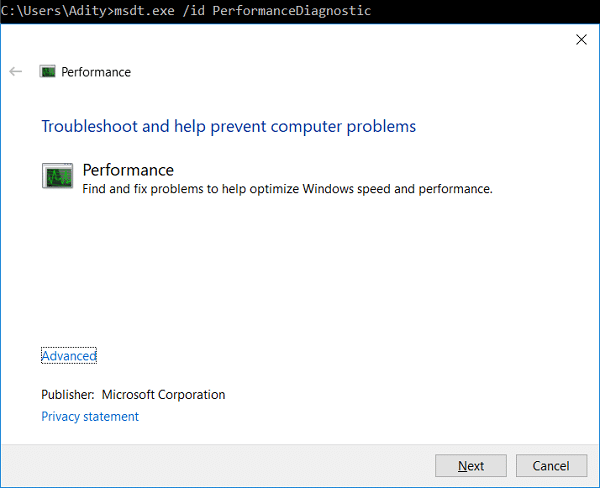
8. Follow the on-screen instruction to run the troubleshooter and fix any issues find the System.
9. Finally, exit the cmd and reboot your PC.
Method 5: Disable Automatic Maintenance
Sometimes Automatic Maintenance can conflict with the Windows Modules Installer Worker service, so try to disable Automatic Maintenance using this guide and see if this fixes your issue.
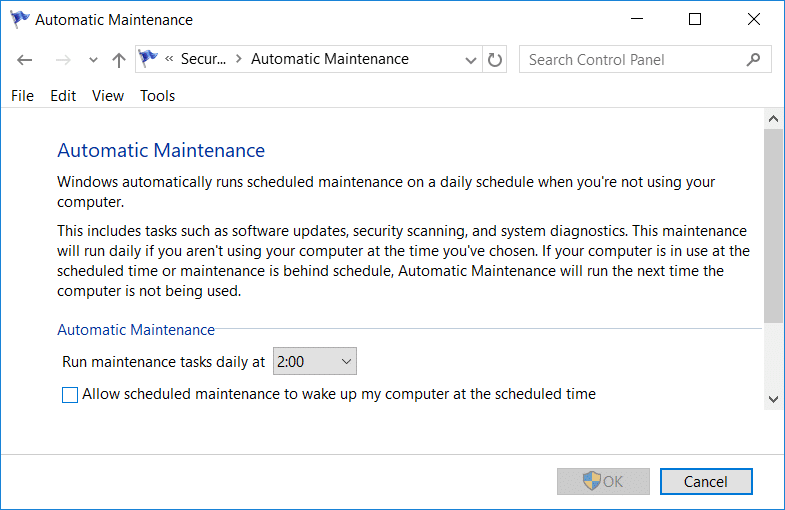
Although disabling Automatic Maintenance is not a good idea, but there might be some case where you need to actually disable it, for example, if your PC freezes during automatic maintenance or Windows Modules Installer Worker High CPU Usage issue then you should disable maintenance to troubleshoot the issue.
Method 6: Run System File Checker and DISM
1. Command Prompt-г нээнэ үү. Хэрэглэгч хайлт хийснээр энэ алхамыг хийж болно 'cmd' Дараа нь Enter дарна.
2. Одоо cmd дээр дараахыг бичээд enter дарна уу:
Sfc /scannow sfc /scannow /offbootdir=c: /offwindir=c:windows (Хэрэв дээрх амжилтгүй бол энийг оролдоно уу)

3. Дээрх үйл явц дуусахыг хүлээгээд дууссаны дараа компьютерээ дахин эхлүүлнэ үү.
4. Дахин cmd-г нээгээд дараах командыг бичээд тус бүрийн ард enter дарна уу:
Dism /Онлайн /Cleanup-Image /CheckHealth Dism /Онлайн /Cleanup-Image /ScanHealth Dism /Онлайн /Цэвэрлэх-Image /RestoreHealth

5. DISM командыг ажиллуулаад дуусахыг хүлээнэ үү.
6. Хэрэв дээрх тушаал ажиллахгүй бол доорх командыг оролдоно уу.
Dism /Image:C:offline /Cleanup-Image /RestoreHealth /Эх сурвалж:c:testmountwindows Dism /Онлайн /Цэвэрлэх-Image /RestoreHealth /Эх сурвалж:c:testmountwindows /Хандалтыг хязгаарлах
Тайлбар: C:RepairSourceWindows-ийг өөрийн засварын эх үүсвэрээр солино уу (Windows суулгац эсвэл сэргээх диск).
7. Өөрчлөлтүүдийг хадгалахын тулд компьютерээ дахин ачаалж, боломжтой эсэхээ шалгаарай Fix Windows Modules Installer Worker High CPU Usage.
Арга 7: Цэвэр ачааллыг гүйцэтгэнэ
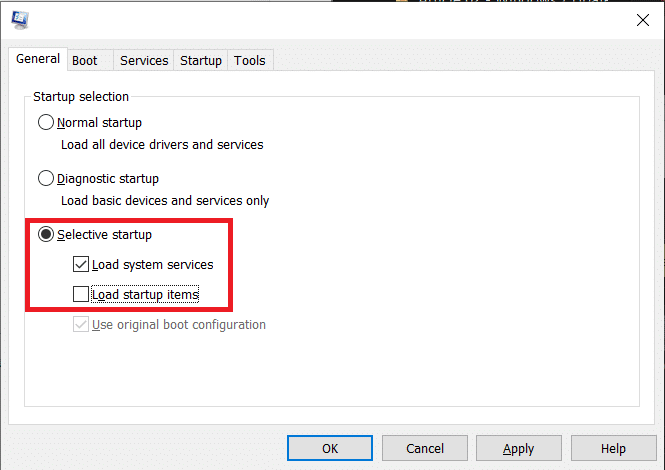
Sometimes 3rd party software can conflict with Windows and can cause the issue. To Fix Windows Modules Installer Worker High CPU Usage issue, та компьютер дээрээ цэвэр ачааллыг хийж, асуудлыг алхам алхмаар оношлох хэрэгтэй.
Method 8: Set your WiFi as Metered Connection
Тайлбар: This will stop Windows Automatic Update, and you will need to manually check for Updates.
1. Windows Key + I товчлуурыг дарж нээнэ үү Тохиргоо дээр дарна уу Сүлжээ ба Интернет.

2. Зүүн талын цэснээс сонгоно уу Wi-Fi ашигладаг
3. Under Wi-Fi, дарж on your currently connected network (WiFi).
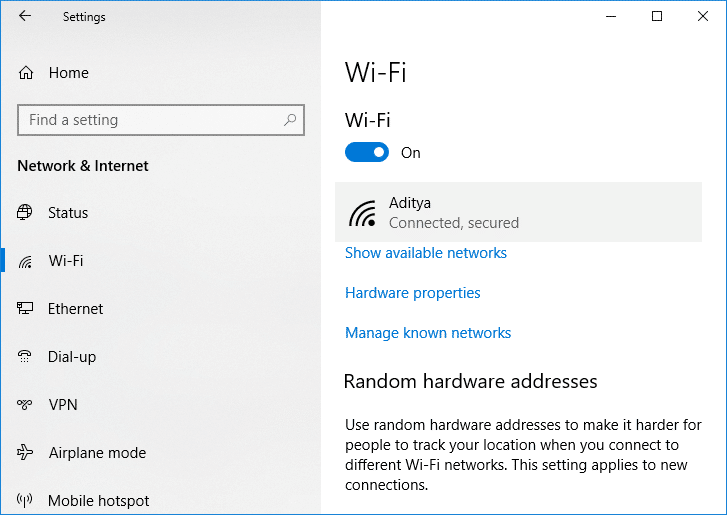
4. Scroll down to Metered connection and шилжүүлэгчийг идэвхжүүлнэ дор “Тоолуурын холболтоор тохируулна уу".
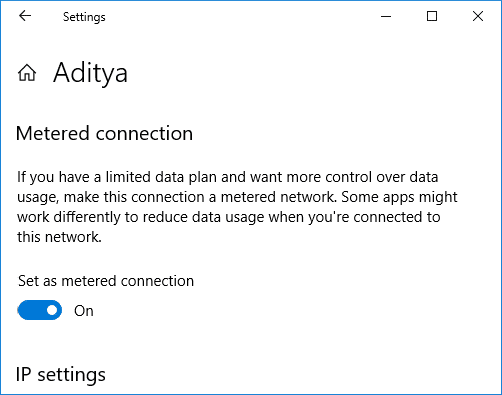
5. Close Settings and reboot your PC to save changes.
Зөвлөмж:
Ингээд л та амжилттай боллоо Fix Windows Modules Installer Worker High CPU Usage Гэхдээ танд энэ заавартай холбоотой асуулт байгаа бол коммент хэсэгт асуугаарай.
