Mac дээр дэлгэцийн агшинг хэрхэн тайрах вэ

In 2007, the screenshot option was introduced to the iPhone. For the old versions of iOS, one was required to press the volume up and power buttons simultaneously to take a screenshot. The first computer screenshots were created in 1980, and the first mac screenshots were taken on the first mac computer in 1984. Since then, taking screenshots has only simplified. With just the click of a few buttons and a few milliseconds, one can screenshot anything present on the screen. If you want to learn how to crop a screenshot on Mac, stay tuned till the end of this article. You will get to learn how to crop a Mac screenshot with the detailed steps and illustrations to your aid.
Mac дээр дэлгэцийн агшинг хэрхэн тайрах вэ
You can crop any screenshot on Mac from the Програмыг урьдчилан үзэх. Keep reading to find out the detailed steps later in this article with the illustrations to understand the procedure better.
Is There a Snip Tool on Mac?
Тийм, there is a snipping tool on Mac. The flexibility and versatility of that snipping tool make it very user-friendly, even for beginners who have just started learning the features of their MacBook. It easily allows you to drag the crosshair and snip as per your wish. Just by pressing Shit + Command +4, you can drag and select the area of the screenshot, picture, or webpage you want to snip or crop.
What is Mac Screenshot Shortcut?
The mac screenshot shortcuts make it very convenient to take screenshots with the snap of a finger. There are basically three shortcuts ижил хувьд:
- Press shift+команд+3 at the same time to take a screenshot of the whole screen.
- Дарна уу shift+команд+4 to take a screenshot of a small portion of the screen.
- сонгоно уу Shift+Command+4+Space Bar simultaneously to take a screenshot of a window or menu.
Where Do Cropped Screenshots Go?
Screenshots are saved to your ширээний as image files in the .png формат. Those screenshots are saved as Screen Shot [date] at [time].png by default. Once they are edited and cropped, they can be saved anywhere. And like other files, be renamed as per your liking.
Can I Edit a Mac Screenshot?
Тийм, you can edit a mac screenshot with great efficiency and very little time. You have to press shift+команд+3 авах нь дэлгэцийн зураг. This screenshot will get saved to your desktop as Screen Shot [date] at [time].png, by default. You can open the file from there in Default Preview болон цэсэн дээр дарна уу арга хэрэгсэл to edit the screenshot.
Мөн уншина уу: How to Take an iPhone Screenshot Without Buttons
How to Crop a Screenshot on Mac? How to Crop a Mac Screenshot on Macbook Pro & Macbook Air?
Cropping a screenshot is simple and time-efficient, irrespective of your Macbook Pro or Macbook Air. The steps to take and edit a screenshot remain the same. Follow the steps below to crop a full screenshot with a specific key combination.
1. To take a screenshot, press the shift+команд+3 at the same time from the keyboard.
Тайлбар: The screenshot will be saved on your ширээний Анхны утгаараа.
2. Once saved on your desktop, double click on the desired saved screenshot to open it in the Урьдчилан харах апп.

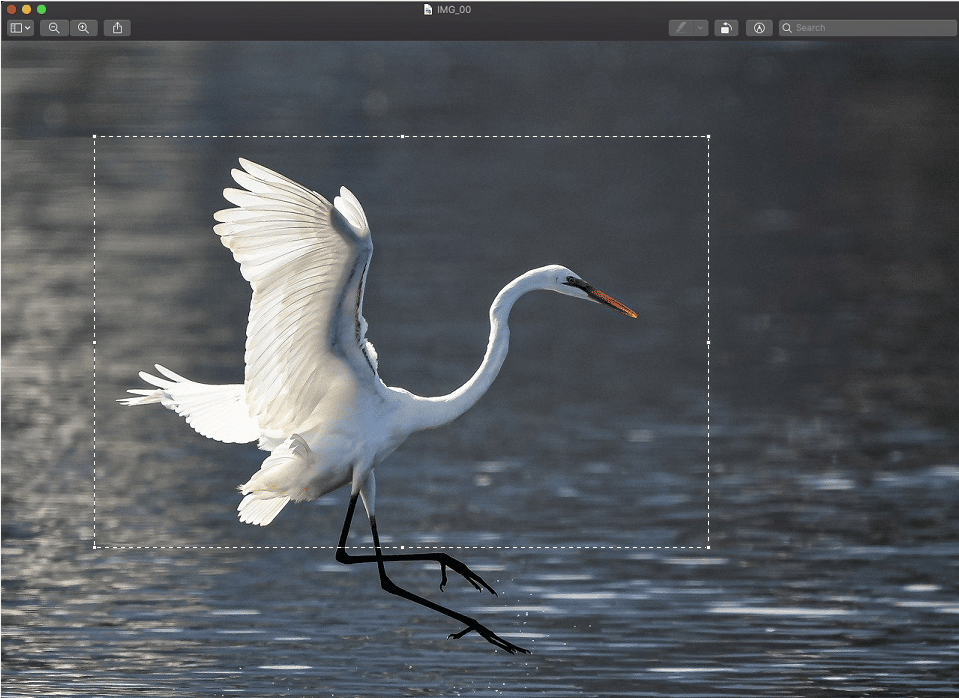
3. Now with the help of the Precision Pointer, select the хүссэн талбай to crop the screenshot.
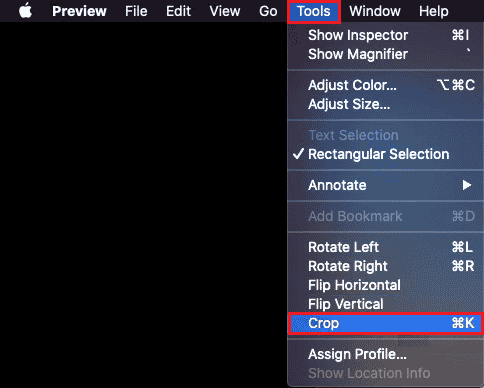
4. Дээр дарна уу арга хэрэгсэл option from the top bar, as shown below.
5. From the drop-down menu, click on Газар тариалан.
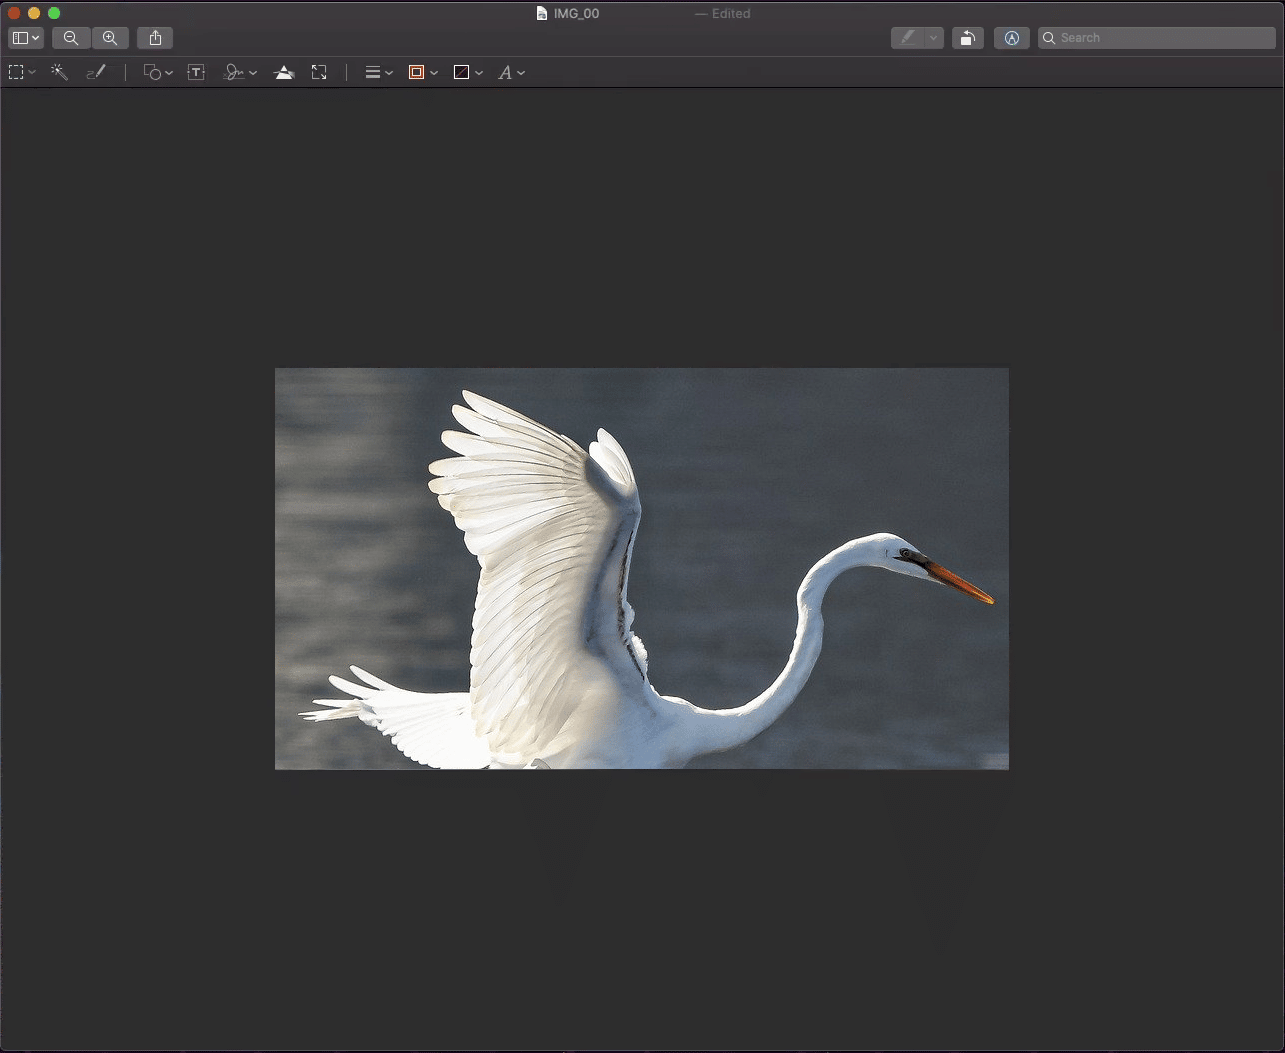
6. The screenshot will get cropped according to the selected area.
Мөн уншина уу: How to Convert Image to Grayscale Paint
How Do I Crop a Screenshot on Mac After Saving It?
If you want to know how to crop a screenshot on Mac, follow our step-by-step guide underneath:
1 дугаартай. Дар shift+команд+3 simultaneously from the keyboard to take a screenshot.
Тайлбар: Та бас ашиглаж болно shift+команд+4 or Shift+Command+4+Space хууль shortcuts to take different types of screenshots.
2. дээр давхар товш desired screenshot ширээний компьютерээс.
3 дугаартай. Дахь Урьдчилан харах app, use the Precision Pointer to select the хүссэн талбай of the screenshot image.
4. Дээр товшино уу Tools > Crop, доор харуулав.
You will get the cropped screenshot saved on your Mac desktop.
Мөн уншина уу: Та Mac дээрх олон iMessages-ийг хэрхэн устгах вэ
Why Can’t I Crop a Screenshot on Mac?
Below are some of the reasons why you can’t crop the screenshots on Mac:
How to Crop a Screenshot on iPhone?
Cropping a screenshot on the iPhone is child’s play. Follow the steps below to do that:
1 дугаартай. Дар Power + Home button нэгэн зэрэг дэлгэцийн агшин авах.
Тайлбар: Товчийг дарна уу Дууг нэмэгдүүлэх + Power buttons together to take a screenshot that doesn’t have the home button.
2. Дээр дарна уу Урьдчилан харах of the screenshot immediately after taking it from the bottom left corner, as shown below.
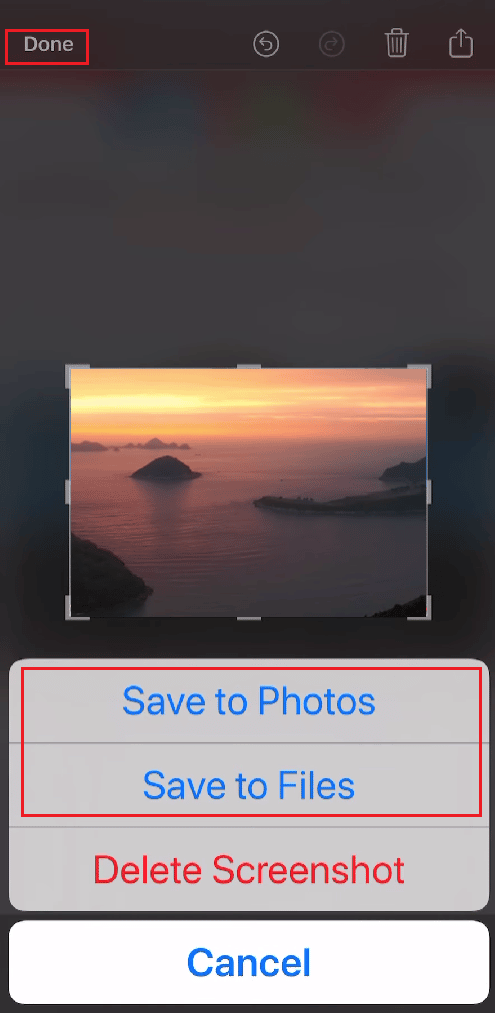
3. Select and adjust the хүссэн талбай you want to crop from that screenshot. Then, tap on дууссаныхаа.
4 дугаартай. Дарна уу Фото зураг руу хадгалах or Файлд хадгалах to save the cropped screenshot in the Gallery.
Зөвлөмж болгож буй:
Энэхүү гарын авлага танд хэрэгтэй байсан бөгөөд танд суралцах боломжтой болсон гэж найдаж байна how to crop a screenshot on Mac. Доорх коммент хэсгээр дамжуулан бидэнтэй холбогдож асуулт, санал хүсэлтээ илгээнэ үү. Манай дараагийн нийтлэлээс ямар сэдвийн талаар мэдэхийг хүсч байгаагаа бидэнд мэдэгдээрэй.