Synchronize Windows 10 Clock with an Internet Time Server

Synchronize Windows 10 Clock with an Internet Time Server: If you have set the Clock in Windows 10 to automatically set time then you may be aware that the current time is synchronized with an Internet Time Server in order to update time. This means that the clock on your PC’s Taskbar or Windows Settings is updated at regular intervals to match the time on the time server which ensures that your clock has accurate time. You need to be connected to the internet for time to automatically synchronize with an Internet time server without which the time won’t be updated.
Now Windows 10 uses the Network Time Protocol (NTP) to connect with the Internet time servers in order to synchronize Windows Clock. If the time in Windows Clock is not accurate then you could face network issues, corrupted files, and incorrect timestamps in documents & important files. With Windows 10 you could easily change the time servers or can even add a custom time server when necessary.
So now you know it’s important for your Windows to display the correct time in order to ensure proper functioning of your PC. Without which certain applications and Windows services will start experiencing issues. So without wasting any time let’s see How to Synchronize Windows 10 Clock with an Internet Time Server with the help of the below-listed tutorial.
How to Synchronize Windows 10 Clock with an Internet Time Server
Ямар нэг зүйл буруу болсон тохиолдолд сэргээх цэг үүсгэхээ мартуузай.
Method 1: Synchronize Windows 10 Clock with an Internet Time Server in Internet Time Settings
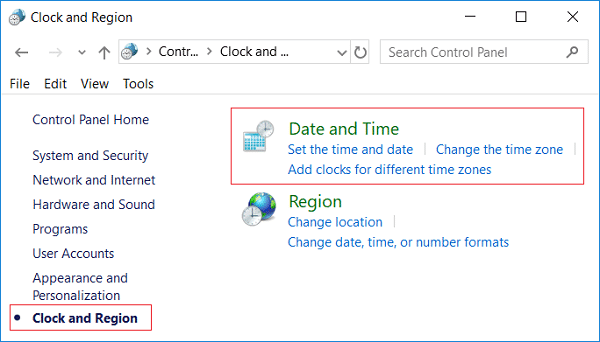
1. Төрөл хяналтын in Windows 10 Search then click on Control Panel хайлтын үр дүнгээс.

2. Одоо " дээр дарна уу.Цаг, хэл, бүс нутаг" дараа нь " дарна ууОгноо ба цаг".
3.Under Date and Time window click “Огноо, цагийг өөрчлөх".
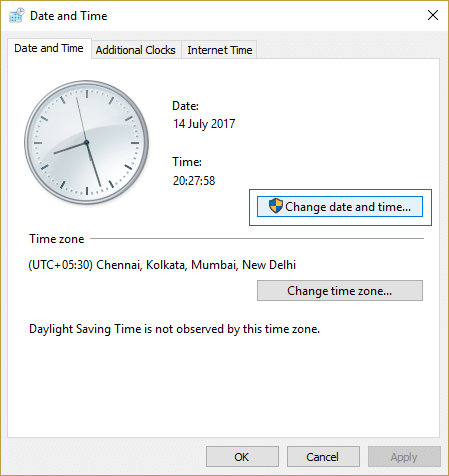
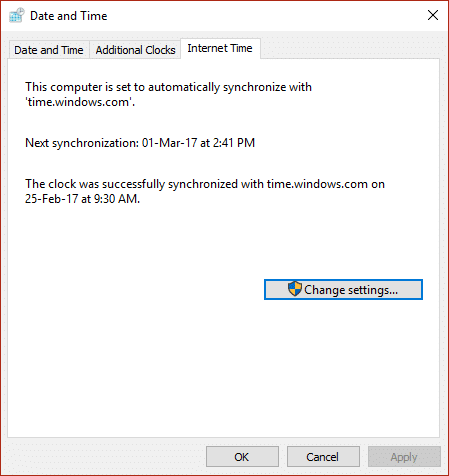
4.Switch to Internet Time then click on “Тохиргоог өөрчлөх".
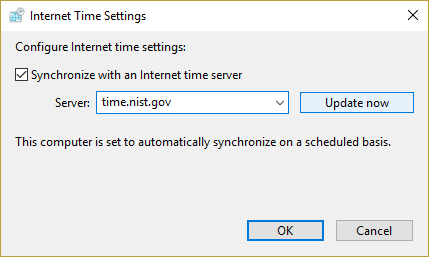
5. " гэж тэмдэглэсэн эсэхээ шалгаарай.Интернет цагийн сервертэй синхрончлох” box, then select a time server from the Server drop-down and click Update Now.
6.Click Ok then click Apply followed by OK again.
7.If the time is not updated then choose a different Internet time server and again click Одоо шинэчлэх.

8. Өөрчлөлтүүдийг хадгалахын тулд компьютерээ дахин ачаална уу.
Method 2: Synchronize Windows 10 Clock with an Internet Time Server in Command Prompt
1. Windows Key + X товчийг дараад сонгоно уу Тушаал хүлээх мөр (Admin).

2. cmd дээр дараах тушаалыг бичээд Enter дарна уу.
w32tm /дахин синхрончлох
net time /domain
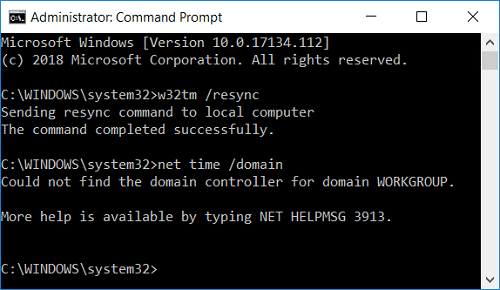
3.Хэрэв та авбал a The service has not been started. (0x80070426) error, тэгвэл танд хэрэгтэй start Windows Time service.
4.Type the following command to start Windows Time service then again try to synchronize Windows Clock:
w32time цэвэр эхлэл
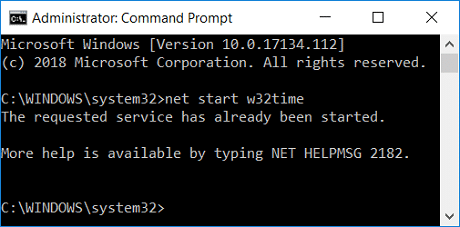
5.Close Command Prompt and restart your PC.
Method 3: Change the Internet Time Synchronization Update Interval
1. Windows Key + R товчийг дараад бичнэ үү regedit Бүртгэлийн засварлагчийг нээхийн тулд Enter дарна уу.

2. Дараах бүртгэлийн түлхүүр рүү очно уу:
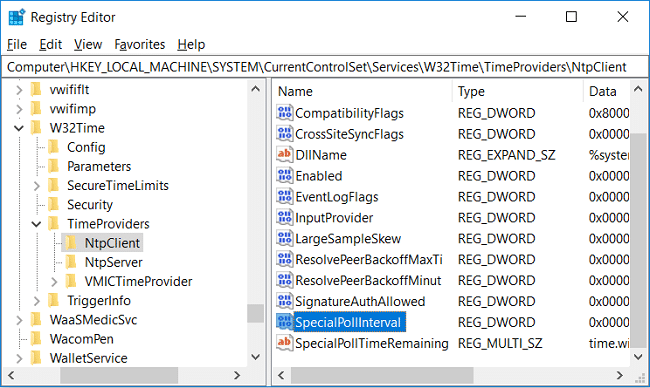
ComputerHKEY_LOCAL_MACHINESYSTEMCurrentControlSetServicesW32TimeTimeProvidersNtpClient
3. Сонго NtpcClient then in right window pane double-click on Тусгай санал асуулгын интервал түүний үнэ цэнийг өөрчлөх.
4. Одоо сонгоно уу Decimal from the Base then in the Value date change the value to 86400.
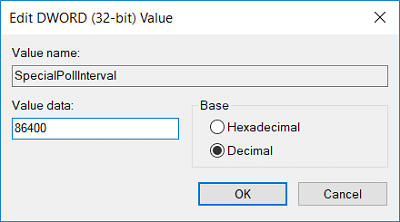
Тайлбар: 86400 seconds (60 seconds X 60 minutes X 24 hours X 1 day) which means that the time will be updated every day. The default time is every 604800 seconds (7 days). Just make sure not use the time interval less than 14400 seconds (4 hours) as your computer’s IP will get banned from the time server.
5.Click Ok then close Registry Editor.
6. Өөрчлөлтүүдийг хадгалахын тулд компьютерээ дахин ачаална уу.
Method 4: Add a new Internet time server on Windows 10
1.Type control in Windows 10 Search then click on Control Panel хайлтын үр дүнгээс.
2. Одоо " дээр дарна уу.Цаг, хэл, бүс нутаг" дараа нь " дарна ууОгноо ба цаг".
3.Under Date and Time window click “Огноо, цагийг өөрчлөх".
4. руу шилжих Интернетийн цаг дараа нь " дээр дарна ууТохиргоог өөрчлөх".
5. "Гэж тэмдэглэнэ үү.Интернет цагийн сервертэй синхрончлох” box then under Server type the address of the time server and click Одоо шинэчлэх.
Тайлбар: Эндээс үзнэ үү for a list of the Simple Network Time Protocol (SNTP) time servers that are available on the Internet.
6.Click Ok then click Apply followed by OK again.
7. Өөрчлөлтүүдийг хадгалахын тулд компьютерээ дахин ачаална уу.
Method 5: Add a new Internet time server on Windows 10 using Registry
1. Windows Key + R товчийг дараад бичнэ үү regedit нээхийн тулд Enter дарна уу Бүртгэлийн редактор.
2. Дараах бүртгэлийн түлхүүр рүү очно уу:
HKEY_LOCAL_MACHINESOFTWAREMicrosoftWindowsCurrentVersionDateTimeServers
3. Хулганы баруун товчийг дарна уу серверүүд Дараа нь сонгоно уу Шинэ > Мөрийн утга.
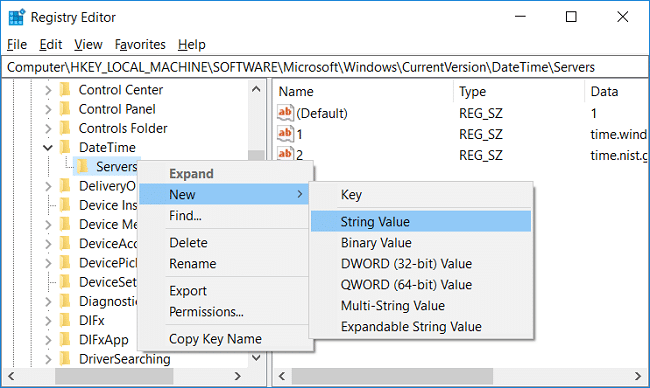
4.Type a number according to the position of the new server, for example, if there are already 2 entries then you have to name this new string as 3.
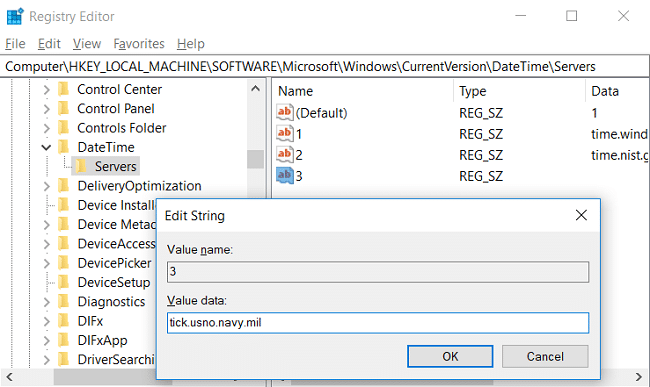
5.Now double-click on this newly created String Value to change its value.
6.Дараа нь, type the address of the time server then click OK. For example, if you want to use Google Public NTP server then enter time.google.com.
Тайлбар: Эндээс үзнэ үү for a list of the Simple Network Time Protocol (SNTP) time servers that are available on the Internet.
7. Өөрчлөлтүүдийг хадгалахын тулд компьютерээ дахин эхлүүлнэ үү.
If you’re still facing in synchronizing Windows 10 Clock then fix them using the below-listed steps:
Тайлбар: This will remove all your custom servers from Registry.
1. Windows Key + X товчийг дараад сонгоно уу Коммандын шугам (Админ).

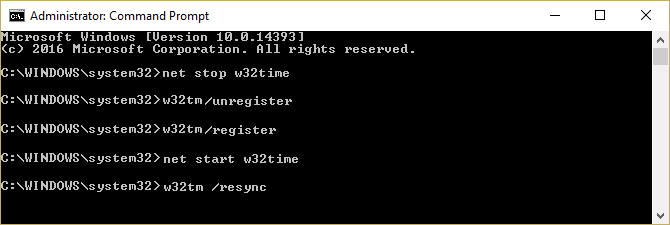
2. cmd дээр дараах тушаалыг бичээд Enter дарна уу.
netstop w32time
w32tm /бүртгэлээс хасах
w32tm /бүртгүүлэх
w32time цэвэр эхлэл
w32tm / дахин синхрончлох / одоо хүлээж байна
3. Өөрчлөлтүүдийг хадгалахын тулд компьютерээ дахин эхлүүлнэ үү.
Зөвлөмж:
Үүнийг л та амжилттай сурсан How to Synchronize Windows 10 Clock with an Internet Time Server but if you still have any queries regarding this tutorial then feel free to ask them in the comment’s section.