Betulkan Menu Mula Tidak Berfungsi dalam Windows 10

If you have recently updated or upgraded to Windows 10, then chances are your Start Menu may not work properly, making it impossible for users to navigate around Windows 10. Users are experiencing various issues with Start Menu such as Start Menu does not open, Start Button is not working, or Start Menu freezes etc. If your Start Menu isn’t working then don’t worry as today we will see a way to fix this issue.
This exact cause is different for different users because each user has a different system configuration and environment. But the problem can be related to anything like corrupted user account or drivers, damaged system files, etc. So without wasting any time, let’s see How to Fix Start Menu Not Working in Windows 10 with the help of the below-listed tutorial.
Pastikan anda membuat titik pemulihan sekiranya berlaku masalah.
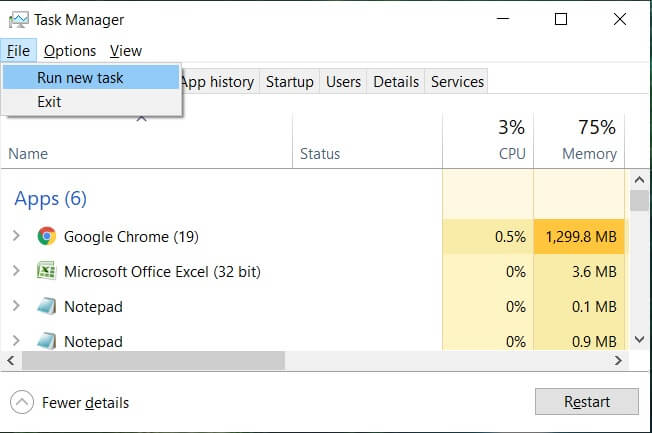
To run Command Prompt as an administrator, press Ctrl + Shift + Esc to open Task Manager. Then click on File kemudian pilih Jalankan tugas baru. jenis cmd.exe dan tanda semak "Buat tugas ini dengan keistimewaan pentadbiran” then click OK. Similarly, to open PowerShell, type powershell.exe and again checkmark the above field then hit Enter.

Kaedah 1: Mulakan semula Windows Explorer
1. Akhbar Ctrl + Shift + Esc kunci bersama-sama untuk melancarkan Pengurus Tugas.
2. Cari explorer.exe dalam senarai kemudian klik kanan padanya dan pilih Tugas Akhir.

3. Sekarang, ini akan menutup Explorer dan untuk menjalankannya semula, klik Fail > Jalankan tugas baharu.
4. Taipkan explorer.exe dan tekan OK untuk memulakan semula Explorer.

5. Exit Task Manager and see if you’re able to Fix Start Menu Not Working in Windows 10.
6. If you’re still facing the issue, then log out from your account and re-login.
7. Akhbar Ctrl+Shift+Del key at the same time and click on Signout.
8. Type in your password to login to Windows and see if you’re able to fix the issue.
Method 2: Create a new local administrator account
If you’re signed with your Microsoft account, then first remove the link to that account by:
1. Tekan Windows Key + R kemudian taip “ms-settings:” (tanpa petikan) dan tekan Enter.
2. Pilih Account > Sign in with a local account instead.
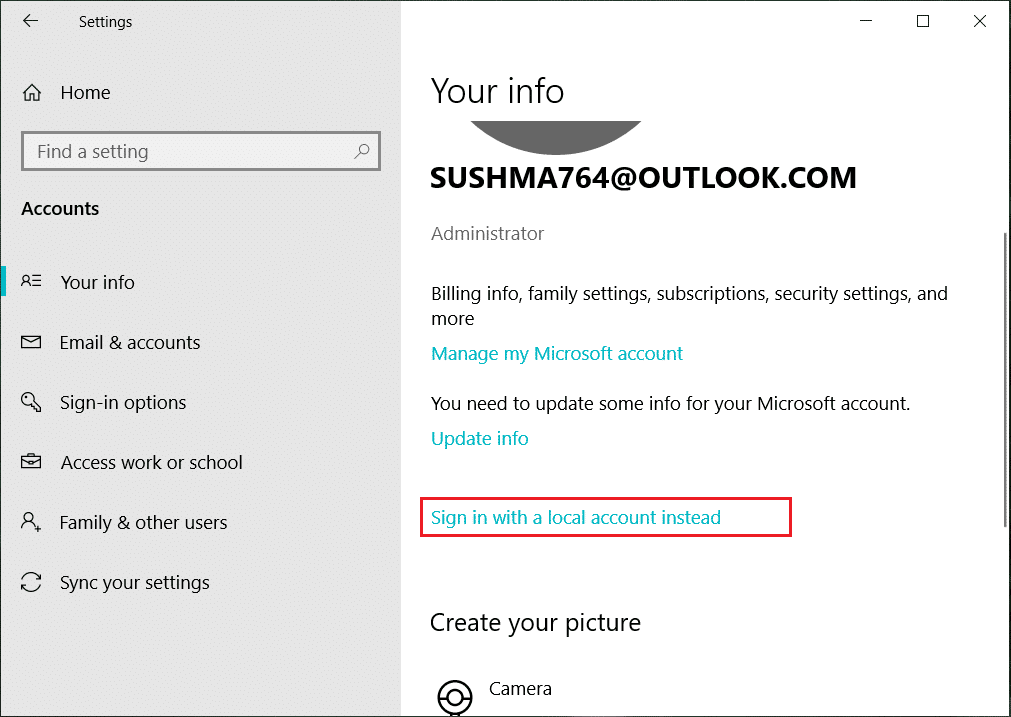
3. Taipkan anda Kata laluan akaun Microsoft dan klik Seterusnya.
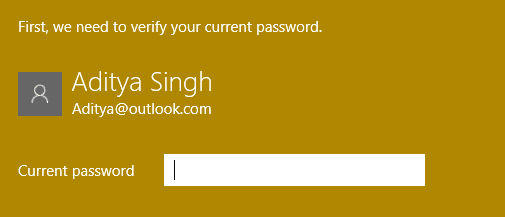
4. Pilih new account name and password, and then select Finish and sign out.
#1. Create the new administrator account:
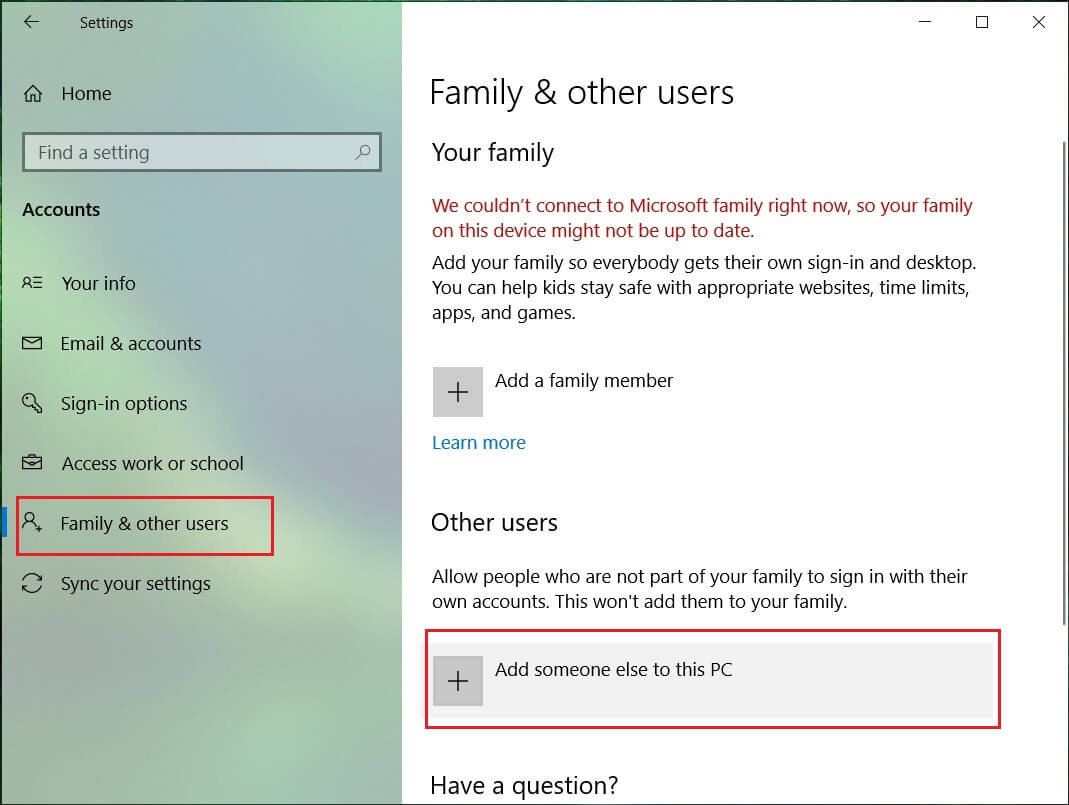
1. Tekan Windows Key + I untuk membuka Tetapan dan kemudian klik Akaun.
2. Then navigate to Keluarga & orang lain.
3. Under Other people click on “Add someone else to this PC."
4. Next, provide a name for the user and a password then select Next.
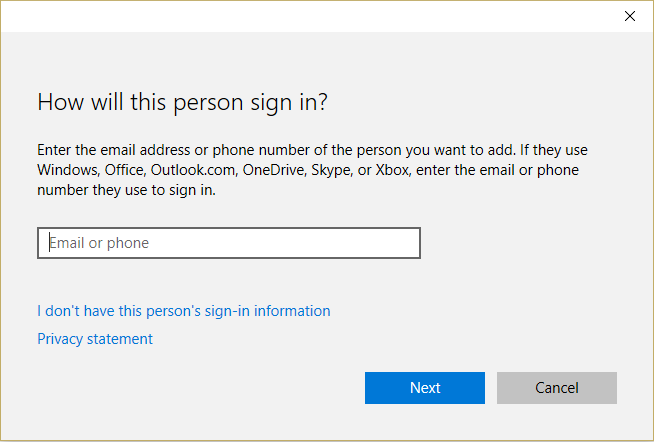
5. Tetapkan a nama pengguna dan kata laluan, Kemudian pilih Seterusnya> Selesai.
#2. Next, make the new account an administrator account:
1. Again open Tetapan Windows dan klik pada Akaun.

2. Pergi ke Tab keluarga & orang lain.
3. Other people choose the account you just created and then selected a Change account type.
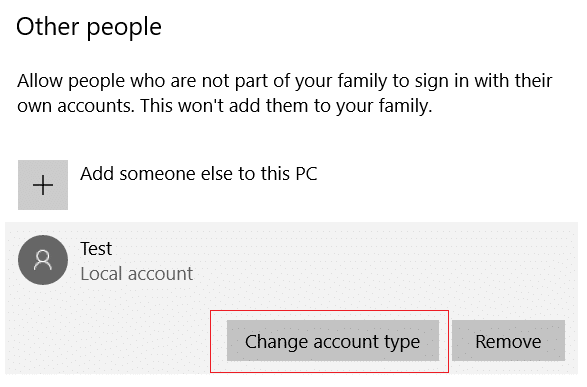
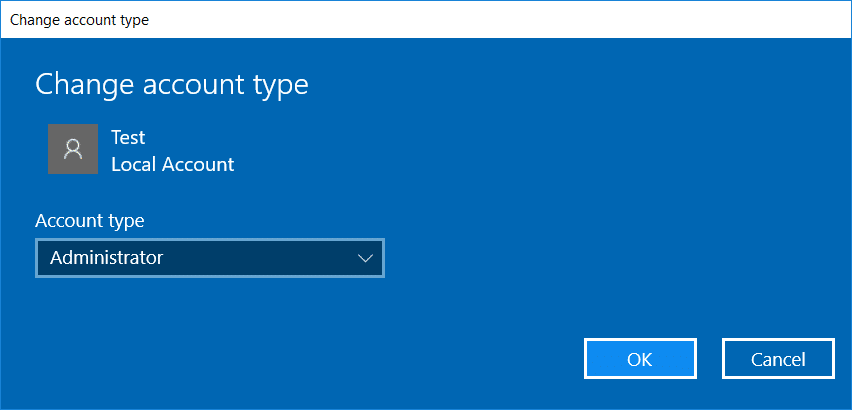
4. Under Account type, select pentadbir kemudian klik OK.
#3. If the issue persists try deleting the old administrator account:
1. Again go to Windows Settings then Account > Family & other people.
2. Under Other users, select the old administrator account, click keluarkan, dan pilih Delete account and data.

3. If you were using a Microsoft account to sign in before, you can associate it with the new administrator by following the next step.
4. Dalam Windows Settings > Accounts, select Sign in with a Microsoft account instead and enter your account info.
Finally, you should be able to Betulkan Menu Mula Tidak Berfungsi dalam Windows 10 as this step seems to fix the issue in most cases.
If you continue to experience Start Menu’s issue, it’s recommended to download and run Start Menu Troubleshooter.
1. Download and run Start Menu Troubleshooter.
2. Klik dua kali pada fail yang dimuat turun Dan kemudian klik Seterusnya.
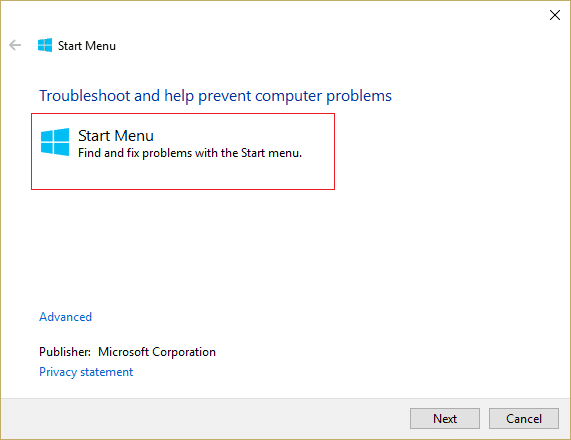
3. Let it finds and automatically Fixes Start Menu Not Working in Windows 10.
Method 4: Run System File Checker (SFC) and Check Disk
1. Buka Prompt Perintah. Pengguna boleh melakukan langkah ini dengan mencari 'cmd' Dan kemudian tekan Enter.

2. Sekarang taip yang berikut dalam cmd dan tekan enter:
Sfc /scannow sfc /scannow /offbootdir=c: /offwindir=c:windows

3. Tunggu proses di atas selesai dan setelah selesai, mulakan semula PC anda.
4. Seterusnya, jalankan CHKDSK dari Betulkan Ralat Sistem Fail dengan Semak Utiliti Cakera (CHKDSK).
5. Biarkan proses di atas selesai dan but semula PC anda untuk menyimpan perubahan.
Method 5: Force Cortana to Rebuild Settings
Open Command Prompt with administrative rights then type the following one by one and hit Enter after each command:
CD /d "%LOCALAPPDATA%PackagesMicrosoft.Windows.Cortana_cw5n1h2txyewy"
Taskkill /F /IM SearchUI.exe
RD /S /Q Settings
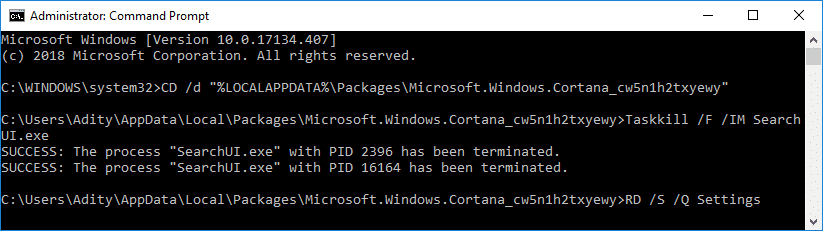
This will force Cortana to rebuild the settings and will Fix Start Menu and Cortana Not Working in Windows 10.
If the issue is still not resolved, follow this guide to fix any issues related to Cortana.
Method 6: Re-Register Windows App
1. Taipkan PowerShell dalam Carian Windows kemudian klik kanan pada PowerShell dan pilih Jalankan sebagai Pentadbir.
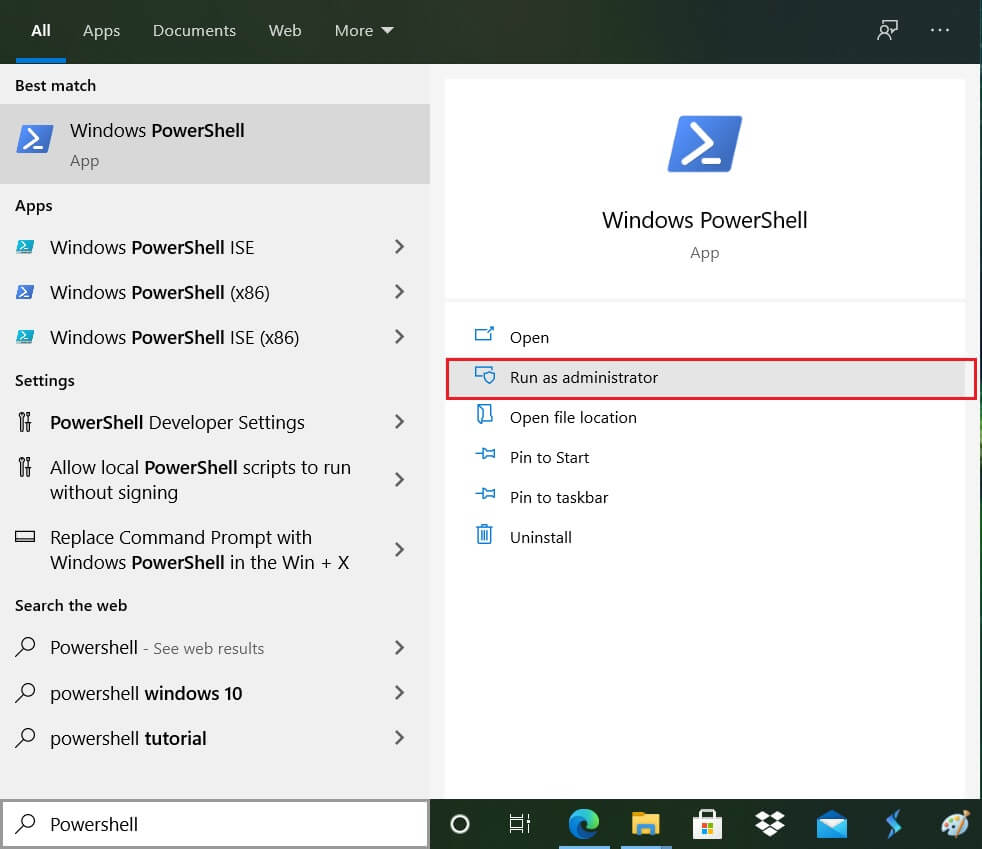
2. Sekarang taip arahan berikut ke dalam tetingkap PowerShell:
Get-AppXPackage -AllUsers | Foreach {Add-AppxPackage -DisableDevelopmentMode -Register "$ ($ _. InstallLocation) AppXManifest.xml"}

3. Tunggu Powershell untuk melaksanakan arahan di atas dan abaikan beberapa ralat yang mungkin datang bersama.
4. But semula PC anda untuk menyimpan perubahan.
Kaedah 7: Pembetulan Pendaftaran
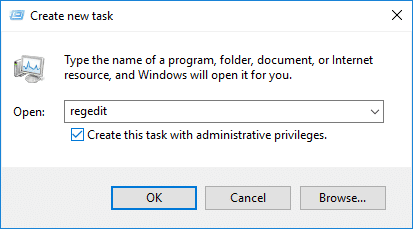
1. Press Ctrl + Shift + Esc to open Task Manager then click on File dan pilih Jalankan tugas baharu.
2. Taipkan regedit dan tanda semak "Buat tugas ini dengan keistimewaan pentadbiran” then click OK.
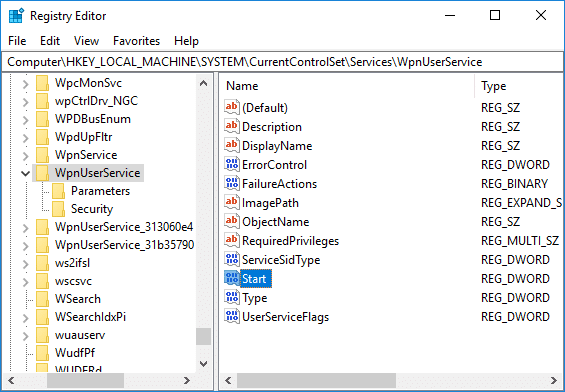
3. Now navigate to the following registry key in the Registry Editor:
ComputerHKEY_LOCAL_MACHINESYSTEMCurrentControlSetServicesWpnUserService
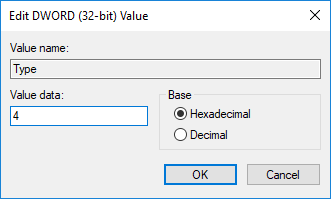
4. Pastikan untuk memilih WpnUserService then in the right window double-click on the Start DWORD.
5. Change its value to 4 then click OK.
6. But semula PC anda untuk menyimpan perubahan.
Kaedah 8: Muat semula atau Tetapkan Semula Windows 10
Catatan: If you can’t access your PC, restart your PC a few times until you start Pembaikan Automatik. Kemudian navigasi ke Selesaikan masalah > Tetapkan semula PC ini > Alih keluar semua.
1. Tekan Windows Key + I untuk membuka Tetapan kemudian klik pada Ikon Kemas Kini & Keselamatan.
![]()
2. Dari menu sebelah kiri pilih Pemulihan.
3. Di bawah Tetapkan semula PC ini, Klik pada "Bermula"Butang.

4. Pilih pilihan untuk Simpan fail saya.

5. For the next step, you might be asked to insert Windows 10 installation media, so ensure you have it ready.
6. Now, select your Windows version and click hanya pada pemacu tempat Windows dipasang > remove my files.

5. Klik pada Butang set semula.
6. Ikut arahan pada skrin untuk melengkapkan tetapan semula.
Lawatan:
Itu sahaja yang anda telah berjaya Betulkan Menu Mula Tidak Berfungsi dalam Windows 10 tetapi jika anda masih mempunyai sebarang pertanyaan mengenai tutorial ini, sila tanya mereka di bahagian komen.